Enabling HTTPS
By default, communication with the RESTful web server is not encrypted. By setting up an HTTPS server, the server can enforce secure connections between client and server on an SSL channel. Steps to configure IIS Express to host an HTTPS server are outlined in the sections below.
Requirements
-
To enable HTTPS, you must install a trusted certificate issued by a certificate authority OR a self-signed certificate used for development testing. The procedures detailed below cover how to install self-signed server certificate.
-
To install a CA (Certificate Authority) signed server certificate, go to Microsoft's TechNet Install a Server Certificate website. If you enable HTTPS and are using a self-signed certificate, you MUST install the self-signed certificate.
Overview
The following high-level steps are covered on this page.
-
Obtain a certificate (we will use self-signed certificate in this documentation).
-
Install the certificate.
-
Configure IIS with HTTPs.
-
Restart Metadefender REST service.
Generating a self-signed certificate
|
Windows 8.1, Windows 2012, or newer |
Windows 7 or Windows 2008 |
|
|


-
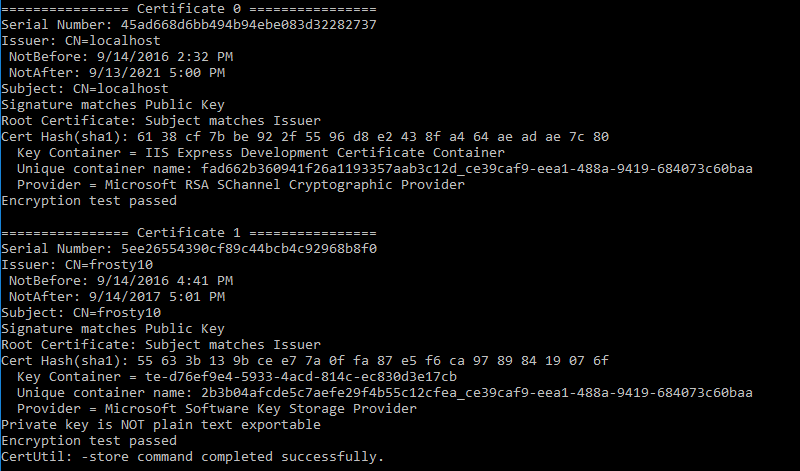
from a command prompt run certutil -store MY
-
Copy the Cert Hash from the certificate that has Issuer: CN={DNS_NAME}. Edit the hash so that it does not have spaces (e.g., ef8a0fc5620b621a54fb367f1e7ee45e1ba6d006).
Install Certificate
-
Create a new GUID at https://www.guidgenerator.com/online-guid-generator.aspx (e.g., {CDA52389-5954-44C2-8CF0-38062D1572F8}).
-
Open a command prompt.
-
Run the following command:
netsh http add sslcert ipport=0.0.0.0:443 appid={<guid retrieved from previous step>} certhash=<certificate thumbprint retrieved from previous step> -
Confirm that the SSL Certificate is successfully added, as indicated by the example below.

Enabling HTTPS on IIS Express
The following procedure enables HTTPS on IIS Express.
-
Open the <Metadefender Core installation directory>\REST\Config folder (e.g., C:\Program Files (x86)\OPSWAT\Metadefender Core X\REST\Config).
-
Open the applicationhost.config file in a text editor.
-
Go to the <sites> tag and add the HTTPS binding to the metascan_rest website as shown in the example below. This port can not be in use by any other applications.
Original
New
<bindings><!--<bindingprotocol="http"bindingInformation="*:80:localhost"/>--><bindingprotocol="http"bindingInformation=":8008:"/></bindings><bindings><!--<bindingprotocol="http"bindingInformation="*:80:localhost"/>--><bindingprotocol="https"bindingInformation=":443:"/><bindingprotocol="http"bindingInformation=":8008:"/></bindings> -
Optionally, to keep REST HTTPS only, remove the <binding protocol="http" bindingInformation=":8008:" /> line from applicationhost.config.
-
Save and close the ‘applicationhost.config’ file.
-
Navigate to the Quarantine folder (by default, this is C:\Program Files (x86)\OPSWAT\Metadefender Core X\Metascan Quarantine).
-
Open Metadefender.Quarantine.Service.exe.config in a text editor and change the following section leaving the replace *DNS_or_IP* value with what is on the original.
Original
New
<settingname="RestBaseUrl"serializeAs="String"><value>http://*DNS_or_IP*:8000</value></setting><settingname="QuarantineBaseUrl"serializeAs="String"><value>http://*DNS_or_IP*:8000</value></setting><settingname="QuarantineProtocol"serializeAs="String"><value>REST</value></setting><settingname="MetascanUrl"serializeAs="String"><value>http://*DNS_or_IP*:8008/metascan_rest/</value></setting><settingname="WebBaseUrl"serializeAs="String"><value>http://*DNS_or_IP*:8008/management/#</value></setting><settingname="RestBaseUrl"serializeAs="String"><value>https://*DNS_or_IP*</value></setting><settingname="QuarantineBaseUrl"serializeAs="String"><value>https://*DNS_or_IP*</value></setting><settingname="QuarantineProtocol"serializeAs="String"><value>REST</value></setting><settingname="MetascanUrl"serializeAs="String"><value>https://*DNS_or_IP*/metascan_rest/</value></setting><settingname="WebBaseUrl"serializeAs="String"><value>https://*DNS_or_IP*/management/#</value></setting> -
Navigate to the Metadefender Mail agent folder (by default, this is C:\Program Files (x86)\OPSWAT\Metadefender Core X\Metadefender Mail Agent).
-
Open C:\Program Files (x86)\OPSWAT\Metadefender Core 4\Metadefender Mail Agent in a text editor and change the following section, replacing *DNS_or_IP* with your server's real DNS hostname or IP address.
Original
New
<settingname="RestBaseUrl"serializeAs="String"><value>http://*DNS_or_IP*:8000</value></setting><settingname="QuarantineBaseUrl"serializeAs="String"><value>http://*DNS_or_IP*:8000</value></setting><settingname="QuarantineProtocol"serializeAs="String"><value>REST</value></setting><settingname="MetascanUrl"serializeAs="String"><value>http://*DNS_or_IP*:8008/metascan_rest</value></setting><settingname="RestBaseUrl"serializeAs="String"><value>https://*DNS_or_IP*</value></setting><settingname="QuarantineBaseUrl"serializeAs="String"><value>https://*DNS_or_IP*</value></setting><settingname="QuarantineProtocol"serializeAs="String"><value>REST</value></setting><settingname="MetascanUrl"serializeAs="String"><value>https://*DNS_or_IP*/metascan_rest</value></setting> -
Stop Metadefender Quarantine Service, Metascan Rest Service, and Metadefender Generic Mail Agent
-
Start Metascan Rest Service then Metadefender Quarantine Service and Metadefender Generic Mail Agent
-
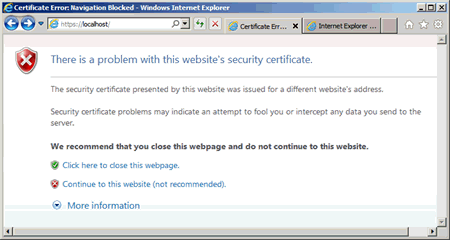
Test that the site works by going to https://localhost. The following webpage should be displayed:
-
Click Continue to this website .
Trusting local or remote self signed security certificate
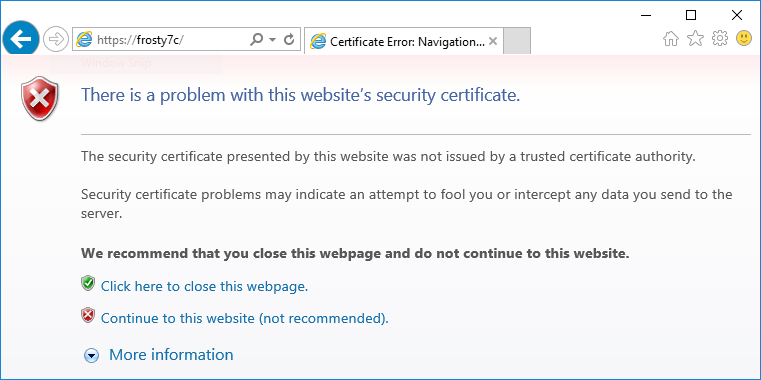
if you are using this guid on the local computer you should access and install the certificate from the DNS address eg https://frosty7c
-
Open Internet Explorer and access core dashboard eg https://frosty7c
-
Click Continue to this website
-
Click certificate error

-
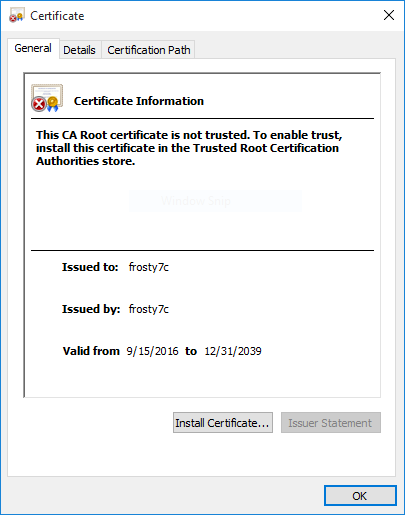
Click view certificates

-
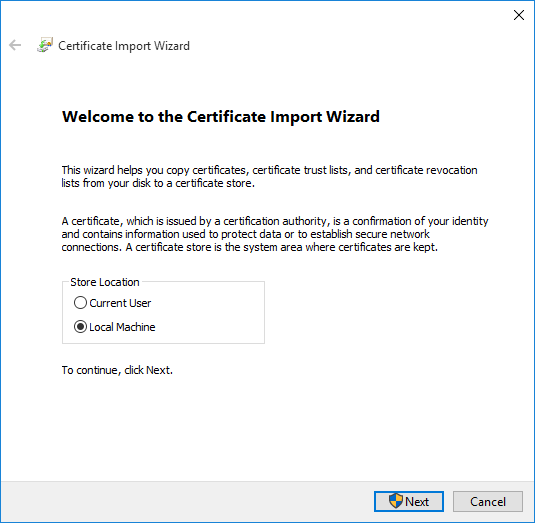
Click Install Certificate...
-
Select either Current User or Local Machine and click next
-
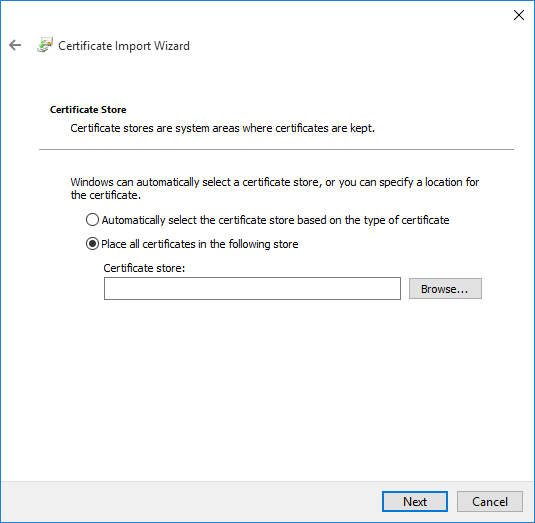
Select "Place all certificates in the following store" and click browse
-
Select "Trusted Root Certification Authorities" and Click OK

-
Select Next then select Finish
-
Restart your Internet Explorer and navigate to the same page again
-
You should now see a locked lock instead of certificate error

-
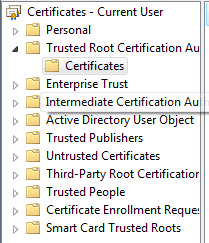
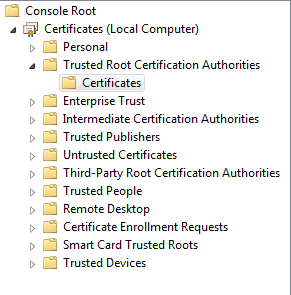
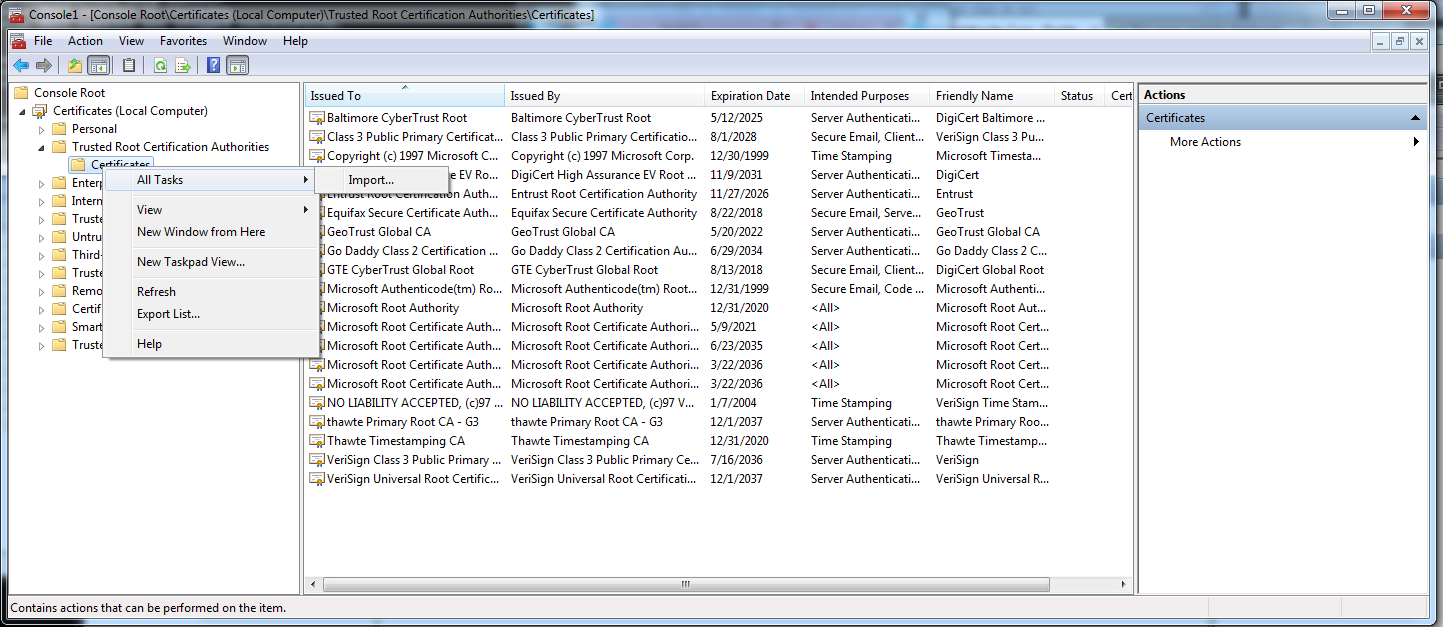
Run certmgr.msc
-
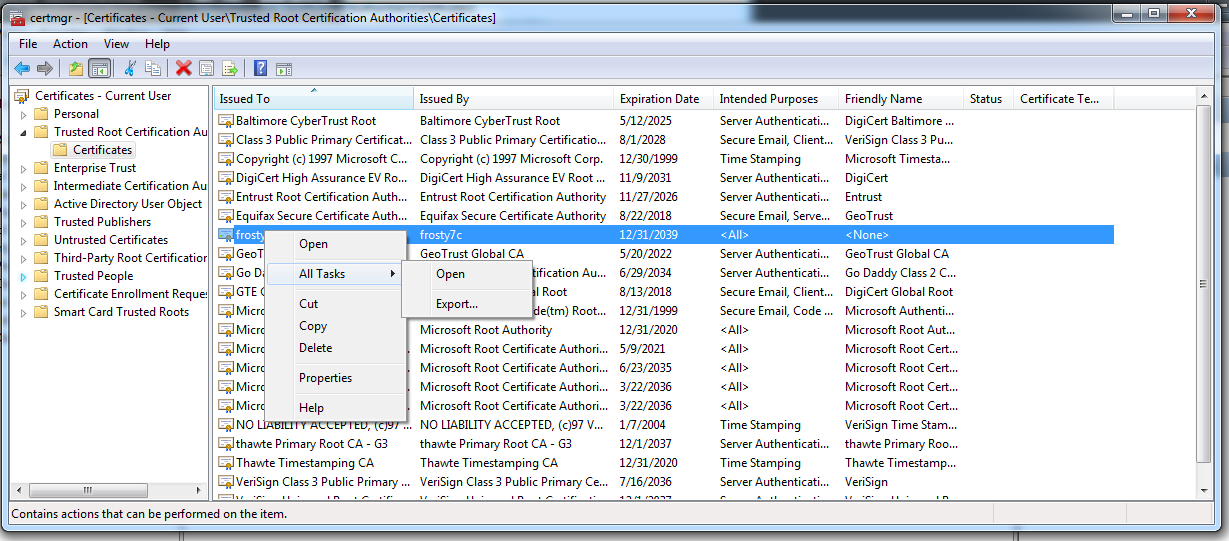
Select Trusted Root Certification Authority → Certificates
-
Right click the DNS name → All Tasks → export
-
Click Next → Next →Browse
-
Choose anywhere to save the certificate and hit save
-
Click Next→finish
-
Run mmc
-
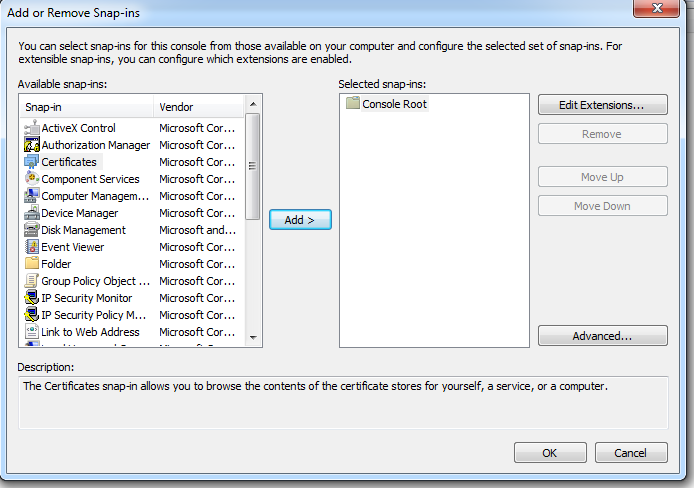
File → add/remove Snap-in
-
Select Certificates and click add
-
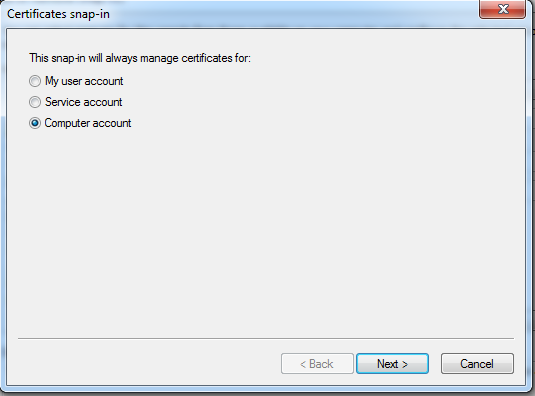
Select Computer account and hit next
-
Click finish then click ok
-
Select Trusted Root Certification Authority → Certificates
-
Right click certificates → all tasks → Import
-
Click next
-
Select the file you created previously
-
Click next->next->finish