Transport Functions & Displays
Transport

| Name | Description | |
|---|---|---|

|
INPUT MONITOR | When enabled, allows you to monitor input signal to set levels prior to recording. Input source is configured in the RX Audio Editor Preferences |

|
RECORD | Begins recording into a new file. One click puts recording into an armed state for safely setting input levels. The next click begins recording. A third click stops recording. If you already have a file open, hitting Record will prompt you to create a new file for recording. |

|
REWIND [Enter/Return] | Brings you back to the start of the file. |

|
PLAY [Spacebar] | Starts and stops playback. Starts or stops recording if Record is armed. |

|
PLAY SELECTION ONLY | When you’ve made a selection of a time range, frequency range, or both, this button auditions just the selection (useful for isolating intermittent noises, etc.) |

|
LOOP Ctrl+L (Windows) Cmd+L (Mac) | Enable this switch to loop the selected audio. |

|
PLAYHEAD FOLLOWS PLAYBACK Ctrl+R (Windows) Cmd+R (Mac) | Toggles the behavior of the playhead on stop. If this is enabled, the playhead will return to the anchor sample (the position before playback began). |
|
|
PLAYHEAD | To place the playhead, single click anywhere in the Spectrogram/Waveform display. To playback audio while positioning the playhead, click and drag the playhead icon or hold Ctrl (Windows) or Command (Mac) while clicking and dragging in the Spectrogram/Waveform display. |
Time/Frequency Readouts

- The time display (on the left in the image above) shows the start, end and length time values of the current selection and the current view. The time format used in this display is selected in the time format menu, explained in the section below.
- The frequency display (on the right in the image above) shows the low frequency boundary, high frequency boundary and frequency range values for the current selection and the current view range.
- Clicking on any of these fields allows you to manually enter values.
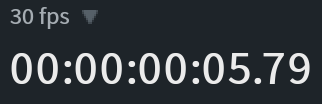
Transport Clock
Indicates the current position of the playhead. Depending on time format display setting, this value is shown in hours/minutes/seconds, time code, or samples.
Time Format Display
You can change the time format display used in the time ruler and time readouts. It can be accessed by right-clicking the time ruler or by clicking the arrow button to the left of the currently selected time format label.
| Display | Name & Description |
|---|---|
|
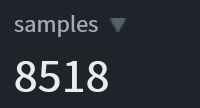
Samples: The sample counter, starting from 0 |
|
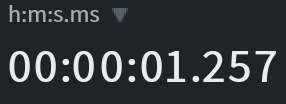
Time (h:m:s): Time in hours, minutes, seconds, and milliseconds, starting from 0 |
|
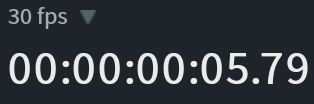
Timecode (n fps): The time code in hours, minutes, seconds, and frames, starting from 0 |
|
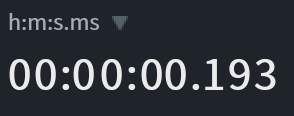
Source Time (h:m:s): Time in hours, minutes, seconds, and milliseconds, starting from the clip’s timecode origin |
|
Source Timecode (n fps): The time code in hours, minutes, seconds, and frames, starting from the clip’s timecode origin. The value of n (the frame rate of the time code) is determined by the Time Scale Frame Rate setting in the Misc tab of the Preferences window |