| Exercise 6 | Job Queues |
| Data | N/A |
| Overall Goal | Send a job through a specific FME Engine |
| Demonstrates | Creating a job queue and assigning jobs to queues |
| Start Workspace | None |
| End Workspace | C:\FMEData2019\Workspaces\ServerAdmin\Scalability-Ex1-JobQueues-Complete.fmw |
Your GIS department is using FME Server and carrying out jobs with the web interface. However, jobs are always being queued, even the quick translations. You are wondering if there is a way to set aside one of the FME Server Engines for quick translations, so that you and your fellow technical analysts do not have to wait too long for your smaller jobs to complete.
With job queues, you can allocate specific engines to specific tasks. So let's set that up.
1) Create a Job Queue
Job queues are created in the FME Server web interface.
Login to the FME Server web interface with an administrator account and select Engines & Licensing > Configure under the Admin section of the main menu.
Scroll down to the bottom of the Engines & Licensing page and select Create Queue.
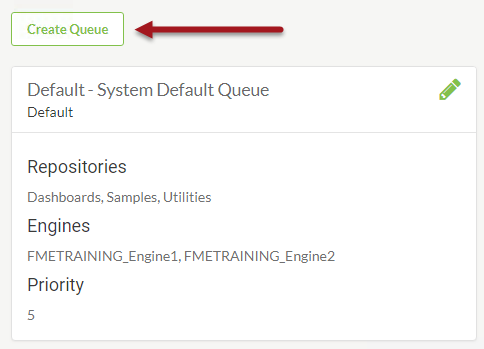
Give it the name Quick Translations and click OK.
2) Assign FME Engines
Now that the job queue has been created, specific FME Engines – and repositories – can be assigned to the queue.
Click on the edit button (the pencil icon) for the Quick Translations queue. Give the Job Queue the description of "FME Server Engine for Quick Translations," then select <hostname>_Engine1 from the drop-down selection for Engines.
Next assign a job priority of 5.
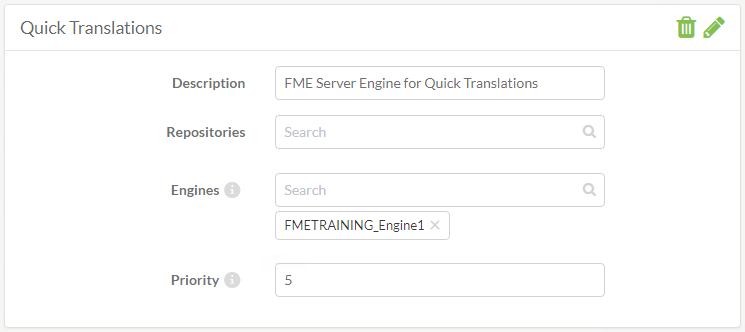
To save your edits click the edit button again.
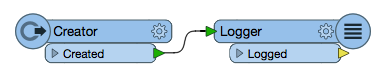
3) Create FME Workspace
To confirm that the job queue is operating correctly, we can run a workspace in FME Server that specifies the Quick Translations queue. For this exercise, we do not need a complicated workspace, just a small workspace that will run in a quick time.
Open FME Workbench and create a new Blank Workspace.
Add a Creator transformer and connect it to a Logger transformer.
4) Publish to FME Server
Publish the workspace to FME Server by selecting Publish to FME Server from the File menu in FME Workbench:
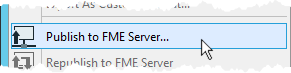
When prompted in the Publish to FME Server Wizard, connect to your FME Server then publish the workspace to:
- Repository Name: Training
- Workspace Name: JobQueue_TestJob.fmw
- Service: Job Submitter
| FME Lizard says... |
| If you have completed the Configure for HTTPS exercise, remember that the URL to connect to FME Server is now https://localhost:8443/fmeserver and NOT http://localhost/fmeserver! |
5) Assign and Run Workspace in Job Queue
Back in the FME Server Web Interface, run the JobQueue_TestJob workspace and set the Job Queue parameter.
Select Run Workspace in the left sidebar of the FME Server web interface.
On Run Workspace page, fill out the parameters as follows:
- Repository: Training
- Workspace: JobQueue_TestJob
Next, expand the Advanced options on the Run Workspace page. Set the Job Queues parameter to QuickTranslations (the name of the queue created in Step 1):
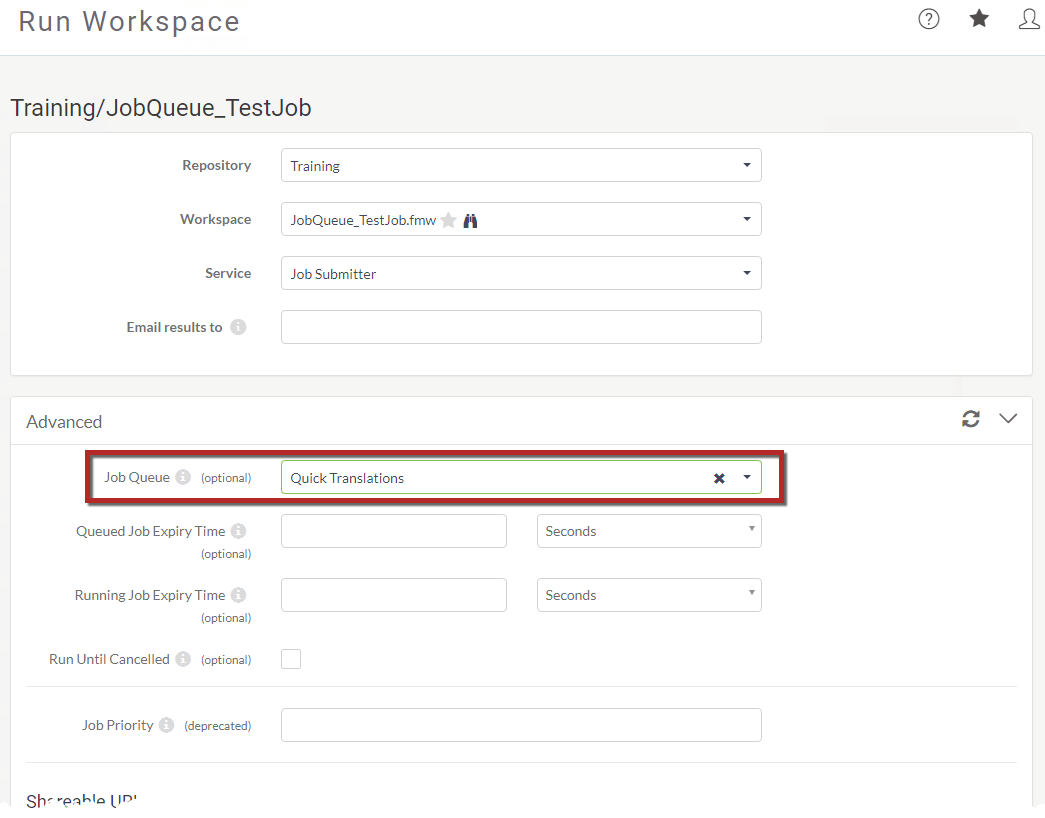
Click Run at the bottom of the Run Workspace page.
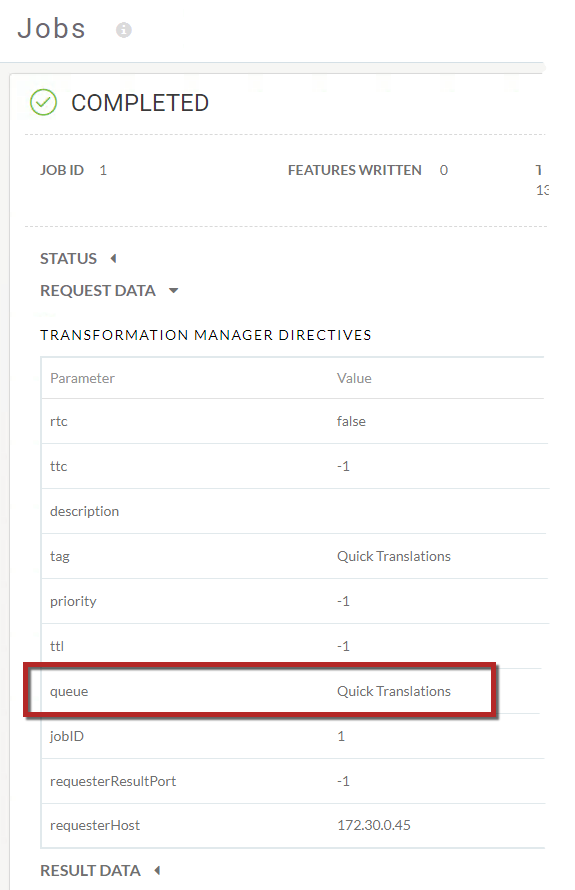
6) Verify Job Queue Configuration
You want to make sure that the job was routed to the correct engine and not just the first available engine.
In the left sidebar of the FME Server web interface select Jobs > Completed.
Select the job that just ran to open the Job Details page.
Click to expand the Request Data section. Next to the queue parameter, you will see the name of the specified job queue:
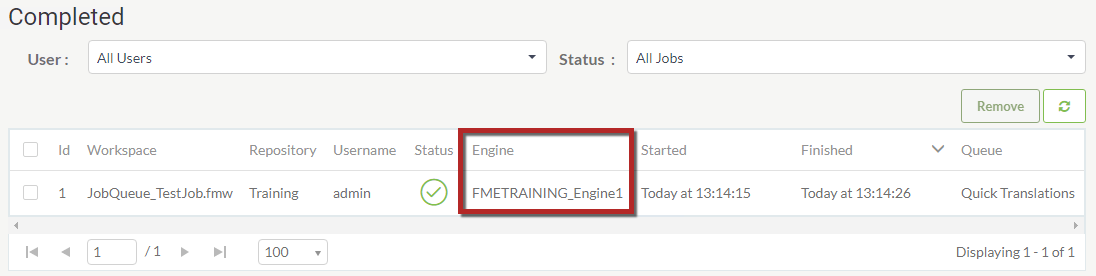
Go back to Jobs > Completed, click on the customize columns icon in the right corner under filters, add the engine and queue to the columns. This will allow you verify that the job was sent to the correct engine and queue.
When testing, you may consider submitting the job multiple times for an added verification step, and peace of mind, but this isn't necessary of course!
| CONGRATULATIONS! |
By completing this exercise you have learned how to:
|