Assistant
Table of Contents
Overview
Neutron 4 includes an Assistant that helps you achieve your creative intent for individual elements of your mix, helping you finish your project with confidence. The Assistant works together with the Assistant View and Detailed View to help you make broad adjustments early in your workflow and refine your choices as you get deeper into your mix. We highly encourage you to use the Assistant in the Neutron mothership plug-in for individual track processing or use the Assistant in the Visual Mixer plug-in for a multiple track starting point.
Assistant: Neutron mothership plug-in
Neutron’s Assistant in the mothership plug-in helps you make broad mixing decisions early in your mix workflow with streamlined control and visual aids to help you reach your outcomes fast.
Recommended Assistant Workflow: Neutron mothership plug-in
To access the Assistant, click the Assistant button in Neutron’s header.

This will begin listening to the input signal and generate a starting point for your track. Once analysis is completed, the Assistant view will become available.
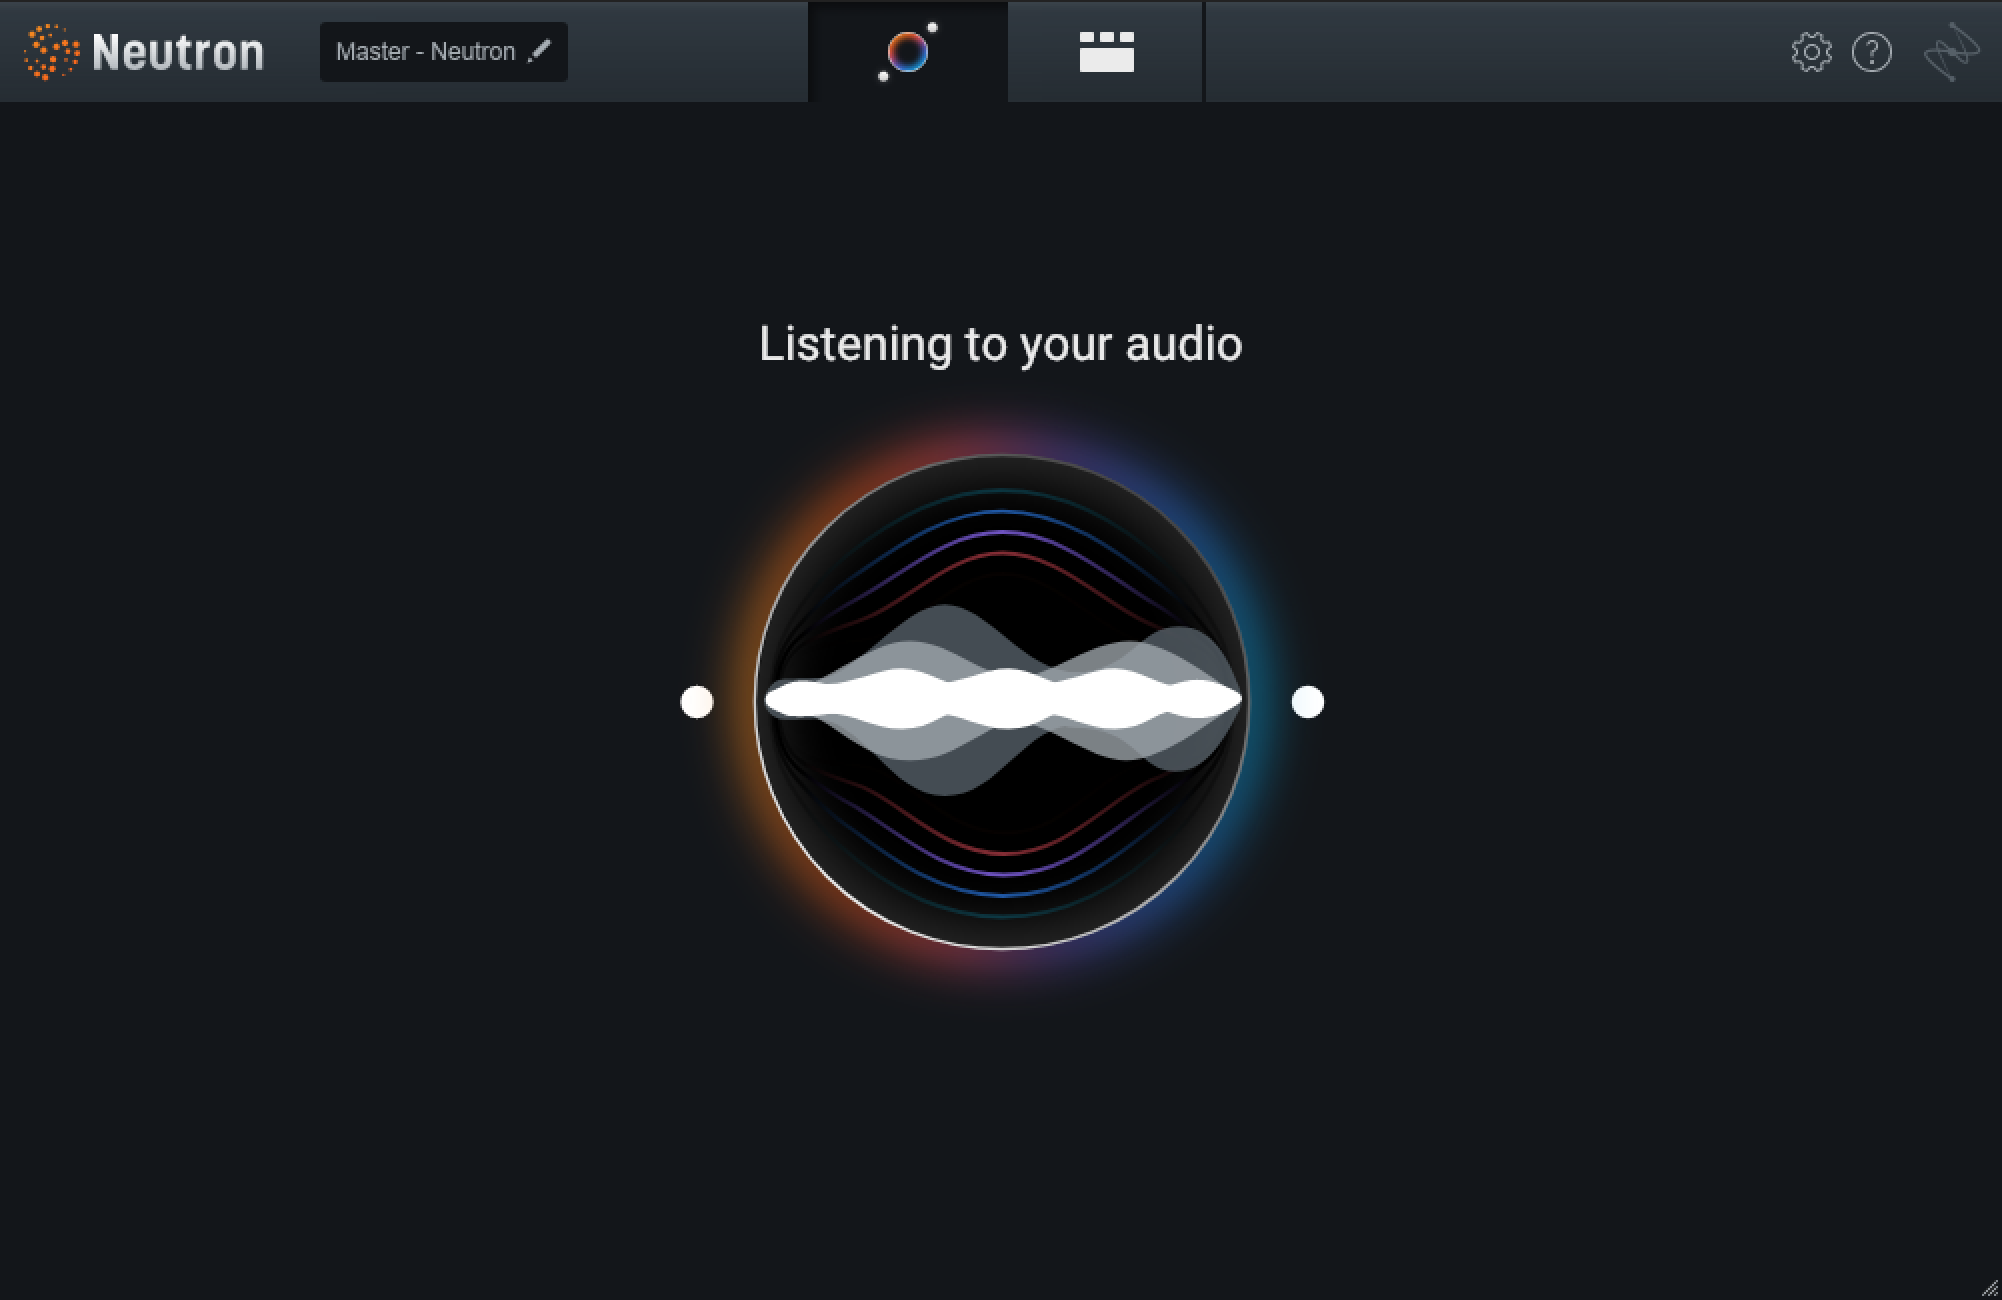
The Assistant view is a real-time environment that works with the detailed controls included in the modules present the module chain.
Assistant View Interface
The following image outlines the key sections of the Assistant View:
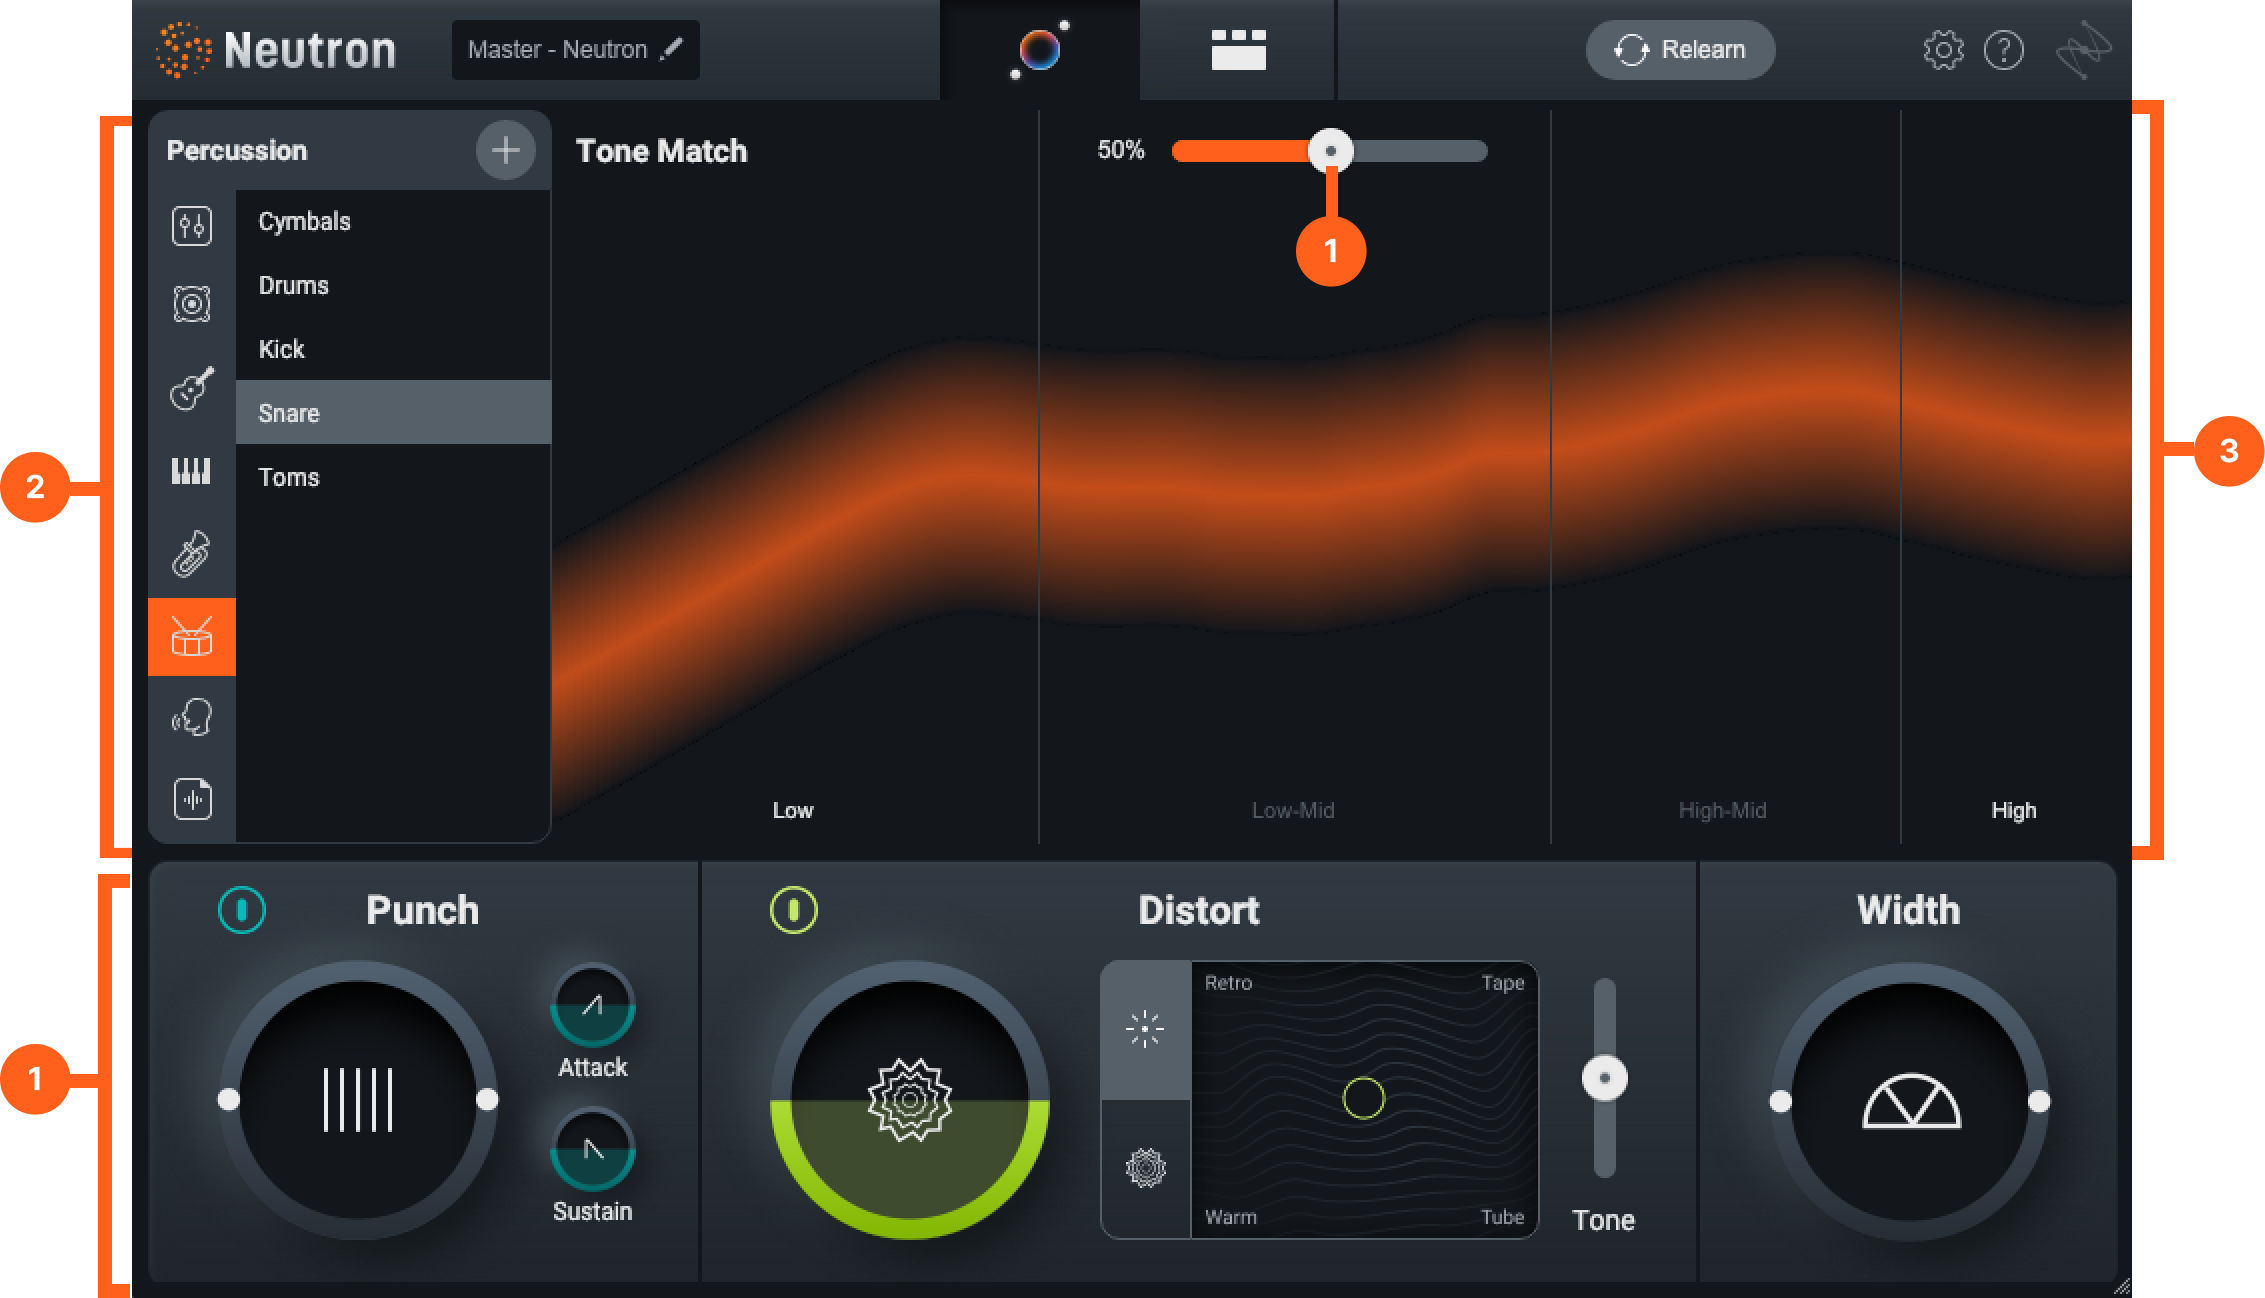
Intent Controls
Intent controls are parameters that allow for broad control over early decisions in your mixing workflow. They work together with Neutron’s intelligent analysis, Targets and the Signal Chain to give you a simple workflow for tonal, dynamics, character, and width decisions in your mix. Intent Controls are exclusive to the Assistant View in the mothership plug-in and are not available in the Neutron component plug-ins or the Visual Mixer plugin.
The following Intent control sections are available:
Intent controls are linked to deeper controls in the Detailed View of the mothership plug-in. Here is what each intent control is mapped to in the Detailed View:
| Intent Control | Parameter | Connected Module Control | Connected Module |
|---|---|---|---|
| Tone | Match | Assistant Pre-EQ | Sculptor |
| Tone | Match | Amount | Sculptor |
| Punch | Amount | Punch Amount | Compressor 2 |
| Punch | Attack | Punch Attack | Compressor 2 |
| Punch | Sustain | Punch Sustain | Compressor 2 |
| Distort | Drive | Drive | Exciter |
| Distort | Processing Mode (Classic/Trash) | Processing Mode (Classic/Trash) | Exciter |
| Distort | XY Pad | XY Pad | Exciter |
| Distort | Tone | Tone | Exciter |
| Width | Width Amount | Width | Global I/O |
Tone Match
Controls the amount of static EQ matching and Sculptor processing applied to the input signal.

The Tone Match slider controls two parameters simultaneously: the Assistant Pre-EQ control and the Amount control found in the Sculptor module. Both controls work together to shape the input signal towards the selected target or custom reference curve in the Target Library.
Assistant Pre-EQ Exclusive to Mothership Plug-in
The Assistant Pre EQ parameter works exclusively with the assistant and is not available in the Sculptor component plugin.
Punch
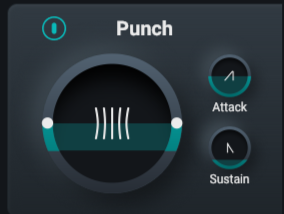
- Amount: Controls the Amount parameter of Punch processing mode in Compressor 2. The Amount control is a single control for dynamics processing. Adjust this control to increase or decrease the dynamic range of musical hits. Settings below 100% decrease dynamic range, creating a consistent compression effect. Settings above 100% increase dynamics range, creating a punchy effect.
- Attack: Controls the Attack parameter of Punch processing mode in Compressor 2. Attack adjusts the rising effect of the punch processing. Lower settings accentuate the punch of musical hits and higher settings attenuate the punch of musical hits.
- Sustain: Controls the Sustain parameter of Punch processing mode in Compressor 2. Adjusts the falling effect of the punch processing. Lower settings sharpen the punch of musical hits and higher settings extend the sound of musical hits.
- Enable/Disable: Controls the enabled state of the Compressor 2 module in the module chain. Use this to bypass Punch dynamics processing.
Punch Intent controls only affect Compressor 2
The Punch Intent controls are only connected to Compressor 2 and will not affect processing in Compressor 1.
Learn more about the Compressor
To learn more about dynamics processing in Neutron visit the Compressor chapter.
Distort
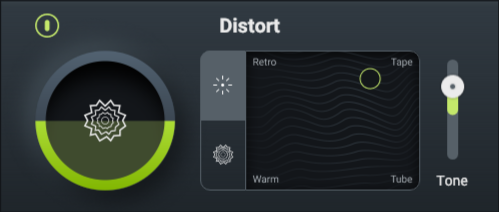
- Drive: Adjusts the Drive parameter for all three bands in the Exciter module. Adjusts the amount of distortion applied to the input signal.
- Processing Modes: Adjusts the processing mode for all three bands in the Exciter module. The processing mode in the Exciter changes the style of distortion between subtle and dramatic harmonic profiles per band. Classic processing mode (top) provides four modes for subtle excitation use cases. Trash processing mode (bottom) provides four modes for dramatic distortion use cases.
- XY Pad: Controls the XY pad for all three bands in the Exciter module. Blends different harmonic profiles to achieve the sound you want to hear.
- Tone: Adjusts the Tone control in the Exciter module. Tone adjusts the balance of distortion applied to low and high frequency content in the Exciter. Values between -100 and 0 emphasize low frequency content; Values between 0 and 100 emphasize high frequency content.
Learn more about the Exciter
To learn more about the harmonic profiles in Neutron, go to the Exciter chapter.
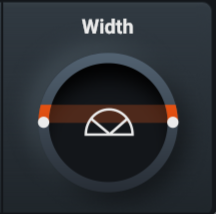
Width
Adjusts the global Width control in the I/O panel of the Neutron mothership plug-in.
Learn more about the I/O Panel
To learn more about the I/O panel, go to the General Controls chapter.
Target Library
The Target Library contains instrument targets and user generated reference targets. Setting a target provides helpful starting points for the Intent controls in the Assistant View and the modules in signal chain in the Detailed View.
Instrument Targets
The Tonal Balance Targets are directly connected to the Sculptor module in the Detailed View. Changing a Target in the Assistant changes the Target Curve Menu in the Sculptor module. This dramatically changes the sound of the processing applied to the input signal.
Dirty State
Targets will enter a dirty state when the original settings for the Target have been modified in the Detailed view. Selecting this button will restore the original settings.
Dirty State
When a Target enters a dirty state it means that changes have been made that are outside assistant-recommended settings.
Reference Targets
You can create and manage your own custom reference targets by importing audio files from your computer.
Press the (+) button to open a system dialog and select audio files on your computer to add to your custom Target Library.

Selecting a sound, clip, or stem will copy the name and that file into the Custom target area of Neutron’s Target Library.
Meters and Displays
Tonal Balance Target Metering
The Tonal Balance Target Meter displays audio as a frequency spectrum, providing a helpful visualization of the selected Instrument Target’s intended shape against the output signal. Switching targets will change the shape of the Tonal Balance Target Meter.
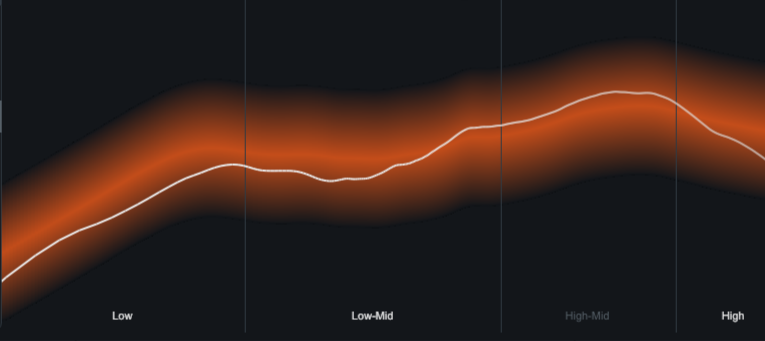
The thin gray line represents the output signal of Neutron, visualizing what the input signal looks like after it’s passed through the module chain in Neutron.
Relearn
Select this to re-run the Assistant in Neutron 4.
Assistant: Visual Mixer plug-in
The Assistant in Visual Mixer helps you automatically set static level in all the tracks with Neutron 4 mothership, Neutron 4 components, and Relay. For best possible results, use the Assistant in Visual Mixer after you’ve imported raw stems (tracks) into a new session.
- You can access the Assistant from the Neutron 4 Visual Mixer plug-in.
- The Assistant can listen to and adjust the following IPC-compatible iZotope plug-ins: Neutron 4 mothership, Neutron 4 Compressor, Neutron 4 Equalizer, Neutron 4 Exciter, Neutron 4 Gate, Neutron 4 Transient Shaper, Neutron 4 Sculptor, Neutron 4 Unmask, and Relay.
The table below outlines which plug-ins are compatible with the Assistant in Visual Mixer.
Recommended Workflow: Visual Mixer plug-in
The Assistant in Visual Mixer helps you automatically set static level in all the tracks with Neutron 4 mothership, Neutron 4 components, and Relay. For the best possible results, use the Assistant in Visual Mixer after you’ve imported raw stems (tracks) into a new session.
Note: Don't Touch Your Faders
Before you run the Assistant in Visual Mixer, check that the DAW faders are set to unity gain, i.e. don’t touch your DAW faders. The less you have set up, the easier it is for the Assistant in Visual Mixer to help you.
If you want Visual Mixer (exclusively) to set all your pans and faders, make sure to put Relay in the last insert on your tracks.
- Import all tracks needed for your session. The more tracks you include, the more time the Assistant will save you!
- Add Visual Mixer on your master bus. Know that Visual Mixer does not process audio, it just needs to know at least that there is activity occurring.
- Click on the Assistant button in Visual Mixer and begin using the Assistant.
Visual Mixer Assistant Stages
The Assistant in the Visual Mixer involves the following stages:
In each stage, you need to perform an action that will help the Assistant provide you the most accurate results.
NOTE: Choose One Plug-in per Audio Source
Use buses or individual tracks but don’t use both. While the Assistant can work on buses and individual tracks, you only need to exclusively use either buses or individual tracks. If you have Neutron 4 and Relay on the same track, you should only select one of these to represent the track.
Tip: Not Getting The Results You Want?
- Make sure you are using either individual tracks or buses. The Assistant was not designed to work well with both individual tracks and buses simultaneously.
- Try setting your faders to unity gain and pan your tracks to center.
- Check that the appropriate plug-ins set for Focus in the Setup stage.
- If you have more than one iZotope plug-in on any individual track or bus, make sure you select a single plug-in instance per track in the Setup stage.
Setup Stage
Select the tracks that are the focus of your mix and those that you want to include. Then, click Begin Listening.

This view lists all of the compatible iZotope plug-ins in your session. Make sure every track you want to include is represented and only included once. Do NOT play music during this stage!
NOTE: Select at Least One Track for Focus
You need to pick at least one focus of your mix. You cannot proceed to the next stage until you have done this. The focus is one instrument that you feel is the most important aspect of your mix. Many tracks can be the focus of your mix, for example, if there are two lead vocal tracks. However, if everything is the focus, then the Assistant will not yield great results.
Waiting Stage
Place the playhead at the beginning of your arrangement. Then, start the transport for the Assistant to begin listening.
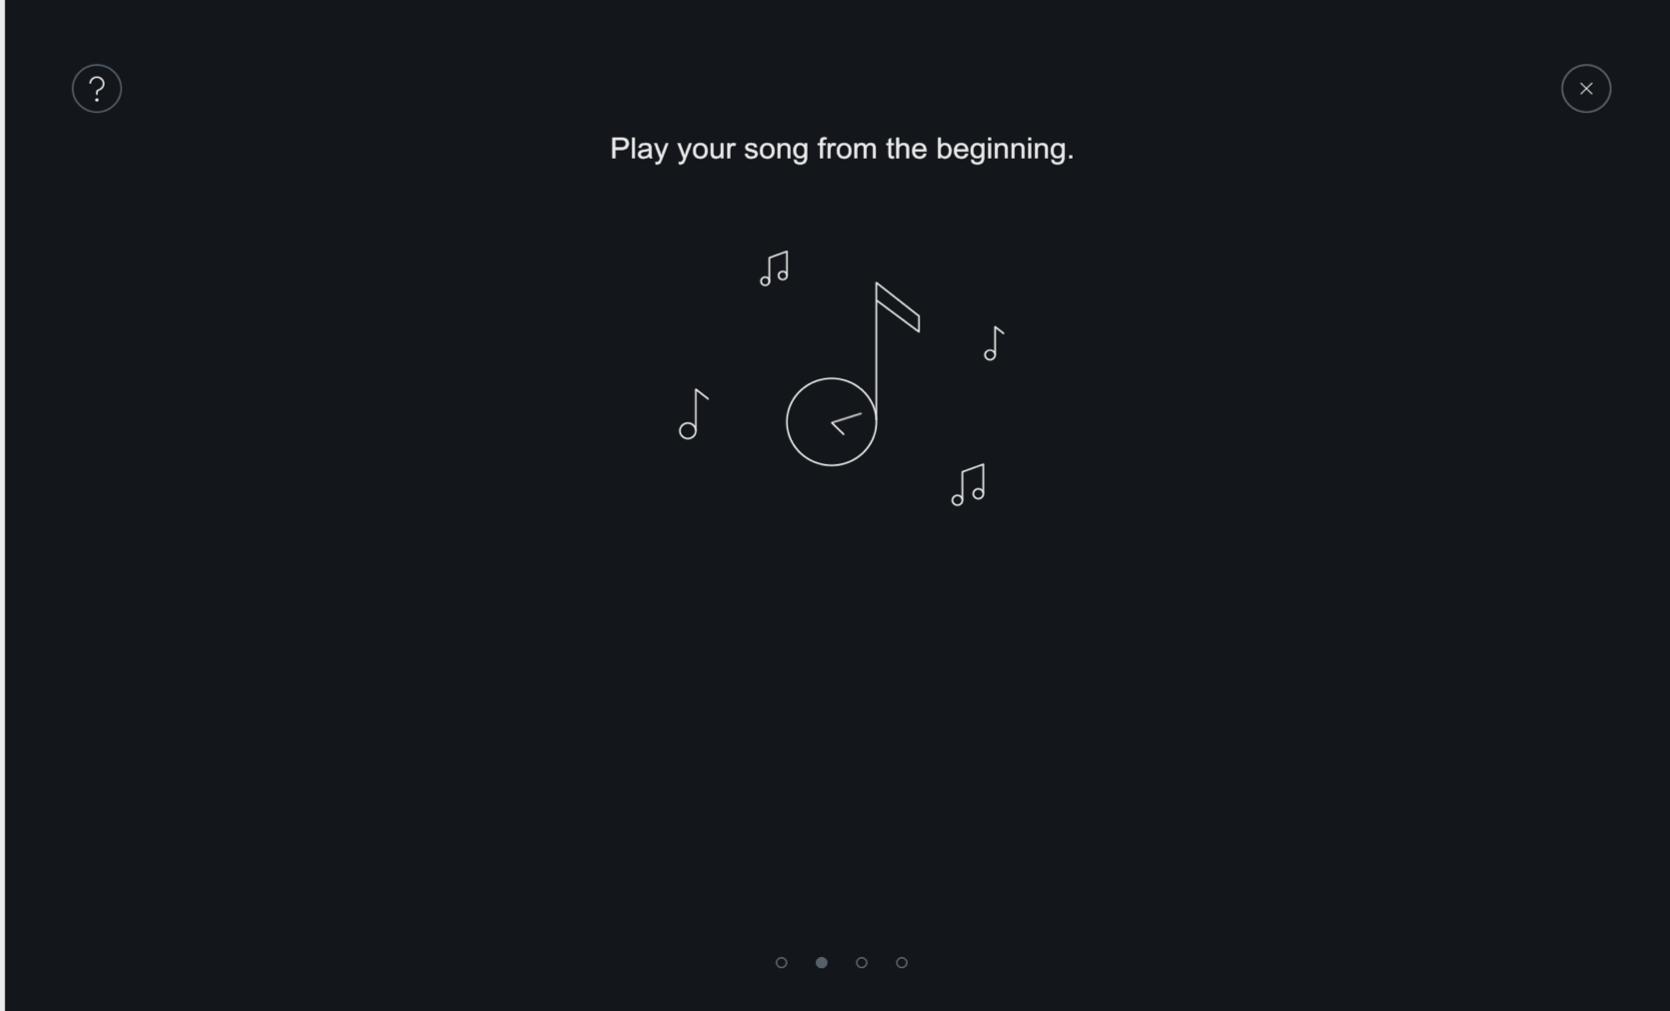
The Assistant can’t do anything without listening to your music. So, make sure you play your audio from where your audio starts wherever you want the Assistant to begin listening.
NOTE: The Assistant Will Not Listen To Already Playing Transport
If your transport is playing when you enter the Listening page, the Assistant will not begin listening automatically. You need to stop your audio and start the transport at the beginning of the song for best results. If using a large session, there may be a slight delay, try to start, rewind, and restart again.
Listening Stage
When you reach the end of your session, click Go To Results to proceed to the results. If you don’t, the Assistant will never stop listening.
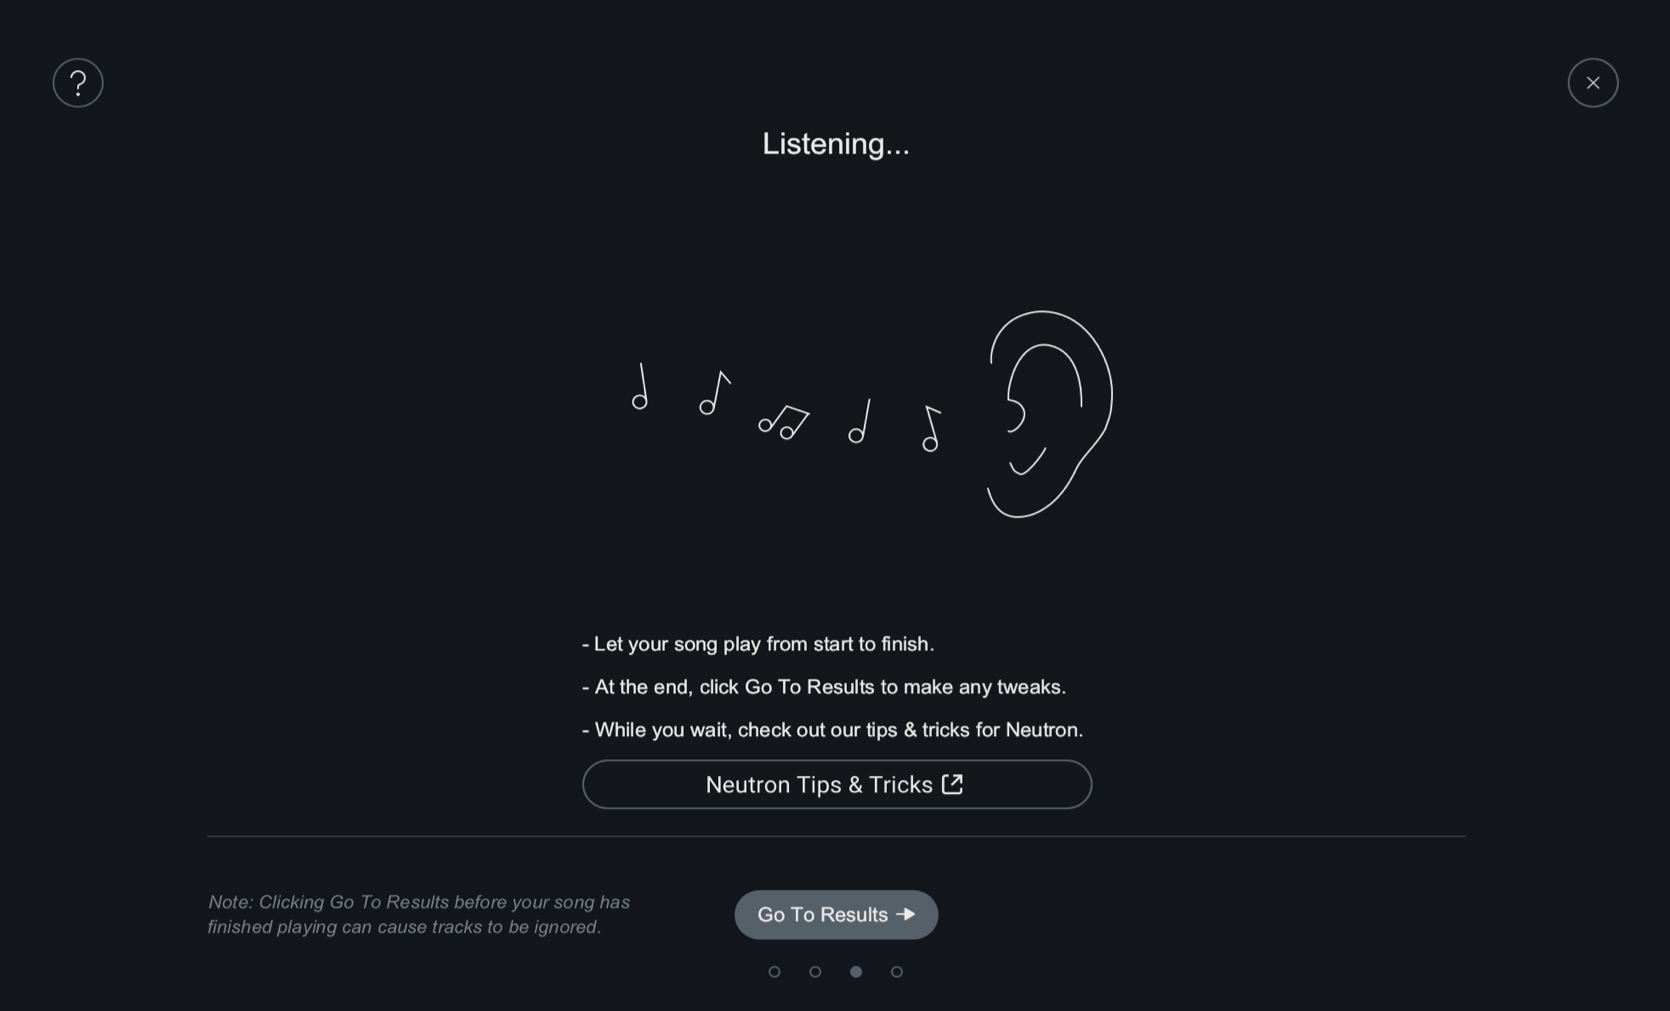
The Assistant listens to the overall level of each audio source and categorizes each instrument into groups.
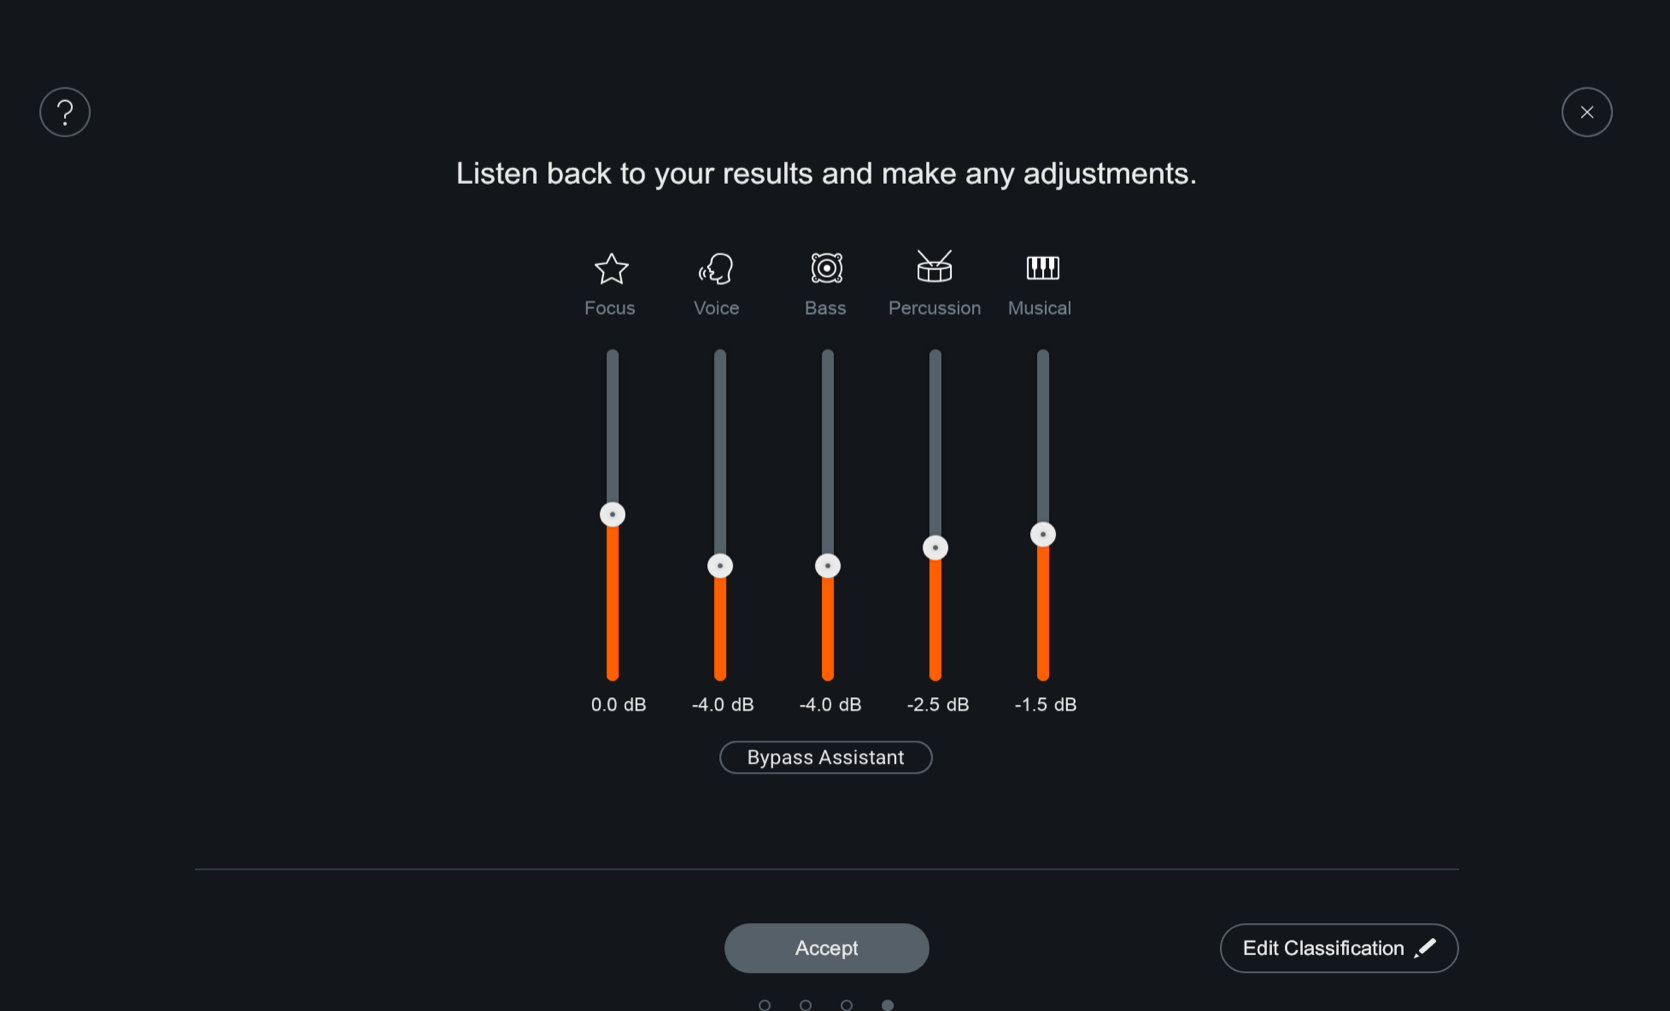
Audition And Adjust Stage
Now that the Assistant has listened and has categorized your audio, you can now:
- Audition the Assistant’s suggestions.
- Adjust the Group Sliders to what sounds best to you.
- Compare the Assistant’s results with your original session by clicking on the Bypass Assistant button.
- Edit the classifications of the Group Sliders and the Focus.
Group Sliders
Adjust the Group Sliders to your preference and audition the differences.
The group sliders are created as a result of the Assistant listening to your audio. The Assistant gathers up all the information it has learned about your music and it sub-mixes these into the groups.
The Assistant determines a target level for the following groups:
- Focus: What you choose as the focus of your mix.
- Voice: Tracks selected with vocals.
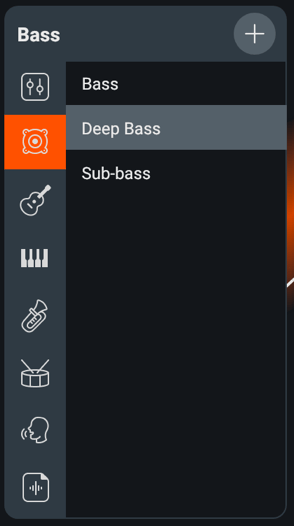
- Bass: Tracks selected with bass.
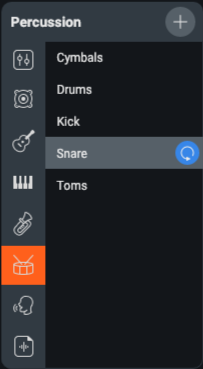
- Percussion: Tracks selected with drums/percussion instruments.
- Musical: Other tracks that may not relate to the groups above.
Each group has an associated, adjustable level slider. The slider itself represents the overall gain differences of the groups relative to each other. When you adjust these sliders, you are making gain changes relative to the Assistant’s initial target level suggestion. The Assistant will try to apply gain adjustment to each track within that group so that their combined levels achieve the target mix level set by the Group Slider. The range of adjustment is +/- 12 dB for the Group Sliders.
TIP: Adjust Group Sliders to Taste
If you don’t like the way your mix sounds with the group sliders at their starting positions, they are not final– you can always experiment until you get the right level balance for your song.
Group Slider Behavior
Group Sliders will be disabled if there is no content recognized for that group. If all your audio sources are selected as the Focus, then only one slider (Focus slider) will be available. With that, any audio source that is not used or classified is disabled.
Bypass Assistant
This button will disable the sliders and allow you to listen to your session pre-Assistant suggestions.
When auditioning the Assistant’s results, the unprocessed mix will be gain-matched to the processed mix. By gain matching, you can better discern the differences in balance.
TIP: The Overall Level May Sound Quieter
To avoid clipping, we try to turn things down when trying to go for an overall mix, so the levels that Mix Assistant suggests may be lower than the original levels.
Edit
Edit which tracks are categorized for each Group by clicking on the Edit Classifications button in the lower right-hand corner. You can adjust the tracks in focus or reclassify the tracks. The Assistant adjusts the Groups to reflect your categorization decisions.
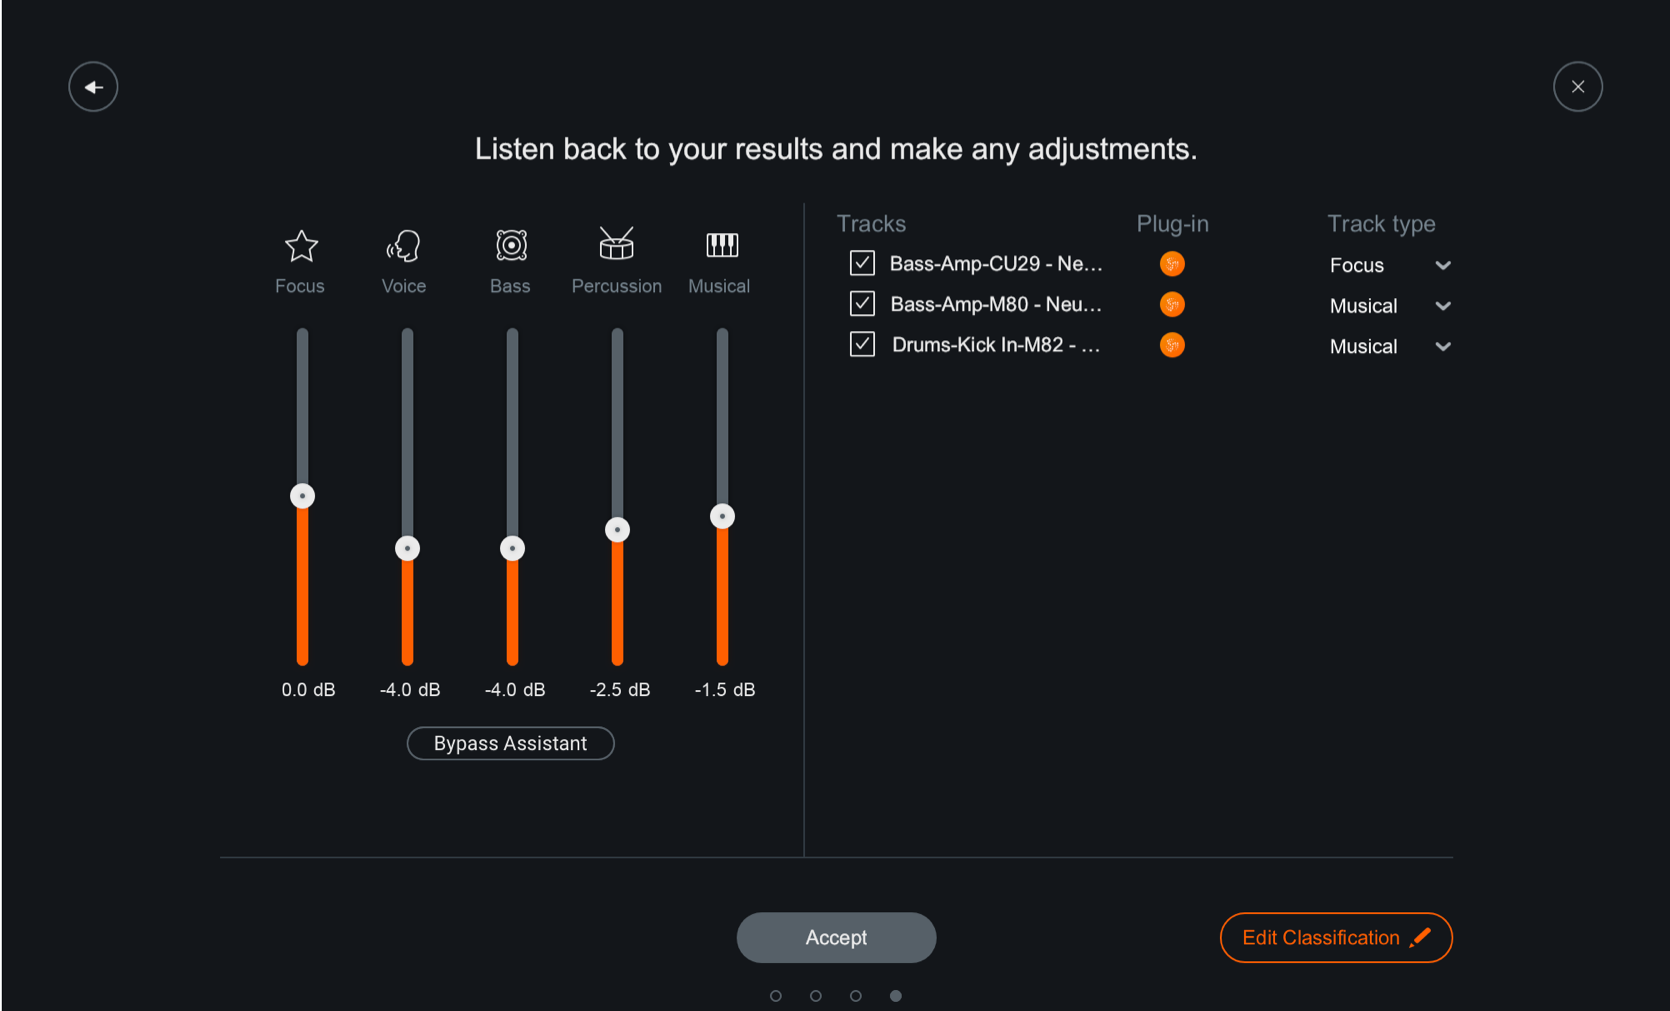
NOTE: Assistant plug-in edit list
Any plug-ins that you did not select in the Setup stage will not appear in the Assistant’s plug-in list editor. You cannot add any plug-ins to that list. Additionally, if you add a compatible iZotope plug-in to your session while the Assistant was in the Learning stage, it will not show up in the plug-in editor.
Accept Stage
When you’re happy with the level balance of your mix, click Accept and your level settings will be applied to each source plugin using iZotope’s Inter-plugin Communication Technology (IPC).
- If you didn’t like results, close out of the Assistant window to revert the changes.
- If you auditioned the results, you can’t click Accept unless you disable Bypass Assistant.
TIP: View Output Gain Adjustments in Visual Mixer
You can see the adjustments made to the output gain sliders in all affected plug-ins shown in the results list. These changes are easiest to view in the Visual Mixer component plug-in.
NOTE: Group sliders cannot be accessed after exiting the Assistant
Once you close out of the Assistant, you cannot go back to the same screen to make group level changes. To make any Group Level changes, you will have to restart the Assistant from the beginning. The Assistant will re-learn everything unless you have overwritten a class which we will not alter.