General Controls
Overview
Adjusting the General Controls will set up different parts of your mixing environment. The following will affect the entire plug-in:
Resize Window
You can resize the main window by clicking and dragging the bottom right corner of the plug-in window.
Global Controls
The Header includes the following Global Controls as outlined in the image and table below.

| Label | Control | Description |
|---|---|---|

|
Track Assistant | Opens the Track Assistant window. For more information, see the Track Assistant chapter. |

|
Preset Manager | Opens the Preset Manager window. For more information, see the Presets chapter. |

|
Undo History | The Undo History window allows you to compare previously adjusted settings in Neutron. For more information on the Undo History window, see the Undo History Controls section below. |

|
Zero Latency | Enables Zero Latency processing. When enabled, transient shaper processing will be affected. |

|
Options | Opens up the Options window. For more information, see the Options chapter. |

|
Help | Links to the Help Documentation related to the module or button you are interacting with. |
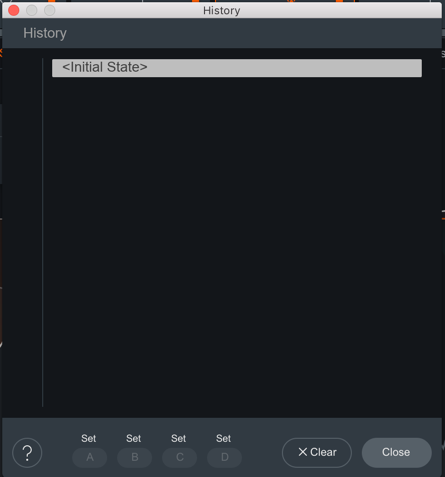
Undo History Controls
The Undo History window allows you to compare previously adjusted settings in Neutron. Clicking on Undo History will present a History list of any controls you’ve altered. You can audition the settings in the History list by clicking on one of the History list items. The table below describes the controls present in the Undo History window.
| Controls | Description |
|---|---|
| CLEAR | Click the Clear button to clear the history list at any time. |
| CLOSE | Click the Close button to close the History window. Processing resumes from the point you had last selected, so you can continue building on the History list from an earlier point. |
| SETS | You can assign up to four points in the History list to sets A, B, C, or D. This is useful for comparing a collection of different settings at once. To assign a History item to a Set:Select an item on the History list you want to capture. Click on either A, B, C, or D to assign the selected History item to the button. Click on assigned A, B, C, or D buttons to see your associated setting. |
Signal Chain
You can add, rearrange, and move the following modules in the Signal Chain:

Use the signal chain controls outlined in the table below to customize your Signal Chain.
| Icons | Controls | Description |
|---|---|---|

|
Add | Click the + button in the Signal Chain to open the module menu. Select a module from the list to add it to the last slot in the Signal Chain. |

|
Power Button | Click the power button the upper left corner of a module tile to bypass processing of that module. |

|
Module Presets | Click to access presets for the selected module. For more information, see the Preset Manager |

|
Remove | Click to remove the associated module from the Signal Chain. |

|
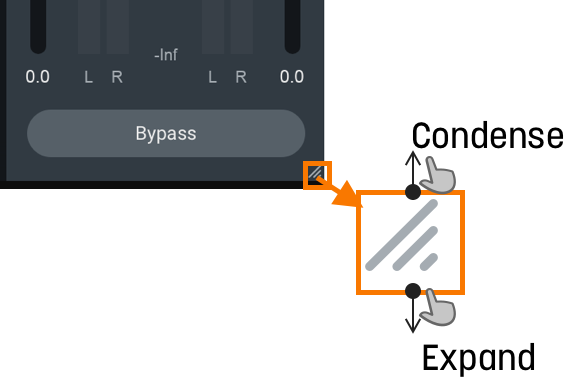
Reorder | Click and drag a module panel left or right within the Signal Chain to change its order in the signal flow. |

|
Wet/Dry Mix | Adjust the slider to balance between the dry (unprocessed) and wet (processed) signals. |
TIP: MODULE PRESETS AS STARTING POINT
Use the Module Preset list to help you get started on cleaning your mix. Each preset is designed to target a specific, but common issue found in a track. Play around with these presets to see how they affect your audio. Then, finely tune the parameters to your taste within the module.
NOTE: BYPASS DOES NOT AFFECT GAIN
All processing can be bypassed in True Bypass mode, except for Input Gain and Output Gain.
NOTE: PARALLEL WITH WET-DRY MIX
Use the Wet/Dry Mix slider in the signal chain to perform parallel processing.
- At 100%, you will hear only the processed audio signal.
- At 50%, you will hear a blend between unprocessed and processed audio.
NOTE: Use Mix As A Blending Tool
Mix slider allows you to adjust how much of the wet signal is added to the dry signal where dry (unprocessed) means audio input to the module, and wet (processed) means audio output from the module. The Mix affects the entire module.
I/O Panel
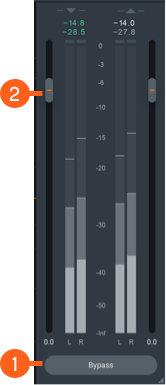
The I/O (input/output) Panel allows you to monitor levels, adjust gain, and engage global bypass.
| Label | I/O Panel Controls | Description |
|---|---|---|
|
|
Bypass | Toggle to either turn Neutron 3 Elements instance processing on (Bypass disabled) or off (Bypass enabled). When you toggle Bypass ON (processing disabled), you will not be able to modify Neutron 3 Elements module controls. |
|
|
Gain (Input/Output) | Adjusts the input or output gain. Output gain level comes before the Limiter in the signal flow. |
I/O Panel Meters
The Input and Output meters display Peak and RMS metering information.
- The current Peak value is displayed in white.
- The current RMS value is displayed in light grey.
The text readouts directly below the meters display the current Peak and RMS values.