Restore a Virtual Machine or VPG from Repositories
Use the following procedure to restore a VM or a VPG from the repository.
To restore a single virtual machine or multiple virtual machines from a VPG:
| 1. | In the Zerto User Interface select Restore > VM/VPG. |
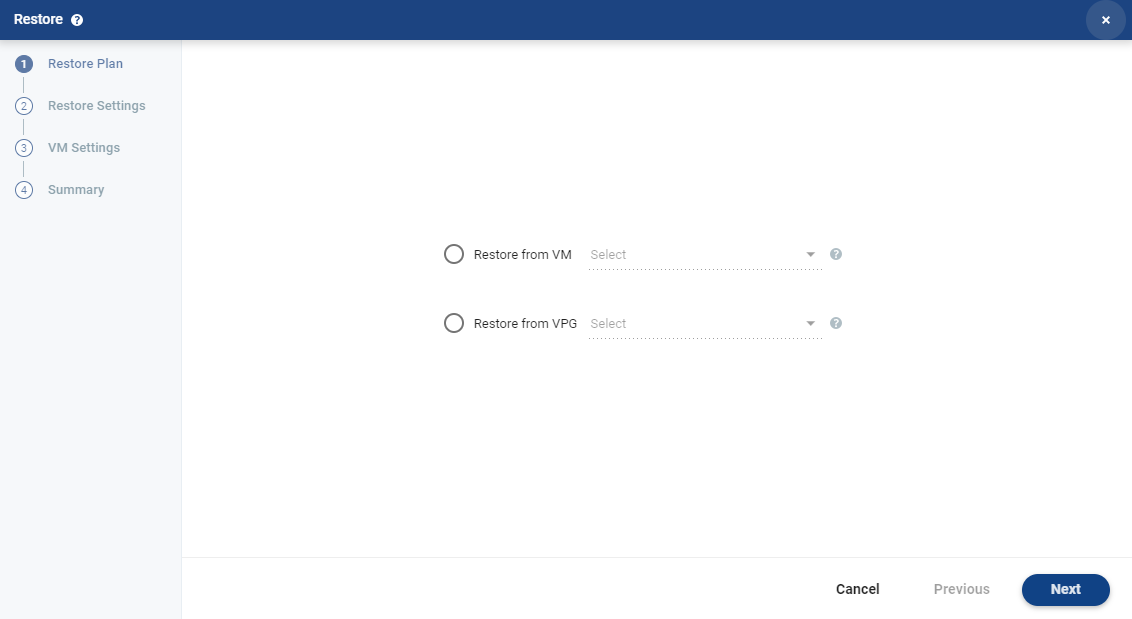
| 2. | Select a VM to restore from the Restore from VM drop-down list or type the VM name. Or, select a VPG to restore from the Restore from VPG drop-down list or type the VPG name. |
If a VM/VPG was renamed, both the original and new names will appear.
The drop-down lists include VMs or VPGs that are currently configured or were configured/deleted on your site. VMs or VPGs marked with an arrow are VMs/VPGs that were configured on your site and are no longer protected.
| 3. | Click NEXT. |
The RESTORE SETTINGS step appears, displaying all the available retention sets for the selected virtual machine or the VPG.
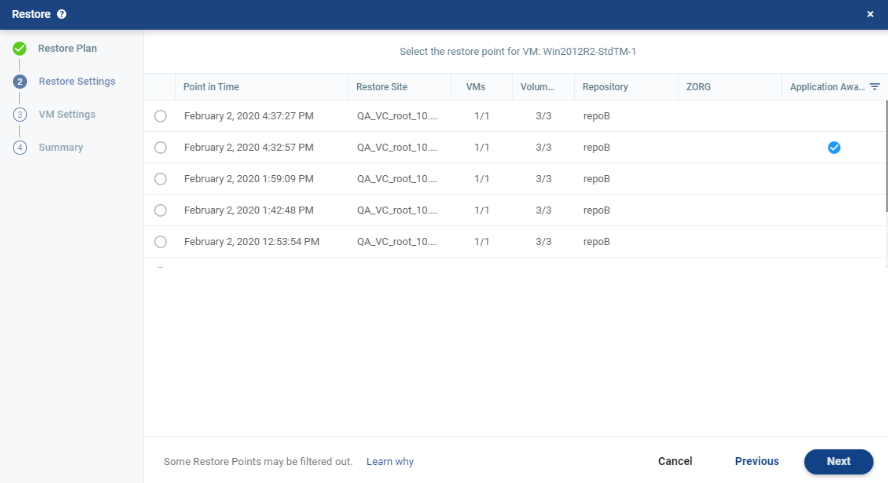
| Note: | Some Restore points may be filtered out. For further details, see Restore Point not Shown. |
| 4. | From the list of available retention sets, select the retention set to restore, where: |
|
Point in Time: |
The date and time the retention set was performed. |
|
Restore Site: |
The recovery site where the virtual machine or VPG reside. |
|
VMs: |
The number of virtual machines that were retained in this retention set. |
|
Volumes: |
The number of volumes that were retained in this retention set, out of the total number of volumes for the virtual machine/s. |
|
Repository: |
The name of the repository where the retention set is stored. |
|
ZORG: |
(ZCM sites only) The Zerto organization for which the retention set was created. This field only has a value if the Zerto Cloud Manager is connected to the site. For details, see Zerto Cloud Manager Administration Guide. |
| Application-aware Retention | Restore point is Application-aware. |
| 5. | When you select a retention set to restore, the list of virtual machines in the retention set appear, displaying the following information: |
| VM Name: | The name of the virtual machine. |
| # of volumes
|
The number of volumes retained, out of the total number of volumes for the virtual machine. |
| Provisioned VM Size: | The total size of the virtual machine. |
| 6. | Click NEXT. |
When restoring a VPG, the list of virtual machines that can be restored is displayed.
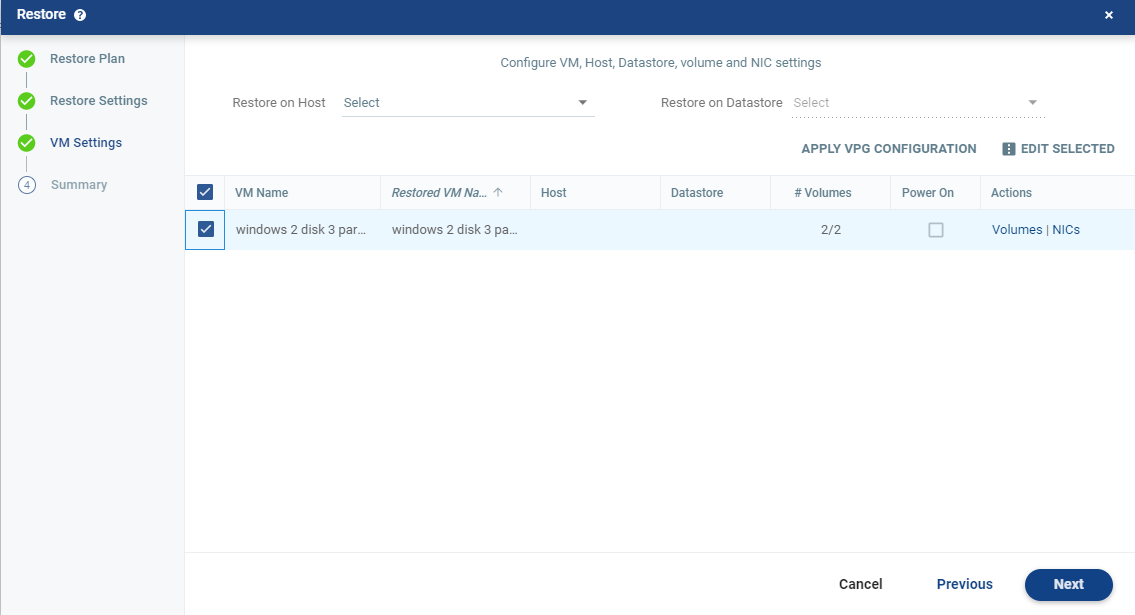
| 7. | You can specify the following which are then applied to the virtual machine/s to be restored: |
| • | Restore on Host: The host where you want the virtual machine/s restored. |
| • | Restore on Datastore: The datastore to use for the restored virtual machine/s. |
| • | Power On: Select this if you want the restored virtual machine/s to be powered on. |
- Or -
| • | Alternatively, click APPLY VPG CONFIGURATION to use the recovery host and storage specified for each virtual machine in the VPG definition. |
| 8. | To change the information in a field, click the field and update the information. |
| 9. | To change the host or datastore information for several virtual machines at the same time, select the virtual machines and click EDIT SELECTED. |
The Configure VM Settings window is displayed.

You can specify the following values, which are then applied to the virtual machine/s to be restored:
| • | Restore on Host: The host where you want the virtual machine/s restored. |
| • | Restore on Datastore: The datastore to use for the restored virtual machine/s. |
| • | Power On: Select this if you want the restored virtual machine/s to be powered on. |
| 10. | To specify the volume information for each virtual machine, from the Actions column, click Volumes. |
The Volumes dialog is displayed:
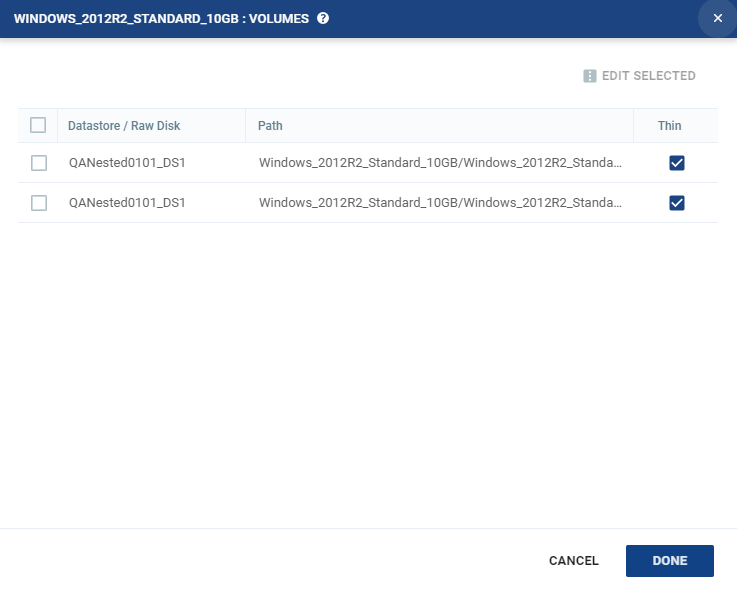
| 11. | To edit information in a field, click the field and update the information. |
| 12. | To edit information for several datastores at the same time, select the datastores and click EDIT SELECTED. |
The Edit Selected Volumes dialog is displayed.
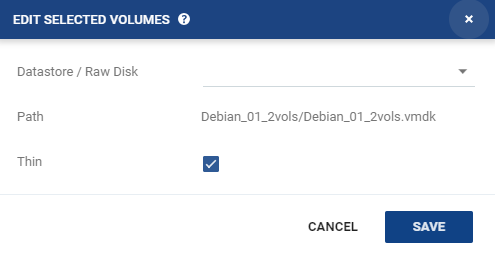
| • | If more than one datastore is selected, the path is not displayed. |
| 13. | Specify the datastore settings. |
| • | Datastore / Raw Disk: The storage or RDM disk where the virtual machine files will be restored. |
| • | Thin: Whether the virtual machine disks will be thin‑provisioned or not. |
| 14. | Click SAVE. |
| 15. | In the Volumes dialog, click DONE. |
| 16. | To specify the NIC information for each virtual machine, from the Actions column, click NICs. |
The NICs window is displayed:
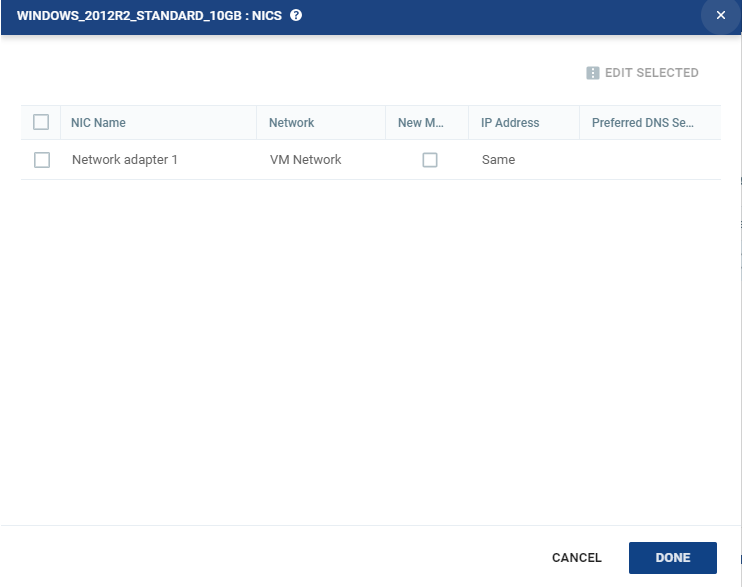
| 17. | To edit information in one field, click the field and update the information. |
| 18. | To edit information for several virtual NICs at the same time, select the NICs and click EDIT SELECTED. |
The Edit NIC dialog is displayed.
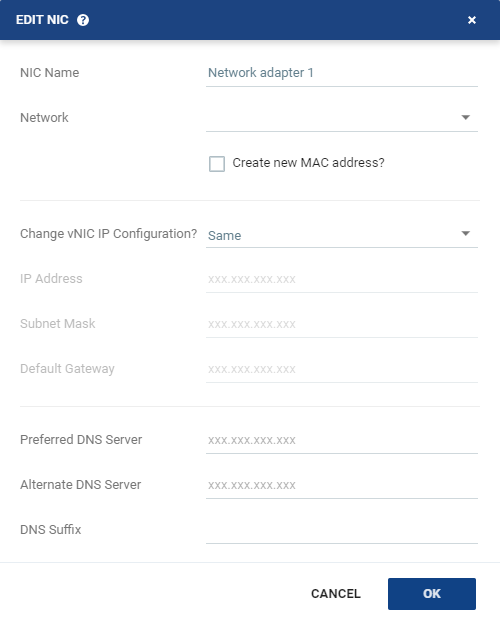
| 19. | Specify the NIC settings. |
|
The name of the selected NIC. | |||||||||
|
The network to use for the restored virtual machine. | |||||||||
|
The Media Access Control address (MAC address) to use. The default is to use the same MAC address for the restored virtual machine that was used in the protected site. Select the checkbox to create a new MAC address on the restore site. |
|||||||||
|
Whether or not to keep the default virtual NIC (vNIC) IP configuration. You can only change the vNIC IP after the restore has completed with VMware Tools installed.
|
|||||||||
|
The IP for the restored virtual machine. This can be the same IP as the original protected virtual machine. | |||||||||
|
The subnet mask for the network. The default value is 255.255.255.0. | |||||||||
|
The default mask for the network. | |||||||||
|
The IP address of the primary DNS server. | |||||||||
|
The IP address of the alternate DNS server. | |||||||||
|
The DNS name excluding the host. |
| 20. | Click OK. |
| 21. | Click DONE. |
| 22. | Click NEXT. |
| 23. | If this is the retention set which you want to restore, click RESTORE. |
The virtual machines are created from the Repository at the recovery site.
For further details, see Using Zerto’s Long-term Retention.
See also:
| • | About Dialog |
| • | Add Checkpoint Dialog |
| • | Pair Sites - Add Site Dialog |
| • | Add Static Route Dialog |
| • | Advanced Journal Settings Dialog |
| • | Advanced Journal Settings Dialog (vCD) |
| • | Advanced VM Recovery Settings Dialog |
| • | Advanced VM Replication Settings Dialog |
| • | Advanced VM Replication Settings Dialog (vCD) |
| • | Advanced VM Settings for Cloud Dialog |
| • | ALERTS |
| • | Boot Order Dialog |
| • | Browse for File Dialog |
| • | Change Host Password VRA Dialog |
| • | Edit VM Recovery VRA Dialog |
| • | Checkpoints Dialog |
| • | Configure and Install VRA Dialog |
| • | Configure Paired Site Routing Dialog |
| • | Configure Provider vDCs Dialog |
| • | Configure VM Settings Dialog |
| • | Create New Credentials Dialog |
| • | Edit Volume Dialog (vCD) |
| • | Edit NIC Dialog |
| • | Edit Repository Dialog |
| • | Edit Selected Volumes Dialog |
| • | Edit VM Dialog |
| • | Edit VM Dialog (vCD) |
| • | Edit VM Settings Dialog (AWS) |
| • | Edit VM Settings Dialog (Azure) |
| • | Edit vNIC Dialog |
| • | Edit vNIC Dialog (vCD) |
| • | Edit Volumes Dialog |
| • | Edit Volumes Dialog (vCD) |
| • | Edit VRA Dialog |
| • | Guest Services Settings Dialog |
| • | License Dialog |
| • | Manage Static Routes Dialog |
| • | New Repository Dialog |
| • | Restore - Edit NICs Dialog |
| • | Offsite Clone Window |
| • | Open Support Case Dialog |
| • | Remote Support Dialog |
| • | Restore - Edit Volumes Dialog |
| • | Restore - Edit Selected Volumes Dialog |
| • | Site Settings Dialog |
| • | Stop Failover Test Dialog |
| • | TASKS |