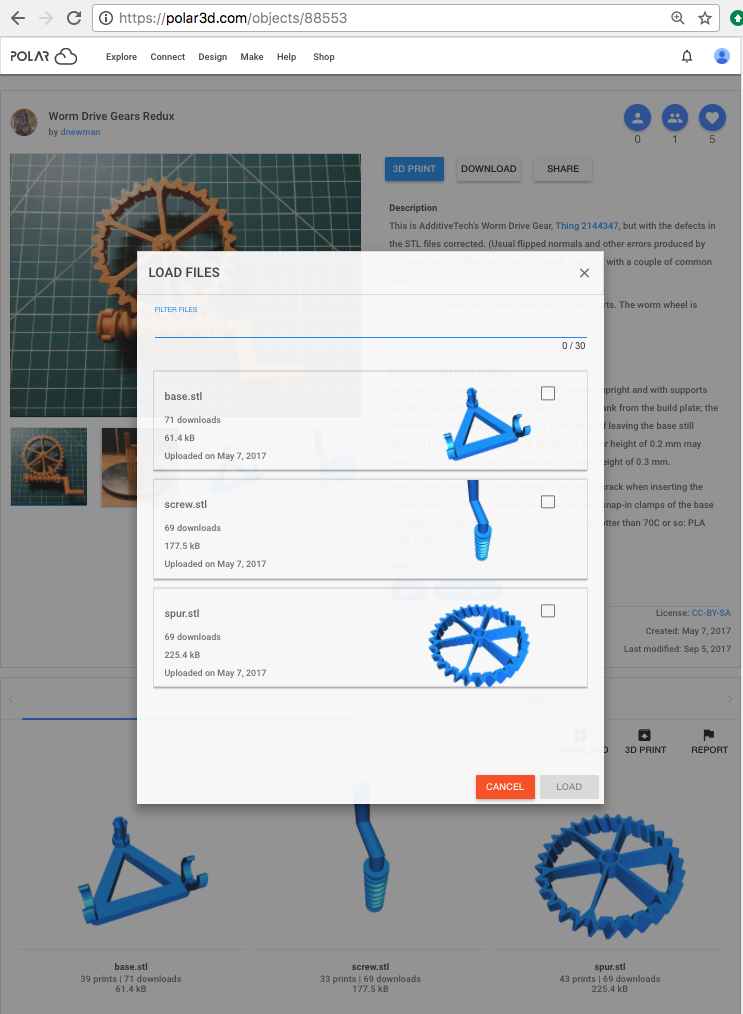
Figure 10.1: Polar Cloud PUBLIC object Worm Drive Gears Redux
To print an object already in your Polar Cloud object collection (or a shared object or a public object in the Polar Cloud), from the Polar Cloud’s main menu, select “Explore” and then “Objects” (see Figure 2.14 on large displays, or Figure 5.2 on narrow displays), then “MY OBJECTS” (see Figure 5.3) – or you may select “OBJECTS SHARED WITH ME” or “COMMUNITY OBJECTS” – and then click on the specific object that you wish to print.
To print an object shared in a group of which you are a member, navigate to the group (see Chapter 7), and then select “OBJECTS” (see Figure 7.36), and then click on the specific object that you wish to print. (Alternatively, navigate to the “OBJECTS” screen and click the “OBJECTS SHARED WITH ME” tab, and then filter for the specific group.)
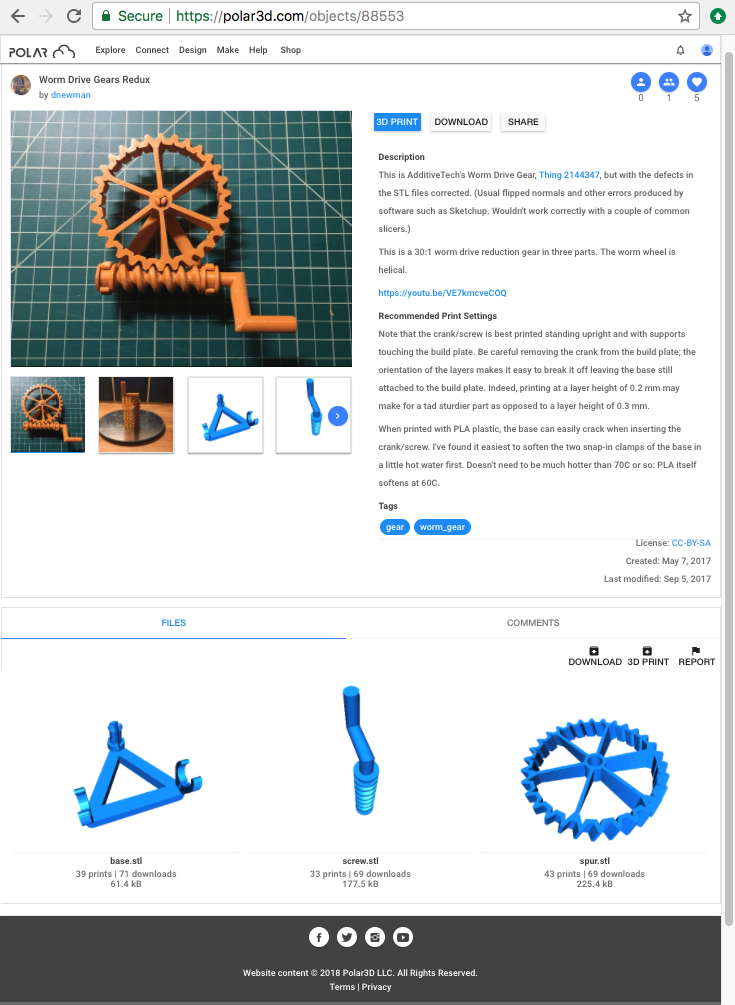
Selecting one of your own objects will take you to an object detail screen such as shown in Figure 5.4. Selecting any type of shared object will take you to an analogous screen; for instance, Figure 10.1 shows the detail screen for the public object “‘Worm Drive Gears Redux”.
From the object’s detail screen, click on the “3D PRINT” button (towards the top). In the case of an object consisting of a single .stl file or OBJ file, clicking the “3D PRINT” button on the detail screen will take you directly to the build plate screen.
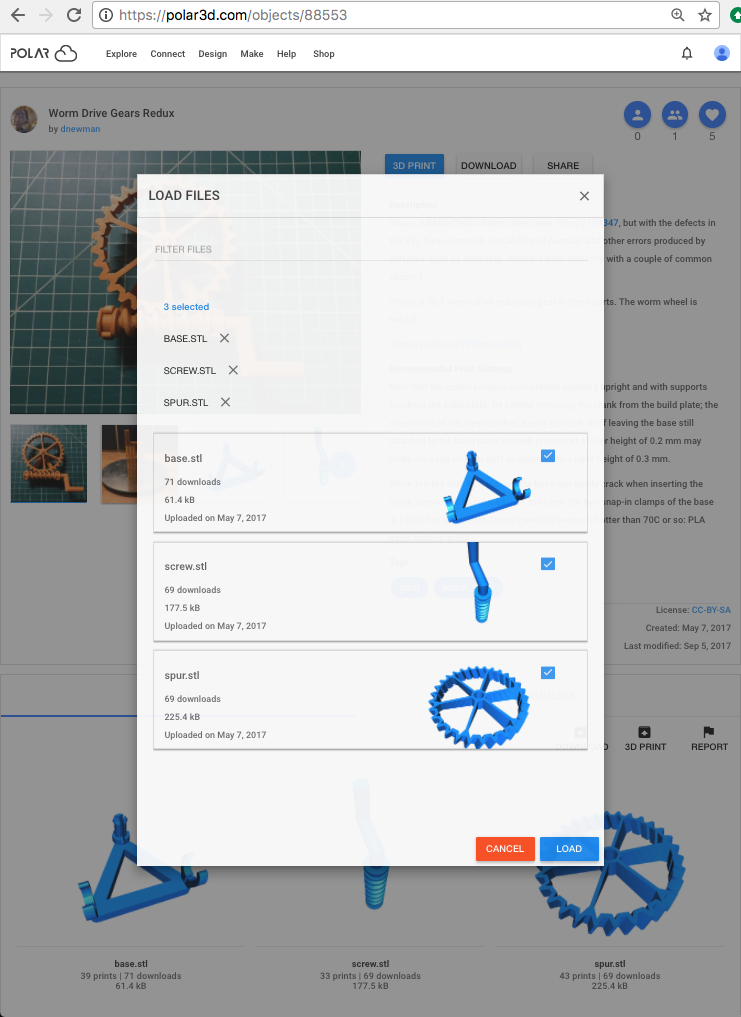
In the case of an object such as in Figure 10.1 comprised of multiple .stl files (or OBJ files), a “LOAD FILES” pop-up screen will appear, asking which of the model files to load to the build plate; see Figure 10.2. Selecting the desired file(s) and then clicking the “LOAD” button, see Figure 10.3, will take you to the build plate screen.
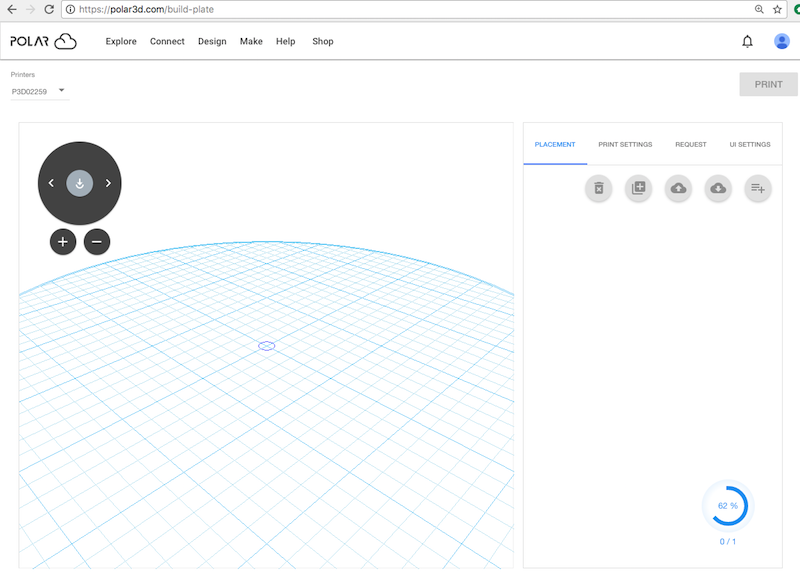
As the object’s .stl files (or OBJ files) are loading to the build plate, you may see a blue progress icon in the lower right corner, as shown in Figure 10.4; once the object is fully loaded, the build plate screen will become active, as shown in Figure 10.5.
In Figure 10.4 and Figure 10.5, note the printer name displayed on the drop-down printer menu at the upper left of the build plate screen. When you click “3D PRINT” for an object, the Polar Cloud loads the object to the virtual build plate of the printer on which you most recently printed, though you may select a different printer after loading the object via the drop-down printer menu. (If you have access to multiple printers and would prefer to select among your printers before selecting and loading an object, see instead Section 10.8.) When loading to a Polar3D printer virtual build plate, note that the object is (size permitting) automatically offset from the center of the build plate.
You may add objects to your Polar Cloud collection; note that uploading an object obtained from elsewhere or created using CAD software accessed from the Polar Cloud will not only add the object to your collection, but will also automatically load it to the build plate screen, thus this is yet another way to get to the build plate screen.
Print jobs submitted to a printer may be editted before they begin printing; see Section 10.5. Editting a submitted job brings up the build plate screen with the object upon it (effectively, it returns you to the build plate screen from which you submitted the job); so that too is another way to get to the build plate screen.