Matching Dialogue
Overview
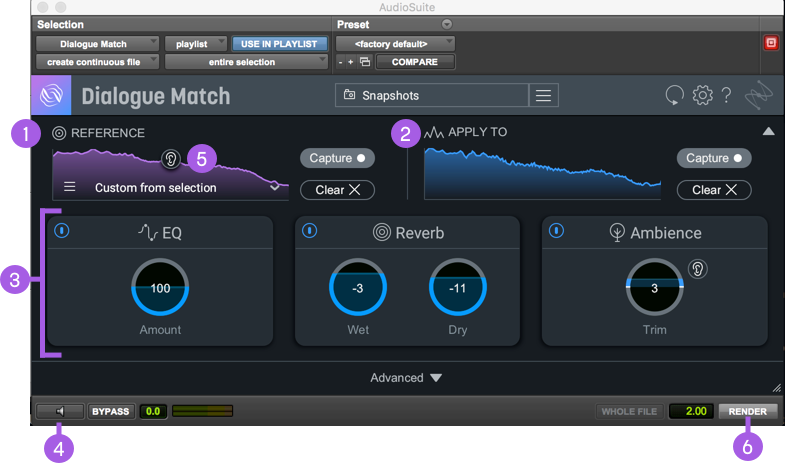
In order to match your dialogue, we provide you with the capability to capture and compare profiles, which will enable you to closely replicate EQ, reverb, and ambience of the desired dialogue audio.
Creating a Match
To begin creating a match, you first need to have in mind which two pieces of dialogue you hope to match. To get the most out of the Dialogue Match plug-in, consider the following suggested workflow.
| Step | Description |
|---|---|
 |
Capture a Reference profile you would like to apply to another track (eg. location dialogue). Select a dialogue clip of any length and learn the Reference clip, or load a saved Reference profile. |
 |
Capture an Apply To profile, or what you intend to change to match the Reference profile (e.g. ADR). Select a dialogue clip of any length and learn the Apply To clip, or load a saved Reference profile. |
 |
Now that Dialogue Match has learned your EQ spectrums, reverb, and ambience of both profiles, Dialogue Match will apply unique DSP settings for your particular dialogue match. |
 |
Preview the changes that will be applied. You can modify the settings in real-time while previewing. |
 |
If you want to hear the originial Reference clip, click and hold on the Reference Preview button. |
 |
When you are content with the changes, click the Pro Tools’ Render button to apply the auditioned processing to your dialogue clip. |
Other Workflow Scenarios
- You may not need to learn a new Apply To profile if you are working on a session where you’re applying the match to similar clips of that scene or to the same performer.
- Saving Snapshots is another way to apply DSP settings that would work for that particular actor.
Match with a Dry Apply To Profile
Dialogue Match works best when matching a dry Apply To profile to a reverberant Reference profile. This is because Dialogue Match processing does not remove reverb, rather it only adds reverb.
Be Careful Where You Apply Processing
If you deselect the clip you were working on, rendering will not occur. Also, if you accidentally select a different clip, it will apply whatever package of processing to whatever you have selected whether you intended to apply the processing or not.
Profiles
A Profile is analyzed data of the spectrum, reverb, and ambience of your dialogue clips that provide Dialogue Match with the necessary information for it to make appropriate matching calculations. You can capture two types of profiles:
- Reference profile: an analyzed spectrum of the clip that best represents what you are trying to achieve.
- Apply To profile: an analyzed spectrum of the clip that will be matched to the Reference profile.
Audio Clips Only Sourced From Session
Dialogue Match only has access to audio that is already within your Pro Tools session.
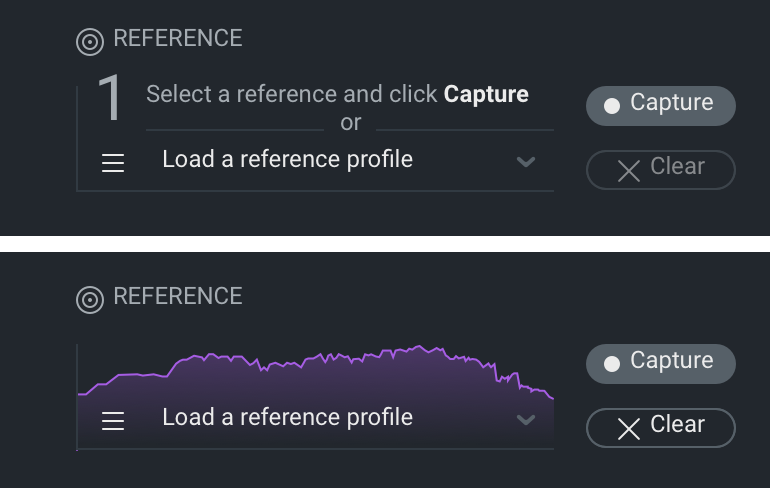
Reference Profile
Select a clip from your session or load a saved reference profile that best represents your matching goals. The captured Reference profile displays as purple in the view.
| Control | Description |
|---|---|
| Capture | Click to analyze and save the spectrum of the clip you wish to be your Reference profile. |
| Clear | If you weren’t satisfied with the captured spectrum, click to clear the Reference profile. |
Reference track length limitations
Dialogue Match works best with a reference track that is at least 3 seconds long. Reference tracks less than 1 second long will not be learned.
Dialogue Match Audio Access
Dialogue Match only has access to audio that is already in the session.
Default Reference Profiles
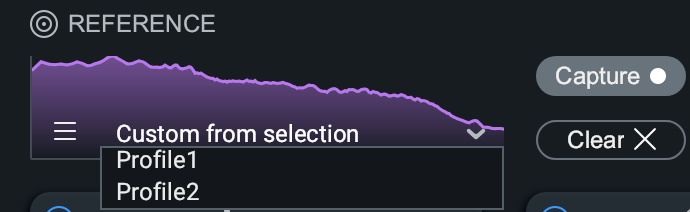
You can use default Reference profiles as a starting point for reverbs, varying from small rooms to long hallways to vehicle interiors. In the “Reference” section, there is a dropdown that says “Load a reference profile” and the Reference Profile will populate there. Use the menu icon to the left of the text to save your own learned reference to be reused later.
Reference Preview
Use the Reference Preview button to audition your Reference Profile.
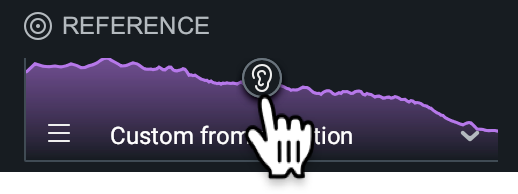
Access Reference Preview
To access the Reference Preview, you will first need to capture a Reference clip. Once you begin previewing in AudioSuite, you will then see the Reference Preview button appear over the Reference Profile spectrum.
Audition Reference Preview
Click and hold the Reference Preview button to audition up to a five-second loop the Reference clip you’ve just captured. Reference Preview is helpful when comparing your Reference clip to the Apply To clip.
Reference Preview Auditions Most Recent Profile
The Reference Preview button will not display if you have loaded your Reference profile from the Reference Profile dropdown menu. Reference Preview will only audition the most recently-learned Reference Profile.
Pro Tools Handle Length Processed
If you select a clip with handles for your Reference Profile, the information in those handles will also be learned when analyzing the clip. Hence, this will affect your Apply To profile when matching.
Apply To Profile
Select a clip from your session that requires matching to your Reference profile. The captured Apply To profile displays as blue in the view
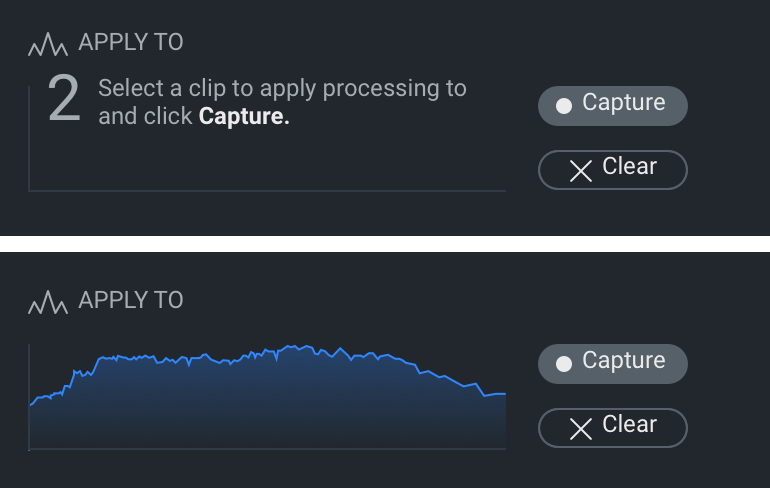
| Control | Description |
|---|---|
| Capture | Click to analyze and save the spectrum to which you wish to apply matching. |
| Clear | If you weren’t satisfied with the captured spectrum, click to clear the source spectrum. |