DAW Setup
Table of Contents
Auto Play Mode
Allows you to use Stutter Edit 2 as an audio effect by triggering the currently selected gesture when playback is started in your DAW. Simply insert Stutter Edit 2 on an audio track in your DAW, enable Auto Play Mode, and start the transport to trigger the selected gesture.
Tip: Use Auto mode to edit gestures
The interface can update frequently when working in MIDI mode, making it tough to edit settings for a particular gesture without stopping transport. Try switching to Auto mode to edit your gestures and switch back to MIDI mode to perform them.
MIDI Play Mode
In MIDI Mode, you can trigger Stutter Edit 2 Gestures using MIDI. Setting up Stutter Edit 2 as a MIDI controlled effect can be different depending on the DAW you are using. We’ve included some instructions below for setting up MIDI Play Mode in a few different DAWs.
Ableton Live
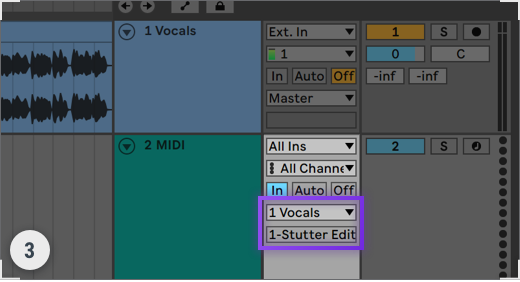
- Create an Audio Track and insert Stutter Edit 2.

- Create a MIDI Track and change Monitoring to “In”.
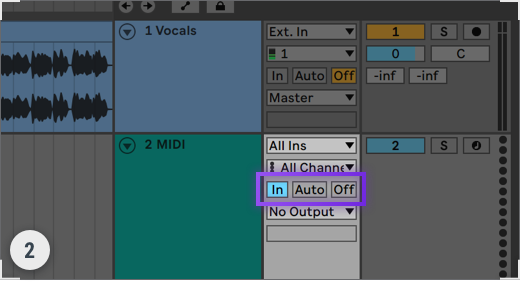
- From the MIDI Track’s ‘MIDI To’ dropdown, choose the Audio Track from Step 1. In the dropdown below it,
ensure Stutter Edit 2 is selected.
Apple Logic Pro
- Go to: Logic Pro X / Preferences / Advanced Tools. Select ‘Show Advanced Tools’ and ‘Enable All’.

- Create an audio track and mute it.

- Create a Software Instrument track and select Stutter Edit 2 from the Instrument menu.

- Select the audio track from the ‘Side Chain’ menu in the Stutter Edit 2 plug-in window.

Avid Pro Tools
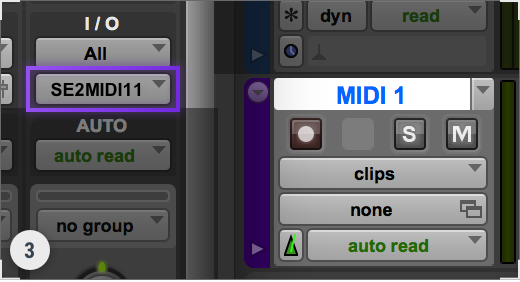
- Create an Audio Track and a MIDI Track.

- Insert Stutter Edit 2 onto the Audio Track.

- In the Output dropdown of the MIDI Track, select any MIDI channel you want for Stutter Edit 2.
Cockos REAPER
- Create an Audio Track and insert Stutter Edit 2.

- Click ‘Input 1’ to open the dropdown and choose your MIDI device.

- Click the speaker to turn on ‘Record Monitoring’ and record-enable your track.

Image-Line Fl Studio
- Create an audio track and add Stutter Edit 2 as an insert on the track.

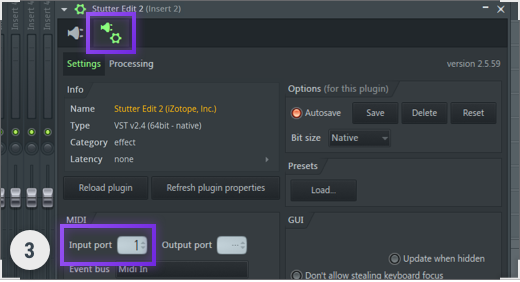
- Go to Options/MIDI Settings. Under ‘Input’ select your MIDI device and the desired Port, click ‘Enable.’

- In Stutter Edit 2, click the gear icon to open plug-in settings, and ensure the MIDI Input Port matches
your device port.
Presonus Studio One
- Create an audio track and insert Stutter Edit 2 on the track.

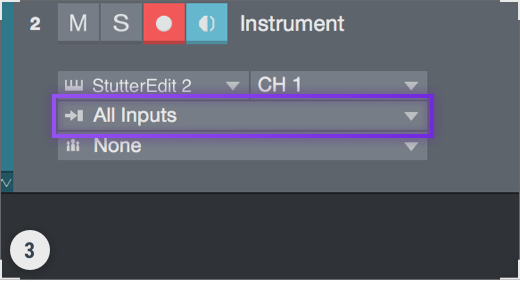
- Create an Instrument track and select ‘Stutter Edit 2’ in the ‘Instrument Output’ menu.

- If you are using a live MIDI device, set the input of the instrument track to your MIDI device.
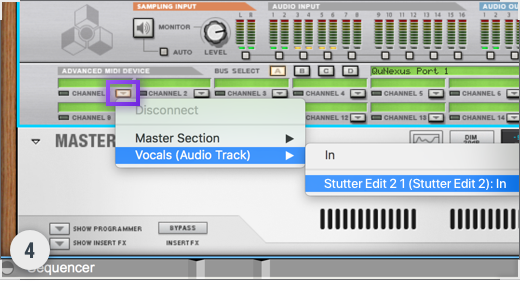
Propellerheads Reason
- Create an Audio Track and insert Stutter Edit 2.
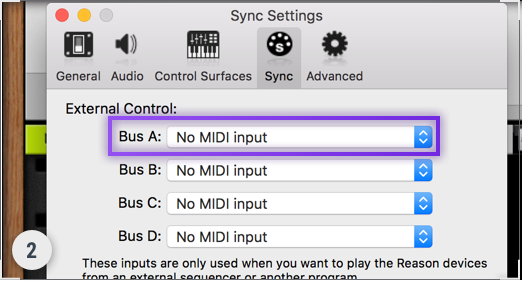
- Open Preferences/Sync. Under ‘External Control: Bus A,’ choose your MIDI Device.
- Open Adv. MIDI Panel from the ‘Hardware Interface’ at the top of the rack.
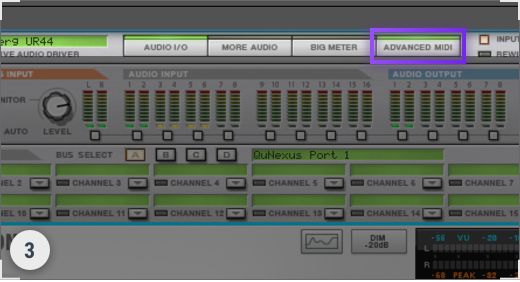
- In any channel, click the triangle dropdown, choose your Audio Track and then the Stutter Edit 2 plug-in.
Steinberg Cubase
- Create an audio track and a MIDI track.
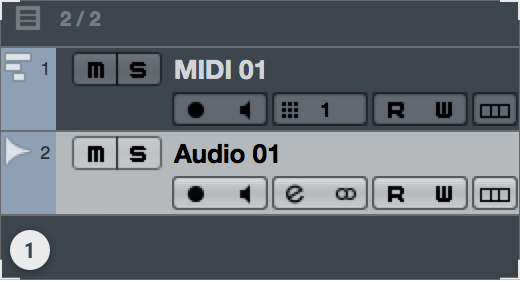
- Insert Stutter Edit 2 on the audio track.
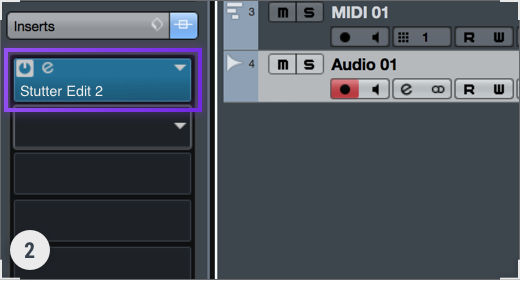
- In the MIDI track output menu, select the Stutter Edit 2 insert on the audio track.
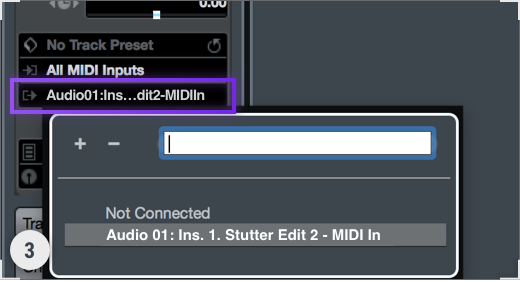
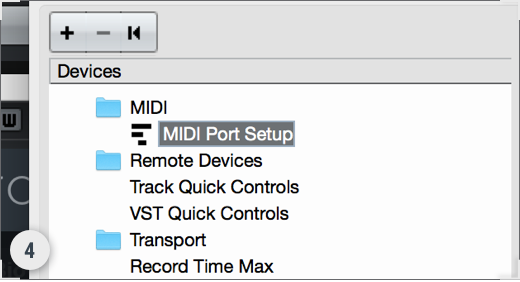
- If you are using a live MIDI device, ensure it is configured in the Studio Setup / MIDI Port Setup window.