Advanced Controls
Creating Your Own Neoverb Presets
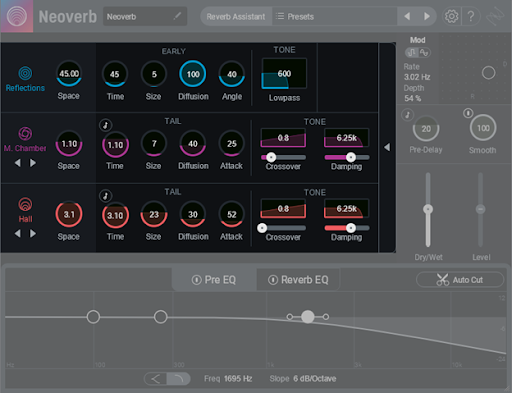
With Neoverb’s Reverb Assistant, Blend Pad interface, and the included presets, you should be able to get a great sound without having to adjust too many parameters. However, if need be you can also customize Neoverb’s advanced parameters within each reverb engine using the Advanced Panel. The following shows the Advanced Panel after opening it. To close it, click on the left-arrow toward the panel’s right.
Sync to Host Tempo
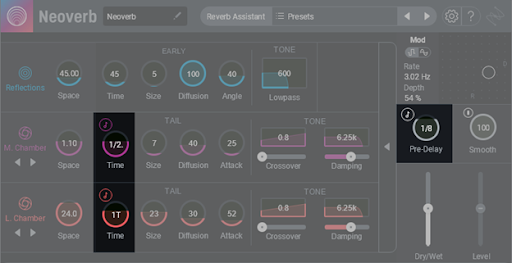
Three of the time-related parameters can synchronize to the host tempo. Click on the associated Note button to toggle a control’s calibrations between time and rhythmic note values. The note values for the two Time parameters include all rhythmic values from 128th notes to eight measures, including triplet and dotted values. Pre-Delay includes all rhythmic values (including triplet and dotted) from 128th notes to eighth notes, as well as quarter-note and quarter-note triplet values.
To supplement the parameter descriptions, we’ve also used the Spectrogram module from iZotope’s Insight 2 program to show graphically how these parameters change the sound. This makes it much easier to understand how reverb parameters alter a signal. The spectrogram displays the amount of audio energy by plotting time along the bottom (X-axis), amplitude by height (the Y-axis), and frequency by the depth (Z-axis).
Insight metering
The following section includes screenshots of measurements taken using iZotope’s Insight plug-in, which is not part of Neoverb. Click here to learn more about iZotope Insight.
Space, Time, and Size
These three controls are interrelated and work the same way for the three reverb engines. Space is a macro control that adjusts both the Time and Size parameters. After finding a general setting with Space, you can then adjust Time and Size individually to edit the sound further. Space controls the full range of Size, so setting Space to minimum or maximum also sets Size to minimum or maximum, respectively. Additionally, Space automatically adjusts Time relative to Size, so that the ratio of Time to Size remains constant.
As a result, the Size and Time settings specified in the Advanced Panel determine how the Space control behaves when the Advanced Panel is folded up. This is handy if you run the Reverb Assistant, call up a preset, or edit the Advanced panel and obtain the sound you want. If you later decide you want the space to sound larger or smaller while retaining the space’s sonic character, simply adjust the Space control. Note that the Space control’s range varies for the three reverb engines.
- Reflections: 36.73 to 250 milliseconds
- Engine 2: 1.4 to 14 seconds
- Engine 3: 4.17 to 24 seconds.
Programming the Reflections Engine (Blue)
These are the initial echoes that a sound creates when it first hits surfaces like walls. As a result, they sound more like discrete echoes than the “wash” of sound that occurs later, as the reverb decays. Because sound travels at approximately one foot per millisecond, the maximum time of 250 ms is equivalent of being in a room where the distance from the nearest reflective surface to the sound source is approximately 250 feet.

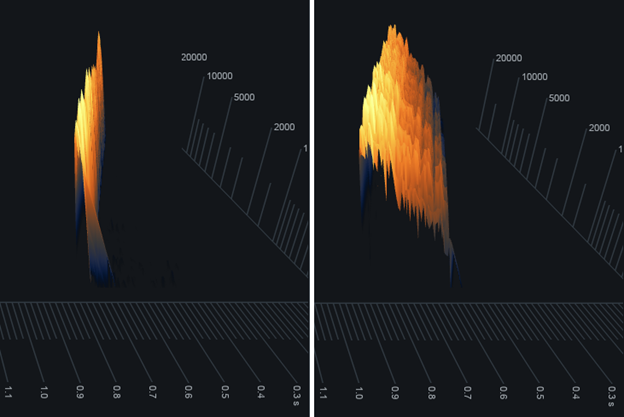
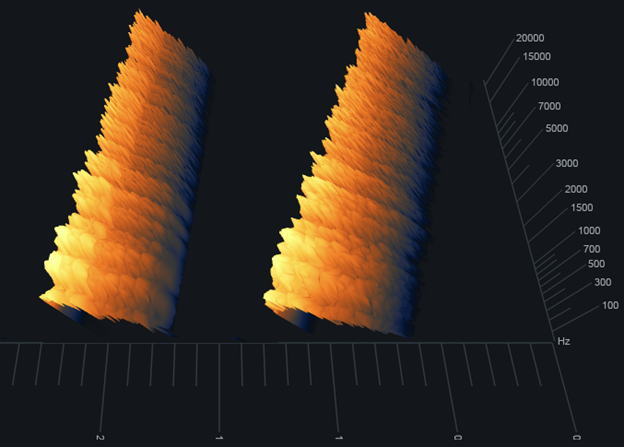
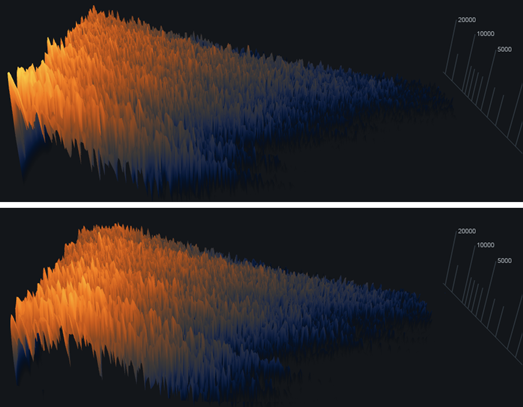
The following image shows the early reflections that result from minimum parameter settings for Space, Time, and Size on the left, and on the right, the early reflections that result from the maximum values for these same parameters. The bottom axis shows time in seconds, so you can see that the early reflections are very short, and don’t last long.
Diffusion (0 to 100)
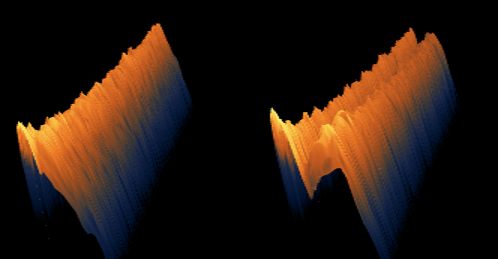
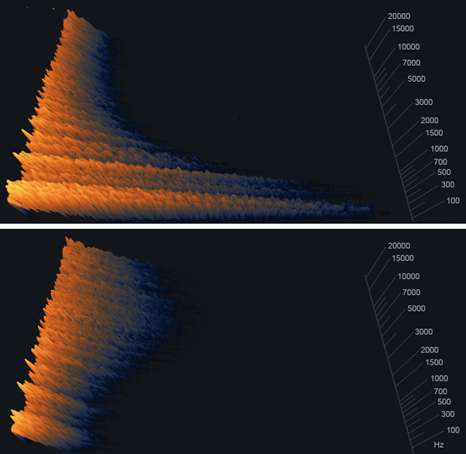
With high diffusion, the reflections are more numerous, and clustered together more tightly. With low diffusion, there are fewer reflections, and they’re spread further apart. The following image shows a signal with low diffusion on the left, and high diffusion on the right. You can see that the right image looks smoother (note how the divisions between the colored bands aren’t as pronounced); it also sounds smoother.
Angle (0 to 100%)
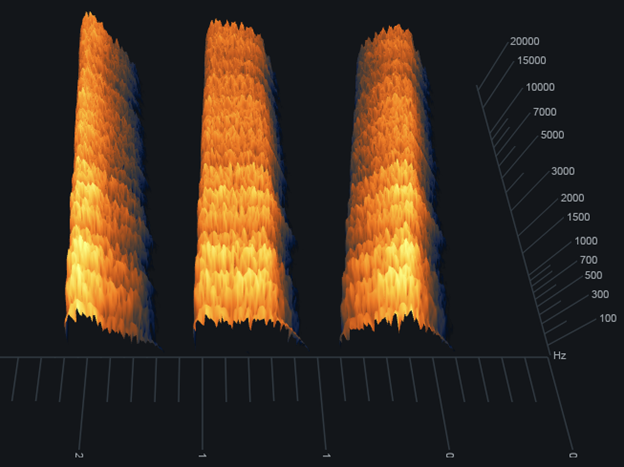
Angle changes the character and strength of the initial reflections, as shown in the image below. Going from left to right, the Angle settings are 0, 50, and 100.
Lowpass (30 Hz – 20 kHz)
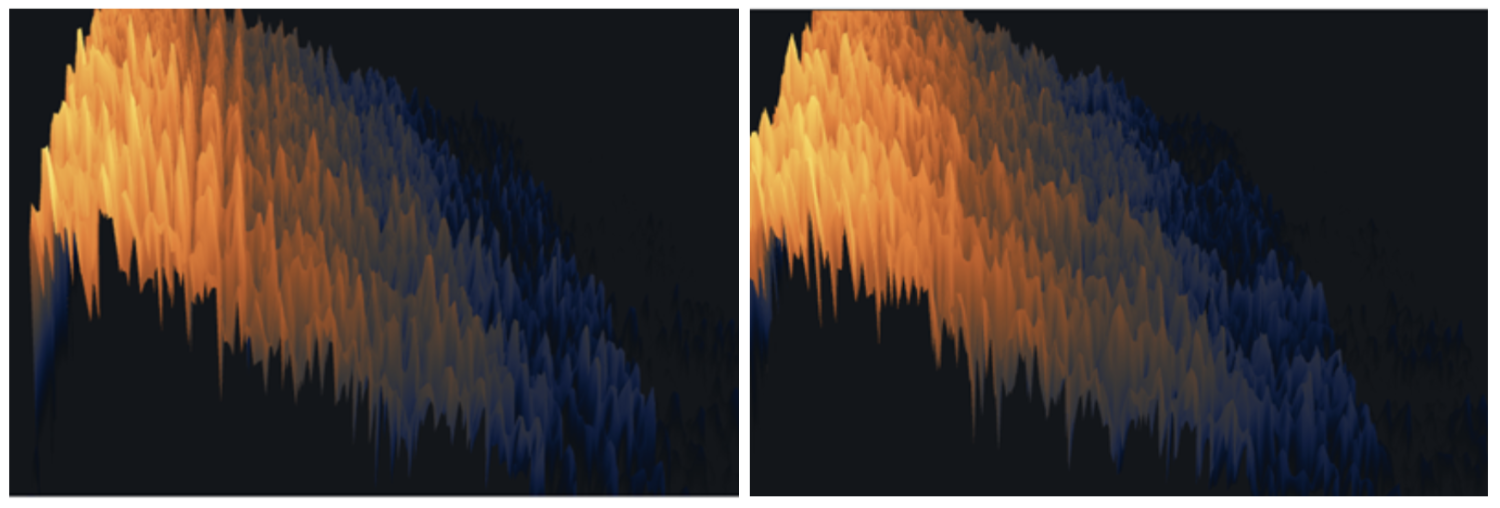
This filter affects the low frequency response with only the later reflections, so there’s no effect on the first few reflections. The effect is subtle, and most apparent with angle settings above 75. The images below have the same parameter values, with lowpass set to 200 Hz. The left image’s Angle is 0, while the right image’s Angle is 100. The reverb in the right image falls off more rapidly.
Programming the Reverb 2 and Reverb 3 Engines (Violet and Orange)
Both engines apply the same parameters to different reverb algorithms. So, we need to describe only one set of controls, because (for example) the decay time will affect how long it takes for the reverb to decay, regardless of the algorithm being used. Unlike the early Reflections, these engines generate myriad echoes of varying time and frequency as they bounce around in a space, until they eventually decay into inaudibility. This produces the “wash” of sound, often called a “tail,” that most people associate with reverb.


Diffusion (0 to 100)
As with the early Reflections, high diffusion means more numerous reflections that are clustered together more tightly. The following image shows reverb with low diffusion at the top, and high diffusion at the bottom. With low diffusion, you can see the “grooves” toward the left that highlight the spaces among reflections; the higher diffusion reflections are packed more tightly together.
Tip
Using low diffusion for sustained sounds “thins out” the reverb sound somewhat to avoid interfering with the sustain. With percussive sounds, high diffusions give a smooth reverb wash, whereas low diffusion settings sound like discrete echoes bouncing around.
Attack (0 to 250 ms)
This is not like pre-delay, but instead specifies how the reverb builds up during its initial onset. The top image below shows 0 Attack. Note how the reverb peaks immediately, and then decays. The lower image shows the effect of maximum Attack. The reverb takes a while to build to its peak before decaying.
Tip
Increasing attack is useful for drums and percussion, when you don’t want the reverb to “step on” the initial percussive transient.
Crossover (20 Hz to 4 kHz) and Balance (0 to 1)
The Room and Hall engines have independent controls over the low- and high-frequency reverb components. For example, you might want a longer high-frequency decay on a diaphanous female EDM vocal to give a more trebly tone, but a lower-frequency reverb on blues guitar for a “meatier” tone.
The Crossover parameter’s slider adjusts the dividing line between the high and low frequencies. The Balance graphic above the slider displays whether the reverb effect is greater at lower or higher frequencies. Edit this by clicking on the graphic, and dragging up or down. At 0, the reverb effect is most prominent at lower frequencies. At 0.5, the reverb effect is equally prominent at all frequencies. At 1.0, the reverb effect is most prominent at high frequencies.
In the following illustration, the top image shows the result of setting the crossover to 2 kHz and Balance to 0. It’s obvious that reverb decay is much more prominent below 2 kHz. The bottom image is the same, except Balance is set to 1. Now the high-frequency reverb effect is more prominent.
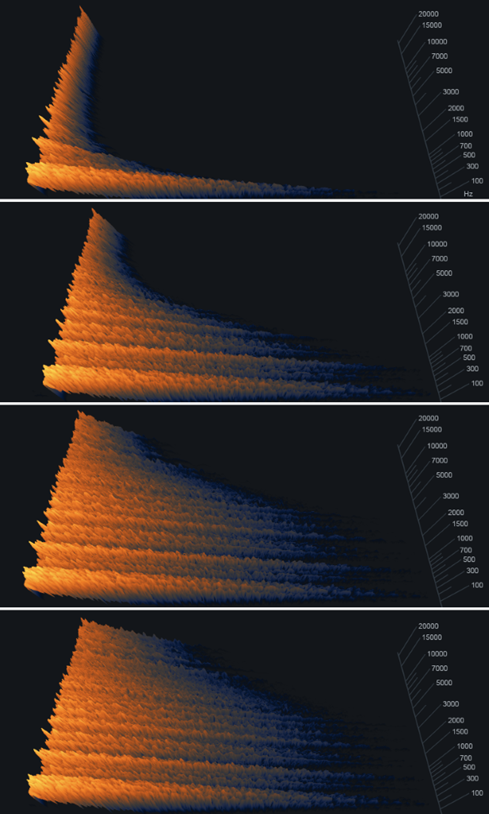
Damping Amount (1-11) and Damping Frequency (30 Hz to 20 kHz)
Like Crossover and Balance, these work together. The Damping Amount slider controls the rate at which the reverb loses high frequencies. Lower values shorten the high-frequency decay; higher values lengthen the high-frequency decay. Damping Frequency controls the range over which high frequency losses occur. In a physical space with padded walls and lots of people, the damping frequency is low because high frequencies are readily absorbed. In a room with hard surfaces, high frequencies are not easily absorbed, so the damping frequency is higher.
In the illustration below, all images have a 2 kHz Crossover and 0.5 (equal) Balance between high and low frequencies. The top image shows a 1 kHz damping frequency, which is an extreme amount of damping. Frequencies above 1 kHz decay very quickly. The next image down shows a 5 kHz damping frequency. The third image down shows a 20 kHz damping frequency. All three images have a Damping Amount of 1 (shortest high-frequency decay). The final image has the same parameter settings as the third one down, but Damping Amount is set to 11 (longest high-frequency decay).