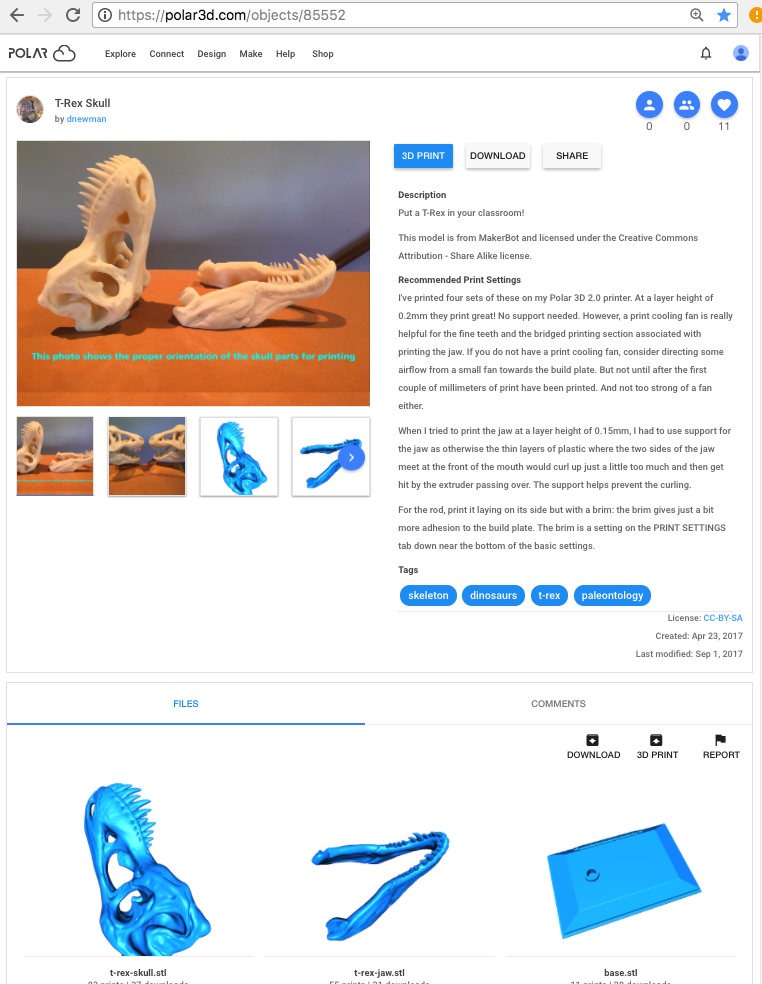
Figure 14.1: Example object orientation for printing minimizing overhangs:
T-Rex skull and jaw
For some shapes of objects, especially shapes that do not have any obvious, flat “bottom”, you will need to think about how best to orient the build of the object, and whether to build the object with support.
On a 3D printer, you are building an object up in layers from the “bottom”, as printed. Each layer benefits from having a prior layer to rest upon. Short (very short) extrusion runs “spanning” or “bridging” open space can work – but long extrusion runs over (entirely) open space are liable to fail, with the extruded plastic drooping, if not outright dripping or breaking. (Note that a thicker “Layer Thickness” setting under “PRINT SETTINGS”, “BASIC”, may more successfully hold together for object protrusions or bridges – at the expense, of course, of coarser detail quality in the print overall.) But note that the “bottom” of the print, the portion of the object resting on or closest to the build plate, need not be the “bottom” of the object in its intended, real-life, use: you may rotate the object on the build plate if that will better orient it for printing. Many time an object may print more successfully if rotated onto its side, or even upside-down. For instance, the T-Rex skull and jaw shown in Figure 14.1 should be printed as shown, which is perhaps not an immediately “obvious” orientation.
When it is possible to orient an object (by rotating it) so that a flat surface is at the bottom of the print, or so that the largest surface (even if not quite flat) is at the bottom, such an orientation may allow for better printing. More generally, strive for an orientation that allows each layer to rest upon a prior layer, and which avoids or minimizes needing to “span” or “bridge” open volumes.
When an object unavoidably requires bridging of open volumes, you will likely need to print the object with support: perhaps support at the bottom (if the object cannot be re-oriented to put a sufficiently large, flat surface towards the bottom), and/or internal support in certain spaces (if the object cannot be re-oriented to avoid needing to “bridge” large, open volumes).
First try experimenting by using the 3D visualization screen of the object detail page, or by using “ROTATE” on the object on the build plate screen: with some experimentation, you may find that there is an orientation, perhaps one that you didn’t initially consider, that you can see will be more successful in avoiding a need for supports while printing. Note that you will get better at pre-visualizing, and spotting when you see, such “good” orientations the more you attempt this.
Mental rotation and spatial visualization skills are skills that can be improved by practice. These skills are useful not only in 3D printing in particular, but more generally in academic areas such as mathematics and physics, and also in various engineering and real-world applications. The exposure to, and practice of, such skills that both you and your students will get as a matter of course while doing 3D printing can be one of the indirect benefits arising from 3D printing in the classroom!
If you cannot avoid a need to span open volumes, on the build plate screen under “PRINT SETTINGS”, select the “BASIC” settings and see the “Support Type” setting: the choices are “None”, “Touching Build Plate” (so generating support between the build plate and the “bottom” of the object, filling in open volumes underneath the object per se), and “Everywhere” (so generating support also inside internal open volumes). The gear icon to the right of the selected “Support Type” allows adjusting the amount of support that will be generated.
For some other tips on “PRINT SETTINGS” that may help with at least minor overhang issues, see item 30 in Section 15.2.
For another example of perhaps non-obvious orientation, plus use of support, see the screw.stl component in Figure 5.6.