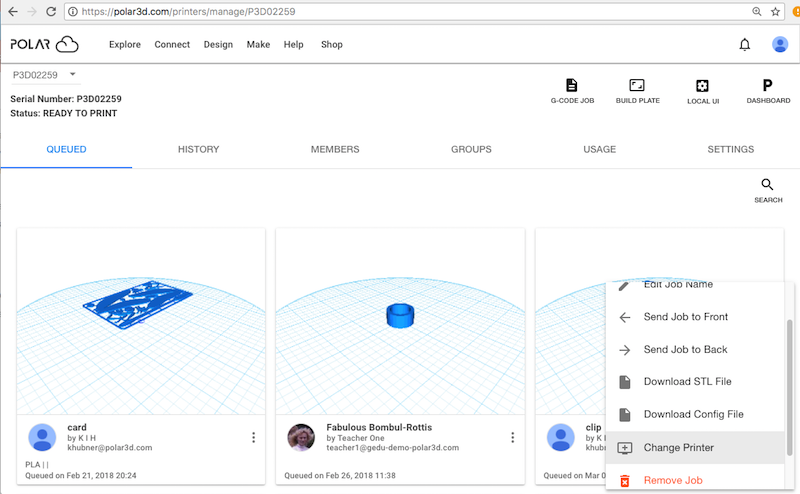
Figure 10.60: Polar Cloud account QUEUED screen Change Printer

If you have access to multiple printers, then a print job that is pending in one printer’s print queue may be moved to a different printer.
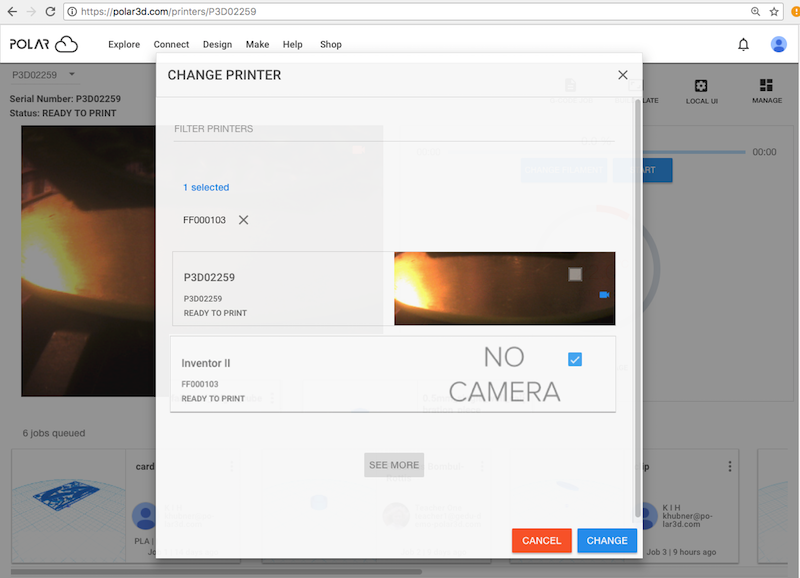
To move a queued print job to a different printer, perhaps a printer not currently in use or which already has loaded the sort of filament you wish to use, click on the three vertical dots towards the upper right of the print job tile in your account’s list of “QUEUED” print jobs, or in the printer list of “QUEUED” print jobs, or on the printer dashboard, to expand a menu including the option “Change Printer”; see for instance Figure 10.60, Figure 10.61, or Figure 10.64. This will bring up a “CHANGE PRINTER” pop-up screen at which you may select a printer to which to move the print job, and then click the “CHANGE” button; see Figure 10.62.
If you are moving a print job to another printer of the same type, then clicking “CHANGE” on the “CHANGE PRINTER” screen immediately moves the print job.
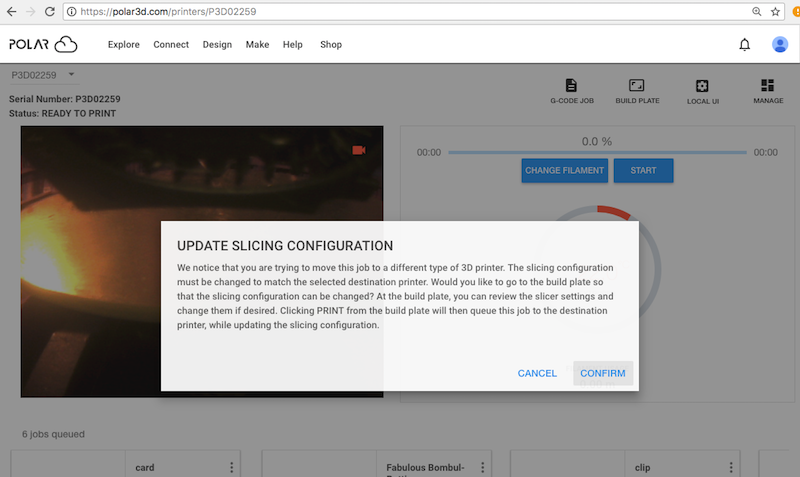
However, if you wish to move a printer job to a different type of printer, then the object must be re-sliced using a slicing profile for the destination printer. So when the Polar Cloud detects that you are moving a print job to a different type of printer, then clicking “CHANGE” on the “CHANGE PRINTER” screen will bring up an “UPDATE SLICING CONFIGURATION” screen offering you the opportunity, see Figure 10.63, to go to the build plate screen from which you may re-submit the job, now with an appropriate slicing profile for the new destination printer. Click the “CONFIRM” button to go to the build plate screen. At the build plate screen with the new destination printer selected, a predefined slicing profile for that destination printer will automatically be activated – and if you wish, you may further adjust the slicing configuration via “PRINT SETTINGS”. Then when you click the “PRINT” button on the build plate screen to again submit the print job, the appropriate slicing configuration can be used and the object can be re-sliced for what is now the destination printer.
When you click “PRINT” at the build plate screen for the different, destination printer, a pop-up “SAVE PRINT JOB” screen will ask whether you wish to “SAVE TO EXISTING PRINT JOB” (remove the original print job on the original printer, and instead replace it with the print job on the newly selected destination printer replaces), or “CREATE NEW PRINT JOB” (in addition to leaving the original print job on the original printer, submit a new print job on the new destination printer); see Figure 10.56. (Note that when a printer manager moves a printer user’s job to another printer, “SAVE TO EXISTING PRINT JOB” leaves the moved print job owned by the original owner of the print job, whereas a newly created job resulting from “CREATE NEW PRINT JOB” is always owned by the printer manager.)
An alternate, but less convenient (and sometimes less efficient), way to move a print job to a different printer is to use the “Edit Job” print job modification option (click the three dots at the upper right of a print job tile on the printer dashboard, printer “QUEUED” screen, or account “QUEUED” screen) to return to the build plate screen for the print job. Then select the desired printer from the printer drop-down menu (towards the upper left of the build plate screen) and click “PRINT” to resubmit the print job to the newly chosen printer. (A drawback to this approach is that it always – even when moving a print job to a different printer of the same type – involves reloading the object to the build plate and then loading the object back through the Polar Cloud to the newly selected printer, thus incurring two additional loads of the object through the Polar Cloud. As such, when the original and new destination printers are of the same type hence have compatible slicing profiles, it is less efficient than using the “Change Printer” approach described above.)
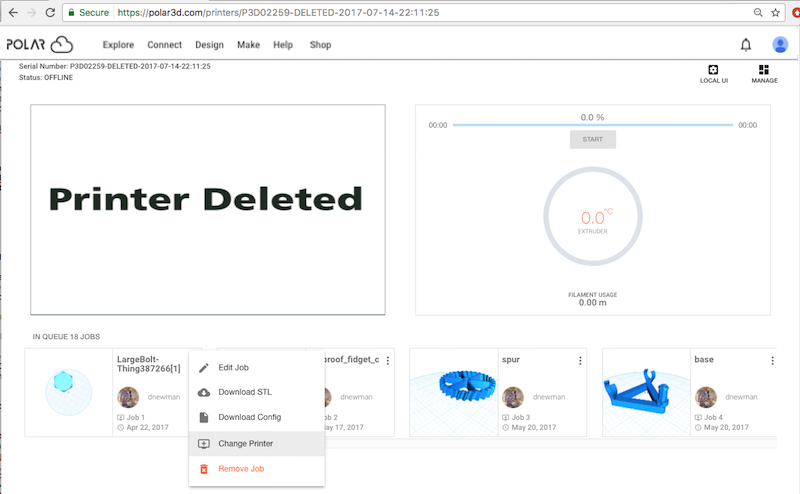
Moving a print job is most often performed just for convenience and efficiency of managing printer use: e.g., a different printer might be currently unused and ready to print, or might already have desired filament loaded. However, another case that can arise is when a printer has been obsoleted in the Polar Cloud: e.g., for a Polar3D printer, when the Polar3D printer local web interface “Reset Printer on the Polar Cloud” button has been used, or for a DREMEL 3D45 printer, when the printer control panel “FACTORY RESET” button has been used. When a printer has been obsoleted in the Polar Cloud, any print jobs that had been pending in its print queue remain in the Polar Cloud, not actively printing but instead assigned to the “obsolete” printer (re)named serial-DELETED-date , so that if desired, such print jobs may be editted to reassign them to a different printer and perform the print. See for instance Figure 10.64.
When moving a print job to another printer, note that the print job will be moved to the tail (end) of the print queue of the destination printer.