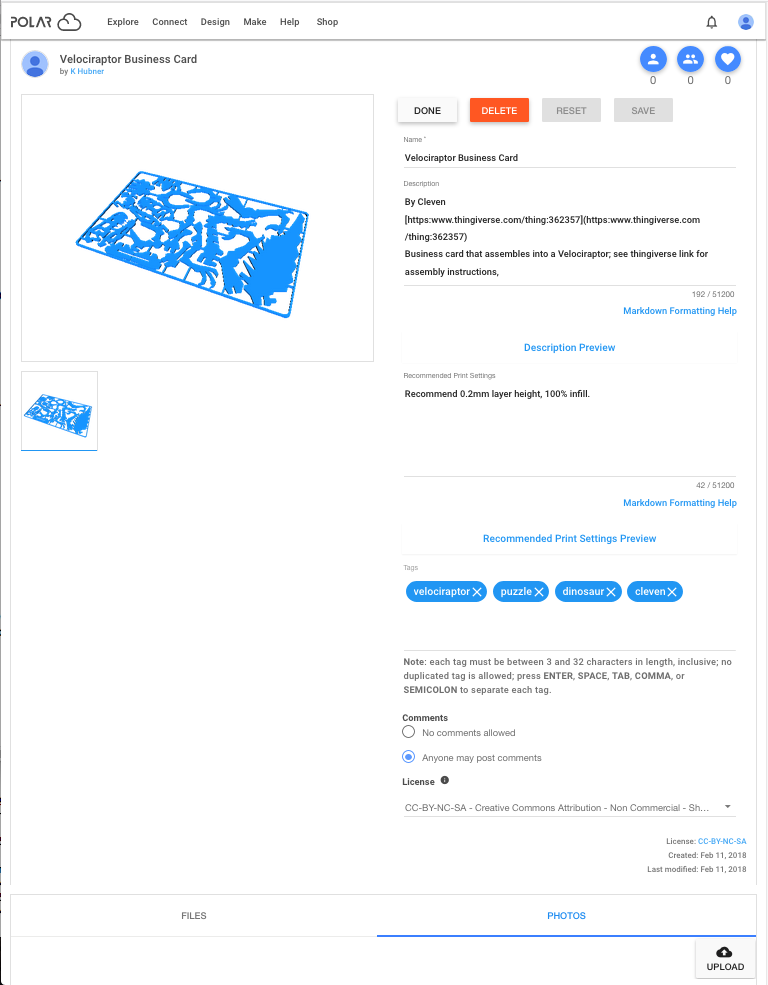
Figure 5.17: Polar Cloud sample object manage screen: calibration box
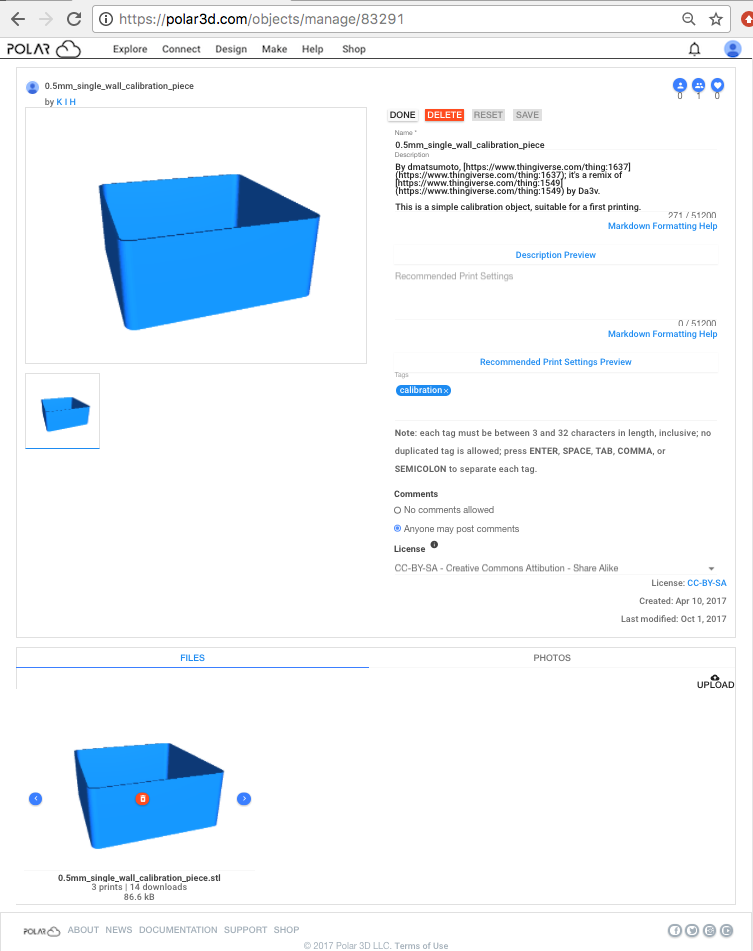
To add or change the name or description of an object of yours, add or change recommendations on printing it, associate tags with the object, change its license type, or specify a different object image as the primary image, click on the “EDIT” button from the object detail page; see Figure 5.4. “EDIT” will take you to the object’s manage screen such as shown in Figure 5.17, where you may: enter or modify the “Name” and “Description” of the object; “DELETE” the object (if it is not publicly shared) from the Polar Cloud entirely (see Section 5.9); recommend print settings; enter or modify “Tags” to aid in searching for this object; enable or disable comments on the object; change the object’s “License” type; “UPLOAD” additional .stl files, OBJ files, or subsidiary files, (or remove existing files); upload (or remove) your own photos of a printed object; or choose amongst object rendered images or photos which to display as the primary object image.
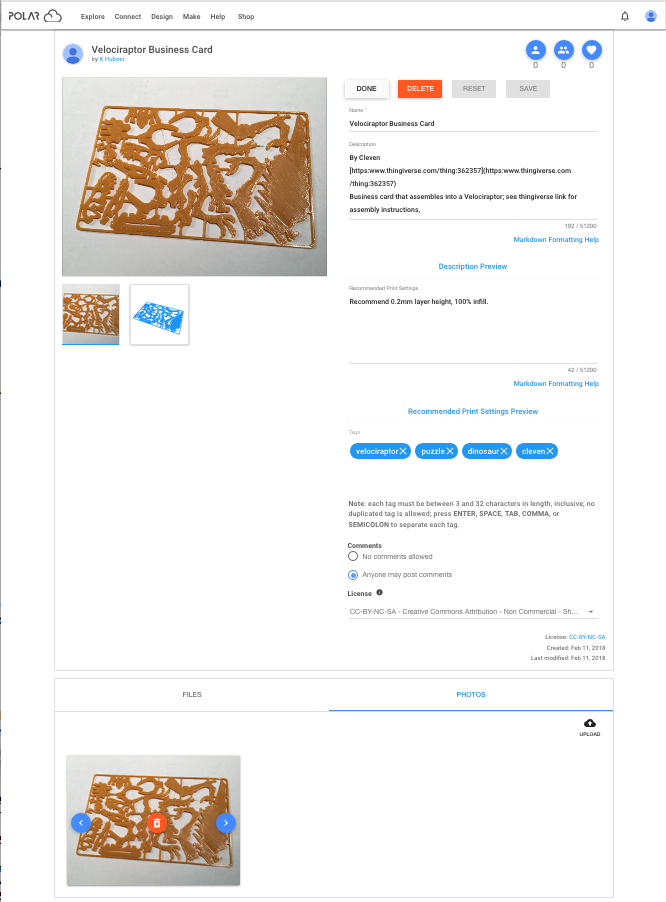
For the object “Name”, note that searching for an object will search on words (space-separated or hyphen-separated), but not on substrings, in an object name. For example, the object “Name” in Figure 5.17, using underline characters, is a poorer choice (for finding by searching) than that of the object in Figure 5.19, using spaces.
Note that the “Description” and “Recommended Print Settings” fields both support the Markdown mark-up language, which includes support for links, special characters, blockquoting, etc. Clicking on the “Markdown Formatting Help” link will bring up a new window describing Markdown. Clicking “Description Preview” or “Recommended Print Settings Preview” will show you what the respective marked-up text will look like on the object detail screen.
If entering or modifying any “Tags”, be sure to press the return key (carriage return) after the last tag to get the tags fully entered.
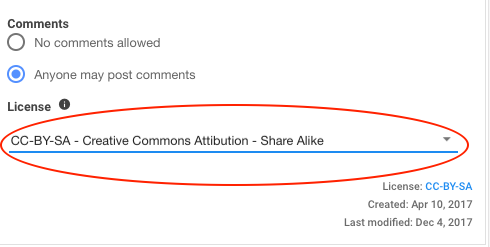
Under “Comments”, the default for objects is that “Anyone may post comments”; check “No comments allowed” to disable the “COMMENTS” pane (which will then no longer appear on the object’s detail screen).
The object’s current license will be displayed under “License” (towards the bottom of the upper pane of the object manage screen). Summary information about license types can be displayed be clicking the black-circled “i” next to “License”; the default is Creative Commons Attribution - Share Alike. Clicking on the license string itself on the object manage screen will open up a window to the full definition of the license. To select a different license type, on the object manage screen open the drop-down menu and select a desired license; see Figure 5.18.
Under “License”, the date when the object was “Created” and “Last modified” are displayed.
Once you are satisfied with your object’s name, description, or other upper pane details, click the “SAVE” button towards the top of the screen. (If you do not like your edits, you may click “RESET”.)
In the object “manage” screen’s lower, “FILES | PHOTOS” pane, see Figure 5.17, when the “FILES” tab is selected, the “UPLOAD” button (upper right of the “FILES” pane) allows adding (uploading) additional .stl or OBJ files to this object (which is different than uploading an entirely new and separate object), as well as allowing uploading subsidiary descriptive files (text files, PDF, etc.). Hovering the cursor over a file tile will bring up left and right arrows, and a red trash can icon button (Delete file); see Figure 5.17. If an object has no images uploaded under “PHOTOS”, then a rendered image of the first object file from the tile list under “FILES” will be the primary image for the object: use the left and right arrows to “shuffle” the order of these file tiles with their rendered images (if there is more than one object file) to move to the front of the list the file tile image you wish to have as the primary image. Clicking the trash can icon allows removing subsidiary files or selected .stl files or OBJ files (which in the case of an object comprised of multiple component files may be different than deleting the entire object).
Each file tile displays a rendered image of the object (for object files) or file icon (for subsidiary, descriptive files), the file name, the number of prints (for object files) and number of downloads of the file, and the file size. In addition, for objects imported directly from a design/CAD package, a live logo link back to the design/CAD package may be present at the lower right of the rendered image (or file icon); see Chapter 6.
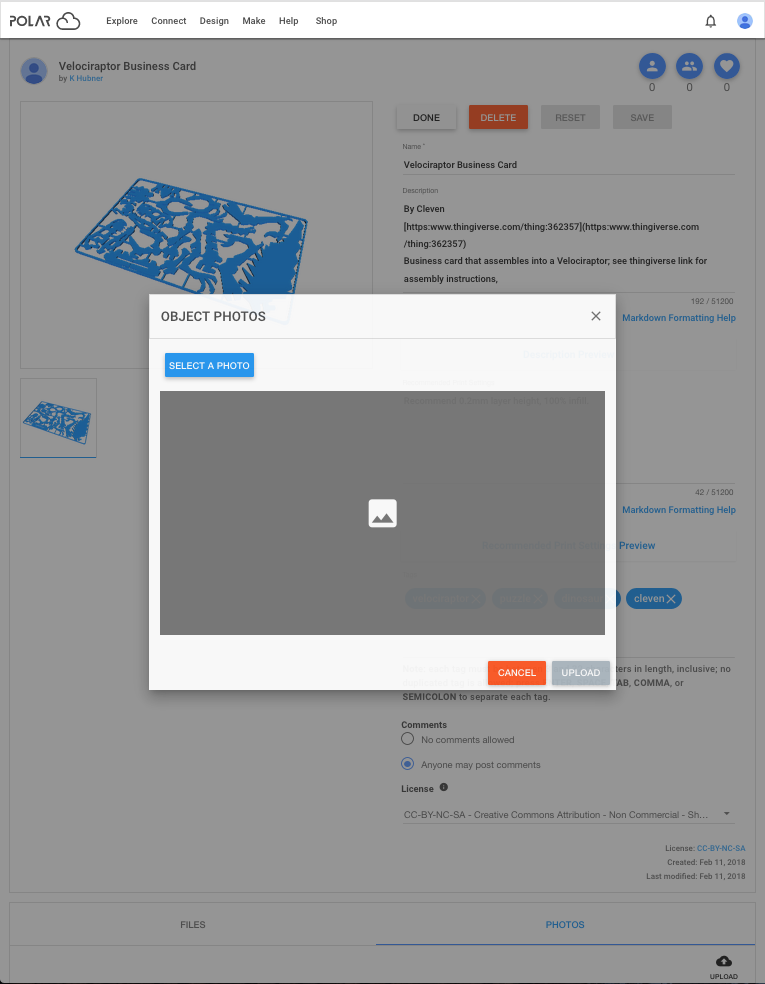
When the “PHOTOS” tab is selected on the object “manage” screen’s lower “FILES | PHOTOS” pane, you may “UPLOAD” images relevant to this object, or remove previously uploaded images. For instance, to upload a photo of your print of an object, click the “PHOTOS” tab in the lower pane and then click the “UPLOAD” button, see Figure 5.19, which will bring up a “OBJECT PHOTOS” screen, see Figure 5.20.
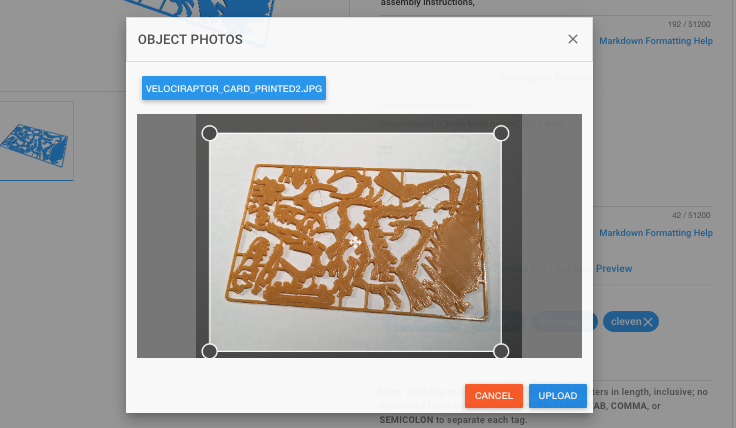
At the “OBJECT PHOTOS” screen, click “SELECT A PHOTO” button to select an image from your device. With a format that permits cropping, you may select the portion of the image to upload; see Figure 5.21 and Figure 5.22.
At the “OBJECT PHOTOS” screen, click the “UPLOAD” button once you have an image selected and cropped as desired; see Figure 5.22. Figure 5.23 shows the resulting updated object manage screen.
On the photo tiles displayed under “PHOTOS”, the left and right arrows, < and >, may be used to shuffle the order of the photos when multiple photos are present. Note that the left-most photo will be used as the object’s primary image: the image displayed on the object tile. And the red trash can icon on photo tiles may be used to delete images, should you wish to do so.
Click “DONE” to finish editting and return to the object detail page.