Repair Assistant
Table of Contents
Overview
Repair Assistant is designed to detect common audio problems in a selection and provide three processing chains tailored to solving the problems detected during analysis.
Repair Assistant is available in the RX Audio Editor. To begin using Repair Assistant, make a selection in the active file tab and click the Repair Assistant button in the upper right hand corner of the RX Audio Editor window.

Repair Assistant Selections
Repair Assistant was designed to detect problems in full frequency bandwidth selections. Even if a frequency band limited selection is made when starting analysis (e.g. brush tool selection), a full frequency bandwidth version of the current selection will be used during analysis. The current selection will be maintained after running Repair Assistant.
Source Type Selection
The first Repair Assistant screen includes source type selection options. This affects the type of processing chains generated and is used in analysis to measure noise amounts and determine processing chain components and settings.
Choices include:
- Dialogue
- Music
- Other (e.g. sources with both dialogue and music)

After selecting the source type, click the “Start analysis” button to begin analysis.
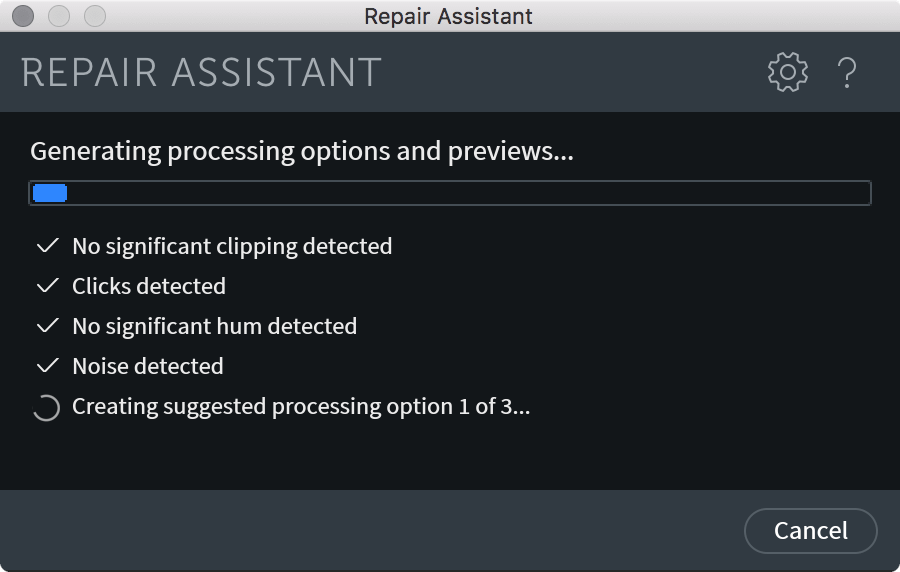
Analyzing Audio
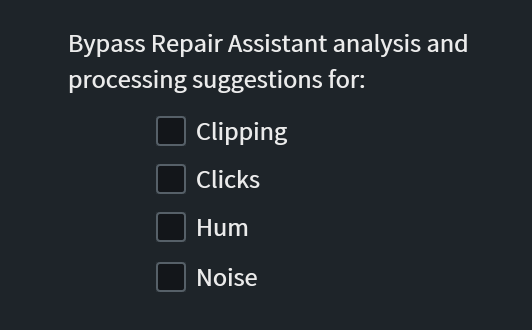
During analysis Repair Assistant analyzes the selection for the following issues:
- Clipping
- Clicks
- Hum
- Noise

Repair Assistant Preferences
To bypass analysis of any of the above categories, click on the gear button in the upper right hand corner of the Repair Assistant window to open the Assistant Preferences.
For more information about the RX Preferences menu, see the Preferences chapter.
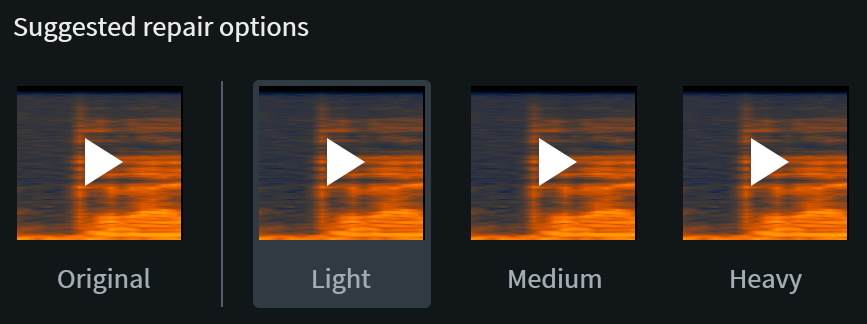
No Problems Detected
If issues are not detected in any of the four categories, Repair Assistant will generate 3 basic clean-up processing chains for the selected source type using data learned during the analysis pass.
Generating Processing Chains
After analysis, Repair Assistant will generate three processing chains based on information gathered during analysis.
After the preview generation is complete, the Repair Assistant window will update and display playback buttons for the original audio and three processing chain preview buttons.
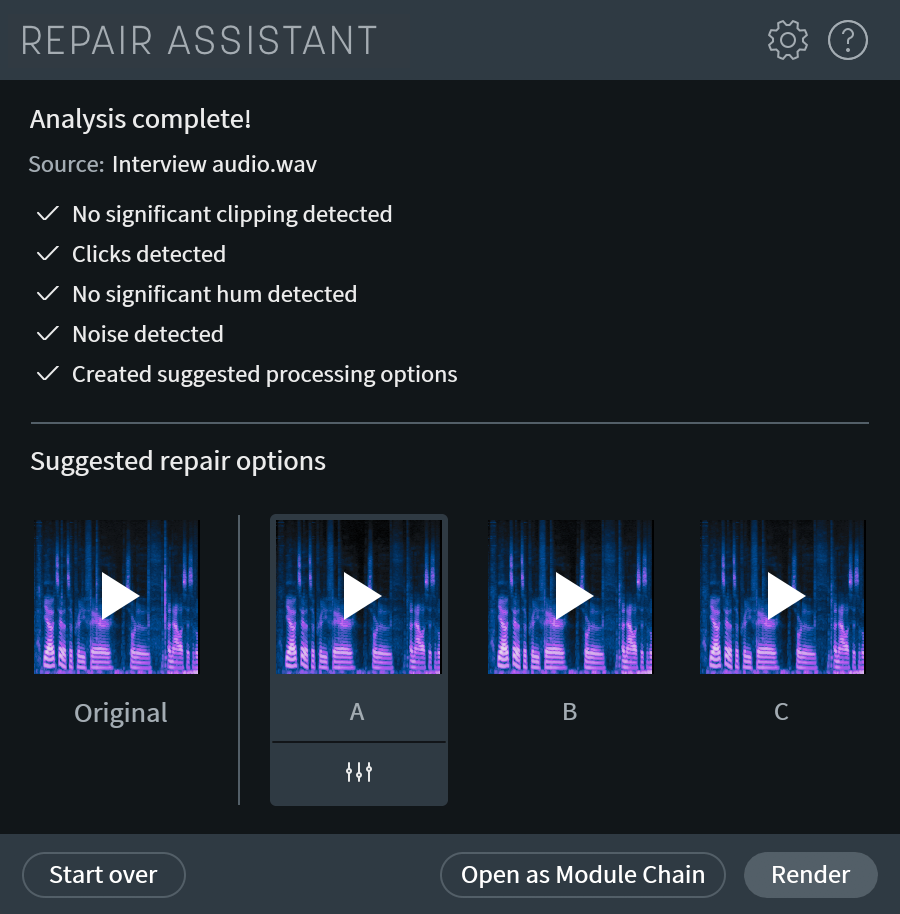
Each processing chain contains modules with settings based on information learned during analysis. e.g. Clipping thresholds (if applicable), noise profiles (if applicable), base hum frequency (if applicable), etc…
Preview Processing Chains
The processing chains can be previewed by clicking on the play buttons in the Repair Assistant window. Preview playback is limited to 10 seconds of the selection that was analyzed, or shorter if the selection was less than 10 seconds in length. Each processing chain preview will playback the same 10 seconds of audio.
A 10 second preview of the unprocessed original audio is included to the left of the 3 preview buttons for easy before and after comparison. The spectrogram displays drawn behind each preview play button reflects the processed spectrogram of the 10 second processing chain preview.
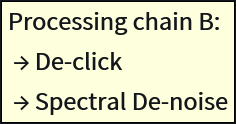
Processing Chain Tooltip
Hovering over a processing chain button will display a tooltip with a list of the modules included in the processing chain option.
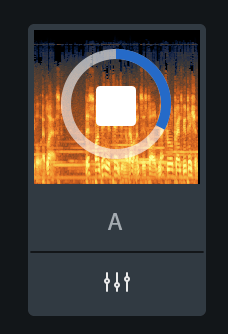
Intensity Variations
In RX Standard and Advanced, Repair Assistant can generate two additional intensity variations for each processing chain option. To generate intensity variations for a specific processing chain, click the button directly below the preview spectrogram display.
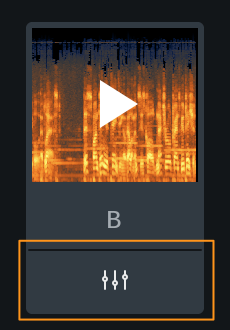
After clicking the intensity variant button, Repair Assistant will begin preparing the intensity variation preview. When the intensity variant preview have been generated, a slider will appear in place of the generate intensity variant button.
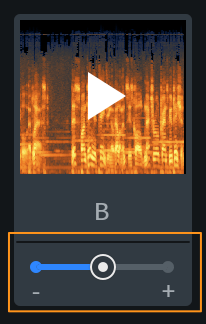
Adjusting the intensity variant slider will audition the same processing chain with modified settings.
RX Elements Intensity Variants
In RX Elements, Repair Assistant does not include intensity variant generation for each individual processing chain option. Instead, the three processing chains generated by Repair Assistant are intensity variations of the same processing chain.
Render
To apply a Repair Assistant processing chain to the current selection, select the processing option in the Repair Assistant window and click the Render button in the bottom right hand corner of the window.

Open as Module Chain
The “Open as Module Chain” feature allows you to save a generated processing chain as a Module Chain preset, or make changes to the generated settings before rendering. To open a processing chain in the Module Chain, select the desired processing chain option and click the Open as Module Chain button in the Repair Assistant footer area.