Compressor
Overview
A compressor allows you to reduce the dynamic range of an audio signal. Dynamic range can be thought of as the difference between the quietest and loudest levels of a signal. Compressors can reduce the dynamic range of a signal by decreasing the level of sounds that exceed a certain threshold level (referred to as “downward” compression) or by increasing the level of signals that fall below a certain threshold level (referred to as “upward” compression). Neutron features two Compressor modules capable of multiband compression, flexible sidechaining options and useful visual feedback.

Global Controls

Digital/Vintage mode
Neutron’s Compressor is capable of two very different styles of compression, Digital and Vintage mode. You can set the mode used by the compressor by toggling the “Vintage Mode” button.
Digital Mode
When Digital Mode is selected, a gain reduction trace meter displays gain reduction for the currently selected band.

Where Digital is a more transparent, surgical compressor, Vintage is more colorful, emulating a number of sonic behaviors from a variety of beloved older analog compressors.
Vintage Mode
When Vintage Mode is selected, VU meters display the gain reduction for each active band.

In Vintage mode, the Attack reacts much more quickly (indeed, an UREI 1176 is capable of very low Attack times) but then begins to ease in, which sounds punchier, but less transparent than the Digital mode. Knee is not adjustable in Vintage mode, as it scales with the Threshold control.
Output Gain
Allows you to adjust the amount of gain applied to the signal after compression, to make up for any loss or increase in level caused by dynamics processing. This is also useful for managing the signal level as it passes to the input of the next module in the signal chain. When using Compressor 1 and Compressor 2 in series, adjusting the output gain of Compressor 1 allows you to manage the signal level going into Compressor 2, allowing for greater control over how Compressor 2 affects your sound.
LFE Bypass (Surround Only)

Surround processing & LFE Bypass
- The LFE Bypass button only appears when Neutron is instantiated on a surround sound track that includes an LFE channel (5.1 or 7.1, for example).
- Neutron processes all input channels equally when used on surround tracks.
When LFE Bypass is enabled, all audio information in the LFE channel will pass through the associated module unprocessed. Latency compensation is applied to the unprocessed LFE channel (if the module introduces latency), to ensure all channels remain time aligned after processing. You can read more about LFE Bypass and Surround processing in the I/O chapter.
Level Detection Mode

Sets the level detection mode used by all bands in the Compressor module. This allows you to inform how the compressor calculates levels coming into the detection filter. The following level detection modes are available:
- RMS (Root Mean Square): Enables Neutron to look at the average level of the incoming signal. RMS detection is useful when you are trying to increase the overall volume level without changing the character of the sound.
- PEAK: Enables Neutron’s detection circuit to look at peak levels of the incoming signal. In general, this setting is useful when you are trying to even out sudden transients in your music.
- TRUE: Behaves much like RMS mode, but with some key advantages. Unlike RMS, True mode produces even levels across all frequencies. Additionally, True mode will not produce the aliasing or artifacts that RMS detection can cause (a signal-dependent behavior that is true of any RMS-based compressor, not just Neutron).
Learn

When enabled, the Crossover Learn function will search for natural crossover cutoff points for multiband processing using a few criteria, including identifying minima in the frequency spectrum of the incoming audio. When the Learn function is active the button will turn orange. When it has determined and set the ideal values for the crossover cutoffs, it will turn itself off automatically. You can also manually disable learning when it is active by clicking the Learn button again.
Crossover Learn Notes
- For crossover learning to behave as expected, the module must be receiving audio input while Learn is engaged.
- The Learn button will be disabled if only one band is enabled in a multiband capable module.
Reset

Returns all controls in the Compressor module to their factory default values. If you wish to return to settings you were using before clicking the Reset button, you can use the Undo History window to revert to the settings before the Reset event.
Auto Gain

When enabled, the Compressor will calculate the level difference between the input (uncompressed signal) and output (compressed signal) and automatically apply gain to match the output level to the input level.
Auto Release

When enabled, the Release time of the Compressor is automatically adjusted based on an analysis of the input signal. If a transient signal is detected, the Release time is scaled to be shorter for less pumping. If a sustained note is detected, the Release time is scaled to be longer for lower distortion.
The Auto Release amount scales in relation to the set Release time values. For example, if you are using the Compressor with the Release time set to 100 ms, the Release time will be automatically adjusted to a value within a range of 20 ms to 200 ms, depending on the type of signal that is being processed.
Note
Auto Release is always enabled when Vintage Mode is selected.
Global Mix
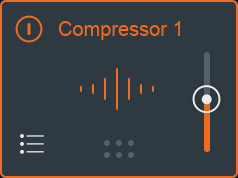
The Mix slider in the module chain is a highly useful feature, allowing you to perform parallel compression. At 100%, you’re hearing only the audio processed by the Compressor, whereas at 50% you’re hearing an even blend between unprocessed and processed audio. Often times, blending in more extreme compression settings (as in…majorly crushed) with completely unprocessed signal (typically around 50 - 80% dry, 50 - 30% wet) gives you a much smoother, more polished sound without eliminating the musicality that peaks and dynamic range have to offer. Note that this a global setting, where unprocessed means audio input to the Compressor, and processed means audio output from the Compressor. Audio output from the Compressor may contain some dry audio, depending on the per-band Mix control settings.
Meters
Gain Reduction Trace

This view offers a scrolling meter that displays the incoming signal’s waveform with a superimposed curve that illustrates the amount of gain reduction taking place in real time. It uses a rectified waveform to better illustrate the compression behavior. The Gain Reduction Trace can help you to set attack and release controls appropriately and monitor the envelope of gain reduction.
VU Meters

In Vintage mode, the gain reduction meters use a VU meter, one per band. There is something magical about the audio/visual connection between the gain reduction that’s occurring and the way the ballistics of the VU meter give you a sense of what’s going on.
Crossover Mini-Spectrum
Multiband modules offer controls for adjusting and auditioning the crossover frequency bands in the crossover mini-spectrum metering view.
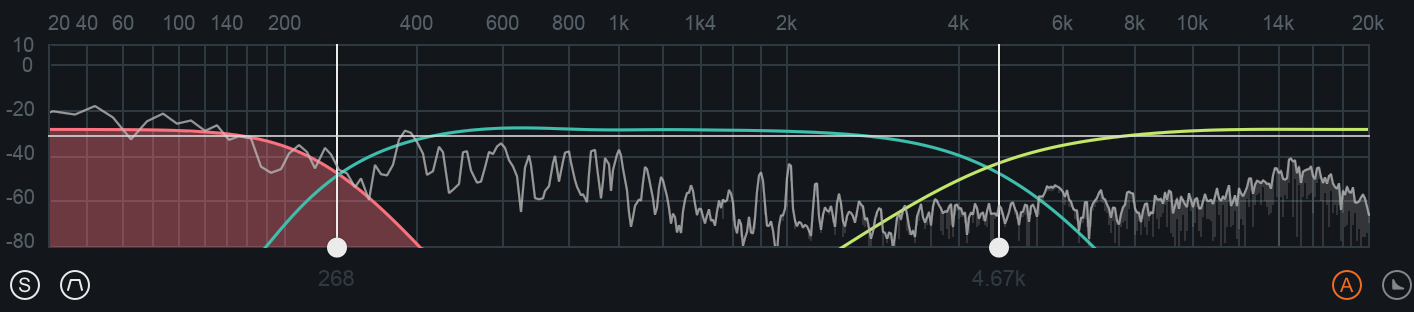
Adjusting Crossover Cutoffs
The multiband crossover points can be manually adjusted in the crossover mini-spectrum view. Crossover cutoff points can be manually adjusted using the following methods:
- CLICK & DRAG CUTOFF HANDLES: Crossover cutoffs can be adjusted by hovering over the white crossover handle, left-clicking and dragging the handle to the desired position. The cursor will change to display a left/right arrow icon when hovering over the adjustable crossover cutoff handle.
- TEXT INPUT: Double-clicking on a crossover cutoffs value readout (white text directly below the cutoff handle) will open an inline edit field. Type the desired frequency value for the crossover cutoff into this field and hit the Enter or Return key to update the value.
Note
- Crossover cutoff points are not shared across multiband modules. Adjusting a crossover point in one module will not affect the crossover points in other multiband modules.
Detection Filter
Adjusts the frequency response of the Compressor’s detection circuit. The detection filter is enabled by clicking the detection filter button located below the crossover mini-spectrum meter.
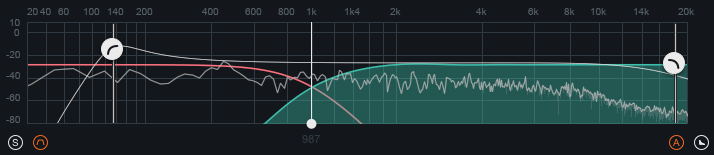
When the detection filter is active, adjustable high-pass and low-pass filter nodes will be displayed on top of the crossover mini-spectrum meter. You can adjust the gain of the filter nodes by dragging them up or down and adjust the center frequency of the filter nodes by dragging them left or right.
Tip: Using the detection filter
- Adjusting the detection filter allows you to tailor how sensitive the Compressor is to different frequencies. You can use this to great effect when using the Compressor in single band mode.
- For example: if you want the compressor to react more to sibilant or harsh frequencies than low frequency content, you can filter out low frequencies using the high-pass filter and boost sibilant frequencies using the resonant low-pass filter to adjust the signal that the Compressor treats as the input signal.
Detection Filter Solo

When enabled, allows you to audition the output of the detection filter. This can be useful to enable when adjusting the detection filter nodes.
Per-band Controls
Threshold
Threshold sets the point at which the dynamics processing begins to take place. With positive ratios (downward compression), signals that exceed the Threshold will trigger processing. With negative ratios (upward compression), signals that fall below the threshold will trigger processing.
Ratio
Ratio allows you to adjust the amount of level adjustment the compressor will apply from any given input signal. A ratio of 3:1 means the for every 3 dB a signal overshoots the Threshold, only 1 dB of gain increase will occur.
Neutron’s Compressor is capable of both upwards compression (with a negative ratio) and downwards compression (with a positive ratio). Additionally, the Compressor supports positive ratios high enough to be considered a Limiter, which when combined with the multiband-capable processing, is particularly useful for processing electronic sounds, or working in genres typified by high RMS values. For acoustic material, we recommend lower ratios and more gentle compression. Only you can prevent over-compression.
Knee
This variable knee allows you to adjust this control to set the desired character of the compression. Since “character” is arguably one of audio’s most overused words, here’s what we mean here: Higher settings result in a “soft knee” setting with a subtler, natural-sounding compression, whereas lower settings result in a “hard knee” setting with a more aggressive-sounding compression, often used as an intended effect on individual tracks such as kick and snare drum(s).
Attack and Release
Adjust the attack and release controls to set how quickly the Compressor module reacts to audio that crosses the threshold.
Mix
Adjust this slider to control the dry/wet mix of the direct, unprocessed signal to the processed signal for the associated band.
Gain
This behavior is identical to the Output Gain parameter described above, but is specific to whichever band you have selected.
Sidechain
Neutron’s Compressor has powerful and detailed sidechain support, meaning you can have a band’s dynamic behavior dictated by a wide variety of other input signals.
- INTERNAL SIDECHAIN SOURCE: By default, a band is triggered by its own audio input but you can use the Internal function to choose any other band of the Compressor. You might like the warm midrange of a guitar (say, band 2) to actually trigger the boomy, muddy low end (say, band 1) dynamically up or down. It’s a phenomenally powerful way to balance a signal within itself. You can also select Internal Full, which will take the full bandwidth of the audio signal, and not anything node specific.
- EXTERNAL SIDECHAIN SOURCE: You can also set the sidechain source to External, which will use the host application’s sidechain input. You can choose between full bandwidth external sidechain or split the external sidechain into bands that match the Compressor’s current crossover settings.
Bypass
Bypass the processing for the associated band by clicking the ‘B’ button.
Solo
Solo the associated band by clicking the ’S’ button.
Add/Remove Bands
Add/remove the associated band by clicking on the power button (next to S and B buttons).
More Information
Limiters/Compressors were originally invented to prevent overmodulation in a radio broadcast signal. As decades passed, and engineers realized more of the practical and aesthetic use cases, compressors have become one of the most used audio processing techniques in modern recording, mixing, and mastering. They can help improve intelligibility in vocals, tame an overly aggressive snare drum, and restrict dynamic range across a mix so that the listener does not have to keep adjusting the volume on their playback system.
Compression is one of the effects we hear most but, if done correctly, the listener will not even be aware that it’s there. While many mix engineers favor compressors that color their audio, when it comes to mixing, transparency is key. One of the challenges mixing engineers face is that different parts of the frequency spectrum will require different compression settings to effectively reduce dynamic range. Individually tuning the attack time, or the length of time before the compressor begins reducing gain, is key.
If a recording of a bright guitar and a bass drum is sent through a compressor with a short attack time, the transients of the guitar will be tamed, but the bass drum will lose its punch and feel choked. With the short attack time, the low frequency transient information in the bass drum does not have enough time to make it through before the compressor kicks in. If the attack time is set longer, the bass drum may have the desired punch before the compressor kicks in but the guitar will sound harsh. Its high frequency transients take a far shorter time to get through—and as a result, the compressor will not compress the guitar much at all.