
DCUO: A Celestial Guide to Healing
by Jin Lovelace, HSM team writer & filmmaker
Game Update 33 is now live for DC Universe Online, and in spite of what others say about the recent client, I’m having a blast.
That isn’t to say that I haven’t gone through some rough mountains, however. Throughout my learning process, I’ve come to understanding how healing works in this game, to play a bit more efficiently, and to understand certain aspects of each power from the genre. While I’m not some master expert on healing, what I do wish to do is extend my knowledge on my venturing experiences in hopes that it’ll help those who were in my shoes.
This guide will cover some of the basis on the following:
- Celestial Power Loadout (Healing)
- Synthetic, Split, and Base Modding
- Skill Point Loadout
- Weapons
Keep in mind that this article only covers what I know in regards to Healing. If you wish to seek for a Damage Per-Second (DPS) loadout, there are some decent guides over at the forums (https://forums.station.sony.com/dcuo/). You can also refer to this thread (https://forums.station.sony.com/dcuo/index.php?threads/celestial-powerset-guide-discussion.170192/) which gives you the basis of the powers as well.
Celestial Power Loadout

Bless Tree
To paraphrase Churchill, put two DCUO players in a room and you’ll get three opinions. Each has their own experience, how they play, and what benefits them. For starters, this loadout consist of something I’ve learned along my journey in growth of understanding these powers.
Make no mistake: Celestial is a rather complex power if you’re not used to combos or reading frame animations. Think of precision button presses in such fighting games like Tekken, Street Fighter or Virtua Fighter. Celestial is a totally unique power to DCUO in that it introduces the role of a combat healer. Similar a bit to Electric and Nature powers in terms of healing and the effects, it’s still a completely different hybrid on its own. For one, it’s precision-based due to the two-hit combo strings you perform based on the power tree. Unlike Hard Light, however, you can only combo into two powers at a time.
Second, and many aren’t fully aware of this, is that your heals are based upon the damage you deal against your enemies. While the healing effects are based on the numeral equation of your Restoration value (along with your perks such as critical healing and healing magnitude), damage also effects your heals as well.
The purpose of this section here is to give an understanding of your approach to this game. Playing defensively can be crucial to one’s enjoyment as a healer, but being combative can yield some extraordinary results.
With that, here’s my power loadout for the powers:
- Blessing
- Renew
- Admonish
- Divine Light
- Guardian’s Light
- Consume Soul
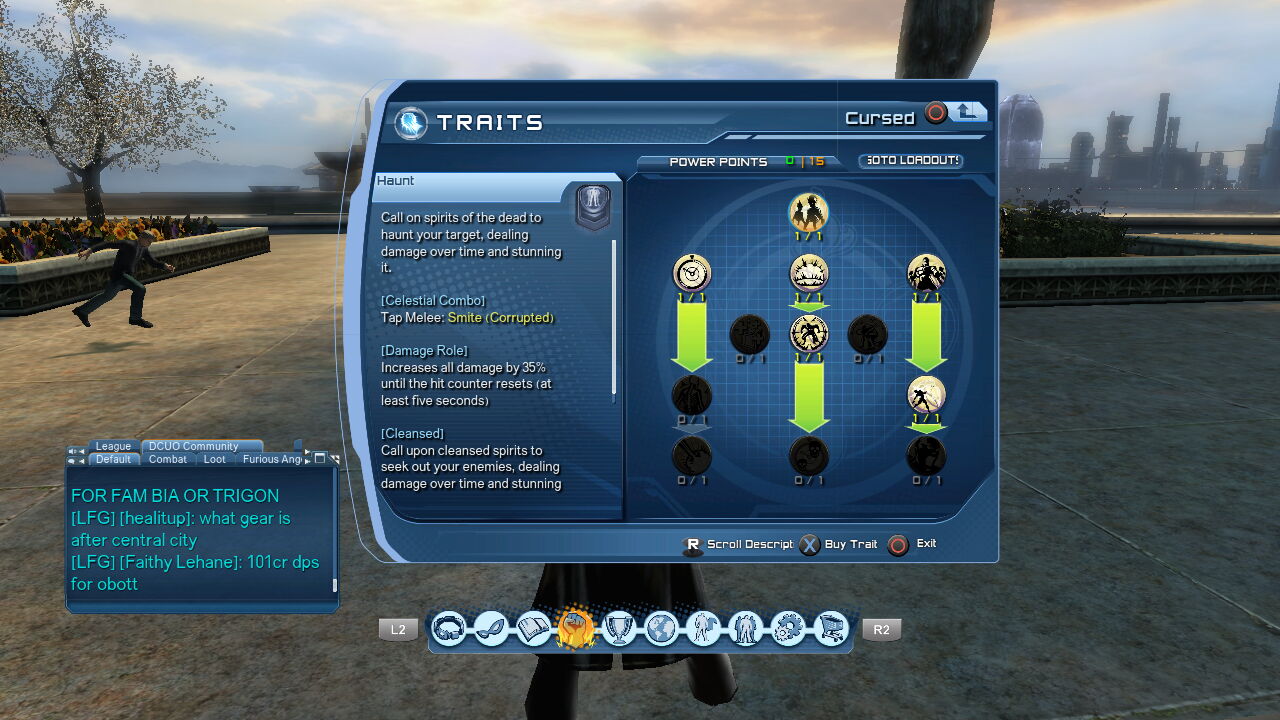
Curse Tree
If you notice in that loadout are two things: a lack of a Super Charge and a power that many dread. The former is just a matter of taste based upon the options available at the time of this loadout was created and, much so, felt that it was pointless to include one that didn’t give me the desired effect. However, they aren’t completely useless to my plight; they just weren’t working for me. The latter is something that I will discuss into as I explain each power to my knowledge.
Blessing: your shield that envelops you and up to four members in a group.
Renew: a burst heal that acts like any normal healing move in the game. However, you can combo into cleansed “Curse” for DoT (Damage over Time) to your enemy which gives an exploding healing effect once the enemy is subdued. Anyone allies caught in the blast will be treated with a very nice HoT (Heals over Time) bonus.
Admonish: the bread and butter of your loadout and one that you will get used to using throughout your role. Knocks down your opponent, affecting them with DoT and simultaneously granting your HoT for you and your group, along with a critical healing chance bonus.
Admonish can be combined into an AoE (Area of Effect) damaging Blight that adds DoT as well as knockdown to your enemies.
Divine Light: a “blooming” heal for you and your allies in your group. The cooldown is rather significant, to which I wouldn’t recommend that you start off any mission with this in effect. This works extremely well for NPCs (Non-Player Characters) whose health is low; the mission “Wayward Souls” comes to mind.
Guardian’s Light: a power that is vulnerable to interrupt, three-second healing effect, and a two-second cool down for a total of five seconds. The power can be jump canceled to nullify the animation, but most are against the power itself due to the charge.
However, the reason why this is in my loadout is twofold. The first: the heals are strong, especially if you successfully allow the power follow throughout its course for a final ticking bonus. The second — and the most neglected — is that upon activation, any enemies nearby is immediately stunned and pushed back away from you and the effects. This creates a window of opportunity for any Tank on your team to pull any access aggro away from you, and one that can be an essential asset to your ploy. I’ve used this many times when such I’m swarmed with enemies attempting to jump me or any of my teammates. When activated, it creates a complete different strategy for everyone, especially the Trollers and Tanks.
I strongly advise that if you haven’t tried this power out to give it a test in your own leisure. You’ll be surprised just how strong Guardian’s Light truly is. If it’s just not to your liking overall, you can substitute with any of the SuperCharges from any of the power trees or a go-to power for Raids: Word of Power.
Consume Soul: a very solid HoT power with the potential of “pulling” your enemies towards you. Any enemy consumed will be stunned. The HoT from this move is essential to your loadout due to the amazing cool down and DoT capabilities as well.
Granted, this build have been modified based on the similar used in a test server at the time but the difference is obviously evident when it comes to Guardian’s Light and my play style preference.
For my Iconic Tree, the Critical Healing Chance and Healing Magnitude slots would be essential to your stats, and one I advise that you obtain when it becomes available to you.
Synthetic, Split, and Base Modding
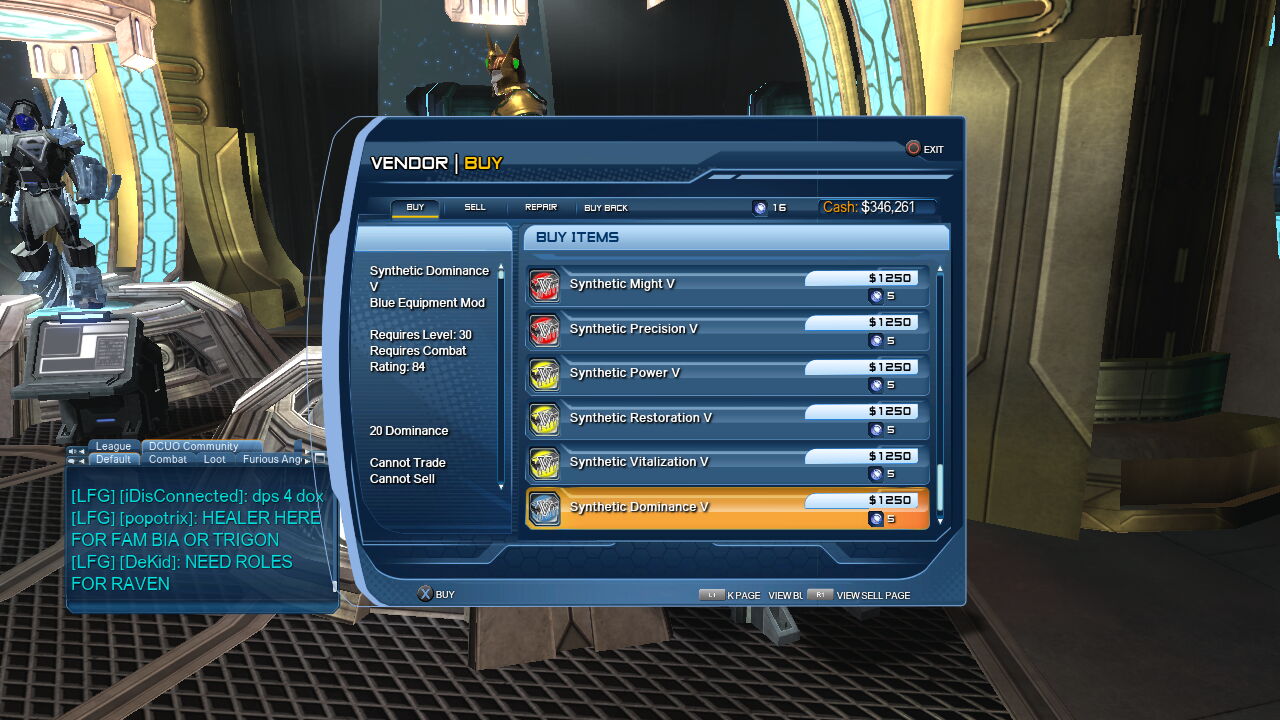
New to DCUO are Synthetic Mods. They are items that you can outright purchase from tiers three through five vendors for the cost of cash and the vendor’s respective Marks.
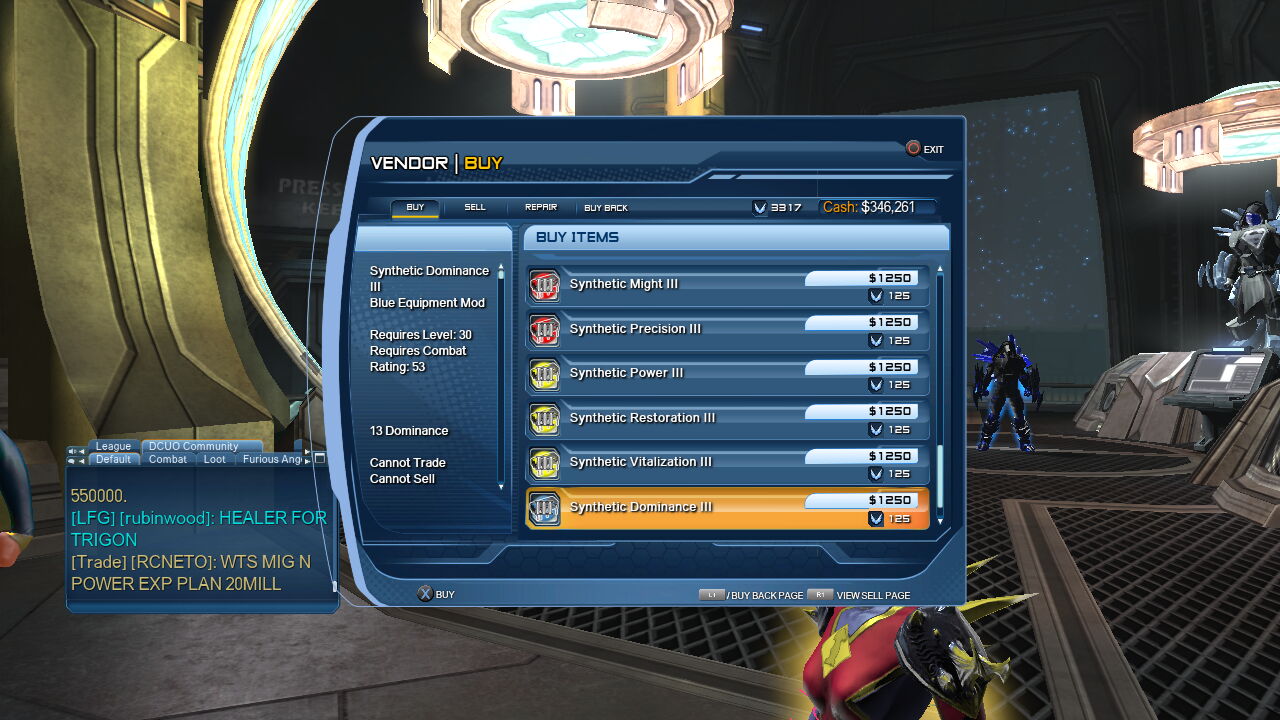
Tier 3 Vendors in Meta Wing
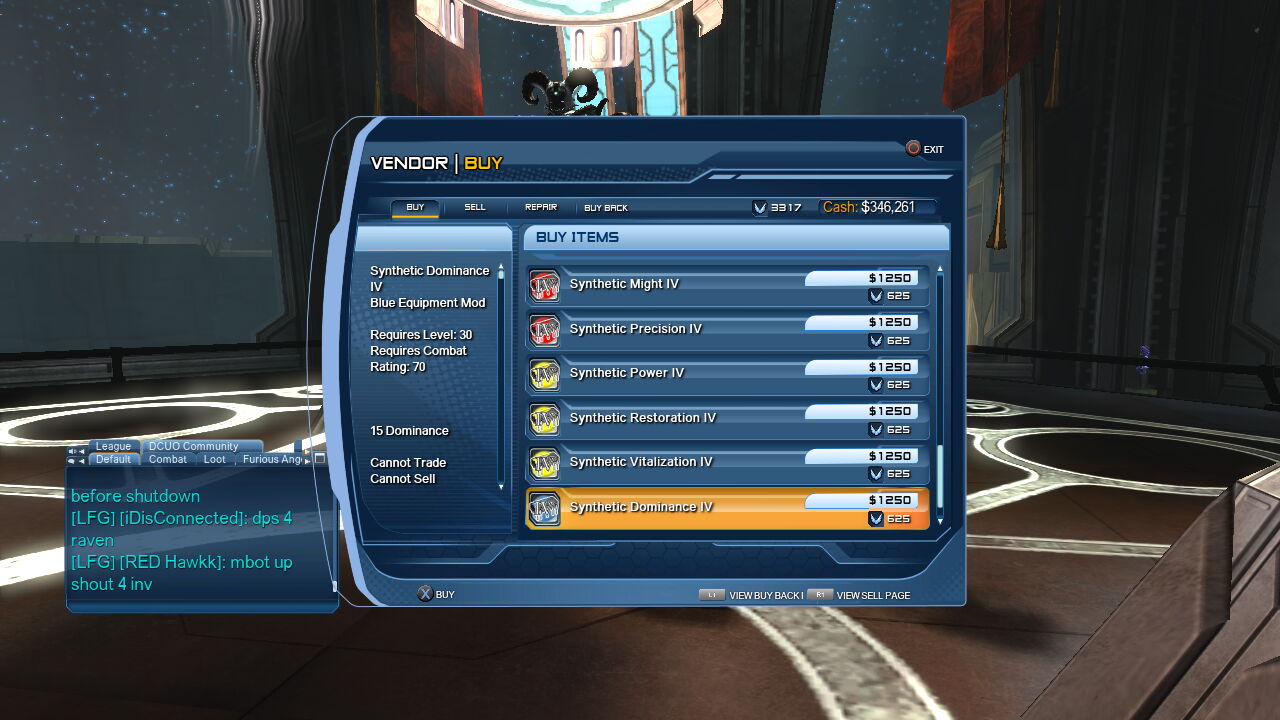
Tier 4 vendors in the Magic Wing
Tier 5 Atlantean Monarch Gear in Meta Wing. You can also access the Pride vendor in Gotham Wastelands.
Synthetic Mods are single stat mods that works much akin to the mods you create, as pictured above. Unlike the mods that you create at an R&D Station, you can’t sell, trade, or recover the items. Once they are purchased and allocated into the chosen slots, that’s pretty much it.
On the positive side, this cuts farming for precise Exobits and materials by half. This means at higher levels you can focus your mods for Expert Plans and items, which is crucial at around CR 95 and after you obtain gear that are item levels 86 and up.
Here’s a loadout on the recommended mods for your role as a Celestial Healer.
Synthetic Mods:
- Restoration
- Precision
- Health
- Power
Split Mods:
- Restoration & Precision
- Restoration & Health
- Restoration & Power
Restoration Mod
Base Mod
Base Mods, on the other hand, are enhancers that you can equip on your weapon, necklace, back, chest, hand, and feet. They are obtainable upon activating the Generators at your Base (provided if you have the DLC “Home turf”), to which you spend Marks of Triumphs to power up your Mainframe.
In my honest opinion, if you’re going to use the Generator to equip your base mods, I strongly suggest that you look over the Orbital Strike, as it is loosely based on having high precision for it to be effective. Instead, Tactical Mods and the Supply Drop Mainframes would be the ideal nods to unlock, especially if you have the Marks to spare to power them up to Boost II. The Supply Drop Trinket is exceptional for when you and your group lack in power and you’re unable to heal them.
The Tactical Mods can be acquired from the vendor at your abode. You can carry up to four each item. I added these mods onto my slots:
- Weapon: Restorative Adapter IV
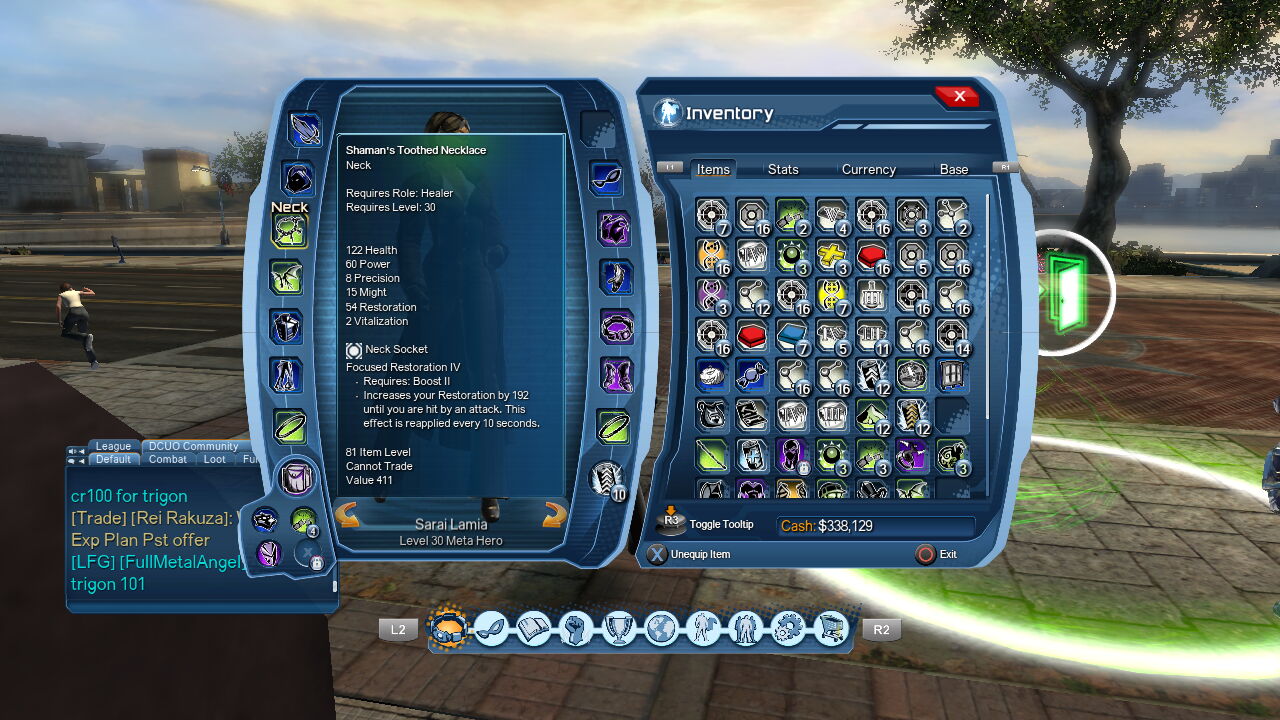
- Necklace: Focused Restoration IV
- Back: Violent Breakout
- Chest: Quick Healing
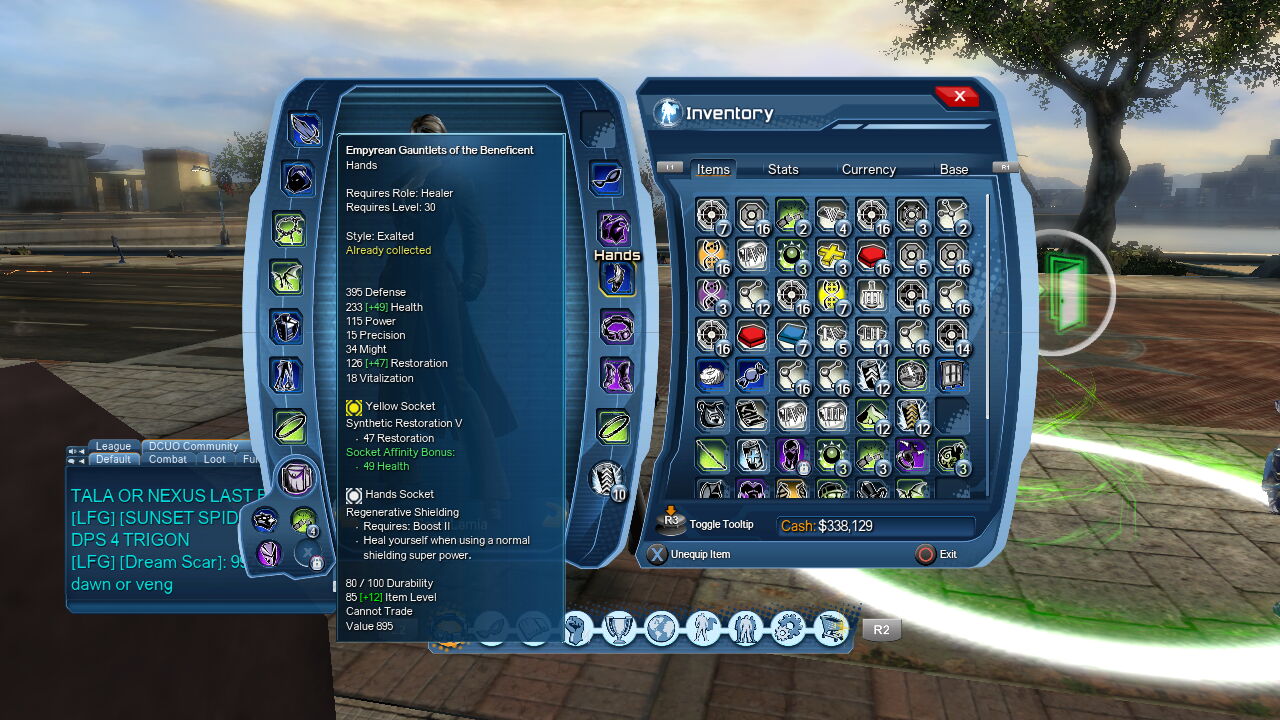
- Hands: Regenerative Shielding
- Feet: Explosive Block
The weapon mod is great for healing during my attacks, as for my neck bonus adds 192 to my restoration as long’s I’m not attacked. Violent Breakout is essential for when I’m surrounded by enemies, which will knock them back. This will provide great leeway for me to utilize Guardian’s Light to help heal my allies in need, or whatever power I choose. Quick Healing adds 15% towards heals I receive, and the hand mod is absolutely glorious for when you activate Blessing, which will heal myself. Finally, Explosive Block knocks your enemy much further back, creating a bit of space for yourself to apply heals or to activate your Trinkets.
These definitely benefit me as a Celestial Healer but of course, you can play around with whatever suits your fancy and come up with your own Base mod loadouts.
Skill Points and Weapons
Finally, I wish to tackle these two topics simultaneously. I’ve heard so many suggestions on which would be the best weapon for you to use while you’re a healer. It can create some frustration if you’re having trouble against a Boss that would deal so much damage to you up close as oppose from a distance. So it would make sense if you were to equip yourself with Handblasters and go to town from long range.
This isn’t the case with Celestial.
You can attack from afar if you prefer, but I like to take it up close and personal with my opponents. Power regeneration is very crucial to your repertoire of super powers in your loadout as you need to consistently heal while dealing sufficient damage.
For this alone, I suggest using either Duel Wield, One-Hand, or Staff. Martial Arts is okay for short and long distance attacks but if you want to stay steady while building your power meter, the three weapons advised is ideal. I personally laud the blades more but it’s to your discretion. If you were to run into any weapons that give a significant stat-boost, use it! Don’t wait around until you get your preferred weapon. You can always re-trait your skill points later, should you acquire your favorite weapon.
As for your skill point loadout, I would concentrate on the following slots:
- Restoration
- Precision
- Critical Healing Magnitude
- Critical Healing Chance
The rest of the points (once you accrue more than what you’re able to allocate) should go straight into…
- Power
- Health
- Defense
- Critical Attack Damage
I can’t stress this enough that the biggest feature of DCUO is skill points. They are essential for you to gain and to use because without them, you’re stifling your own character build and growth, and that is a compromise to any team you are paired with. I don’t think that is something anybody wish to go through.
What’s purveyed above are some of the slots I’ve allocated my points into that has helped me along my journey of building an efficient Healer. I hope this guide is useful to you and anyone who wishes to learn how to play with the Celestial powers.
January 19th, 2014 by Jin Lovelace | 0 comments
Jin Lovelace is a machinimist and team writer for HomeStation Magazine, as well as the founder of Twilight Touch Inc. -- http://twilighttouchinc.com and http://youtube.com/twilighttouchinc. When not found in PlayStation Home, Jin studies graphic design and illustration (character design and fashion), gaming, and the culinary arts.
 Twitter
Share
| Tweet |