| Exercise 19 | Data Visualization |
| Data | None |
| Overall Goal | To use the Esri JavaScript and the Power of FME to create and easy to use and interesting map with live data. |
| Demonstrates | How to use Esri JavaScript, Data Streaming Web Service URLs, and online resources in a workspace. |
| Starting HTML | C:\FMEData2019\Resources\RESTAPI\myThirdApp\myThirdApp.html |
| Completed HTML | C:\FMEData2019\Resources\RESTAPI\myThirdApp\myThirdAppComplete.html |
| Projects | C:\FMEData2019\Resources\RESTAPI\myThirdApp\WebApplication.fsproject C:\FMEData2019\Resources\RESTAPI\myThirdApp\BestPracticeAnalysis.fsproject |
This exercise was made to demonstrate how to stream KML Layers produced from workspaces to an online map. When a user selects a layer, a workspace is activated to produce the KML Layer. However, by default Esri will cache the results of the KML Layer for 30 minutes. Esri caches layers to enhance the performance. However, if your data needs to be refreshed on a shorter interval this code will have to be modified.
| WARNING |
| For this exercise to work properly you will need to have completed Exercise 16 or have an existing web server for testing. |
1) Open the myThirdApp.html file
Go to C:/FMEData2019/Resources/RESTAPI. Then, right click on the myThirdApp.html and select Edit with Notepad++.
2) Review lines 1-12 in the code
This is the code needed to access the ArcGIS JavaScript that we will be using to host the KML Layers streamed to the application through FME Server.
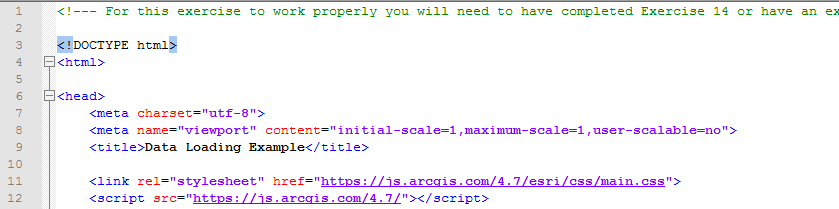
Notice, in this application there is no connection to the FME Server JavaScript API. The ArcGIS JavaScript API will be used to create the map the objects and turn the layers on and off.
The layers are created from workspaces hosted on FME Server. We are using a Web Service URL to activate the layers.
3) Review the Body of the HTML
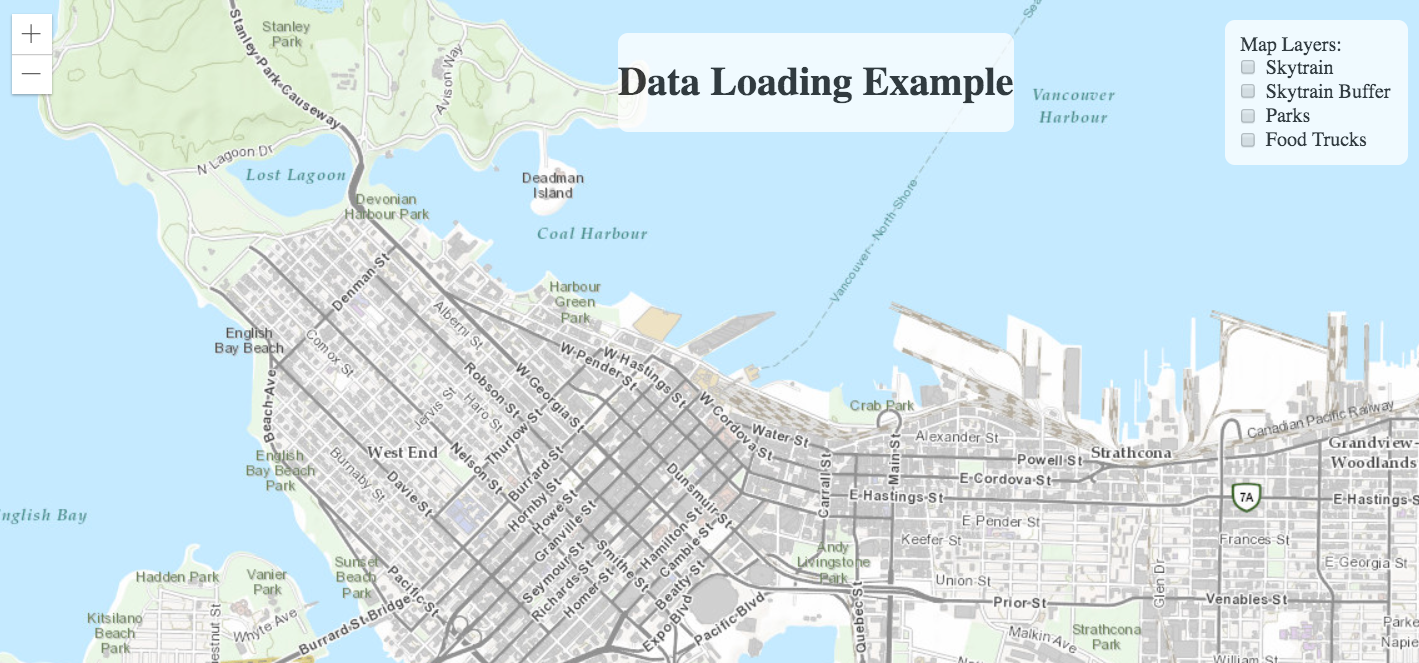
The body of the HTML (lines 110 - 126), holds the map div (viewDiv), a heading, and the map layers.
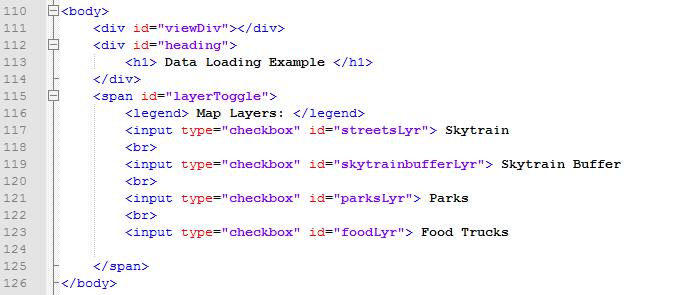
The above code creates a title and checkbox list on the web page. These checkboxes will represent the layers of the map. Once a checkbox is activated; this will trigger a function to enable the data streaming.
4) Review the CSS
| TIP |
| *The following CSS is sourced from ArcGIS Introduction to Layers* |
The styling components (lines 128-161), describe how each HTML element is displayed on the screen.
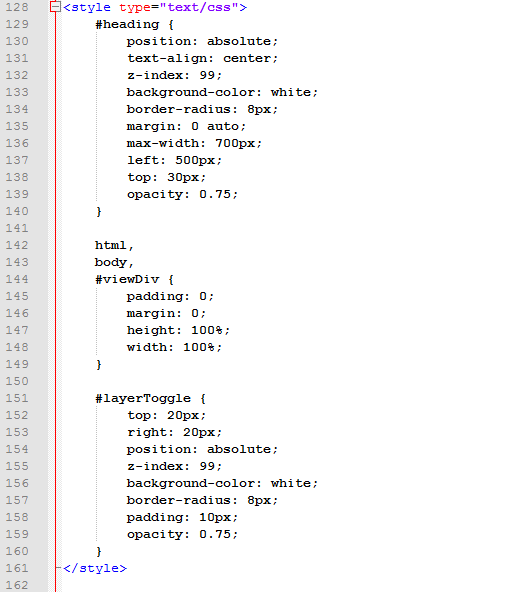
For the heading, we are giving it a z-index of 99 to ensure that it is placed in front of the map (line 132). It has a white background (line 133) and has an absolute position on the screen (line 130). Which means as the screen size changes the heading will remain in the same place.
The viewDiv which contains the map is given a height and width of 100% (line 147-148). The map will be displayed on the entire screen regardless of the screen size.
The layer toggle which contains the layers available will be formatted similarly to the heading. It will be placed on top of the map and has a white background.
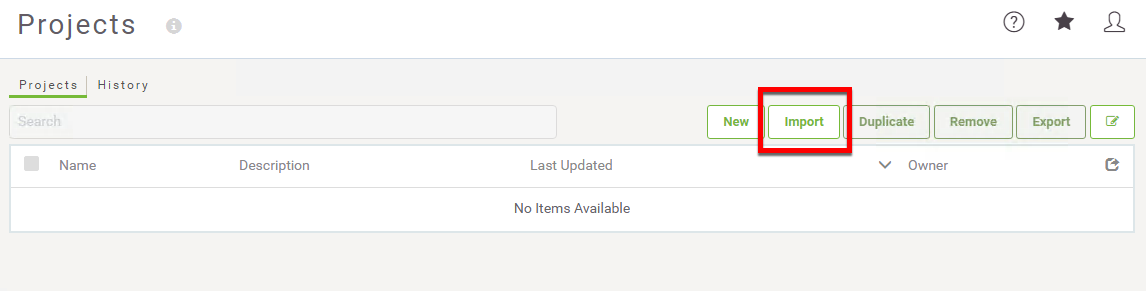
5) Navigate to the Projects in your FME Server
Open FME Server by visiting http://localhost/fmeserver. Sign into the account as the admin. The username will be admin and the password will be admin as well. Next, look on the left-hand panel and click Projects.
6) Import the Project Folders
Click the Import button.
The next step is to upload the Project Folder that contains the repository and workspaces needed for this web application.
Go to the File Explorer window. Navigate, to the FMEData2019 folder, click Resources, select REST API, then myThirdApp.
In this folder, there are two .fsproject files. The WebApplication project contains the workspaces and the repository needed for the web application.
Additionally, upload the BestPracticeAnalysis.fsproject file. This project folder contains additional images for use with the KMLStyler. This allows the user to have more symbolization options when creating KML.
Drag and drop the WebApplication.fsproject, then select Import. This will Import the WebApplication project into your FME Server. Then repeat the same process to upload the BestPracticeAnalysis.fsproject file.
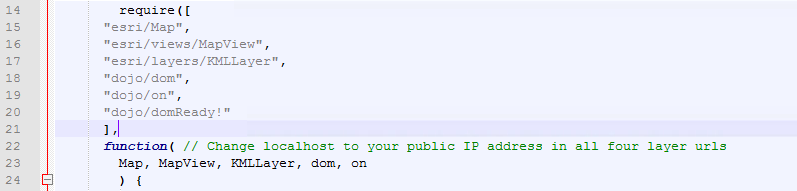
7) Review the require and the function section
In the ArcGIS API there are many functions, objects, and classes stored in modules. These modules have to be called to use the functions listed. On lines 14-20 the modules are loaded. On lines 22-23 the code references the classes and stored in the modules.
8) Add Web Service URLs for each new KMLLayer Created
Line 26-47 contains the layers of the map. Here, we are creating a new KMLLayer, this will create a layer from the Web Service URL from the server. For each layer, an id is required. Additionally, the visibility should be initially set to false.
Now, we need to access our FME Server and find the Web Service URLs for each layer.
Log into your FME Server as the admin. On the left hand side of the screen find the Repositories tab. Select repositories and then select the WebApplication repository. Find webapp.skytrains.fmw, go to the Advanced dropdown menu.
Select, Share this Workspace. Click OK to create a new token. Each time you create a new Web Service URL through the FME Server interface it will create a new token.
Copy the Web Service URL Example.
![]()
Paste the Web Service URL into the URLs section of the transporationLyr (line 27).
var transportationLyr = new KMLLayer({
          url: "http://FMETRAINING/fmedatastreaming/WebApplication/webapp.skytrains.fmw?&token=<youtoken>", // Skytrain Layer
          id: "skytrainlayer",
          visible: false
        });
Go to Run Workspace. Select, the WebApplication Respository and the Workspace webapp.skytrainbuffer.fmw. Go to the Advanced section and click Share this Workspace. Click OK to accept the token. Then, copy the Web Service URL into line 33.
var skytrainbufferLyr = new KMLLayer({
          url: "http://FMETRAINING/fmedatastreaming/WebApplication/webapp.skytrainbuffer.fmw?token=<yourtoken>", // Skytrain Buffer Layer
          id: "skytrainbufferlayer",
          visible: false
        });
Go to Run Workspace. Select, the WebApplication Respository and the Workspace webapp.parks.fmw. Go to the Advanced section and click Share this Workspace. Under Additional Permissions select the Data Resource. Click OK to accept the token. Then, copy the Web Service URL into line 38.
var parksLyr = new KMLLayer({
          url: "http://FMETRAINING/fmedatastreaming/WebApplication/webapp.parks.fmw?SourceDataset_MITAB=%24(FME_SHAREDRESOURCE_DATA)%2FWebApplication%2FParks%2FParks.tab&token=<youtoken>", // Parks Layer
          id: "parkslayer",
          visible: false
        });
Go to Run Workspace. Select, the WebApplication Respository and the Workspace webapp.foodTrucks.fmw. Go to the Advanced section and click Share this Workspace. Click OK to accept the token. Then, copy the Web Service URL into line 43.*
var foodLyr = new KMLLayer({
         url: "http://FMETRAINING/fmedatastreaming/WebApplication/webapp.foodTrucks.fmw?DestDataset_OGCKML=%24(FME_SHAREDRESOURCE_DATA)%2FSienna%2FOutput%2FfoodTrucks.kml&token=<youtoken>", // Food Truck Layer
         id: "foodlayer",
         visible: false
       });
Now, all of the URLs are in place. However, the URL with FMETRAINING will not work. We need to replace FMETRAINING to your Public IP Address.
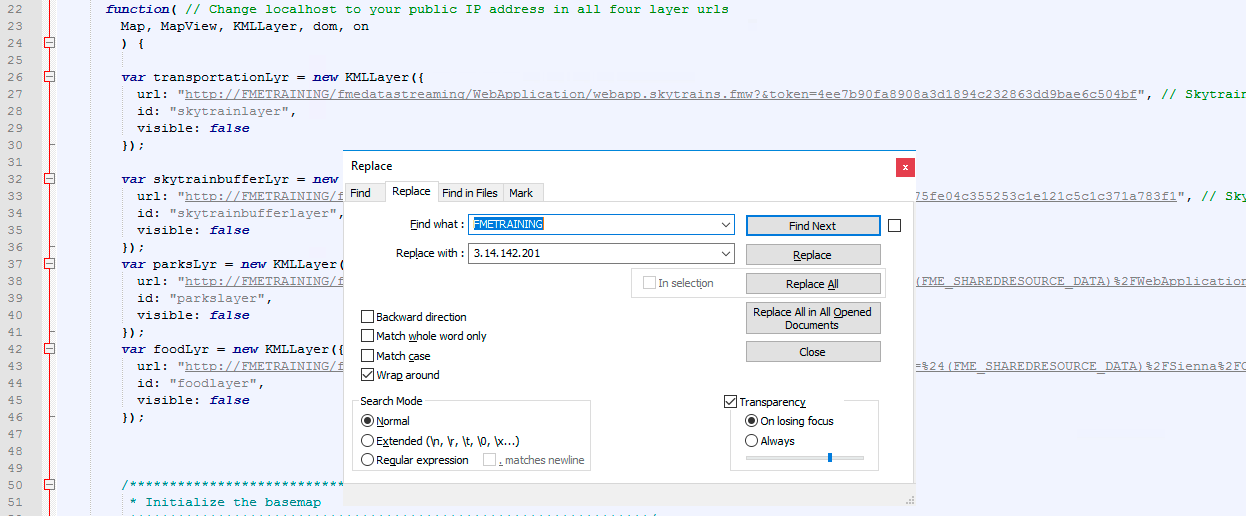
9) Update FMETRAINING to your Public IP Address in the URLs
Now, we are going to find our Public IP Address by visiting whatismyip.com.
Next, we are going to copy the URL listed as the Public IP Address.
Now, we can modify the URLs we previously inserted in the last step. In Notepad ++, use the command Ctrl + H to open the Replace menu.
In the Replace menu, under Find what: write FMETRAINING, under Replace with paste the IP Address found previously.
10) Update the basemap used in the map
The code to initialize the basemap (lines 50-55) needs to be updated with the basemap name.

On line 54, add "topo" after basemap:
var map = new Map({
         basemap: "topo"
       });
11) Add the Layers to map.add
Currently, there are no layers in the map.add function (lines 60-63). We need to update the map.add to include the layer variables we assigned previously.
/*****************************************************************
 * Add the layers to the map
 *****************************************************************/
map.add(transportationLyr);
map.add(skytrainbufferLyr);
map.add(parksLyr);
map.add(foodLyr);
12) Update the center of the map and the zoom level
Next, in the code (line 67-76) we can modify the code to adjust the center and zoom level. In the square brackets on the center variable (line 74) insert the coordinates -123.10, 49.268. The zoom level (line 75) should be set to 14.
/*****************************************************************
 * Creates the view for the basemap, adjusts the center and the zoom level.
 *****************************************************************/
var view = new MapView(
{
    container: "viewDiv",
    map: map,
    center: [-123.10, 49.268],
    zoom: 14
});
13) Review the code to create the toggle variables
In the next section of code (lines 78-86). Variables for the toggles are created using dom.byId, this will get the layer objects created previously.
/*****************************************************************
 * Variables are created for the Toggles, these
 * toggles are attached to the ids assigned to the checkboxes
 *****************************************************************/
var streetsLyrToggle = dom.byId("streetsLyr");
var skytrainbufferLyrToggle = dom.byId("skytrainbufferLyr");
var parksLyrToggle = dom.byId("parksLyr");
var foodLyrToggle = dom.byId("foodLyr");
14) Add the Code to toggle the visibility of the food layer
The next section of code (line 90-107), changes the visibility of the layer based on if the toggle is checked. The code for the foodLyrToggle has been omitted.
On line 105 write foodLyr.visible = foodLyrToggle.checked;
/*****************************************************************
 * The following code manipulates the visibility of the layer.
 * When the layer is checked then the layer becomes visible.
 *******************************************************************/
on(streetsLyrToggle, "change", function()
{
    transportationLyr.visible = streetsLyrToggle.checked;
});
on(skytrainbufferLyrToggle, "change", function()
{
    skytrainbufferLyr.visible = skytrainbufferLyrToggle.checked;
});
on(parksLyrToggle, "change", function()
{
    parksLyr.visible = parksLyrToggle.checked;
});
on(foodLyrToggle, "change", function()
{
    foodLyr.visible = foodLyrToggle.checked;
});
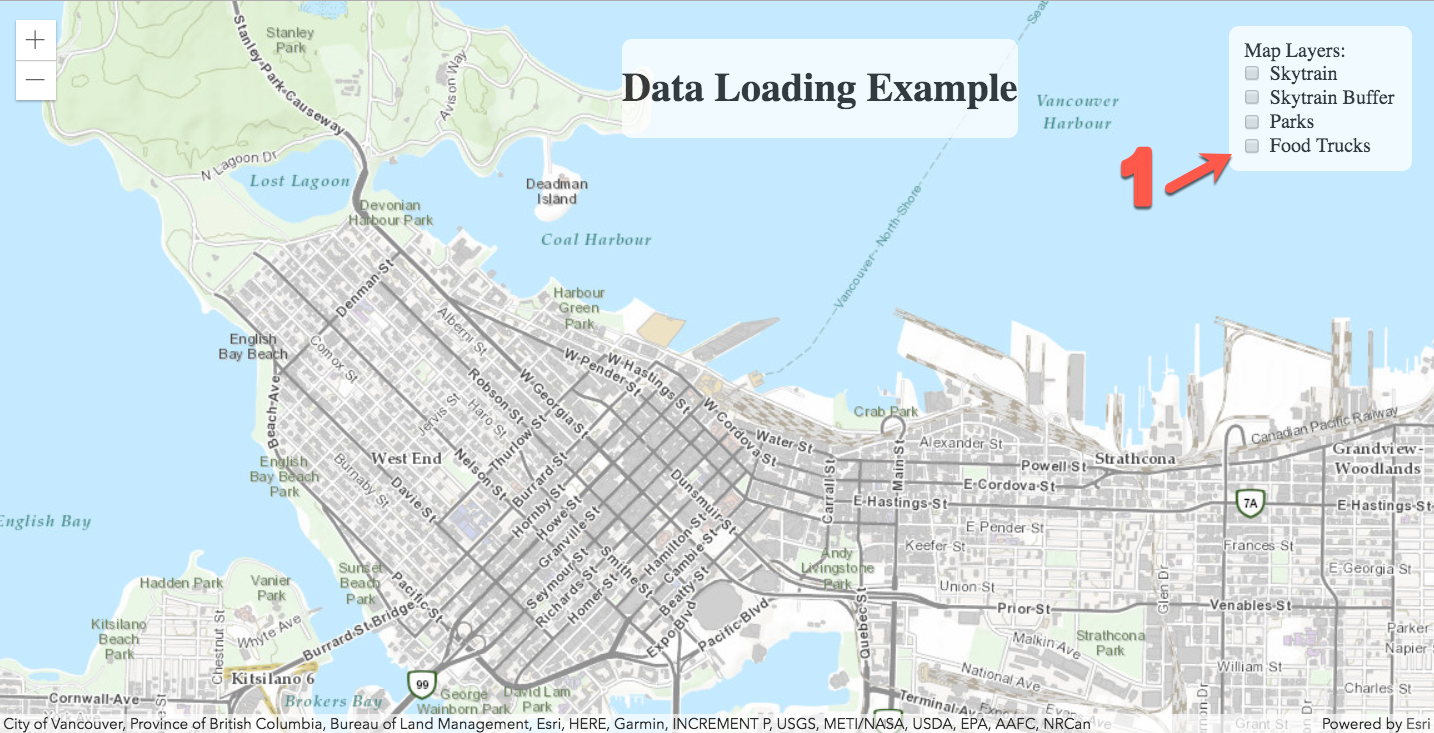
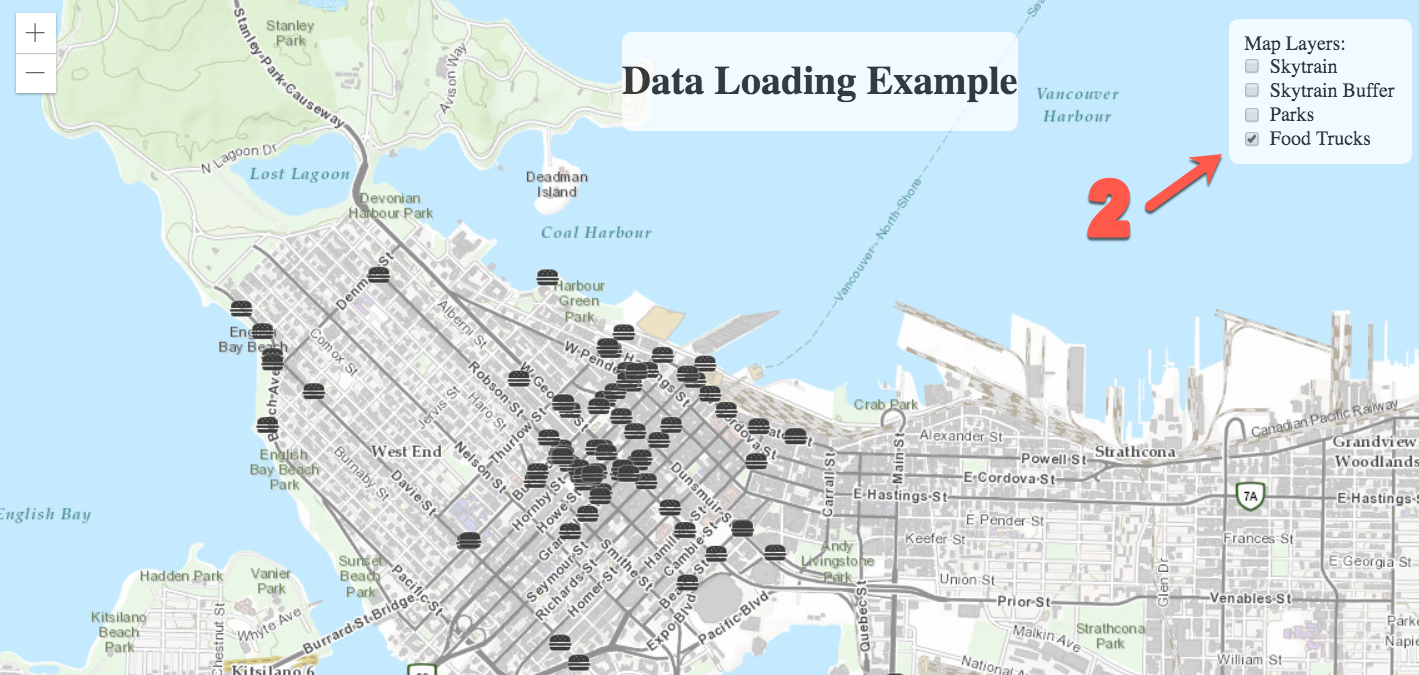
16) Test the Page!
Save the file and visit http://localhost:8000/MyThirdApp/myThirdApp.html
When you test out the page, you should be able to select and de-select different layers. Each layer runs a workspace on your FME Server.
| CONGRATULATIONS |
By completing this exercise you have learned how to:
|