Figure 9.8: Polar Cloud printer dashboard MANAGE button
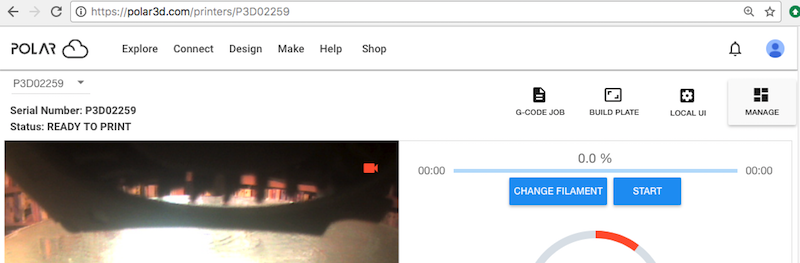
From the list of printers in either “TILE” or “LIST” display, (see Figure 9.3 or Figure 9.4, respectively), click on the printer of interest to get to the printer dashboard screen. Clicking the “MANAGE” button on a printer’s dashboard screen, see Figure 9.8, will take the printer’s owner and managers to a printer manage screen such as shown in Figure 9.9. (Users of a printer who are not a manager will only see a more limited manage screen; see Figure 9.10.)
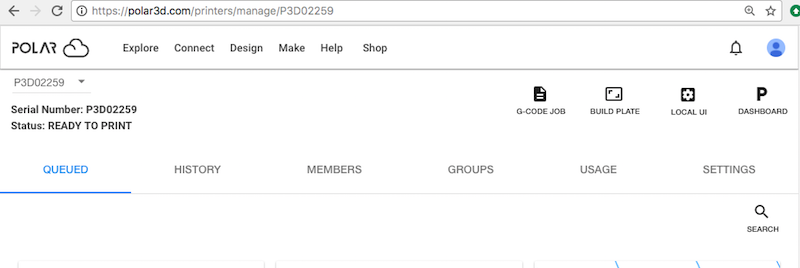
The very first time you go to a printer’s “MANAGE” screen, the “QUEUED” tab will be highlighted, and the printer’s queue of print jobs displayed; subsequently, clicking “MANAGE” will take you directly to whichever of “QUEUED”, “HISTORY”, “MEMBERS”, “GROUPS”, “USAGE”, or “SETTINGS” you last viewed.
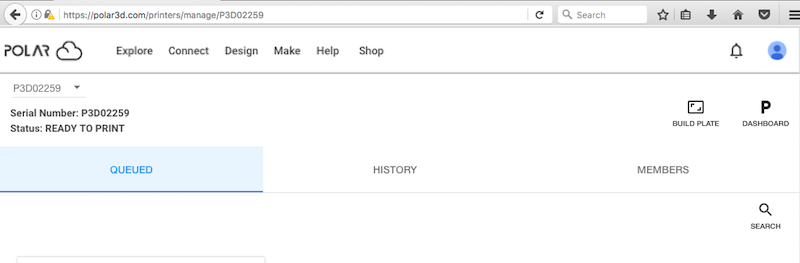
Note that only the printer owner and managers see the “GROUPS”, “USAGE”, and “SETTINGS” tabs on the “MANAGE” screen; other Polar Cloud members allowed to use a printer may only access the “QUEUED” and “HISTORY” tabs (under which they will only be shown their own print jobs, not other users’ print jobs), as well as the “MEMBERS” tab.
The drop-down menu of printer names at the upper left of the printer manage screen (and the printer dashboard screen) allows you to switch conveniently between printers you manage, while under that menu appears the serial number and status of the currently selected printer.
The printer manage screen (as well as the printer dashboard screen) also includes navigation buttons at the upper right. From right to left:
Note that the “LOCAL UI” and “UPDATE” buttons (when available) are only displayed to printer managers, as is the “G-CODE JOB” button. Note also that if a printer is offline (not currently connected to the Polar Cloud), then any “LOCAL UI”, “COMMANDS”, and “UPDATE” buttons will be grayed-out (inactive).
In addition to the printer selection drop-down menu at the top left, and the navigation buttons for getting to the printer dashboard or build plate screen, as well as possibly additional navigation buttons to access the printer local web interface, printer private commands, or printer firmware updates, the main tabs of the printer “MANAGE” screen are: