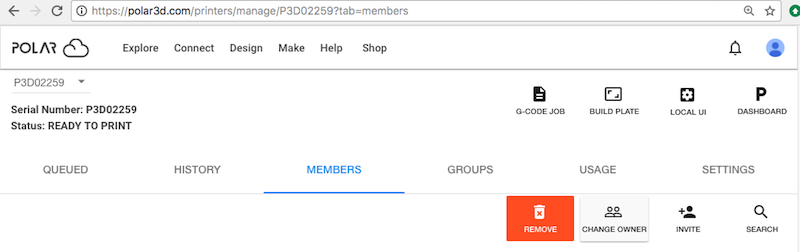
Figure 9.11: Polar Cloud printer MEMBERS screen CHANGE OWNER button
Occasionally it may be necessary or useful to switch printer ownership, or to attach a printer originally connected by some other Polar Cloud member to your Polar Cloud account: for instance, if you are taking over or acquiring a previously used printer from another teacher.
There are four levels of “ownership/management change” of a printer:
The printer “MEMBERS” screen’s “CHANGE OWNER” button is intended for this sort of case, where only the Polar Cloud ultimate authority for the printer is changing – where the list of printer “MEMBERS” is not otherwise changing, and where retaining the printer’s “HISTORY” of what it has performed may be desirable.
For non-Polar3D printers, also be sure to change the printer’s own settings for registration to a Polar Cloud account (“Email” and “PIN Code”) to the proper values for the new Polar Cloud owner of the printer.
On the printer itself, obsolete/invalidate the printer’s registration in the Polar Cloud: e.g., use the Polar3D printer local web interface “Reset Printer on the Polar Cloud” button, or the DREMEL 3D45 printer’s “FACTORY RESET” button. The former printer will now remain in the Polar Cloud under the name serial-number-DELETED-date , with a status of “OFFLINE”; (for an example of how such an obsoleted printer then appears in the Polar Cloud, see Figure 10.64).
Use the printer “SETTINGS” screen’s “DELETE PRINTER” button. (This might be the case for a test printer, or at the end of a project or a school year, if no Polar Cloud records regarding the printer need be retained.)
A new owner of a non-Polar3D printer, if he or she wishes to connect the printer to the Polar Cloud, will presumably enter his or her own Polar Cloud account details (“Email” and “PIN Code”) into the printer’s configuration – but before you hand over the printer, if you don’t want to have the chance that a new owner omits configuring their own values on the printer and instead accidentally re-registers the printer back to your Polar Cloud account, you may prefer to either change your own account “PIN Code”, or delete (or alter) your account values from the printer configuration, either via a printer reset such as the DREMEL 3D45 printer’s “FACTORY RESET” button, or simply by altering on the printer the values you had previously entered for your own Polar Cloud account.
Note that in any of the cases 2, 3, or 4, the printer’s local network configuration may need to be changed, as well as its Polar Cloud owner registration. And while it may be up to any new owner of the printer to properly configure the printer’s new local network configuration, you may prefer to reset the printer’s local network configuration (and in particular remove any local network password from the printer configuration) before handing over the printer for cases where the printer is being transferred outside your organization. (On the other hand, even the case 4 of “DELETE PRINTER” might not call for local network configuration changes, if you were simply performing some local testing of the printer.) If you do need or want to clear old local network configuration from a printer before transferring it, for a Polar3D printer use the “Reset Network” button of the local web interface, or for a non-Polar3D printer perform a reset (such as via the DREMEL 3D45 printer’s “FACTORY RESET” button) or simply delete or alter the network configuration details on the printer.
If you are merely switching ownership at the same site, without changing connection details (network details), and wish to allow any other users of the printer (e.g., class or club members) to continue to use that same printer without obsoleting the existing printer queue and history of print jobs – as for instance, when a new teacher is assigned to take over an existing class and printer – then the “CHANGE OWNER” button on the printer’s “MEMBERS” screen under the printer manage screen, see Figure 9.11, allows the current printer owner to conveniently reassign printer ownership to another Polar Cloud member who is (individually) in the printer’s “MEMBERS” list; see Figure 9.12.
If the Polar Cloud member to whom you want to transfer ownership of the printer is not currently a “Permitted User” or “Manager” in the printer’s “MEMBERS” list, note that you will need to first “INVITE” the desired person to become a user or manager of the printer; (in particular, note that a current printer member who is solely a “Group User” must accept an invitation to become an individual user or manager of the printer first, before you can invite him or her to then become the printer owner). Once that person accepts the invitation and is (individually) in the printer’s “MEMBERS” list, then when you click “CHANGE OWNER” that member will appear with an active (i.e., dark gray) checkbox in the list presented on the “CHANGE PRINTER OWNER” pop-up screen and may be selected as the new printer owner.
Note that with “CHANGE OWNER”, the printer “MEMBERS” will remain unchanged (other than promoting the new owner, and demoting you to printer manager status), and also the print queue and printer history will remain unchanged: any other printer users may continue to use the printer, any pending print jobs can continue without interruption, and the printer history will retain its list of jobs performed.5
Note also, that unlike when you “INVITE” someone to manage or use a printer, which generates an invitation which the recipient must choose to “ACCEPT” in order to take effect, performing “CHANGE OWNER” for a printer occurs immediately, without involving action by the new owner.
For a non-Polar3D printer, in addition to changing the owner from the Polar Cloud point-of-view via the “CHANGE OWNER” button, the new printer owner will also need to reconfigure the printer itself with his or her own Polar Cloud account information (“Email” and “PIN Code”).
Depending on whether the printer is also being switched to a different local network, it may also be necessary to reconfigure the printer’s local network connection information.
When a printer previously registered in the Polar Cloud is moved to an entirely different site or organization, or is being drastically re-purposed, then either the printer’s old owner or new owner may wish to first de-register the printer from the Polar Cloud, and then the new owner should re-register the printer to effectively “start afresh” with the printer. The process for starting afresh with a printer, attaching a previously used printer at a different site, is essentially that of attaching a new printer to your Polar Cloud account, as overviewed in Section 9.1. However, there are one or two preparatory steps that the prior owner (or you, if the prior owner omitted such steps) may wish to perform prior to transferring and re-registering the printer.
When a Polar3D printer is moved to a new site, the prior owner may have chosen to delete their local network profile information from the printer via the “Reset Networks” button of the “Network” screen of the Polar3D printer local web interface, and may have obsoleted their ownership of the printer in the Polar Cloud via that same screen’s “Reset Printer on the Polar Cloud” button or (more drastically) via the “DELETE PRINTER” button on the printer’s management “SETTINGS” screen. Performing “Reset Printer on the Polar Cloud” rather than “DELETE PRINTER” is recommended in particular when changing ownership of a Polar3D printer in high use as it means that any remaining print jobs queued to the printer remain visible to members on a printer now named P3Dserial-digits-DELETED-date , so that members can move such old jobs to another printer to which the members have access – it is less disruptive to the printer’s members than “DELETE PRINTER” (which discards all pending print jobs).
When a DREMEL 3D45 printer is moved to a new site, the prior owner may have chosen to restore the printer to factory defaults (removing their Polar Cloud account “Email” and “PIN Code” from the printer’s memory) via the DREMEL 3D45 printer’s “FACTORY RESET” button (under “TOOLS”, “SETTINGS” on the DREMEL 3D45 printer control panel). Any existing print queue or history for that printer will then remain visible in the Polar Cloud as information for an obsolete printer now named DREMserial-digits-DELETED-date , and any existing print jobs may potentially be moved to a different printer. Or the prior printer owner may have chosen to simply use the “DELETE PRINTER” button to remove the printer entirely from the Polar Cloud (discarding the printer “MEMBERS” list, the printer history, and any existing print queue); however, the DREMEL 3D45 printer itself likely has cached the Polar Cloud account details (“Email” and “PIN Code”) of the prior owner, which “DELETE PRINTER” will not affect; (so from the point of view of the prior printer owner, performing a physical “FACTORY RESET” of the printer is recommended, though this discards the printer’s local network configuration as well).
After obsoleting or deleting the printer’s prior registration in the Polar Cloud, the next issue to consider is whether the printer’s prior network connection configuration is still available and appropriate (as when a printer is being transferred for a new use at the same physical site and none of its local network configuration was wiped out by the prior owner), or whether the printer’s network configuration must be reconfigured. But if the local network configuration was wiped out, or if the printer was previously connected via some different-than-yours local network (as when you have acquired a printer formerly used at a different site), then you will need to start at the steps for configuring local network use.
If a Polar3D printer was already in use in your 3D printer lab or classroom, so already properly configured to use your local network (and the prior owner didn’t click “Reset Networks” thereby deleting the local network profile), and you merely need to take over as its owner, then you should start your re-registration of the printer by connecting to the printer’s local web interface and clicking “Reset Printer on the Polar Cloud” on the “Network” screen; then go directly to connection step 10 (discussed in detail in Section 1.1: Connecting the Polar3D printer to the Polar Cloud via WiFi of the Polar3D Printer Guide, but which is identical whether connecting via WiFi or Ethernet cable), to add the printer to your Polar Cloud account. With the printer turned on (and its LED lights appearing as POLAR3D, i.e., blue over white), then from the Polar Cloud main menu select “PRINTERS” and then on that screen click the “ADD” button (“+”); see Figure 1.14 of the Polar3D Printer Guide. Then continue on at the resulting “ADD A PRINTER” screen, entering the serial number of the printer, and going through the colored light security check, etc., as discussed in Chapter 1: Get connected to the Polar Cloud of the Polar3D Printer Guide.
For a DREMEL printer, if the printer’s “FACTORY RESET” button was used, that will have wiped out the printer’s local network configuration, as well as obsoleting its Polar Cloud registration, so you will need to re-perform local network connection for the printer. Then register the printer to your Polar Cloud account, as discussed in the Dremel 3D45: Connecting to the Polar Cloud guide.
5Which Polar Cloud member can view which print jobs in the printer history may change, however: a printer owner or manager has full access to see the print jobs submitted during the time periods of their management of the printer, but not those submitted during other time periods.
