Note: ● District data administrators may restrict your ability to add/edit user and class data. If you do not have access and require support, you must contact the district data administrator team that manages rostering for your district. ● When you create or edit user and class accounts manually, the updates directly alter the rostering data stored in the centralized data store and impact all HMH Rostering Platforms. If your district is using HMH recommended best practices of integrating to Clever, ClassLink, or a SIS, then all rostering changes should take place in the rostering system and not using the manual entry options. To learn more, see the HMH Rostering Service Overview topic.
|
1. On the My Schools page, click Create Class.
The Create Class page appears.

2. If you are associated with more than one school, select the school to which the new class is being created.
3. Complete the create new class fields as follows.
Field |
Action |
Lead Teacher (Optional) |
➔ Select a lead teacher from the list or begin typing the teacher name and then select the teacher from the list. Only one lead teacher is allowed for a class. |
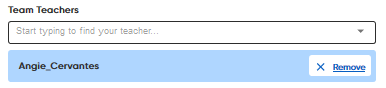
Team Teacher (Optional) |
Note: The lead teacher and the team teachers both have the same capabilities to manage classes, including adding and removing students and creating assignments. ➔ Select a team teacher from the list or begin typing the teacher name and then select the teacher from the list. Multiple team teachers are allowed for a class. To add additional team teachers, select another team teacher.
|
Class Local ID (Optional) |
➔ Type the class ID. Note: HMH recommends that you provide a Class Local ID that matches a ClassID from your student information system (SIS). If you do not provide one, HMH autogenerates an ID, which will not be able to be matched back to your SIS. |
Class Name |
➔ Type the name of the class. |
Grade |
➔ Select the class grade from the list. |
4. Click Save. A message appears confirming that the class has successfully been added and offering a link to the Class Overview page for the newly added class.
5. Click the X to close the message.
6. Click Save. A message appears at the top of the page confirming that the class is added.
See Also: