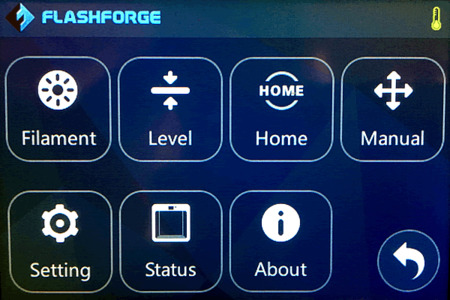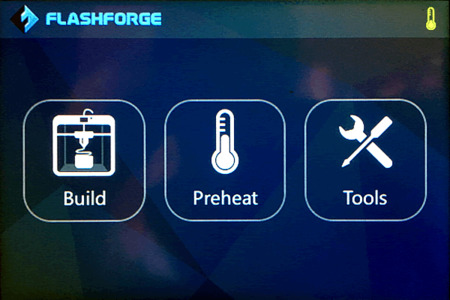
Figure 3: Main Menu
The Inventor must connect to the Internet in order to communicate with the Polar Cloud. This connection can only be established using the printer’s built in WiFi support.
To configure the Inventor’s WiFi, select the “Tools” item on the main menu as shown in Figure 3.
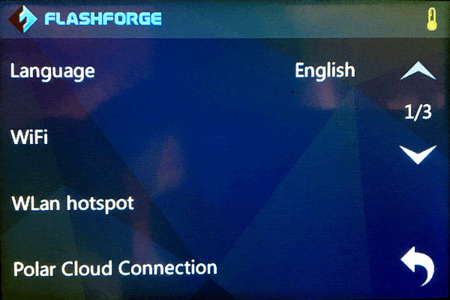
On the “Tools” menu, then select the “Setting” item seen in the lower left of Figure 4.
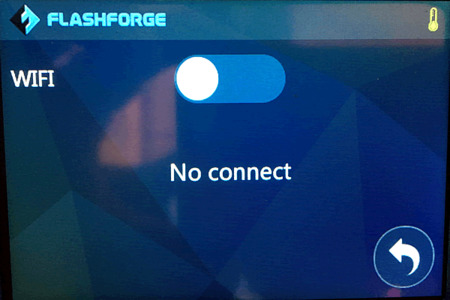
Finally, in the settings page, select the “WiFi” item by touching it. This is the second item listed in Figure 5.
To enable and configure the printer’s WiFi, touch to the immediate right of the white circle above the phrase “No connect” as seen in Figure 6 below.
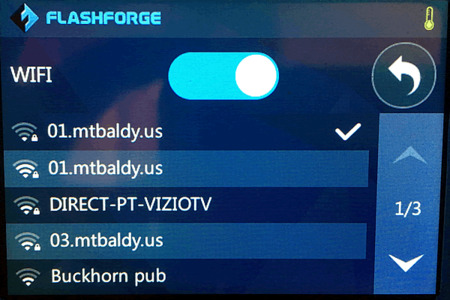
You are “sliding” the circle to the right to “enable” the WiFi as seen in Figure 7.
Once the WiFi is enabled, the printer will scan for nearby WiFi networks and present a list of those which it finds. If a password is required for the network, you will be asked to enter it using the touchscreen.
After the network is selected and any necessary password entered, the printer will then connect to the network. If it is successful, it will then display a WiFi icon across the top of the screen. Touch the “Back” icon to return to the prior menu. The back icon is the arrow which turns to the left and is suggestive of “return”.
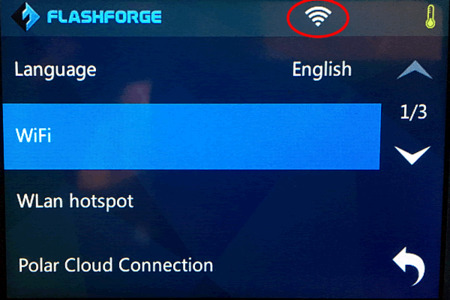
When the printer is successfully connected to your network and you have returned to the “Setting” menu, your screen should appear as shown in Figure 8. That figure shows the WiFi icon circled in red: if you see that icon, then your printer is connected to your network. If you do not see it, then the printer is unable to connect to your network.