Figure 2.1: Control panel: FIRMWARE UPDATE AVAILABLE

If you have not already done so, connect your Dremel 3D45 printer to a local network; see Section 1.1.
Then, when you power on (rocker switch on the right hand side of) your network-connected Dremel 3D45 printer, the printer’s control panel touch screen may display a screen such as shown in Figure 2.1, indicating that there is a Dremel firmware update available for your printer.
If such a screen appears, then for the moment select “LATER”, as some firmware updates could be problematic for Polar Cloud compatibility. (Check with both Dremel and Polar 3D before choosing to update your firmware, so as not to interfere with Polar Cloud compatibility.)
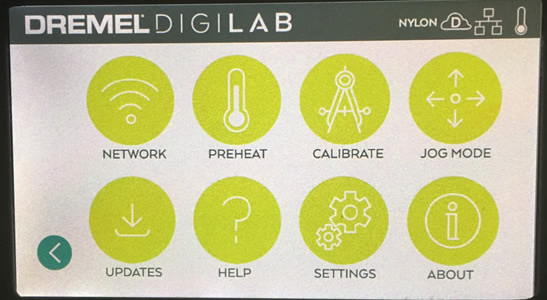
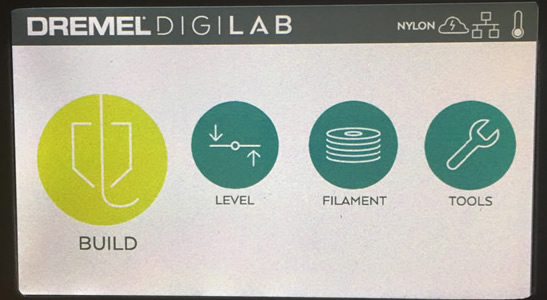
Figure 2.2 shows the control panel home screen; this is the first screen you will see if no firmware update is available for your printer, or is the screen you will see after declining to update your firmware.
On this screen, note the icons at the top right. The icons shown in Figure 2.2 indicate, from left to right:
To begin configuration of Polar Cloud connection, at the control panel home screen, select “TOOLS”; that will take you to the screen shown in Figure 2.3.
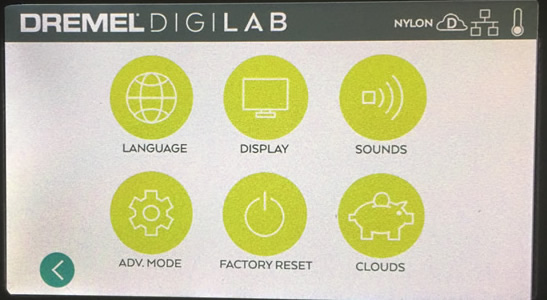
At the screen shown in Figure 2.3, select “SETTINGS”; that will take you to the screen shown in Figure 2.4.
At the screen shown in Figure 2.4, select “CLOUDS”; that will take you to the screen shown in Figure 2.5.
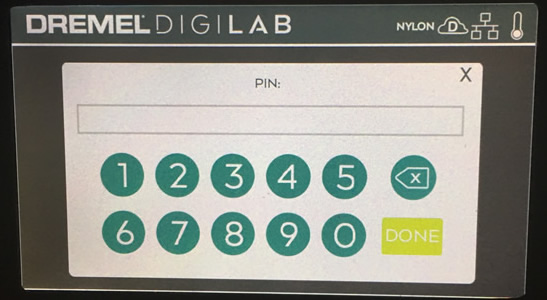
Select “POLAR CLOUD”; that will take you to the screen shown in Figure 2.6.
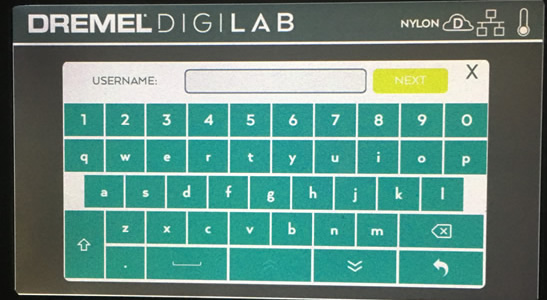
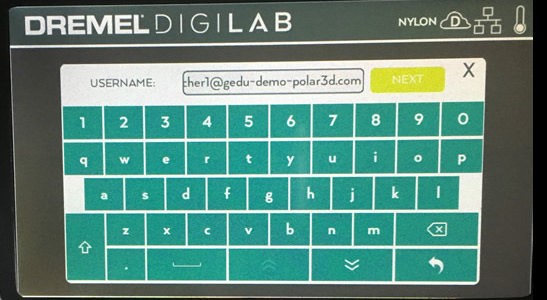
At the enter “USERNAME” screen, enter the email address1 associated with your Polar Cloud account (as seen in Figure 1.3); Figure 2.7 shows an example of the Dremel printer “USERNAME” entry screen with an email address typed in. Note that to enter “special” characters (such as the at character, @, or a hypen, -) you will need to press the double-down-arrow key (to get access to a screen of special characters).
Once you have finished typing in an email address associated with your Polar Cloud account, press the “NEXT” key; that will take you to the screen shown in Figure 2.8.
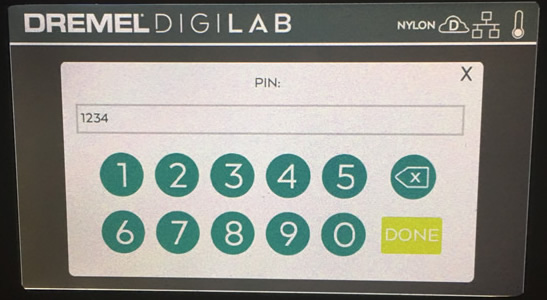
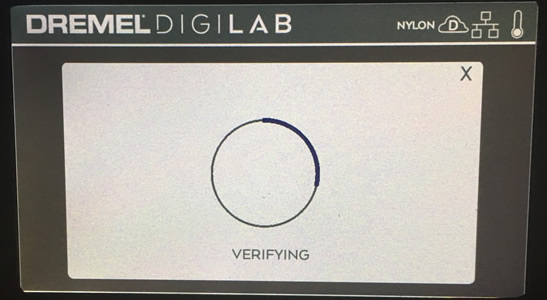
Enter your Polar Cloud account “PIN Code” (see for instance Figure 1.3) at the Dremel control panel “PIN” screen, as shown in Figure 2.9, and then press “DONE”. After you press “DONE”, you will see a “VERIFYING” screen, as shown in Figure 2.10.
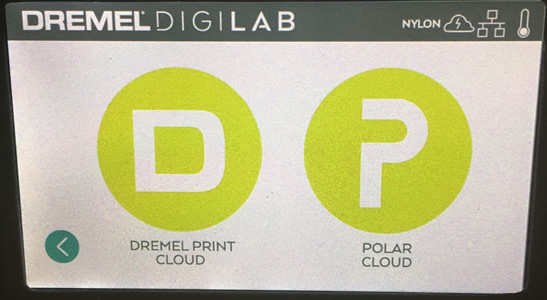
If you entered your Polar Cloud account details correctly and your Dremel printer was able to verify that it successfully registered itself to your account in the Polar Cloud, then you will return to the “CLOUDS” screen, but now the cloud icon will be updated indicating Polar Cloud connection; see Figure 2.11. (If instead you see an error screen, as in Figure 2.16, you likely have mis-entered your “Email” or “PIN Code”; see Section 2.2.)
Note that a cloud icon with a lightning bolt (as shown in Figure 2.11 and Figure 2.12) means that the printer is connected to both the Dremel cloud and the Polar Cloud; a cloud icon with a “P” inside would indicate that the printer was connected only to the Polar Cloud (but not to the Dremel cloud).
Note that if the cloud icon continues to show a “D” inside, and does not change to showing a lightning bolt inside, that indicates that the printer, although connected to the Dremel cloud (so enjoying an Internet connection) has not been able to connect to the Polar Cloud. This likely means that your local network blocks outgoing TCP ports 80 and/or 443; you will probably need to talk to your network or IT administrator. See http://about.polar3d.com/yellow3d.
Press the back arrow key (towards the lower right of the control panel “CLOUDS” screen, as shown in Figure 2.11) to return to the control panel home screen, as shown in Figure 2.12.
Now your printer is registered in the Polar Cloud!
1Note that if your Polar Cloud account has more than one email address associated with it, you may enter any of the email addresses associated with the account – although the original, primary email address associated with the Polar Cloud account is most commonly used.