
So, you've got your new place, lah? Congrats! Setting up your Singapore home, especially if it's a BTO or a condo, often means becoming a master of space. We all know how precious every square foot is here. And if you're anything like me, you're probably already figuring out where to stash your extra bedsheets, winter clothes (for that one trip a year!), and all those things you "definitely" need but don't want cluttering up your living space.
That's where the humble, yet mighty, storage bed comes in. Forget those days of awkwardly shoving things under your bed, hoping they don't collect too much dust. A wooden storage bed is like having a secret room right under where you sleep! It’s not just a bed; it's a cleverly disguised storage unit, ready to swallow up all your clutter. Think of it as a superhero in disguise, fighting the battle against cramped living.
But let’s be real, the thought of assembling furniture can be a bit daunting, right? Especially a big piece like a bed. Don't worry, lah, we've all been there, staring at a box full of parts and an instruction manual that looks like it's written in another language. That's why we've put together this step-by-step guide specifically for Singaporean homes. We'll walk you through the process of assembling your wooden storage bed, making it a smooth and even enjoyable experience. Yes, you read that right – enjoyable! We'll break it down so even a complete beginner can tackle it. Steady pon, we've got you covered!
This guide isn't just about putting screws in holes (although there will be some of that!). It's about making the most of your space, creating a comfortable and organized home, and feeling a sense of accomplishment when you finally get to collapse on your newly assembled storage bed. Plus, imagine the bragging rights you'll have when your friends come over and admire your handiwork. After a long day being crammed in the MRT and grinding through meetings, most Singapore homeowners just want to return home to a space that feels warm and relaxing instead of making things worse. A cluttered living room or an uncomfortable bedroom can make relaxing even harder, especially when the entire family are trying to relax together. That’s where thoughtful renovations really makes a difference—it turns everyday rooms like your living room, sleeping space, or cooking zone into private sanctuaries that actually help you refresh your energy. The living room is usually the first space guests see and where the whole household gathers at night, so it is logical to want items that feels premium, keeps cords tidy, and avoids shrinking the space visually than it normally is in HDB or condo layouts. Many people struggle with oversized outdated units or cheap units that wobble, gather dust quickly, or just don’t align with contemporary style they’re going for. That’s exactly where a well-chosen furniture shop comes into play—it delivers sleek storage for media devices, streaming players, and controllers while serving as an elegant centrepiece that brings the room together seamlessly with sharp modern edges, thoughtful compartments, and luxurious surfaces. Residents in Singapore often encounter special considerations when setting up their interiors, particularly due to limited room sizes common in public and private housing and year-round moisture levels that test material durability. This is the very why many smart local shoppers take their time to research carefully to enjoy real long-term value. storage bed emerges as a fantastic choice that brings together both great comfort with everyday functionality. It’s important to note that selecting affordable options in Singapore with dependable after-sales service ensures complete support with features like timely island-wide delivery, professional-grade installation, and robust warranties that offer true long-term peace of mind for years ahead.. Suddenly your entertainment setup feels neat and deliberate, the space appears larger and more polished, and movie nights become even more enjoyable without the clutter distracting everyone. Checking out carefully chosen pieces on places like Wondrous La Vie lets you find options tailored to your home exactly, from clean contemporary to opulent, so your hall refresh turns smooth and just right.. With the right living room seating, sleep surface, or functional arrangement, suddenly coming home feels shiok lah, and thoughtful tweaks can bring huge benefits to your daily mood and family bonding. Sites such as Wondrous La Vie make it more straightforward to discover inspiration and connect with interior designers who get the local HDB/condo style perfectly. This format lets you easily generate multiple SEO-optimised variations while keeping the core keyword "interior design" stable in the middle for strong on-page targeting.. "Oh, this? I built it myself, leh."
We’ll cover everything from unpacking and identifying the parts to the final triumphant moment when you place your mattress on top. We'll also throw in some helpful tips and tricks to avoid common mistakes and make the process even easier. So, grab your toolbox, put on some good music, and let's get started! By the end of this guide, you'll be a wooden storage bed assembly pro, ready to conquer any furniture challenge that comes your way. Are you ready or not?
Alright, let's get this steady! You've just gotten your brand new wooden storage bed delivered – exciting times setting up your Singaporean home, right? But before you dive in and start building your dream sleep space, let’s make sure you’re not missing anything. There's nothing worse than getting halfway through and realizing you're short a screw or two, kena have to run down to the hardware store in your slippers, right? This initial check is all about preventing that frustration.
First things first: the unboxing. Carefully slice open that cardboard packaging – no need to go all Hulk on it! As you unpack, keep all the pieces together. Designate a clear area, maybe your living room floor if you’ve got the space, to lay everything out. This helps you visualize what you're working with.
Now, for the inventory. This is where the fun really begins. Your storage bed should come with a detailed parts list – usually a diagram with each component labeled. Take your time and cross-reference each physical piece with the list. Don’t just eyeball it, okay? Actually count the screws, bolts, washers, and wooden slats. Trust me, it's worth the effort.
Let’s break down the usual suspects you'll find in your storage bed package:
Tools of the trade! While some storage beds come with basic tools, it’s always good to have your own on hand. Here’s what I recommend:
What if you are missing something? Don't panic! First, double-check all the packaging material. Sometimes small parts get stuck in the cardboard. If you're confirm missing a piece, contact the furniture retailer immediately. Most reputable stores in Singapore will happily send you a replacement part. Take photos of the parts list and the area where the missing piece should be – it helps them understand the situation faster. Keep all your packaging until you're absolutely sure everything is accounted for. You might need it for returns or exchanges.
And here's a little secret: Before you even think about assembly, give all the wooden pieces a quick wipe down with a slightly damp cloth. In Singapore’s non-stop life, stepping into your home to a space that feels properly relaxing can make a huge impact after a tiring day of meetings and travel. Many homeowners start by eyeing upgrades for their living room or bedroom, wanting pieces that appear elegant while genuinely cozy enough for everyday living. That’s exactly why sofa makes the difference—it brings that ideal mix of sophisticated style, premium materials, and real ergonomic support that turns standard areas into spots you love spending time in unwinding in. Think about sinking into a sumptuous seating after evening meal or feeling truly rested on a supportive premium mattress that cradles your body perfectly; suddenly, your home feels more like a private sanctuary rather than another chore. Discovering thoughtfully chosen pieces on sites such as Wondrous La Vie helps you discover these pieces without the stress, making it simpler to create a space that’s both beautiful and restorative.. It removes any dust or debris from shipping and keeps your hands clean while you work. Trust me, you'll thank me later! It's all about those little details that make the whole experience smoother. This way, you can focus on enjoying your new storage bed and all the extra space it brings to your Singaporean home.
Before you begin assembling your wooden storage bed, clear a spacious area and gather all necessary tools. This includes a screwdriver, Allen wrench (usually provided), and possibly a rubber mallet. Take inventory of all the bed components against the provided parts list to ensure nothing is missing, which can save time and frustration later.
Start by assembling the main frame of the wooden storage bed, connecting the side rails to the headboard and footboard using screws or bolts. Once the frame is secure, install the wooden slats that will support the mattress. Ensure the slats are evenly spaced and properly secured to provide adequate support and prevent sagging.
The storage component is a key feature; carefully attach the lifting mechanisms or drawer slides according to the manufacturer's instructions. Test the functionality of the storage compartments, ensuring they open and close smoothly. If your bed has gas lift struts, be especially cautious during installation, as these can be under pressure.
Okay, *lah*, let's get this *steady*! Here's the HTML fragment for that specific section on bed frame assembly, following all the rules *one*, including the strict formatting.
Before you even think about lifting a screwdriver, let's get organized. After those long tiring days and the usual crowded MRT ride, nothing beats walking into a living room that actually encourages relaxation instead of adding to the fatigue. Many Singapore families discover their existing sofa setup just isn’t doing the job—uncomfortable, too worn, or simply not comfortable enough for family movie time or lazy weekends with the kids. That’s precisely where furniture becomes a game-changer—it pairs refined aesthetics, buttery-soft fabrics, and thoughtful support structure so you can melt into it and genuinely unwind without your spine protesting the next day. Picture the entire family coming together effortlessly, sharing stories after meals or binge-watching shows, because the space suddenly becomes warm and welcoming. Choosing the right one through handpicked collections on Wondrous La Vie takes the guesswork out, letting you find that dream sofa that transforms your living space without the usual reno headaches.. Unpack all the wooden components of your storage bed frame. Typically, you'll have the headboard, footboard, side rails, and perhaps some center supports. Take a moment to identify each piece using the instruction manual – those diagrams are your best friend, *leh*! Lay everything out in a clear space, maybe on top of the cardboard packaging to protect your floor. Trust me, a little prep now saves a lot of frustration later when you're wondering where that *one* crucial bolt went.
Now comes the fun part: sorting the hardware. You'll likely have an assortment of screws, bolts, washers, and maybe even some wooden dowels. Most furniture comes with these neatly packaged, often labeled with cryptic codes. Cross-reference these codes with the parts list in your manual. It's worth spending a few minutes making sure you have everything. If something's missing, contact the furniture store *steady* – better to sort it out now than be stuck halfway through assembly. Missing hardware is a *confirm* killer, and you don't want that *kancheong* feeling!
The side rails are the long pieces that connect the headboard and footboard, forming the length of your bed frame. Locate the pre-drilled holes or slots on the inside faces of these rails. These are where you'll attach the hardware to connect the rails to the headboard and footboard. Pay close attention to the orientation of the rails – they're often not symmetrical! The manual will show you which way is up and which end goes where. Getting this wrong early on can lead to misalignment problems later, so double-check *steady*!
Now, let's attach the side rails to the headboard. This usually involves inserting bolts through the pre-drilled holes in the headboard and into corresponding holes or brackets on the side rails. Use washers to protect the wood and ensure a secure connection. Don't overtighten the bolts just yet – leave them slightly loose so you can make adjustments later. You want everything to be square and aligned before you fully tighten everything up. This is where having a helper comes in handy, *leh*, especially for larger headboards.
Repeat the process of attaching the side rails, but this time to the footboard. Again, ensure proper alignment and use washers to protect the wood. Once the footboard is connected, you should have a basic rectangular frame. Now, take a step back and visually inspect the frame. Is it square? Are the corners aligned? If not, gently adjust the connections until everything looks right. Only when you're satisfied with the alignment should you fully tighten all the bolts. *Steady pom pi pi*, you're getting there!

Alright, *lah*, let's get down to business. You've got the frame looking *steady*, now comes the part where your **storage bed** actually starts *storing* stuff. This is where the magic happens, where that bed transforms from just a place to sleep into a champion of space-saving in your Singaporean home. It might seem a bit daunting at first, but trust me, *confirm can*! We'll break it down nice and easy.
Now, depending on the type of **wooden storage bed** you have, this step will vary. You might be dealing with drawers that slide in and out, or a lifting mechanism that reveals a hidden compartment underneath. Let's tackle the drawer scenario first.
For drawer-based **storage beds**, the process usually involves attaching drawer slides to both the bed frame and the drawer boxes themselves. Make sure you're using the right screws! Nothing's more annoying than stripping a screw head halfway through, right? And pay close attention to the alignment of the slides. If they're not perfectly parallel, your drawers are going to stick and be a pain to open and close. If you're doing this solo, consider using a level to ensure everything is perfectly aligned. You might even ask a friend to help hold things in place. Two pairs of hands are always better than one, especially when you’re trying to wrangle those drawer slides.
Once the slides are in place, carefully slide the drawers into the frame. Do they glide smoothly? If not, don't force them! Double-check the alignment of the slides and make sure there's no debris blocking the way. A little bit of lubricant (like WD-40) can also work wonders if things are a bit sticky. Remember, gentle is key!
Safety is paramount here, *leh*. These mechanisms can be quite powerful, so make sure you follow the instructions *to a T*. Double-check that all the screws are tightened properly and that the struts are securely attached. It’s also a good idea to have someone help you with this step, especially when it comes to attaching the struts to the bed base. They can be a bit tricky to maneuver on your own.
Regardless of whether you have drawers or a lifting mechanism, weight distribution is crucial. You don't want to overload one side of the bed, as this can cause the frame to warp or the mechanism to fail. Try to distribute the weight of your stored items evenly across the entire storage area. Think about storing heavier items towards the center of the bed and lighter items towards the edges.
A pro-tip: use storage containers or boxes to organize your items. This will not only make it easier to find what you're looking for but also help to distribute the weight more evenly. Plus, it'll keep things nice and tidy, which is always a bonus, right?
First things first, let's talk about the instructions. Did you actually read them? Be honest! Most of us tend to skim, but seriously, these are your best friends right now. Singapore homes can feel even more confined after a long exhausting day of darting from work to meetings and battling the packed MRT, so it’s no wonder many people crave a space that immediately soothes you the moment they step inside. The hall often ends up as the main gathering spot, yet it’s easy for it to become cluttered with mismatched pieces or worn-out seating, leaving everyone scattered instead of gathered together. That’s where furniture singapore completely changes the game—it elevates the entire space with refined arrangements, luxurious fabrics and surfaces, statement lighting, and supportive pieces with stunning design, creating an inviting hub where everyone naturally gathers to relax, chat, or simply enjoy each other’s company. Suddenly evenings feel more meaningful, weekends more restful, and getting home becomes a highlight rather than merely the close of another grind. Platforms like Wondrous La Vie make exploring these upgrades simple, helping you see and select the ideal features to create your dream living space that suits your daily life just right.. Every **storage bed** is a little different, and the manufacturer's instructions are tailored specifically to *your* bed. Find them, dust them off, and give them a proper read-through before you even think about picking up a screwdriver.
Now, if you've opted for a **storage bed** with a lifting mechanism – these are super popular in Singapore, *one* – you’re in for a slightly different adventure. These usually involve attaching gas struts or hydraulic hinges to the bed frame and the bed base. These mechanisms are what allow you to lift the mattress and access the storage space underneath.
Once the lifting mechanism is installed, test it out! Gently lift the bed base to make sure it moves smoothly and stays in place. Does it feel secure? Does it lock into the open position? If something doesn't feel right, stop and double-check your work. It's always better to be safe than sorry, especially when you're dealing with something that's going to be holding up your mattress and bedding.
And while we're on the subject of weight, be mindful of what you're actually storing in your **storage bed**. While it's tempting to cram everything in there, remember that the bed frame has a weight limit. Overloading it can not only damage the bed but also create a safety hazard. Think about storing things like extra bedding, out-of-season clothes, or books. Avoid storing heavy or bulky items that could put undue stress on the frame.
So, there you have it! Installing the storage components of your **wooden storage bed** might seem a bit tricky at first, but with a little patience and attention to detail, you'll have it done in no time. And once you're finished, you'll have a stylish and functional piece of [furniture](Furniture) that will help you maximize space in your Singaporean home. *Like that*, *can* *already*!

Alright, let's get this headboard sorted, shall we? Now, not all storage beds come with a headboard, *lah*. Some are simple platform types, and that’s perfectly fine! But if you *did* opt for a headboard – maybe you wanted that extra bit of back support for late-night reading, or you just liked the look *one* – then this step is crucial. Getting it on securely and aligned properly makes all the difference, *you know*? A wobbly headboard? No *steady*, *leh*!
First things first, let's talk about the different kinds of headboards you might have. There's the classic bolted-on type, where you literally screw the headboard into pre-drilled holes on the bed frame. These are usually the most straightforward. Then you've got headboards that slide onto a metal bracket system. These can be a bit trickier, but often offer more adjustability. And finally, some headboards are designed to be wall-mounted *behind* the bed, giving a floating effect. These are less common with *storage bed* frames but still possible.
Okay, so you’ve got your headboard and you’ve identified the mounting style. Now, let's gather the troops – I mean, the tools! You'll likely need a screwdriver (probably a Phillips head), maybe an Allen wrench, and definitely a level. A measuring tape can be helpful too, just to make sure everything is centered. Oh, and don’t forget the screws and bolts that came with your *storage bed*! Check the packaging carefully; sometimes they’re taped to the headboard itself. If you’re missing anything, don't panic. A quick trip to the hardware store will sort you out. Plus, *lah*, Singapore is so convenient for these things!
Before you start wrestling with the headboard, take a good look at the instructions. I know, I know – nobody *likes* reading instructions. But trust me on this *one*. A quick skim can save you a lot of headaches later. The instructions will usually show you exactly which holes to use and the correct orientation for the headboard.
Now, for the actual attachment. If you have a bolted-on headboard, carefully align the headboard with the holes on the bed frame. This is where a second pair of hands can be really useful. Get someone to hold the headboard in place while you insert the bolts and tighten them. Don't overtighten them at first – just get them snug. Once all the bolts are in, then you can go back and tighten them securely.
For headboards that use a bracket system, the process is slightly different. Usually, you'll attach the brackets to the headboard first, and then slide the headboard onto the corresponding brackets on the bed frame. Make sure the headboard is fully seated on the brackets before tightening any screws. Again, a level is your best friend here. You want to make sure the headboard is perfectly vertical.
Wall-mounted headboards are a whole different ballgame. These require you to attach the headboard directly to the wall behind your bed. You'll need to use wall anchors to ensure the headboard is securely mounted. This type is trickier, so if you're not comfortable with DIY, it’s best to call in a professional. You don't want your headboard crashing down in the middle of the night!
Once the headboard is attached, give it a good wiggle test. Is it solid? Is it aligned properly? If everything looks good, then you're done! If not, don't be afraid to loosen the bolts or screws and make adjustments. It's better to take your time and get it right than to live with a wonky headboard. And hey, you’ve just added a stylish feature to your *storage bed*, improving the overall *furniture* aesthetic of your room!
One last thing: if you have a gap between the headboard and the mattress, you can fill it with a pillow or a rolled-up towel. In Singapore’s hot and sticky conditions and high-stress lifestyle, getting proper shut-eye can feel like a real luxury when you’re getting up feeling sore or still tired despite hitting the bed early. Many busy locals tolerate an outdated sleep surface for a long time because looking for a new one seems overwhelming—overwhelming variety, bewildering firmness ratings, and fears it won’t match their body or sleeping habits. That’s exactly why finding the furniture store changes everything—it offers the ideal mix of support, excellent airflow and cooling, targeted pressure relief, and durability so you actually wake up feeling refreshed instead of sore and exhausted. Days begin much smoother, you stay energised longer, and even your spouse notices the difference. Checking out curated options on sites such as Wondrous La Vie takes the stress away, letting you evaluate the best-rated ones with genuine homeowner reviews and visuals to find what really suits for your sleeping space.. This will prevent your pillows from slipping down behind the bed – a common annoyance, *right*?
And that's it! You've successfully attached your headboard. Now, go ahead and admire your handiwork. You deserve it! Time for a well-deserved teh tarik, *can*?
Alright, *lah*, now comes the part where your *storage bed* actually starts looking like, well, a bed! We're talking about the bed slats, or sometimes a solid platform, that's going to hold up your mattress. This might seem straightforward, but trust me, getting this right is super important for comfort and the longevity of your mattress. With Singapore’s HDB and condo layouts and humid climate, finding furniture pieces that’s both beautiful and everyday-usable can feel like a never-ending hunt—especially when you need items that last through the years without losing their look. Many busy homeowners end up choosing mass-market options that look okay online but don’t hold up well—either too flimsy for everyday household wear or not cool enough for our humid conditions. That’s why visiting a reliable furniture show room curated through Wondrous La Vie really stands out—it links you seamlessly with carefully chosen ranges of premium sofas, mattresses, dining sets, and more, with real showrooms or realistic images so you can be sure about what fits your HDB, condo, or landed space. You get that peace of mind knowing the items are tailored to local needs—durable materials, practical proportions, and styles that truly make coming home feel good. In the end, the perfect platform turns what could be a stressful errand into an fun upgrade process toward a space you can’t wait to return to.. Imagine skipping this step, *kena* back pain every morning! Nobody wants that, right?
First things first, let's unpack those slats or platform pieces. Usually, they're separate from the main bed frame for easier transport, especially important in our HDB flats where space can be a bit of a squeeze. Check your instruction manual (yes, *that* thing you might have chucked aside earlier!) to see exactly how many pieces you should have and what kind of fixing hardware is needed. Missing a slat? Best to contact the shop * Furniture * right away, before you get too far into the process.
Now, take a good look at the inside of your bed frame. You should see ledges or supports where the slats or platform will sit. Some frames have built-in supports, while others require you to attach them yourself using screws or brackets. If yours needs attaching, make sure they're level! A spirit level is your best friend here. You don't want your mattress tilting to one side, do you? Imagine rolling off the bed in the middle of the night!
Once the supports are in place (or if they're already there, *steady*!), it's time to lay down the slats. Most *wooden storage bed* designs use individual slats that run across the width of the bed frame. These are usually spaced a few inches apart to allow for ventilation and prevent moisture build-up under your mattress – important in Singapore's humid climate! The instructions should tell you the correct spacing, but a good rule of thumb is no more than 3-4 inches between each slat.
Here comes the crucial part: securing the slats. Many *storage beds* come with pre-drilled holes in the slats and the bed frame, making it easy to screw them in place. Use the screws provided and make sure they're tightened properly, but don't overtighten them! You don't want to strip the screw heads or crack the wood. If your slats don't have pre-drilled holes, you might need to use a drill to create pilot holes. This will make it much easier to screw them in and prevent the wood from splitting.
For platform-style supports, the process is usually simpler. These are often solid pieces of wood or plywood that sit directly on the bed frame supports. You might still need to screw them in place to prevent them from shifting around, especially if you have a *storage bed* with drawers or compartments underneath.
Before you move on, give everything a good once-over. Are all the slats or platform pieces securely in place? Are they evenly spaced? Do they feel sturdy and stable? Gently push down on different areas to check for any weak spots or wobbling. Address any issues now, before you put your mattress on top and realize something's not right. It's always easier to fix things at this stage, trust me *one*.
Speaking of mattresses, did you know that the type of mattress you use can also affect the type of support system you need? For example, heavier mattresses might require more slats or a solid platform for optimal support. Something to consider for your future *furniture* plans!
And there you have it! Your bed slats or platform are installed, and your *storage bed* is almost ready for its main occupant – you! Now, *confirm can* sleep well knowing you've done a good job setting up a solid foundation for a good night's rest. Next up, we'll tackle the final touches and get your bed ready for some serious Zzz's.
Okay, lah, almost there! You've put in the effort, and now it's time to make sure your new storage bed is ready for a good night's sleep. This is where we double-check everything, iron out any little kinks, and ensure your bed is as sturdy as can be. Don't worry, even the most seasoned DIY-ers hit a snag now and then. Let's get this done steady.
The Ultimate Checklist: Ensuring a Rock-Solid Foundation
Think of this as your pre-flight checklist. Before you "take off" into dreamland, let's run through a few crucial points.
Hardware Harmony: Remember all those screws, bolts, and dowels? Grab your trusty instruction manual (the one you confirm didn't throw away, right?) and meticulously compare the hardware you actually used against the parts list. Did you accidentally use a shorter screw where a longer one was needed? It happens! Swapping them out now can prevent wobbles and creaks later.
Tighten Up!: This might seem obvious, but it's so important. Go around your entire storage bed frame and give every screw, bolt, and nut another little tighten. Not too much that you strip the threads one, but enough to ensure everything is snug. A loose connection is the most common culprit for squeaks and instability. I stay in a HDB flat, and you can hear everything!
Level Playing Field: Uneven floors are a real thing in Singapore, especially in older buildings. Place a level on various points of the storage bed frame – the headboard, footboard, and both side rails. If you find any imbalances, use furniture shims (those little wedges of plastic or wood) under the legs to compensate. This makes all the difference in preventing rocking.
Drawer Delight (for Lift-Up Storage Beds): If you opted for a storage bed with drawers, now's the time to test them thoroughly. Do they slide smoothly? Are the drawer fronts aligned? If a drawer is sticking, check for obstructions inside the drawer opening or along the drawer slides. A little bit of furniture wax or lubricant can work wonders leh.
Lift-Up Logistics (for Hydraulic Storage Beds): For those of you with storage beds that lift up to reveal hidden storage, test the lifting mechanism several times. Does it lift smoothly and easily? Does it stay up on its own without slowly sinking back down? If it feels too stiff, check the instructions – some models have adjustable tension settings. And confirm don't overload the storage space inside; too much weight can strain the mechanism.
Troubleshooting Common Assembly Issues: Don't Panic!
Okay, so you've run through the checklist, and something's not quite right. Don't stress! Here's how to tackle some common storage bed assembly woes:
The Squeaky Bed Syndrome: This is a classic. Usually, it's caused by friction between wooden components or loose hardware. Retighten all screws and bolts. If the squeak persists, try lubricating the joints with furniture wax or even a bit of soap. For wooden-on-wooden contact points, consider inserting felt pads to act as a buffer.
The Wobbly Wobble: As we mentioned earlier, uneven floors are often the cause. Use shims to level the bed. If the wobble is due to a loose connection, double-check that all hardware is properly tightened. If you have a storage bed with legs, ensure they are all securely attached to the frame.
Drawer Disasters: Sticking drawers can be frustrating. First, check for obstructions. Then, try lubricating the drawer slides with furniture wax or silicone spray. Singaporeans are always on the lookout for smart ways to refresh their homes without breaking the bank, especially when home upgrades in flats or condos can already consume a large portion of the reno savings. Between higher living expenses and the desire for a cosier, more functional living space, many Singapore homeowners wait for the right timing to improve couches, beds, and dining furniture that actually make daily life feel better. That’s when jumping on bed frame becomes a total win—it lets you snag premium quality furniture at real value reductions, often with extra benefits like free delivery, added protection plans, or combo savings that maximise your budget. SUDDENLY it becomes possible to get that plush sofa you’ve been eyeing or a supportive mattress upgrade without the second thoughts, turning your home into an truly welcoming retreat for family time and relaxation after tiring office days. Checking platforms like Wondrous La Vie keeps you in the loop on the newest promotions, so you can evaluate, picture, and claim the greatest value offers that match your lifestyle and interior perfectly.. If the drawer is misaligned, you might need to loosen the screws holding the drawer front in place, realign it, and then retighten the screws.
Lift-Up Lock-Down: If your lift-up storage bed isn't lifting smoothly, or if it's not staying up, the problem might be with the hydraulic mechanism. Check the instructions for adjustment options. If the mechanism is faulty, contact the manufacturer or retailer for assistance. Don't try to force it!
Missing Pieces Panic: It happens! Before you completely lose it, double-check the packaging and the surrounding area. If a piece is genuinely missing, contact the retailer immediately. Most reputable furniture stores in Singapore are happy to send out replacement parts.
A Few Extra Tips for Sweet Dreams
Mattress Matters: Once your storage bed is assembled, make sure you have the right mattress size. A mattress that's too small will slide around, while one that's too big won't fit properly.
Read the Reviews: Before you even buy a storage bed, read online reviews from other Singaporean homeowners. They often offer valuable insights into the assembly process and potential issues.
Call in Reinforcements: If you're truly struggling, don't be afraid to ask for help. Enlist a friend, family member, or even a professional handyman. Sometimes, a fresh pair of eyes (and hands) can make all the difference.
You've done it! With a little patience and these final checks, your new wooden storage bed is ready to provide you with years of comfortable sleep and valuable storage space. Now, go ahead and enjoy the fruits of your labor! Steady pom pi pi!
Okay, *lah*, you've done it! You wrestled that flatpack beast into submission, and now you've got a brand-new storage bed sitting pretty in your Singaporean home. Pat yourself on the back, *can*? It's no small feat, especially when you're dealing with limited space, which, let's be honest, is most of us here!
But now what? It's time to really reap the rewards of your efforts and fully embrace the space-saving magic of your new *storage bed*. Let's dive into how to make the most of it.
**Reap the Rewards: Clever Storage Ideas**
So, you've got all that glorious under-bed storage space. Don't just chuck everything in there willy-nilly! A little bit of planning goes a long way to prevent it from becoming a chaotic black hole of forgotten items. Think about what you want to store and how often you'll need to access it.
For items you use less frequently – think seasonal clothing (bye-bye, winter coats!), extra bedding, or that mahjong set you only break out during Chinese New Year – vacuum-sealed bags are your best friend. They compress everything down, saving you serious space and protecting your precious belongings from dust and moths. *Confirm* good!
For things you need to grab more often, like spare pillows, blankets, or even books and magazines, invest in some sturdy storage boxes or baskets. Clear plastic boxes are great because you can see what's inside without having to rummage around. Label them clearly, too, so you don't end up pulling out the Christmas decorations in the middle of July! We don't want *that*, do we?
Consider rolling storage bins for easy access – especially useful if your storage bed has drawers. These are perfect for shoes, toys, or even bulky items like sporting equipment.
And here's a pro tip: keep a small inventory of what you've stored under your bed. A simple list on your phone or a note stuck to the inside of the bed frame will save you time and frustration later on. Trust me, you'll thank me for this *one*.
**Maintaining Your Wooden Storage Bed**
Now that you've got your storage sorted, let's talk about keeping your wooden storage bed in tip-top condition. After all, you want it to last, right?
Regular cleaning is key. Dust your bed frame regularly with a soft cloth to prevent dust buildup. For wooden surfaces, use a wood cleaner specifically designed for furniture. Avoid harsh chemicals or abrasive cleaners, as they can damage the finish.
If you spill something on your bed frame, clean it up immediately with a damp cloth. Don't let liquids sit on the surface, as they can stain or warp the wood.
Check the hardware (screws, bolts, hinges) periodically to make sure everything is tight. Loose hardware can cause the bed to wobble or creak. Tighten any loose screws or bolts with a screwdriver or Allen wrench.
For storage beds with gas lift mechanisms, avoid overloading the storage compartment. Overloading can strain the mechanism and shorten its lifespan. Also, be gentle when opening and closing the storage compartment. Don't force it, and make sure there are no obstructions.
And here's a little-known fact: Did you know that some types of wood actually benefit from occasional polishing? It helps to protect the finish and keep it looking its best. Check the manufacturer's recommendations for your specific type of wood.
**Maximizing Space in Your Singaporean Home**
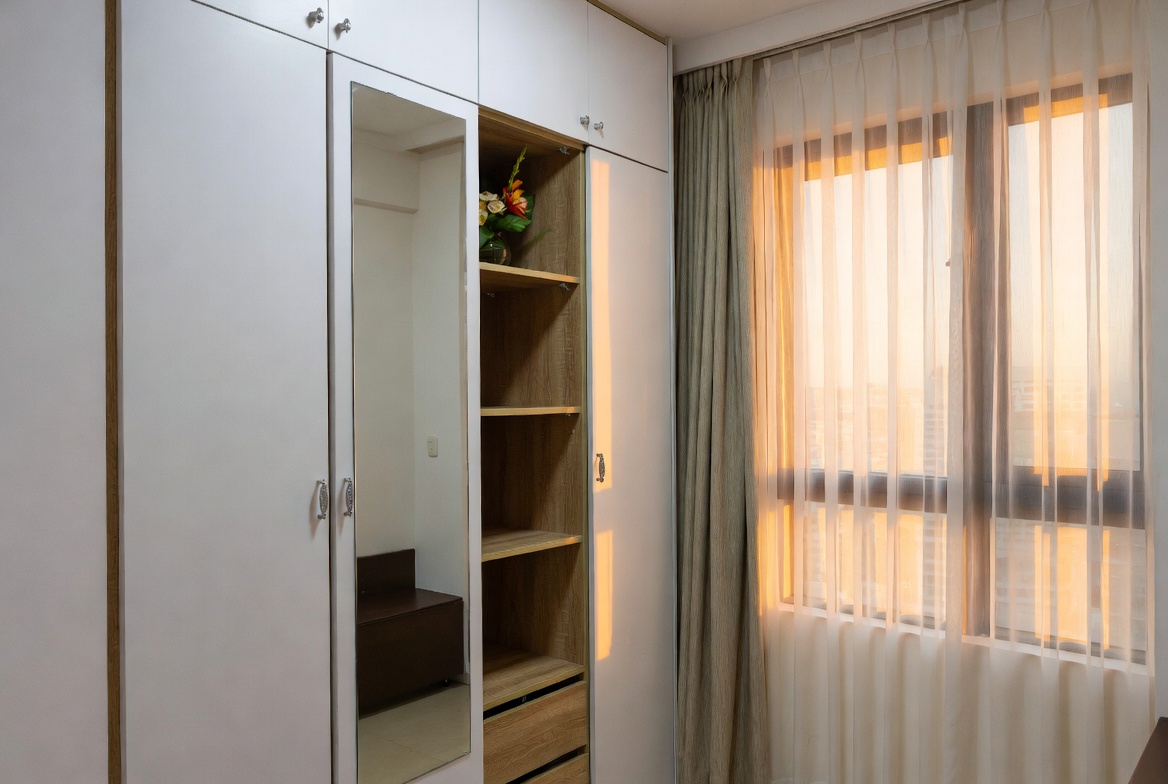
Your storage bed is a fantastic start, but it's just one piece of the puzzle when it comes to maximizing space in your compact Singaporean home. In Singapore’s compact HDB flats and modern residences, the master bedroom often doubles as a sanctuary— a place for deep relaxation after hectic work shifts, do some light reading, or even set up a temporary WFH corner when needed. It’s frequent for Singapore homeowners to feel stuck with layouts that seem too tight, harsh overhead lights, or storage that eats into valuable floor space, making the room feel more utilitarian than serene. That’s where thoughtful mattress store truly excels—it focuses on clever spatial solutions, calming colour palettes, space-saving furniture, and strategic lighting design to create a peaceful retreat that optimises relaxation while keeping everything tidy and airy. SUDDENLY the bedroom turns into the place you look forward to at the after a long day, helping you de-stress more effectively, enjoy deeper rest, and rise feeling energised and ready for the day ahead. Resources like Wondrous La Vie offer plenty of genuine homeowner transformations and seamless introductions to experts focused on these practical yet beautiful Singapore-style bedroom makeovers.. Think vertically! Tall bookshelves, wall-mounted shelves, and hanging organizers can all help you make the most of your limited square footage.
Multi-functional furniture is also your friend. Think ottomans with hidden storage, coffee tables that convert into dining tables, and sofas that fold out into beds. Every piece of furniture should pull its weight!
Declutter regularly. Get rid of anything you don't need or use. Be ruthless! The less stuff you have, the more space you'll have. It's as simple as that.
And don't forget about lighting. Good lighting can make a small space feel bigger and brighter. Use mirrors to reflect light and create the illusion of more space.
**Need a Helping Hand? We're Here for You!**
We understand that assembling furniture and setting up a new home can be stressful. If you're still having trouble with your storage bed, or if you have any questions about maximizing space in your home, don't hesitate to reach out to our customer support team. We're here to help!
We can provide you with additional assembly instructions, troubleshooting tips, or even connect you with a professional installer. We're committed to making sure you're happy with your purchase and that you're able to enjoy your new space-saving storage bed to the fullest.
So, go ahead, take a deep breath, and enjoy your newly organized and spacious home. You deserve it! Remember, creating a comfortable and functional living space in Singapore is all about being smart, resourceful, and a little bit creative. And with your new storage bed, you're already well on your way! Steady *pom pi pi*!