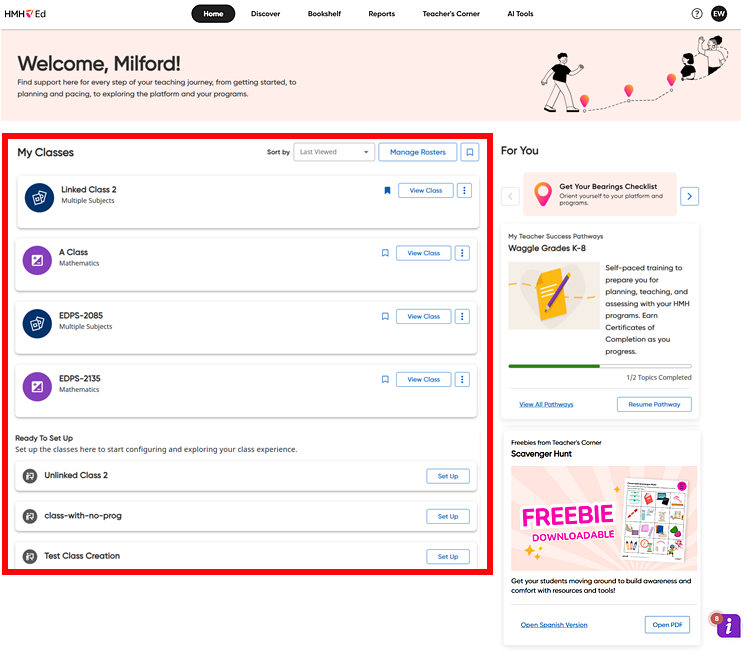
The Home page displays a list of the classes to which you are associated and offers options for viewing, setting up, and managing rosters and classes.
Note: Even if you are not assigned any classes, a demo class is automatically available for you.
1. In the HMH Ed™ banner, click the Home tab. The Home page appears, listing all your classes as separate class cards in the My Classes area. The classes that have been set up with programs appear at the top of the list, and below that, classes that need to be set up are listed in a Ready To Set Up section.

2. If you have multiple classes, you can use the Sort by list to sort your class list and locate the class you want to view.
– Class Name A–Z – Class Name Z–A – Last Viewed |
3. In the top portion of the My Classes list, you can do any of the following:
– To
quickly identify your favorite classes, click the bookmark icon ![]() in the class card. The selected
bookmark icon appears as solid blue and moves the class card to the top
of the list on your My Classes
area.
in the class card. The selected
bookmark icon appears as solid blue and moves the class card to the top
of the list on your My Classes
area.
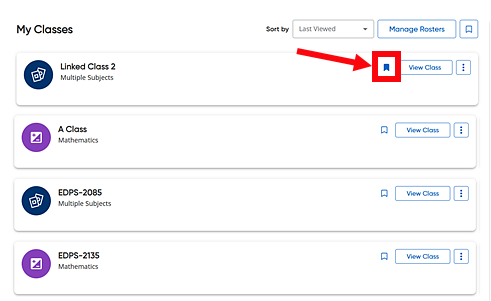
Once you have bookmarked classes, you can click
the bookmark filter button  (beside the Sort
by list) to display only your bookmarked class cards.

– To
add a nickname for a class, click the vertical ellipsis  button in the card of the class for which you want to
create a nickname and select the Add
Class Nickname option.

In the Add Class Nickname dialog box, type a nickname for the class and click Apply. The My Classes list updates to display the newly created nickname for the selected class.
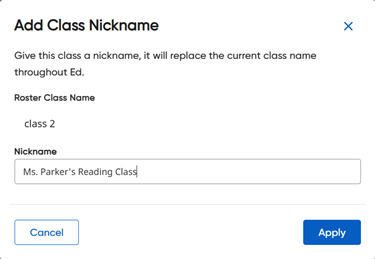
For complete details, see Add or Edit Nicknames for Classes.
– To view additional details and manage a class, click the View Class button in the class card.
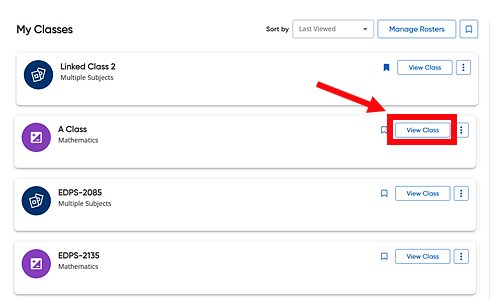
The Class Overview page appears. See Navigate the Class Overview Page for complete details.
4. To set up a class that has been assigned to you but has no programs associated with it, do the following:
a. In one of the class cards in the Ready to Set Up Classes area, click the Set Up button. A Class Set Up dialog box appears.
b. In the Grade list and Subjects lists, select the grade and subjects for the class and then click Done.
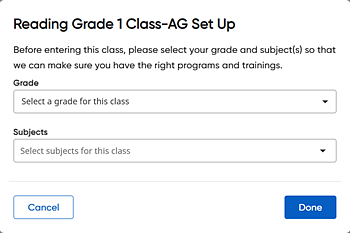
The class card moves to the top section of the My Classes list.
Note: All users are provided with a Demo Class card, even if you have no other classes assigned to you. You can use this class card to explore programs and products. The demo class, however, has limited functionality—no students are rostered into the class, and it is not editable.
5. To view and manage your rosters, click the Manage Roster button. The Manage Roster page appears. See About Class Rosters for details.