|
Defining Staging Areas
|   |
|
Defining Staging Areas
| |
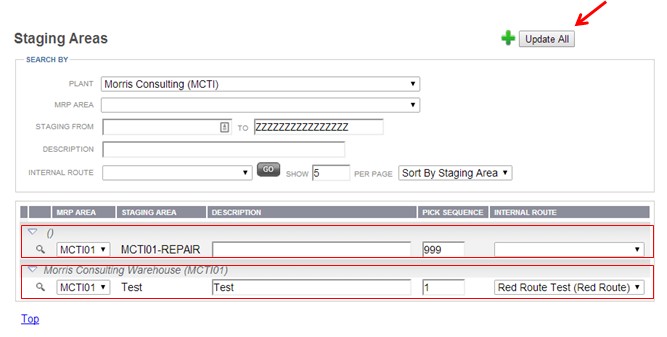
The staging area is the physical location used to accumulate parts that are needed to produce a product before sending the parts out to the assembly floor. This could be a rack, a shelf or a spot on the floor near the line. The difference between a staging area and a storage location is that on-hand balances are not kept at the staging area. Inventory in a staging area is non-nettable. The best practice is to have only one staging area for each item. This makes it easier to locate material when needed.
The staging area and pick sequence are assigned when the broadcast is generated. They are updated when the rack is scanned. When picking starts, the staging area is updated again but not the pick sequence.
To access staging areas:
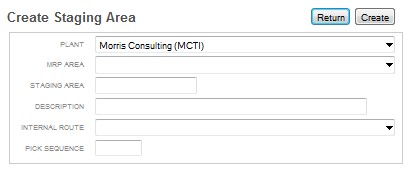
To add a new staging area:
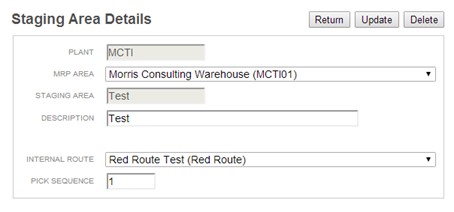
To edit the details of a staging area:
To update multiple staging areas: