Creating a Item Supplying MRP Area Record
Previous Topic  Next Topic 

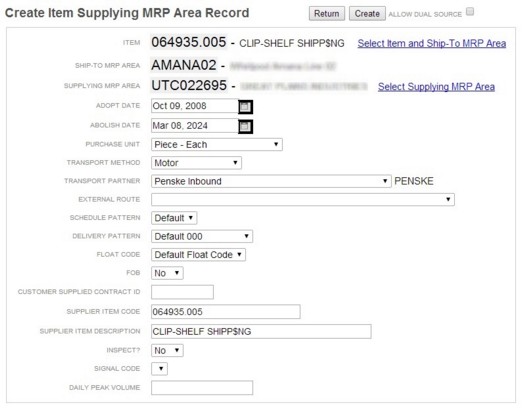
Item Supplying MRP Area records can be created two different ways:


  1. By releasing items to production.  See Releasing Items to Production.
  2. Manually.


To manually add the item supplying MRP area record for an item:


  1. Using the Advanced menu, click Item Planning > Item Supplying MRP Area.
  2. Click Add.
  3. Click Select Item and Ship-To MRP Area.
  4. Select the Item Ship-To MRP Area.
  5. Click Select Supplying MRP Area.
  6. Select the Supplying MRP Area.
  7. Select the Adopt Date.
  8. Select the Abolish Date.
  9. Select the Purchase Unit of Measure. 
  10. Select the Transport Method. 
  11. Select the Transport Partner. 
  12. Select the External Route. 
  13. Select the MRP pattern. 
  14. Select the Delivery Pattern. 
  15. Select the Float Code. 
  16. Select FOB. 
  1. Update the remaining fields if required. 
  2. Click Create.