Interpreting a Model
Model interpretations can be run on a Driverless AI experiment or on the predictions created by an external model (that is, a model not created by Driverless AI).
Use the Interpret this Model button on a completed experiment page to interpret a Driverless AI model on original and transformed features. You can also click the MLI link from the top navigation menu to interpret either a Driverless AI model or an external model.
Interpreting a Driverless AI Model
A completed Driverless AI model can be interpreted either from the MLI Page from the top main menu or from the Completed experiments Page.
Notes:
This release deprecates MLI experiments run in Driverless AI 1.8.9 and earlier. MLI migration is not supported for experiments from versions <= 1.8.9 i.e user cannot directly run interpretations on a Driverless AI model built using versions 1.8.9 and earlier but can still view them if already built in those versions.
MLI does not require an Internet connection to run on current models.
Run Interpretations from MLI page
This method lets you run model interpretation on a Driverless AI model. This method is similar to clicking “Interpret This Model” on an experiment summary page but provides more control via the MLI expert settings and recipes.
Click the MLI link in the upper-right corner of the UI to view a list of interpreted models.
Click the New Interpretation button.
Select the dataset that was used to train the model that you will use for interpretation.
Specify the Driverless AI model that you want to use for the interpretation. Once selected, the Target Column used for the model will be selected.
Optionally specify which MLI recipes (or Explainers) to run. This also includes Autoreport.
Optionally specify any additional MLI Expert Settings or Explainer (recipe) specific settings to use when running this interpretation.
Optionally specify a weight column.
Optionally specify one or more dropped columns. Columns that were dropped when the model was created are automatically dropped for the interpretation.
Click the Launch MLI button.
Run Interpretation from Completed Experiment page
Clicking the Interpret this Model button on a completed experiment page launches the Model Interpretation for that experiment. Note that if you would like to control the MLI run via the expert settings or (custom) recipes for explainers, build the model from the MLI page.
The interpretation includes a summary, interpretations using the built Driverless AI model and the interpretations using Surrogate models (built on the predictions from the Driverless AI model). For details on the plots, see Understanding the Model Interpretation Page.
The plots are interactive, and the logs / artifacts can be downloaded by clicking on the Actions button.
For non-time-series experiments, this page provides several visual explanations and reason codes for the trained Driverless AI model and its results. More information about this page is available in the Understanding the Model Interpretation Page section later in this chapter.
Interpreting Predictions from an External Model
Model Interpretation does not need to be run on a Driverless AI experiment. You can train an external model and run Model Interpretability on the predictions from the model. This can be done from the MLI page.
Click the MLI link in the upper-right corner of the UI to view a list of interpreted models.
Click the New Interpretation button.
Leave the Select Model option to none
Select the dataset that you want to use for the model interpretation. This must include a prediction column that was generated by the external model. If the dataset does not have predictions, then you can join the external predictions. An example showing how to do this in Python is available in the Run Model Interpretation on External Model Predictions section of the Credit Card Demo.
Specify a Target Column (actuals) and the Prediction Column (scores from the external model).
Optionally specify any additional MLI Expert Settings to use when running this interpretation.
Optionally specify a weight column.
Optionally specify one or more dropped columns. Columns that were dropped when the model was created are automatically dropped for the interpretation.
Click the Launch MLI button.
Note: When running interpretations on an external model, leave the Select Model option empty. That option is for selecting a Driverless AI model.
The generated interpretation will include the plots and explanations created using the surrogate models and a summary. For details, see
Recipes
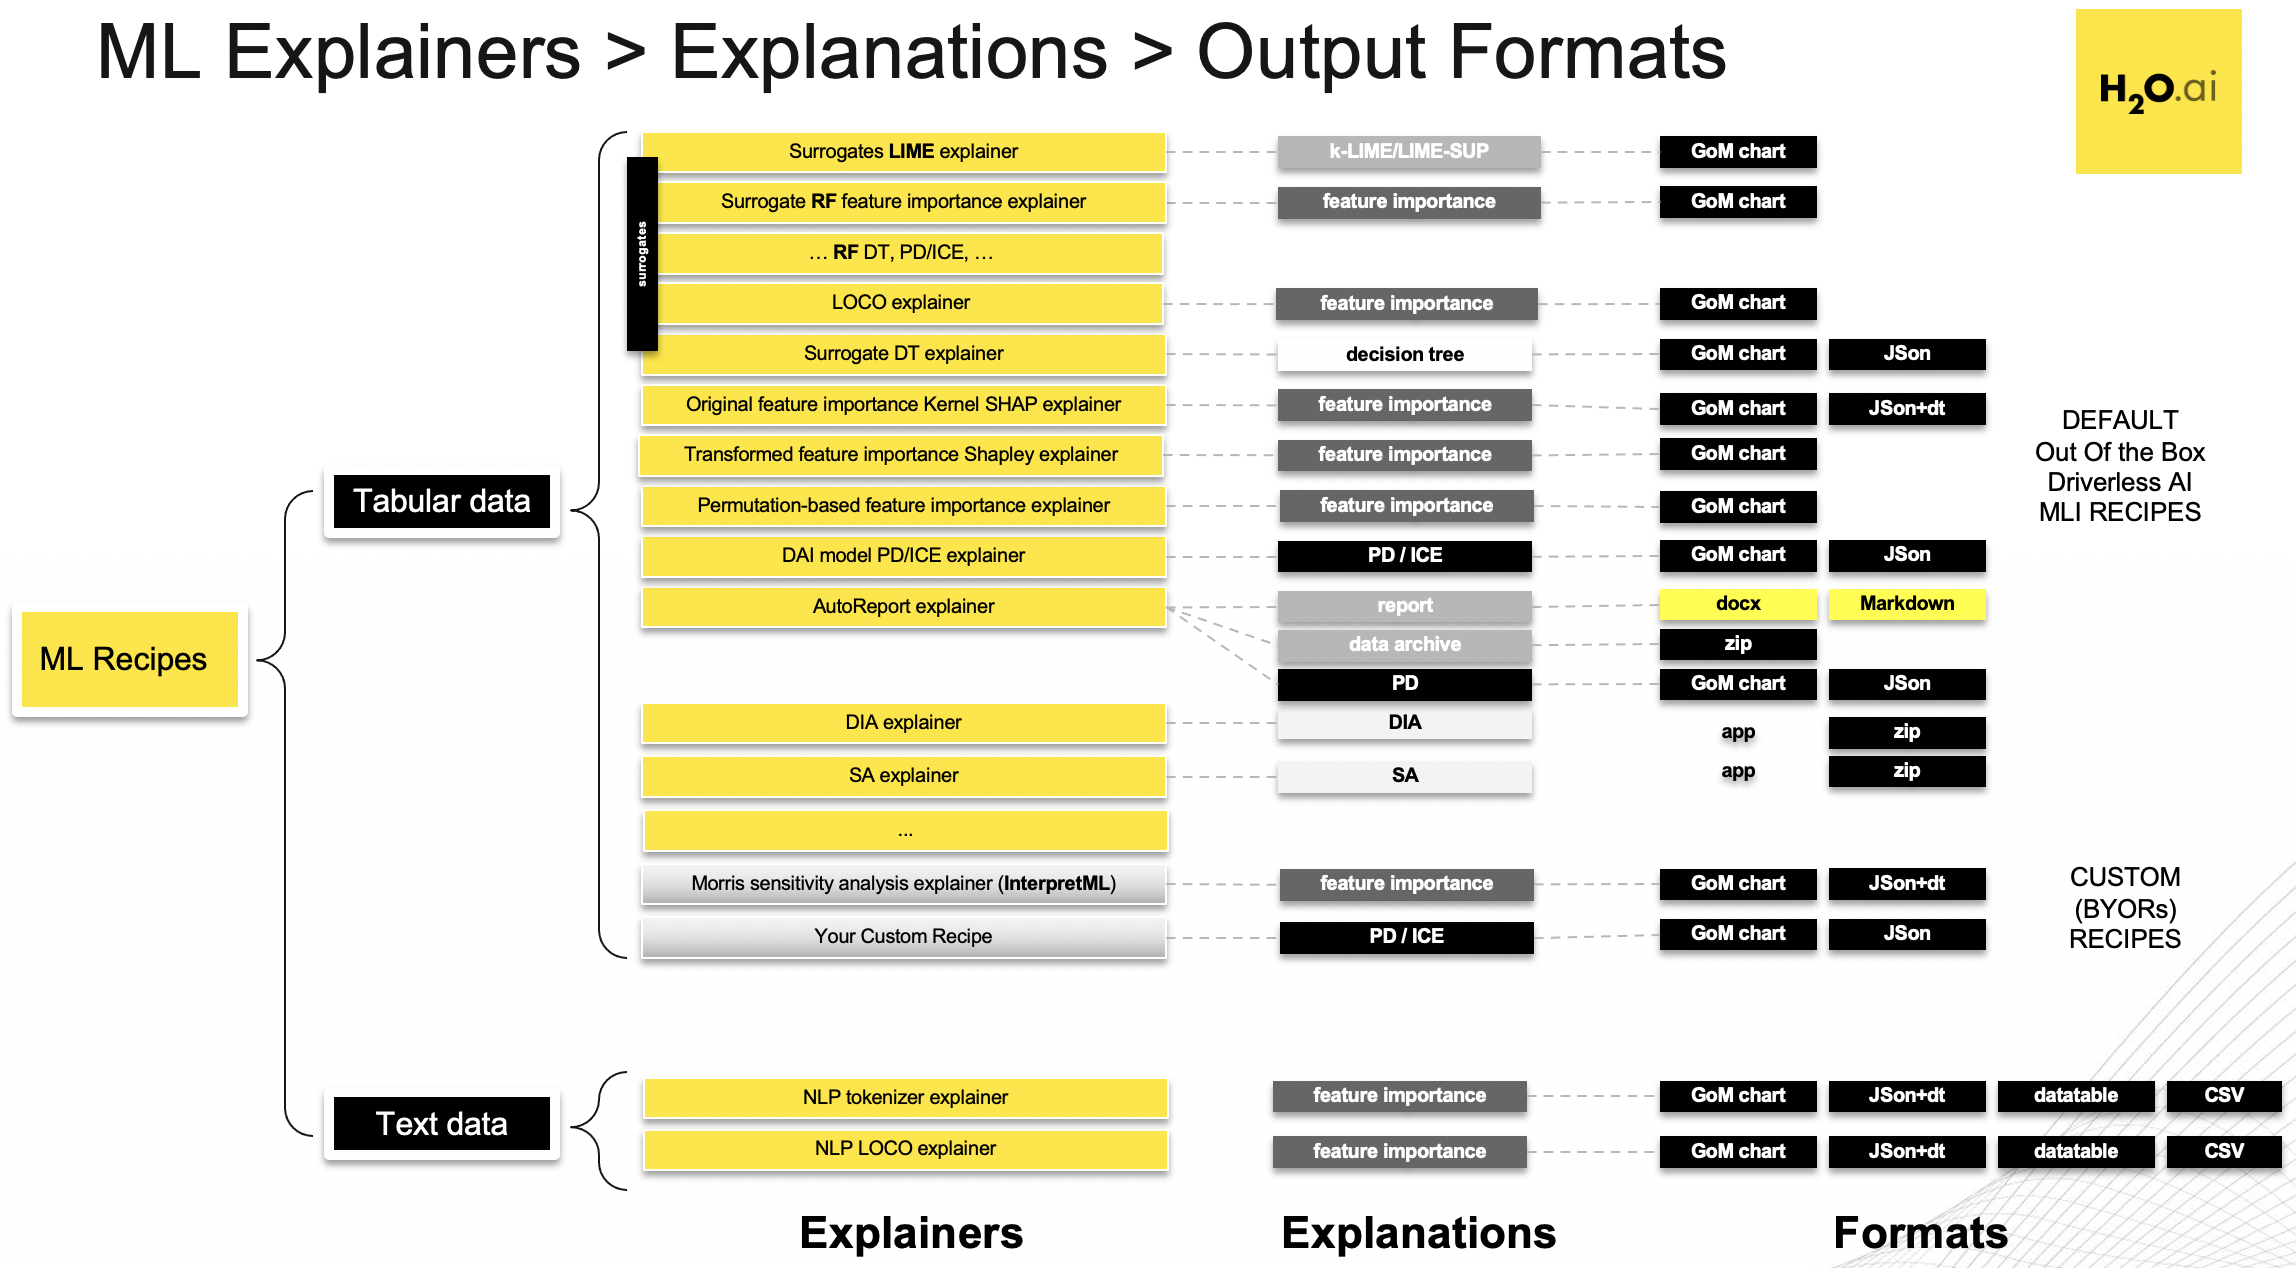
Driverless AI Machine Learning Interpretability comes with a number of out of the box explainer recipes for model interpretation that can be enabled when running a new interpretation from the MLI page. Details about the interpretations generated by these recipes can be found here. And a list of explainer specific expert settings can be found here
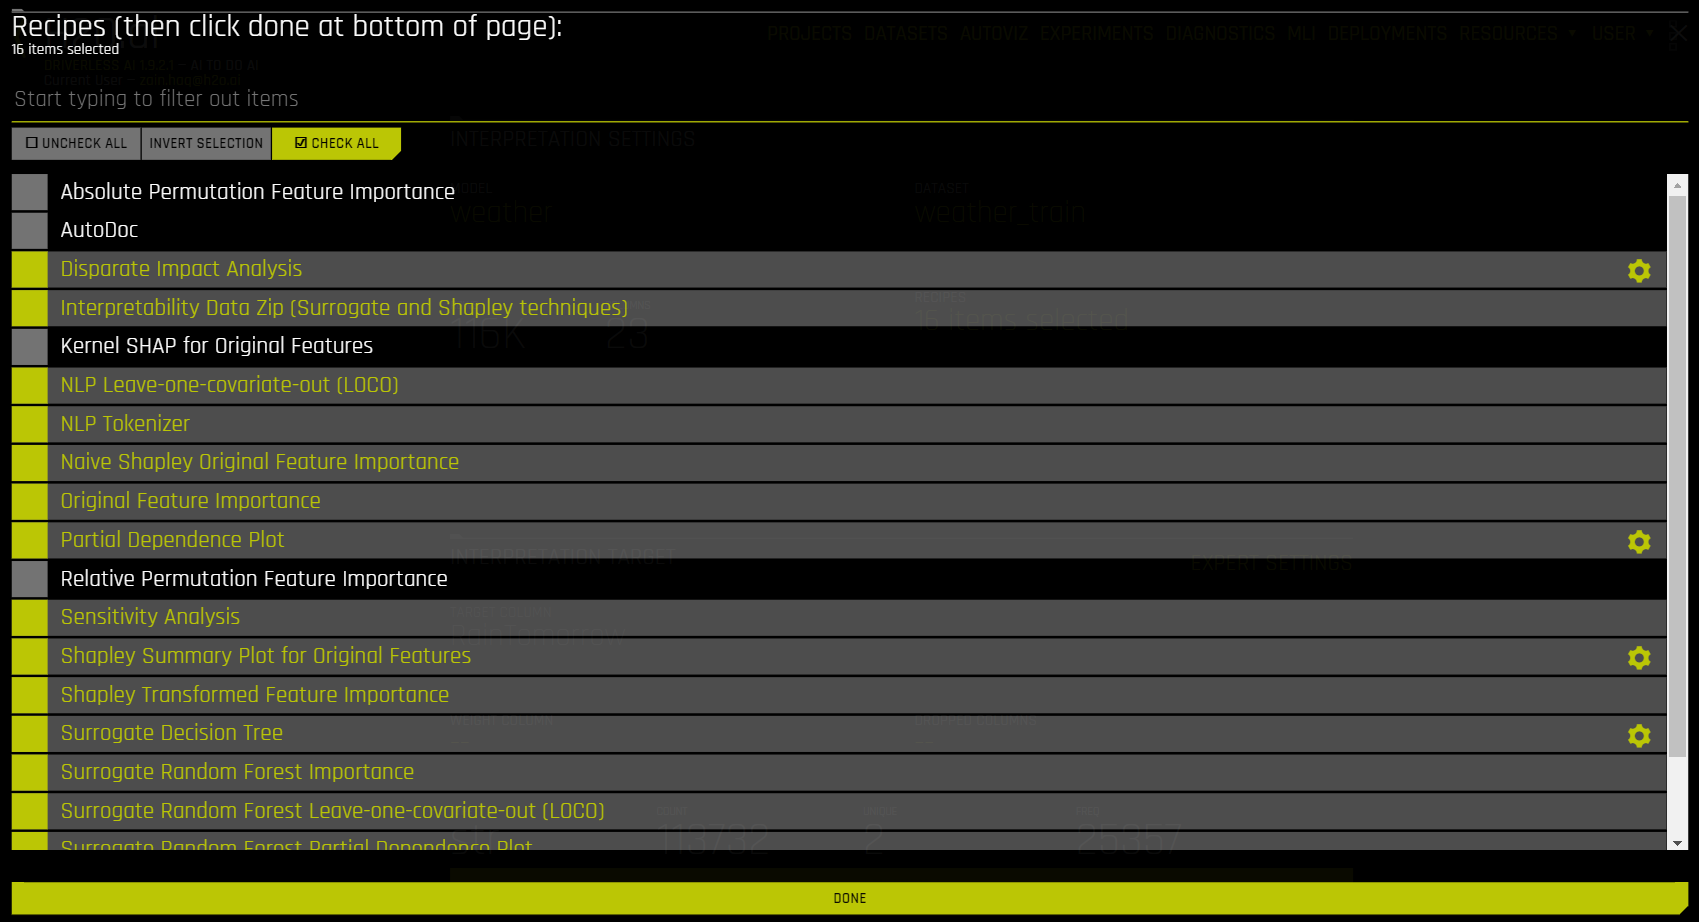
This recipe list is extensible, and users can create their own custom recipes. For more information, see MLI Custom Recipes.
Interpretation Expert Settings
When interpreting from the MLI page, a variety of configuration options are available in the Interpretation Expert Settings panel that let you customize interpretations. Recipe-specific settings are also available for some recipes. Use the search bar to refine the list of settings or locate a specific setting.
For more information on each of these settings, see Interpretation Expert Settings. Also see for explainer (recipe) specific expert settings.
Notes:
The selection of available expert settings is determined by the type of model you want to interpret and the specified LIME method.
Expert settings are not available for time-series models.
Expert Settings from Recipes (Explainers)
For some recipes like Driverless AI Partial dependence, Disparate Impact Analysis (DIA) explainer and DT (Decision Tree) Surrogate explainer, some of the settings can be toggled from the recipe page. Also, enabling some of the recipes like Original Kernel SHAP explainer will add new options to the expert settings.
For more information on explainer specific expert settings, see Explainer (Recipes) Expert Settings.