C.2.2 Cable direct printing
Once you have connected your printer via USB cable directly to
your computer, and configured the printer controller software on
your computer (e.g., Repetier-Host), as described in Section C.2.1,
you are ready to print an object!
-
1.
- Obtain an .stl file to print. (From your computer, you
may want to look for an interesting file on the Polar Cloud,
download it to your computer, and then you will be able to
upload it from your computer to the printer.) But if this is
your first print and you don’t have something else you want
to print, then for your convenience the Polar 3D support
website has a sample .stl file along with the .rcp and
.rcf files you already downloaded during the configuration
in Section C.2.1. Go back to the Polar 3D support website
and download the 3DBenchy.stl file to your computer:
Polar 3D support: Repetier-Host/USB printing
-
2.
- Use the Repetier-Host “Load” button (towards the upper
left of the Repetier-Host main screen) to load an .stl file:
-
3.
- You may want to change the position of the object on the
build plate. You will generally want to position the object
so that it is not at the center of the build plate, and
instead is near the edge of the build plate – this will
tend to increase the speed of the print. (See Section 14.1:
Positioning objects of the Polar Cloud Guide for additional
discussion of operational tips regarding positioning objects.)
To move the object, right click on the object and drag
it – for instance, towards the edge of the build plate.
You can also scale and rotate the object by utilizing the
Object Placement tab on the right of the Repetier-Host
screen.
-
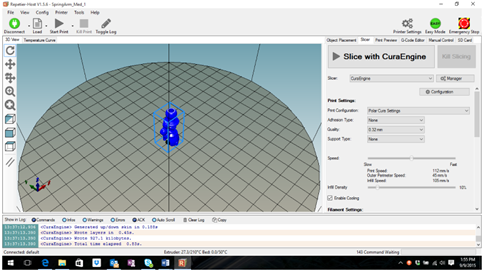
4.
- Once you are satisfied with the placement of your object, click
the “Slicer” tab, and then click “Slice with CuraEngine”:
-
5.
- When the slicing completes, click “Start Print”.
That’s it!
blockelement¡/div¿