towards the top of Figure 6.14, you may now manipulate it via its block. And clicking the Render button (at the bottom of the rendering pane) will render the .stl file, as shown in Figure 6.14.
For Polar Cloud objects with a BlocksCAD logo – objects that were exported directly from BlocksCAD to the Polar Cloud, such as that shown in Figure 6.10 – clicking on the BlocksCAD logo opens up a new window to the BlocksCAD design screen and loads the object in BlocksCAD: the object’s code blocks will be present on the BlocksCAD workspace screen, and you need merely click BlocksCAD’s “Render” button to re-render and display your object.5 This is an especially simple way to return to BlocksCAD to manipulate an object.
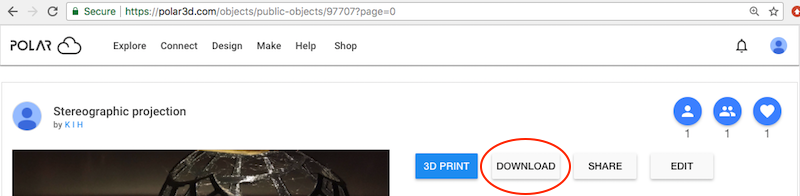
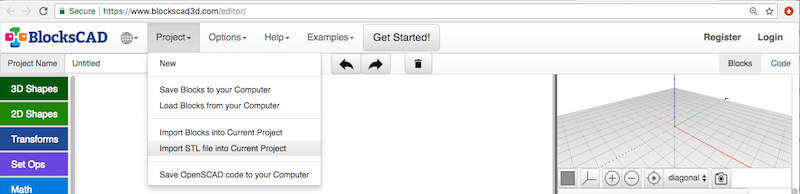
However, sometimes you might wish to modify and manipulate in BlocksCAD a Polar Cloud object not necessarily originally created in BlocksCAD.6 Standard .stl files7 can be moved back and forth between the Polar Cloud and BlocksCAD to achieve this.
towards the top of Figure 6.14, you may now manipulate it via its block. And clicking the Render button (at the bottom of the rendering pane) will render the .stl file, as shown in Figure 6.14.
Saving in BlocksCAD merely a literal “copy” of a Polar Cloud object amounts to saving a single “STL import” block; for instance, using the example of Figure 6.14, it amounts to saving the single block:
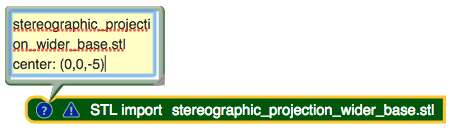
But note that BlocksCAD doesn’t itself save the underlying imported file; see the expansion of the block’s “!” warning icon:

Indeed, even the originally referenced file name is only preserved via a comment:
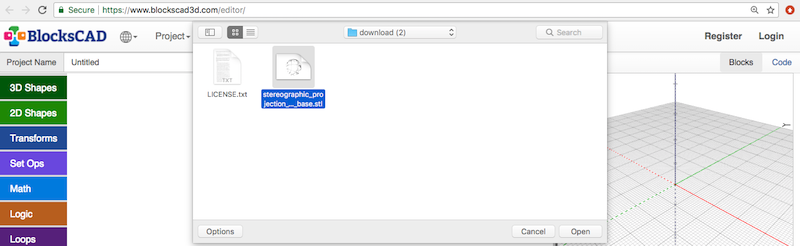
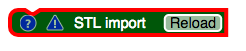
Because BlocksCAD doesn’t save imported .stl files along with its blocks, all you’re saving is that one block but not the file contents: every time you want to further manipulate such a saved, imported Polar Cloud object you’re going to have to click “Reload” on the “STL import” block, see Figure 6.15, and re-specify the location of an .stl file to import, as in Figure 6.13. (Also keep in mind that you’ll need a copy of the desired .stl file on whatever device you’re using at that moment to access BlocksCAD – so if you sometimes use BlocksCAD from a home device and sometimes from a different school device, you’ll be wanting a copy of the file on both devices!) Thus for such a literal copy case, you almost might as well just go through the import process of Section 6.1.3 to re-import the object into BlocksCAD all over again next time you want it – “saving” the imported object in BlocksCAD doesn’t save you much future work.
However, presumably if you’re importing a Polar Cloud object into BlocksCAD, it’s because you actually want to do something with that object: remove parts of it, add parts to it, combine it with other shapes, etc. – in other words, wrap other BlocksCAD blocks around the “STL import” block. Saving such an enveloping set of BlocksCAD blocks (along with any embedded “STL import” blocks), in contrast, likely is worth doing.
Nevertheless, in case you really want to save merely an unaltered copy of a Polar Cloud object in BlocksCAD, it is possible.
The first step, if you want to save an object in BlocksCAD, is to login to BlocksCAD (if you aren’t already logged in); see, for instance, the “Login” tab at the upper right of Figure 6.14.
If you are logging in after having imported an .stl file, you’ll need to click “Reload” on the “STL import” block; see Figure 6.15. (If you want to check the name of the file this block originally imported, click the “?” icon. Then you’ll need to reselect what .stl file to actually import, as in Figure 6.13, and then re-Render the object, so you’re repeating some of the steps from Section 6.1.3; so if you know you’re going to want to save an object in BlocksCAD, login when you first get started!)
Once you’re logged in (and your object reloaded and re-rendered, as necessary), you’ll have a “Save” button at the upper right of the screen. You may wish to first set a title for the object (at the upper left of the screen), and then click “Save” to save the object under that name; see Figure 6.16.
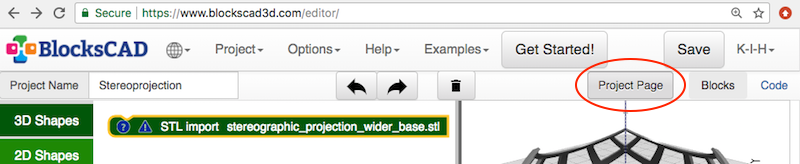
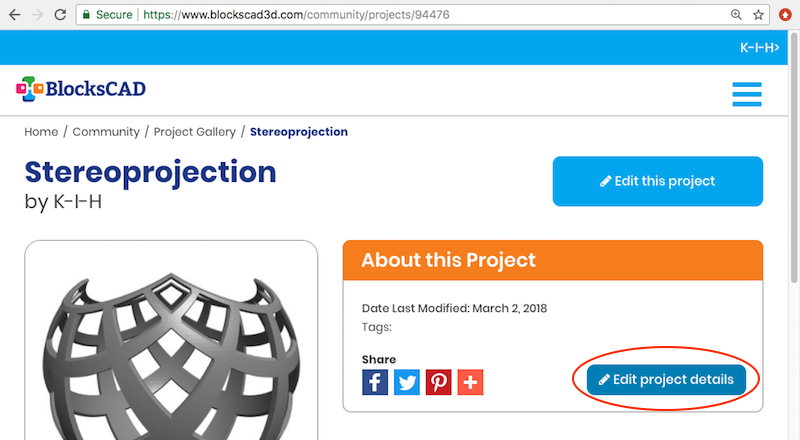
Then, if you wish to further specify information about the object, such as pointing back to the object description, source, and license in the Polar Cloud, click the “Project Page” button, see Figure 6.17; at the project page click the “Edit project details” button, see Figure 6.18.
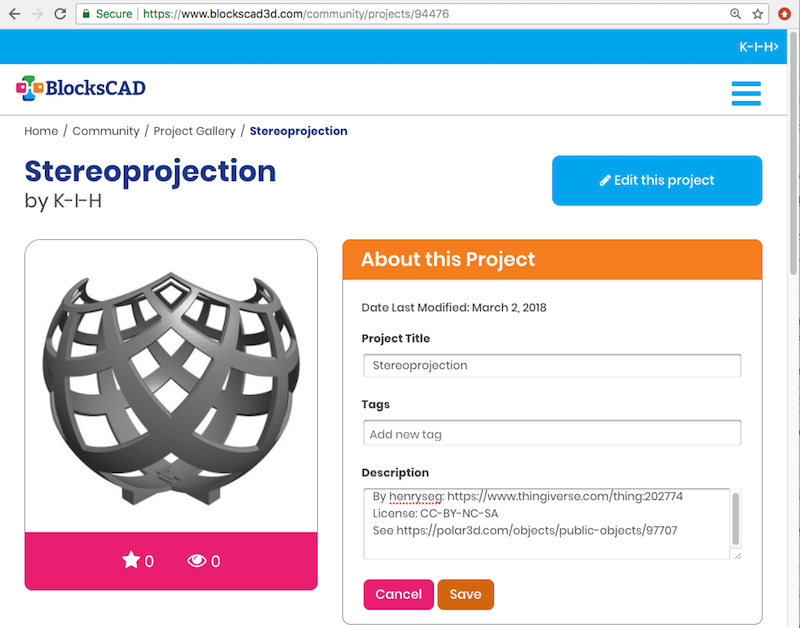
At the expanded“About this Project” screen, see Figure 6.19, you might, for instance, enter a URL for the original Polar Cloud object, and describe the object licensing.
5Note that if the BlocksCAD object was created using BlocksCAD’s STL import feature, then the BlocksCAD blocks do not directly include that .stl file: instead the BlocksCAD blocks will be attempting to reload the .stl file(s) from local disk. See Section 6.1.4.
6Or you may wish to manipulate an object created in BlocksCAD by someone else who used .stl files to which you do not have access, so you’d like to operate on the Polar Cloud version of the object which includes the imported .stl, not the original BlocksCAD blocks that attempt to re-import the .stl; this is another case where even if the Polar Cloud object has a logo link back to BlocksCAD, you will instead wish to download the Polar Cloud version of the object, and then import that into BlocksCAD.
7BlocksCAD doesn’t support OBJ files; however, if a Polar Cloud object comprises OBJ files, the OBJ files can be converted to .stl files.