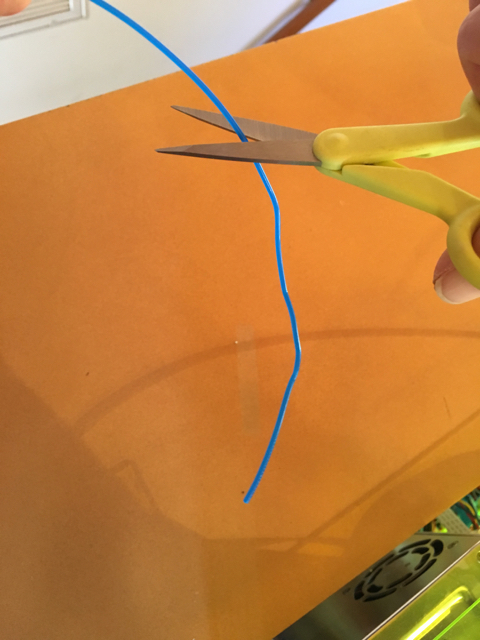
2.1 Load filament on the Polar3D printer
For a video demonstation, see:
Polar 3D youtube video: WWBD - Plate and Filament
Installation
-
1.
- Swing out the spool holder arm from the back (see Figure
1.2) of the Polar3D printer.
-
2.
- Unwrap the spool of filament and place it onto the spool
holder; see Figure 2.1.
-
3.
- Find the end of the string of filament.
-
4.
- Snip off the end of the filament – perhaps an inch or two –
with a pair of scissors or wire clippers to get a good, clean
end to feed into the printer (especially if the end is kinked,
or melted, or blobby); see Figure 2.2.
-
5.
- Feed the filament through the filament guide (the hole at the
top of the Polar3D printer); see Figure 2.1.
-
6.
- Stick the end of the filament into the filament feed hole at the
top of the print head. The “feel” of this takes a bit of getting
used to: when sticking the filament into the feed, you must
push past some initial resistance: you must push the filament in
far enough to engage with the filament drive gear inside the
print head, and then down past that into the throat of the
extruder. The Polar 3D support site has a clip of this
process:
Polar 3D support document “Loading and Unloading
Filament”
Note that if you cannot seem to get the filament past the
resistance at the filament drive gear and properly engaged, it
may be that a bit of old filament has stuck, hardened up, in the
filament drive gear. (And since Polar3D printers get a sample
print performed at the factory – see for instance the yellow
“Benchy” boat object pictured in the shipping box in Figure
1.1 –
your new printer could have a bit of filament hardened up in its
filament drive gear.) In this case, heat up the extruder
as discussed in step 7 and then again try inserting the
filament, manually feeding it through the filament drive
gear (and perhaps pushing out a now-melting blob of old
filament).
-
7.
- Check that the filament is properly inserted and engaged with
the filament drive gear as follows:
-
(a)
- From your device (phone, tablet, computer), connect
to the printer’s local IP address to access the printer’s
local web interface. (If your local network permits
access from the Internet back to your printer’s local
IP address, you may instead conveniently access the
printer local web interface and perform such settings
while within the Polar Cloud. From the Polar Cloud
main menu, expand the left-hand menu and click on
“PRINTERS”, then click on the image of the printer you
are loading with filament; this will take you to the
printer’s dashboard screen. At that printer dashboard
screen, click on the “LOCAL UI” button (gear icon) at
the upper right, to navigate to the printer’s local web
interface; see Figure 2.3.)
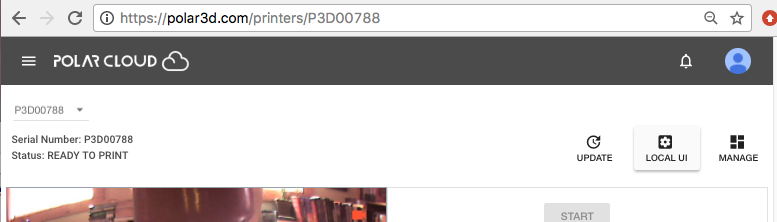
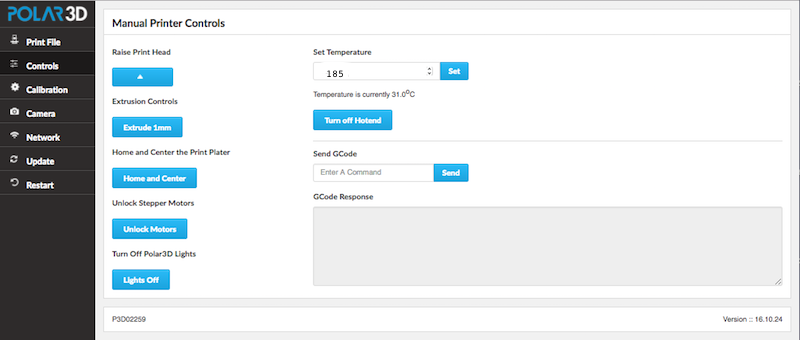
At the printer local web interface, click on the “Controls”
tab from the vertical menu on the right (Figure 2.4) to get
to the “Manual Printer Controls” screen (Figure 2.5).
At the “Manual Printer Controls” screen, enter a
temperature of 185°C and click the “SET” button; see
Figure 2.5.
-
(b)
- Once the extruder has warmed up,
which you can see on the Manual Printer Controls
screen just underneath where you set the desired
temperature, on that same screen click the “Extrude 1mm”
button several times, to extrude a few millimeters of
filament.
-
(c)
- Note that if the printer already had a bit of filament in the
extruder – and the Polar3D printers get a test print
performed at the factory so even a brand-new printer may
have a bit of filament in the extruder – you may see molten
plastic leaking out as the printer heats up, even before you
tell it to extrude filament. But you want to see the
printer feeding in and extruding your filament – the
filament you just loaded. Seeing a string of your filament
get extruded as now molten plastic confirms that
your filament is properly loaded, and you’re ready to
print!