Mounting the Disk that Contains the Required Files and Folders
Before you can recover files or folders, you must first select the checkpoint in time from which you will recover the files or folders. Then you must select and access the disk in which the files or folders are contained.
To mount a disk that includes files and folders to restore:
1. From either the protected or recovery site, select ACTIONS > RESTORE FILE.
The File and Folder Restore wizard is displayed.
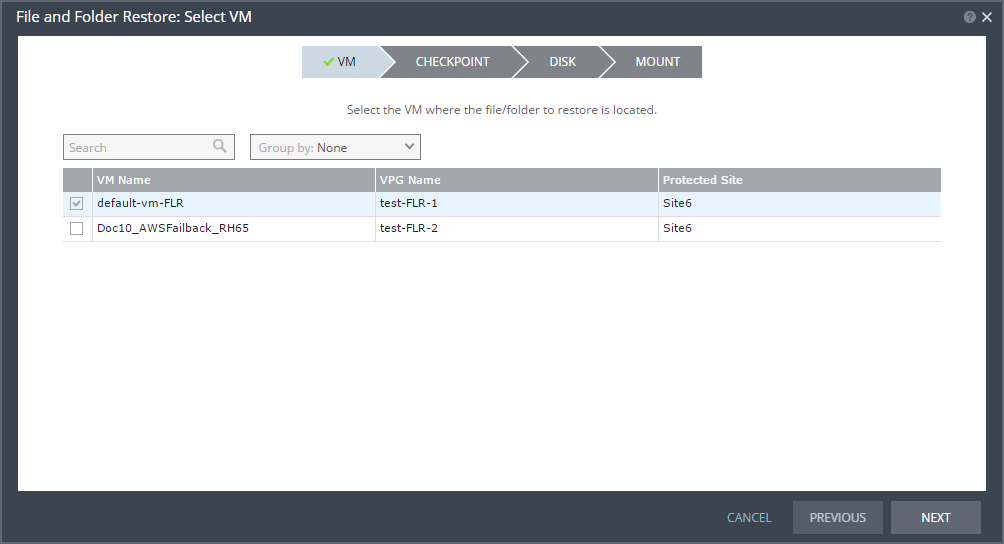
The list of all protected virtual machines is displayed. You can only recover files or folders from one virtual machine at a time.
2. Select the virtual machine on which the file or folder is located and click NEXT.
The CHECKPOINT step is displayed. By default, all checkpoints are displayed.
3. Select the checkpoint from which to recover the file or folder.
■ Auto: Checkpoints generated by the Zerto Virtual Manager are displayed.
■ Tagged: Checkpoints that were added by a user, or were added by the Zerto Virtual Manager when a failover test was performed on the VPG that included the virtual machine, or when the virtual machine was added to an existing VPG after the virtual machine was synchronized.
4. Click NEXT.
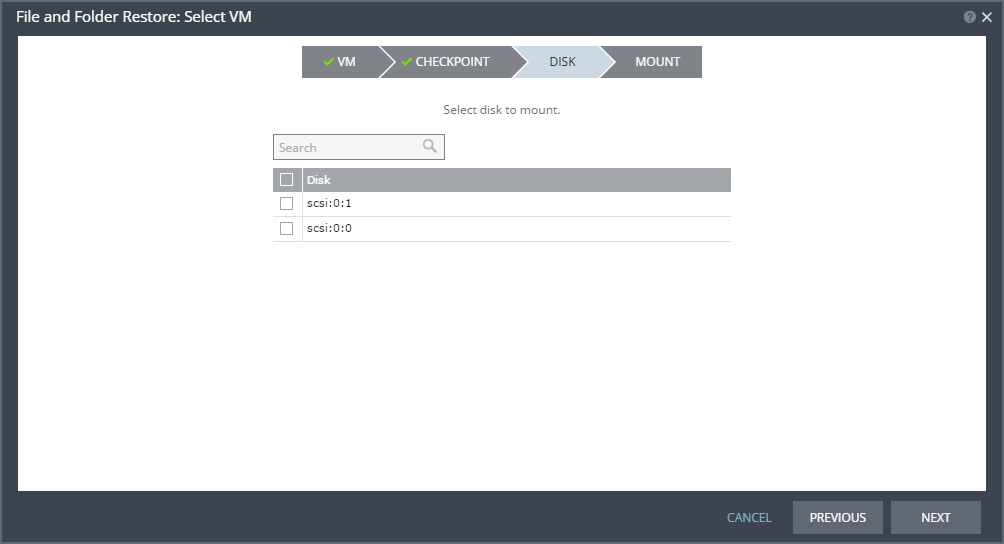
The DISK step is displayed. All disks associated with the selected virtual machine are displayed.
5. Select a disk to mount and click NEXT.
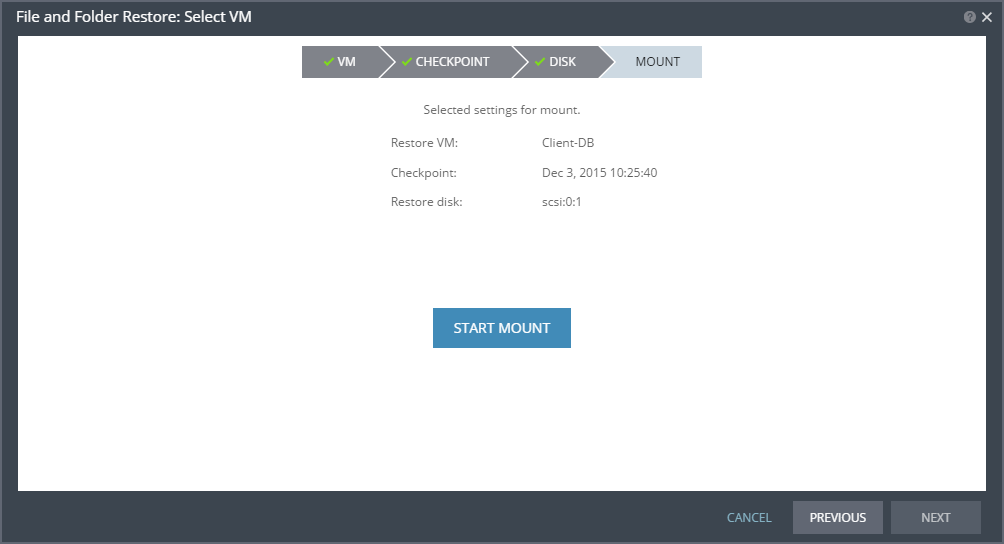
The MOUNT step is displayed. The settings you selected are displayed.
6. Click START MOUNT to mount the disk.
Mounting the disk may take some time, depending on the selected checkpoint and the number of files and folders on the disk.
■ When the first part of the restore process is done, icons appear next to the completed task.
■ By clicking the folder icon (

) you can browse the folders and files on the disk.
■ By clicking the unmount icon (

) you can unmount the disk without restoring any files or folders.


 ) you can browse the folders and files on the disk.
  ) you can unmount the disk without restoring any files or folders.