Ensuring Transaction Consistency in Microsoft Windows Server Environments
The Microsoft Volume Shadow Copy Service (VSS) enables taking manual or automatic offsite backup copies or snapshots of data, even if it has a lock, on a specific volume at a specific point-in-time over regular intervals. This ensures not just that the data is crash consistent but also transaction consistent if recovery is needed.
Zerto Virtual Replication enables adding checkpoints to the journal that are synchronized with VSS snapshots.
To use Zerto Virtual Replication with VSS to ensure application consistency you must install the ZertoVssAgent on every virtual machine that uses VSS and that you want to protect with Zerto Virtual Replication.
You can install the ZertoVssAgent on the following supported Windows operating systems:
Operating Systems |
Windows Server 2008, all versions (SPs and R2) |
Windows Server 2012, all versions (SPs and R2) |
To install the ZertoVssAgent:
1. Download the ZertoVssAgent, ZertoVss64Agent.msi, from the Zerto Support Portal downloads page, on the virtual machines that use VSS and that you want to protect with Zerto Virtual Replication.
2. Run the ZertoVssAgent on the virtual machines that use VSS and that you want to protect.
Note: Only a single virtual machine in a VPG can have application consistent checkpoints and the VSS checkpoint is only applied to the virtual machine where the ZertoVssAgent is installed. Thus, even if more than one virtual machine runs VSS, you only install the Zerto VssAgent on one of the virtual machines in the VPG. Also, the virtual machine where the ZertoVssAgent is installed must have network connectivity to the local Zerto Virtual Manager in order to be able to add VSS checkpoints successfully.
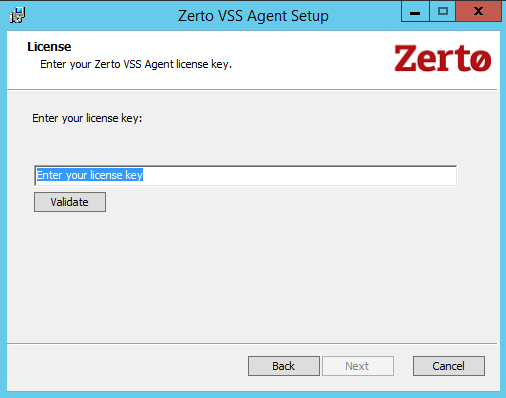
3. Enter the license key and click Validate.
4. Follow the wizard through the installation.
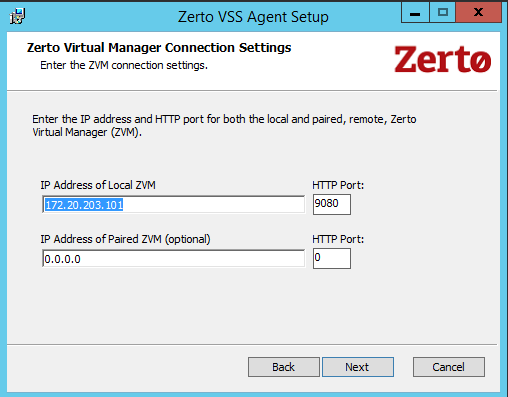
The Zerto Virtual Manager Connections Settings dialog is displayed.
5. Specify the IP address and HTTP port number for the Zerto Virtual Managers managing the protection of the virtual machines, both for the local site and optionally, for the paired, remote site. If the same hypervisor manager is used both for protecting and recovering virtual machines, specify the IP address and HTTP port number for the single Zerto Virtual Manager installed.
Note: The default HTTP port number when Zerto Virtual Replication is installed is 9080.
If you enter a wrong IP address or port you can correct the address or port after the installation completes by editing the ZertoVssAgentGUI.exe.conf file in the ZertoVssAgent folder under the folder where the ZertoVssAgent is installed, for example, C:\Program Files\Zerto.
6. Click OK.
The ZertoVssAgent is installed and the Add VSS Checkpoint is placed on the desktop. The agent runs as a Windows service, ZertoVssprovider.
You can add a checkpoint to the Zerto Virtual Replication via the Add VSS Checkpoint dialog, via the command line or as a scheduled task. The ZertoVssAgent ensures that the virtual machine is in an application consistent state and then sends the checkpoint to the Zerto Virtual Manager, which then adds the checkpoint to the journals for the VPG containing that virtual machine.
The checkpoint is logged for the entire VPG, however any other virtual machine in the VPG will have a crash-consistent checkpoint.
To add a checkpoint while ensuring application consistency via the Add VSS Checkpoint dialog:
1. On a virtual machine where the ZertoVssAgent has been installed, click Start > Programs > Zerto Virtual Replication > Add VSS Checkpoint or double-click the Add VSS Checkpoint icon on the desktop.
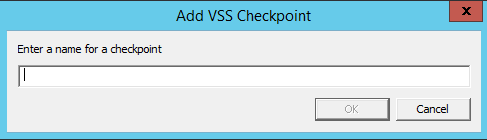
The Add VSS Checkpoint dialog is displayed.
2. Enter a name for the checkpoint.
3. Click OK.
Note: A message that the process was completed is displayed on the machine where the ZertoVssAgent is installed. The handling of the checkpoint by the Zerto Virtual Manager is done asynchronously and you can check via the recent tasks list in the Zerto User Interface that the checkpoint is added in the VPG.
To add a checkpoint while ensuring application consistency via the command line:
1. Open the command line dialog as an administrator.
2. Navigate to the directory where the ZertoVssAgent is installed. The default location is C:\Program Files\Zerto\ZertoVssAgent\
3. In the command line, run the following:
ZertoVssAgent.exe <localURL> <localPort> <remoteURL> <remotePort> <checkpoint> |
where:
localURL – The URL for the Zerto Virtual Manager that manages the protected site.
localPort – The HTTP port for the Zerto Virtual Manager that manages the protected site.
remoteURL – The URL for the Zerto Virtual Manager that manages the recovery site.
remotePort – The HTTP port for the Zerto Virtual Manager that manages the recovery site.
checkpoint – The name of the checkpoint.
Note: A message that the process was completed is displayed on the machine where the ZertoVssAgent is installed. The handling of the checkpoint by the Zerto Virtual Manager is done asynchronously and you can check via the recent tasks list in the Zerto User Interface that the checkpoint is added in the VPG.
To schedule checkpoints:
1. Open the Task Scheduler.
2. Under the Actions menu item, select Create Task.
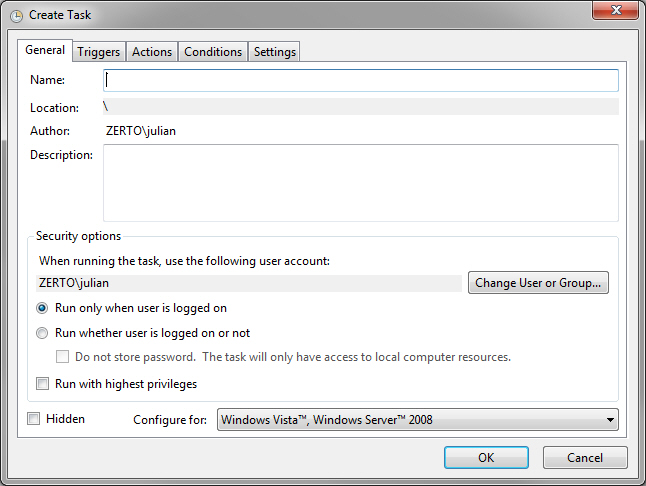
The Create Task dialog is displayed.
3. Enter the following:
Name – A name for the task.
Run whether the user is logged on or not – Make sure that this is checked.
Run with highest privileges – Make sure that this is checked.
The Windows Scheduled Task will be created and run by the currently logged in user. After the task is created, Zerto recommends changing this to
NT AUTHORITY\Network Service permissions and follow the steps to allow the correct permissions as described in
To set COM permissions for VSS when “Access Denied” errors are received:.
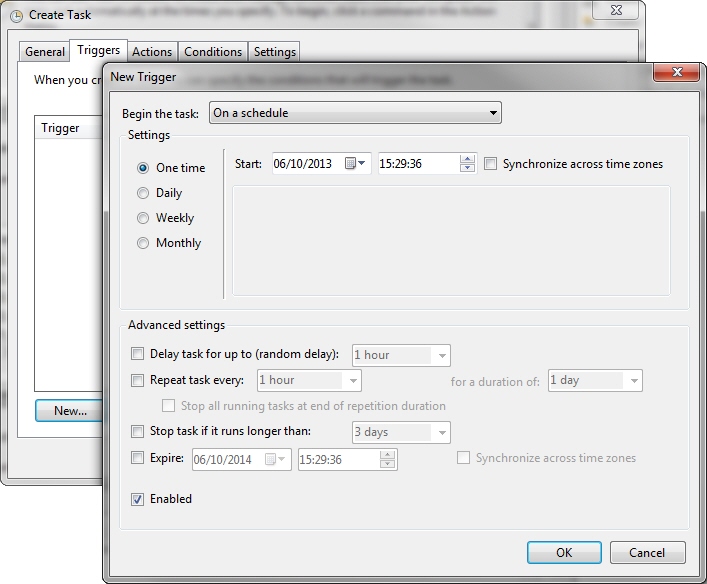
4. Select the Triggers tab and configure a new trigger.
The New Trigger dialog is displayed.
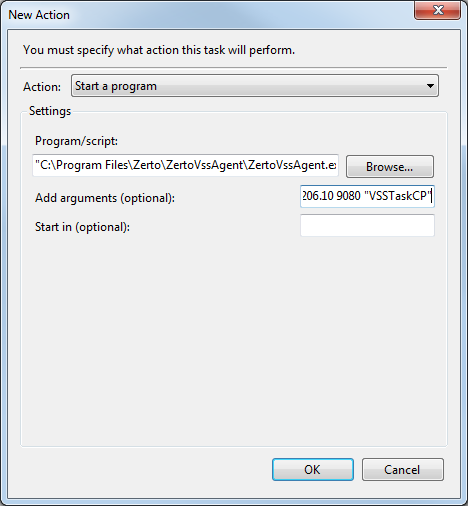
5. Select the Actions tab and create a new action to start the ZertoVssAgent with the IP address and port of the Zerto Virtual Manager and the checkpoint to use. For example:
C:\Program Files\Zerto\ZertoVssAgent\ZertoVssAgent.exe and
106.18.206.10 9080 106.18.206.10 9080 "VSSTaskCP"
That is, with the format: <protecting_ZVM_IP> 9080 <recovery_ZVM_IP> 9080 "<CP_name>"
6. Click OK.
7. Select the Settings tab and make changes as required. Make sure Stop the task if it runs longer than is not selected.
8. Click OK.
There are certain permissions required for the Windows scheduled task to execute successfully. For example, you may see the following in the event logs:
Volume Shadow Copy Service error: Unexpected error querying for the IVssWriterCallback interface. hr = 0x80070005 |
This is often caused by incorrect security settings in either the writer or requestor process.
If this is the case, the service which runs the Windows Scheduled Task must have NT AUTHORITY\Network Service permissions or be using the SYSTEM account to run the task. VSS operations are performed as NT AUTHORITY\Network Service which is not granted COM access by default on the service assigned to Windows Scheduled Tasks.
The following procedure is only required if the windows scheduled task is using the Network Services account.
The correct permissions can be assigned by using the Component Services application, accessed by running dcomcnfg.exe, in the windows guest.
To set COM permissions for VSS when “Access Denied” errors are received:
1. Run dcomcnfg.exe.
The Component Services dialog is displayed.
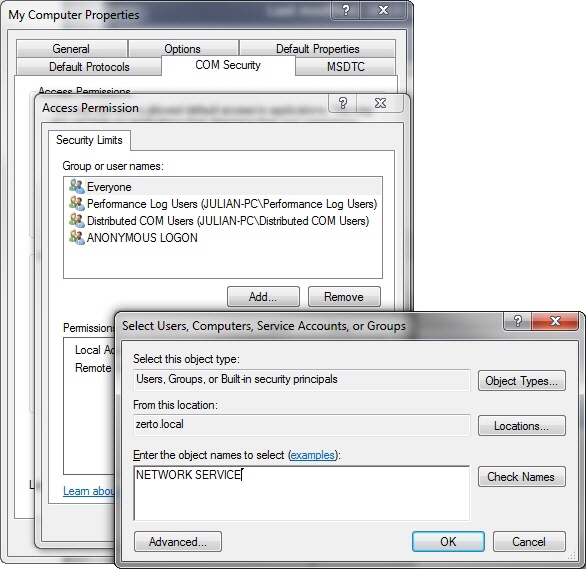
2. Expand the Component Services node to My Computer and right-click to access the Properties menu.
The My Computer Properties dialog is displayed.
3. Select the COM Security tab and click Edit Limits under Access Permissions.
4. Add the NETWORK SERVICE local access.
5. Click OK and verify that the user is now in the Access Permission list.
6. Click OK to commit these changes.
Access Denied messages should no longer be written in the event viewer for VSS. Additionally, you can grant Network Service full control over HKLM\SYSTEM\CurrentControlSet\Services\VSS\Diag. You can also check this key HKLM\SYSTEM\CurrentControlSet\Services\VSS\VssAccessControl which should at least contain the DWORD NT Authority\NetworkService set to value 1.
You may also add a new DWORD like DOMAIN\MyZertoServiceUserAccount and set its value to 1.
During recovery you can recover to the VSS checkpoint, ensuring both application consistency and that the data is crash‑consistent for this virtual machine. For details, refer to
To test failover: and
To initiate a failover:.
Test to See if Guest Can be Quiesced Successfully
If you are not receiving the checkpoints or if you wish to test if the Windows guest can be quiesced successfully, a snapshot may be taken of the VM via the vSphere Client. If VMware tools are installed, VMware can quiesce the Windows guest operating system. If this snapshot takes a long time to generate, then the ZertoVssAgent checkpoints may fail. For example, if this operation takes longer than the frequency of the Windows scheduled task, then either the task must be set to a higher interval or the Windows guest must be troubleshooted to lower the quiesce time.
Note: To check if the Windows guest can be quiesced successfully, you must first uninstall the ZertoVssAgent and then take the VMware snapshot.
Changing the Zerto Virtual Manager Used by the ZertoVssAgent
When you install the ZertoVssAgent, you specify the Zerto Virtual Manager to use to manage the addition of checkpoints for the virtual machines that uses VSS and that you want to protect in VPGs. You can change the IP and port of the VPG that you specified during the installation either by rerunning the installation and selecting the Repair ZertoVssAgent option or by editing IP and port values in the ZertoVssAgentGUI.exe.conf file in the folder where the ZertoVssAgent is installed.