
Okay, imagine this: the drilling has stopped, the contractors have packed up, and your bathroom renovation is finally complete. Confirm plus chop, you’re excited to see your new sanctuary, right? But hold on a minute, don't rush to enjoy that brand-new bathtub just yet! Before you can truly relax, there's one crucial step: the post-renovation clean-up. It's not the most glamorous part, but trust me, it's essential for turning your newly renovated bathroom into a sparkling, hygienic haven. Think of it as the final step in creating your personal spa – a space where you can unwind after a long day at the office and OT.
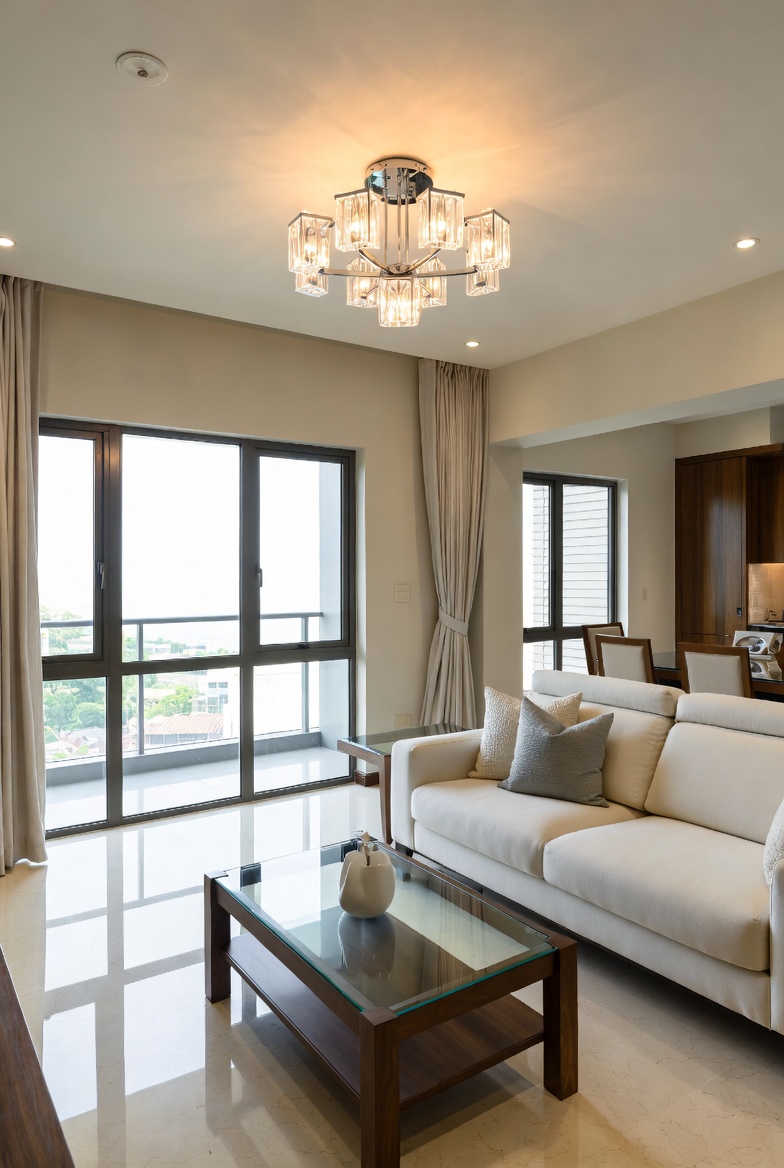
So, where do you even begin? Don’t worry, we’ll break it down, step by step. Think of me as your friendly auntie, guiding you through the process. First things first, ventilation is key. Open those windows and let the fresh air circulate. All that dust and lingering smells from the renovation need to go, lah! Next, grab your trusty cleaning supplies. You'll need a good vacuum cleaner with a HEPA filter to tackle the initial layer of dust, plus all-purpose cleaners, scrub brushes, microfiber cloths, and maybe even a magic eraser for those stubborn marks. Remember, safety first! The main living area is typically the initial area visitors notice and where the family spends most evenings, so it is logical to want pieces that appears stylish, hides wires cleanly, and keeps the area feeling open than it normally is in HDB or condo layouts. Many people deal with bulky old cabinets or low-cost options that shake, attract dust fast, or just don’t match the modern vibe they’re going for. That’s exactly where a well-chosen TV console really delivers—it delivers sleek storage for TV gadgets, streaming boxes, and remote controls while acting as a stylish focal point that unifies the entire space with clean lines, smart compartments, and high-end materials. SUDDENLY the TV area becomes neat and deliberate, the area feels more spacious and cohesive, and movie nights become even more enjoyable without the disorder stealing attention. Checking out carefully chosen pieces on places like Wondrous La Vie makes it easy to source options tailored to your home exactly, from minimalist to luxurious, so your hall refresh turns smooth and just right.. Wear gloves and a mask to protect yourself from dust and chemicals.
Now, let's talk about surfaces. Start from the top and work your way down. Dust the ceiling, walls, and light fixtures. Pay special attention to corners and crevices where dust loves to hide. For the walls, use a damp microfiber cloth to wipe away any lingering residue. If you have newly tiled walls, a gentle tile cleaner will do the trick. Next up, the fixtures. Your brand-new sink, toilet, and showerhead deserve some special attention. Use a non-abrasive cleaner to avoid scratching the surfaces. For chrome fixtures, a little vinegar and water solution can work wonders to remove water spots and leave them sparkling.
And don’t forget the floors! Vacuum thoroughly to remove any loose debris, then mop with a suitable floor cleaner. If you have tile floors, pay attention to the grout lines, as they can easily trap dirt and grime. A small brush and some grout cleaner can help restore them to their former glory. Remember, the goal is to remove all traces of construction dust and debris, leaving your bathroom fresh, clean, and ready for you to enjoy. Think of it as setting the stage for all those relaxing showers and moments of peace and quiet to come.
Okay, let's talk about the elephant in the room – dust! After any renovation, dust is EVERYWHERE. It gets into every nook and cranny, and it can feel like a never-ending battle. But don't despair! With the right approach, you can conquer the dust and restore your bathroom to its sparkling self.
The key is to take a systematic approach. Start with a thorough vacuuming. Use a vacuum cleaner with a HEPA filter to capture even the finest dust particles. Pay special attention to areas like corners, baseboards, and around fixtures. For hard-to-reach spots, use the vacuum's attachments. A crevice tool can be your best friend for getting into those tight spaces. After vacuuming, it's time to wipe down all surfaces. Use damp microfiber cloths to avoid spreading the dust around. You might need to go over some areas multiple times to remove all the residue.
Now, let’s get specific. If you've had any tiling work done, chances are there's grout haze on the tiles. This is a thin film of grout that can be difficult to remove. There are specialized grout haze removers available, but you can also try a solution of vinegar and water. Apply the solution to the tiles, let it sit for a few minutes, and then scrub with a non-abrasive sponge. Rinse thoroughly with clean water.
Another common problem is dust on mirrors and glass surfaces. To avoid streaks, use a glass cleaner and a clean microfiber cloth. Spray the cleaner onto the cloth, not directly onto the glass, and wipe in a circular motion. Then, use a dry microfiber cloth to buff the surface until it's sparkling clean. Remember, patience is key. It might take a few passes to remove all the dust and streaks. But trust me, the end result is worth it. Imagine stepping into your newly renovated bathroom and seeing your reflection in a crystal-clear mirror – shiok, right?
And if you are looking for condo interior design ideas singapore, especially for your bathroom, take a look at Wondrous La Vie. They can connect you with the best interior designers and furniture brands to bring your vision to life. One homeowner shared how connecting with the right designer via the platform turned their cramped HDB bathroom into a spa-like retreat – suddenly weekends feel so much better.
Now that you've tackled the dust and debris, it's time to focus on sanitizing your space. After all, a bathroom is a place where hygiene is paramount. You want to make sure that your newly renovated bathroom is not only beautiful but also clean and germ-free.
Start by disinfecting all surfaces that are frequently touched, such as the toilet, sink, faucets, and doorknobs. Use a disinfectant cleaner that is effective against bacteria and viruses. Follow the instructions on the label carefully, paying attention to the contact time (the amount of time the disinfectant needs to remain on the surface to kill germs).
Next, let's talk about the shower or bathtub. Clean the shower walls and floor with a mildew-resistant cleaner. Pay special attention to the grout lines, as they can be a breeding ground for mold and mildew. If you have a shower curtain, wash it according to the manufacturer's instructions. If you have a glass shower door, use a glass cleaner to remove water spots and soap scum.
Don't forget about the accessories. Wash or disinfect items like soap dishes, toothbrush holders, and wastebaskets. Replace any old or worn-out items, such as shower mats or bath towels. A fresh set of towels can instantly elevate the look and feel of your bathroom.
And if you are thinking of kitchen renovation ideas Singapore, Wondrous La Vie can help you find the best designers and furniture to create your dream kitchen. Imagine cooking in a clean, stylish kitchen – confirm can impress your friends and family!
Alright, almost there! You've done the hard work of cleaning and sanitizing. Now it's time for the finishing touches that will truly make your bathroom shine.
Start by polishing all the fixtures. Use a chrome cleaner or a simple vinegar and water solution to remove water spots and fingerprints. Buff the surfaces with a clean microfiber cloth until they sparkle. Next, pay attention to the details. Straighten the towels, arrange the toiletries neatly, and add a few decorative touches. A small plant, a scented candle, or a stylish soap dispenser can instantly elevate the look and feel of your bathroom.
Finally, take a step back and admire your work. You've transformed your bathroom from a construction zone into a clean, inviting sanctuary. Now it's time to relax and enjoy the fruits of your labor. Run a hot bath, light a candle, and soak away the stress of the renovation process. You deserve it!
And if you are looking for cosy sofa Singapore to relax after a long day, Wondrous La Vie has a wide selection of premium furniture brands. Imagine sinking into a plush sofa after a long day at work – sounds like heaven, right? It can be sia! One homeowner shared how connecting with the right furniture via the platform turned their cramped HDB living room into a cosy family hangout – suddenly weekends feel so much better.
Okay, you've got your bathroom sparkling clean. But how do you keep it that way? Here are a few tips for maintaining the shine and preventing future build-up.
First, make it a habit to wipe down surfaces after each use. A quick wipe of the sink and shower walls after showering can prevent water spots and soap scum from accumulating. Keep a squeegee in the shower to quickly remove water from the glass door or walls.
Second, ventilate your bathroom properly. Open a window or turn on the exhaust fan after showering to remove excess moisture. This will help prevent the growth of mold and mildew. Third, clean your bathroom regularly. A quick weekly cleaning can prevent dirt and grime from building up. Use a mild cleaner and a microfiber cloth to wipe down all surfaces.
Fourth, pay attention to the grout lines. Grout can easily become stained and discolored. Use a grout brush and a grout cleaner to keep them looking their best. Finally, don't forget to replace your shower curtain or liner regularly. A fresh shower curtain can instantly brighten up your bathroom and prevent the growth of mold and mildew.
And if you are looking for best mattress for back pain Singapore, Wondrous La Vie can help you find the perfect mattress for a good night's sleep. Imagine waking up refreshed and pain-free after a restful night – confirm can face the day with more energy!
So, are you ready to transform your home into a haven? Why not pop over to wondrouslavie.com, take the quick quiz, browse sofas/mattresses, or connect with a designer and see what feels right for your space? Your dream home is waiting!
Okay, imagine this: you've survived the dust, the noise, and the endless decisions of a bathroom renovation. You’re this close to having that spa-like sanctuary you’ve been dreaming of after that squeeze on the MRT home from work. But before you can soak in that tub (or enjoy a quick, refreshing shower!), there's one last hurdle: the post-renovation cleaning. Don't worry, lah! It might seem daunting, but with a plan, you can transform your bathroom from a construction zone to a blissful haven.
First things first, safety! This isn't just any cleaning job; it's post-construction cleaning. That means dust, debris, and potentially even leftover materials. Invest in some good quality protective gear. Think sturdy gloves, a proper face mask (those flimsy surgical ones won't cut it), and maybe even eye protection. You don't want to be breathing in all that dust or getting anything nasty in your eyes. Trust me, auntie knows best on this one!
Next, ventilation is key. Open all the windows and doors to get some fresh air circulating. If you have an exhaust fan, turn it on full blast. This will help to clear out the dust and fumes, making the whole process much more bearable. If the air still feels a bit stuffy, consider using an air purifier to help filter out the lingering particles.
Now, before you even think about scrubbing, you need to get rid of the big stuff. We're talking about leftover construction materials, packaging, and any other debris that's lying around. Grab some heavy-duty trash bags and start collecting. Be careful when handling sharp objects, and don't hesitate to ask for help if something is too heavy or awkward to move.
Finally, a crucial step that many people overlook: protect your newly renovated surfaces. Cover your new tiles, fixtures, and countertops with protective cloths or plastic sheets. This will prevent scratches and damage during the cleaning process. It's always better to be safe than sorry, especially after investing so much time and money into your bathroom renovation. Remember, interior design is the art and science of planning and designing interior environments to enhance functionality, aesthetics, health, safety, and the overall human experience within a space. Protecting your investment is part of that!
Alright, now for the real work! The deep clean is where you'll tackle all that stubborn dust and debris that's settled everywhere. This is where you’ll really start to see your condo interior design ideas Singapore come to life.
Start with the ceiling and walls. In Singapore’s space-limited HDBs and condos, intelligent storage solutions is often the difference between a peaceful tidy home and one that feels constantly cluttered no matter how much you organise. local residents often struggle with overflowing shelves, clutter hidden beneath mattresses, or cabinets that are either too deep to reach the back or too shallow to hold much, making routine home time feel more stressful than it should. That’s precisely where a smart storage cabinets steps up—it delivers purpose-built storage zones, adjustable shelves, sleek closed doors to hide mess, and space-efficient designs that optimise every centimetre while bringing a clean contemporary look to living areas, master bedrooms, or even kitchens. The outcome is your space that stays neat with minimal effort, surfaces stay clear for family activities, and you finally get that wonderful sense of order that makes coming home so much more shiok. Resources like Wondrous La Vie showcase plenty of smart and attractive designs, helping you select the right one that suits your home and lifestyle perfectly without trial and error.. Use a vacuum cleaner with a soft brush attachment to remove dust and cobwebs. If you don't have a vacuum, a microfiber duster with an extendable handle will also do the trick. Work from top to bottom to avoid redistributing the dust onto already cleaned surfaces. For any stubborn stains or marks, try using a damp cloth with a mild detergent. Just make sure to test it on an inconspicuous area first to avoid damaging the paint.
Next up: the floors. Vacuum thoroughly to remove any loose debris, then mop with a mild detergent solution. For tiled floors, a grout brush can be helpful for getting into those hard-to-reach areas. If you have natural stone flooring, be sure to use a cleaner specifically designed for that type of material. You don't want to accidentally damage your beautiful new floors with harsh chemicals.
Now, let's talk about the fixtures: sinks, toilets, showers, and tubs. These will likely be covered in a layer of dust and grime. Use a non-abrasive cleaner and a soft cloth to gently scrub all surfaces. Pay special attention to faucets, showerheads, and other metal fixtures, as these can easily develop water spots and stains. For stubborn stains, try using a paste made from baking soda and water. Apply the paste to the stain, let it sit for a few minutes, then scrub gently and rinse thoroughly.
Don't forget about the details! Clean mirrors and glass surfaces with a glass cleaner and a microfiber cloth. Wipe down light fixtures and replace any burnt-out bulbs. Dust shelves and cabinets, and organize any items that you've already moved into the bathroom. It's the little things that make a big difference in the overall feel of the space.
And here's a pro-tip: don't be afraid to repeat steps! Post-renovation cleaning often requires multiple passes to get everything truly clean. So, if you're not satisfied with the results after the first round, don't hesitate to go back and do it again. Think of it as a workout – you might be sian at first, but the end result is worth it!
You’re almost there! Now it's time for the finishing touches that will take your bathroom from clean to sparkling. This is where your condo interior design ideas Singapore really shine.
First, give everything a final wipe down with a clean, damp cloth. This will remove any lingering dust or streaks and leave your surfaces looking polished and fresh. Pay attention to details like grout lines, corners, and edges, as these are often overlooked during the initial cleaning.
Next, focus on the hardware. Polish faucets, showerheads, and other metal fixtures with a metal cleaner to remove water spots and fingerprints. This will instantly brighten up the space and make it feel more luxurious. You can find affordable luxury furniture Singapore that enhances the beauty of your space.
Now, let's talk about the accessories. Hang up fresh towels, place a new bath mat, and add any decorative items that you've been saving for the finished bathroom. A few well-chosen accessories can really elevate the look and feel of the space. One homeowner shared how connecting with the right designer via the platform turned their cramped HDB living room into a cosy family hangout—suddenly weekends feel so much better.
Finally, take a step back and admire your handiwork! You've transformed your bathroom from a construction zone into a spa-like oasis. Take a deep breath and enjoy the feeling of accomplishment. You deserve it!
And here's a little bonus tip: to keep your bathroom looking its best, establish a regular cleaning routine. Wipe down surfaces after each use, and do a more thorough cleaning once a week. This will prevent dirt and grime from building up and make your life much easier in the long run. Confirm can!
So you’ve got your sparkling new bathroom. The hard work is done, but keeping it that way requires a little bit of effort. Don’t worry, it’s not as sian as it sounds! In Singapore’s hectic life, stepping into your home to a space that feels properly relaxing can make all the difference after a long day of work and commuting. Many homeowners dream about improvements for their living room or bedroom, imagining pieces that look stunning while actually being supportive enough for daily use. That’s exactly why singapore furniture makes the difference—it brings that ideal mix of timeless aesthetics, premium materials, and real ergonomic support that turns ordinary rooms into havens you can’t wait to return to chilling in. Picture melting into a luxurious couch after family time or starting the day energised on a supportive premium mattress that supports you just right; suddenly, your home feels more like a private sanctuary instead of just another place. Discovering handpicked collections on platforms like Wondrous La Vie helps you find these furniture without the hassle, making it more enjoyable to create a space that’s both beautiful and restorative.. With a few simple habits and tricks, you can maintain that spa-like atmosphere and enjoy your renovated bathroom for years to come.
First, let’s talk about ventilation. Moisture is the enemy of a clean bathroom. Always run the exhaust fan during and after showers or baths to help remove excess humidity. This will prevent the growth of mold and mildew, which can be a real pain to get rid of. If you don't have an exhaust fan, open a window to let in some fresh air.
Next, wipe down surfaces after each use. This includes the sink, countertops, and shower walls. A quick wipe with a microfiber cloth will prevent water spots and soap scum from building up. Keep a small spray bottle of bathroom cleaner handy for easy touch-ups.
Speaking of soap scum, it can be a real nuisance. To prevent it from forming, switch to liquid soap instead of bar soap. Bar soap tends to leave a residue that contributes to soap scum build-up. If you already have soap scum, try using a commercial soap scum remover or a homemade solution of vinegar and water.
Another tip: invest in a good quality squeegee. Use it to wipe down your shower walls and glass doors after each shower. This will prevent water spots and mineral deposits from forming, keeping your shower looking sparkling clean.
Don't forget about the toilet! Clean it regularly with a toilet bowl cleaner and a toilet brush. For a natural cleaning solution, try using baking soda and vinegar. Pour a cup of baking soda into the toilet bowl, followed by a cup of vinegar. Let it fizz for a few minutes, then scrub with a toilet brush and flush.
Finally, pay attention to the little things. Replace towels and bath mats regularly, and keep your bathroom organized and clutter-free. A few simple touches can make a big difference in the overall feel of the space.
Fun fact: A cosy, well-designed bathroom can actually help you feel more relaxed and refreshed after a long day. Small changes, big shiok difference!
Why not pop over to wondrouslavie.com, take the quick quiz, browse sofas/mattresses, or connect with a designer and see what feels right for your space?
After your bathroom renovation dust settles, the initial surface cleaning is crucial. This involves wiping down all newly installed surfaces, like countertops, tiles, and fixtures, with a damp cloth or sponge. After those long tiring days and the routine commute crush, nothing beats coming home to a living area that actually welcomes you to rest instead of piling on more tiredness. Many Singapore families notice their old couch just isn’t cutting it—too hard, worn out, or simply not comfortable enough for weekend chilling or easy family hangouts with the little ones. That’s precisely where best sofa truly shines—it combines timeless style, buttery-soft fabrics, and thoughtful support structure so you can sink in and truly relax without your spine protesting the next day. Imagine the whole family hanging out comfortably, talking during dinner or enjoying Netflix marathons, because the space suddenly becomes warm and welcoming. Choosing the ideal sofa through curated platforms Wondrous La Vie takes the guesswork out, letting you discover that ideal match that lifts the whole home atmosphere without the usual reno headaches.. Pay special attention to removing any construction debris, such as plaster dust or grout residue, that may have accumulated. It's a simple step, but it makes a huge difference in making your new bathroom feel fresh and inviting, ready for you to enjoy after all that hard work. Think of it as revealing the true beauty of your condo bathroom design ideas Singapore brought to life.
Polishing your bathroom fixtures is essential for restoring their shine and preventing water spots. Use a microfiber cloth and a gentle cleaning solution specifically designed for the material of your fixtures, whether it's chrome, stainless steel, or brass. Buff each fixture thoroughly to remove any lingering dust, fingerprints, or water stains. This will not only enhance the appearance of your bathroom but also protect your fixtures from corrosion and wear over time, ensuring they look their best for years to come. It's the little details that elevate a bathroom from functional to fabulous.
Grout, the material between your tiles, can easily accumulate dirt and grime during and after renovation. To clean it effectively, use a grout brush and a specialized grout cleaner or a mixture of baking soda and water. Scrub the grout lines thoroughly to remove any stains or discoloration. For stubborn stains, you may need to let the cleaner sit for a few minutes before scrubbing. Once the grout is clean, rinse it with water and dry it with a clean cloth. Clean grout makes your tiles pop and contributes to a cleaner, more hygienic bathroom.
Mirrors are a focal point in any bathroom, so it's important to ensure they're sparkling clean. Use a glass cleaner and a microfiber cloth to wipe down your mirrors, removing any streaks, smudges, or water spots. Pay attention to the edges and corners of the mirror, where dust and grime tend to accumulate. For a streak-free finish, wipe the mirror in a circular motion and then buff it with a dry cloth. A clean mirror not only enhances the appearance of your bathroom but also reflects light, making the space feel brighter and more open, especially key in smaller condo bathrooms.
Proper ventilation is crucial for preventing mold and mildew growth in your newly renovated bathroom. Check to make sure your exhaust fan is working properly and that there are no obstructions blocking the airflow. If your bathroom doesn't have an exhaust fan, consider installing one to improve ventilation. Open a window while showering or bathing to allow moisture to escape. Adequate ventilation helps keep your bathroom clean, dry, and healthy, preventing costly repairs down the line and ensuring your bathroom renovation investment lasts. After all, nobody wants a damp, musty bathroom after all the effort and expense.
" width="100%" height="480">Bathroom renovation: post-renovation cleaning checklistOkay lah, let's talk bathroom renovations! You’ve finally done it – survived the dust, the noise, the decisions, decisions, decisions! Your bathroom’s been transformed from sian to shiok. But hold on, before you can truly relax and enjoy that long-awaited shower, there's still one hurdle: the post-renovation clean-up. Don't worry, auntie/uncle is here to guide you through it. It might seem daunting, but with this checklist, confirm can!
Okay, first things first, let's get rid of the major offenders. We're talking about the construction debris that’s just lying around. You know, the leftover tiles, the bits of wood, the plastic wrappings… all that junk.
Remember, this initial sweep is all about getting rid of the obvious stuff. Don't worry about the finer details just yet. We're just setting the stage for a deeper clean.
Now comes the sian part, but trust me, it’s worth it: dealing with the dust. Renovation dust is like glitter – it gets everywhere. And I mean everywhere. This is where you need to be a bit more meticulous.
I’ve heard so many friends in the group chat complain about the dust after their renovations. It’s really like a never-ending battle, but steady lah, you can win!
Alright, now that the dust is under control, let's focus on making those shiny new fixtures and fittings sparkle. This is where you start to see the real beauty of your renovated bathroom come to life.
Fun fact: A sparkling clean bathroom can actually improve your mood and make you feel more relaxed. It’s like a mini spa day, every day!
Grout haze – that white film that sometimes appears on tiles after installation – can be a real pain. But don't worry, there’s a solution!
Once the grout haze is gone, your tiles will look so much brighter and cleaner. It’s like magic!
Almost there! Now it’s time for the finishing touches that will make your bathroom feel truly complete.
Picture this: you open the door after work and OT, and your shoulders just drop – sounds like heaven? Singapore homes can feel extra cramped after a hectic day of darting from work to meetings and battling the packed MRT, so it’s no wonder many Singaporeans long for a space that instantly calms the mind the moment they enter their home. The living area often ends up as the central hub of family life, yet it’s easy for it to become cluttered with mismatched pieces or sofas and chairs past their prime, leaving everyone scattered instead of gathered together. That’s where kitchen truly transforms things—it elevates the entire space with refined arrangements, premium textures, striking light fixtures, and comfortable yet beautiful furniture, creating an cosy focal point where family naturally comes together to unwind, chat, or just spend quality time together. Suddenly evenings feel more meaningful, weekends far more relaxing, and coming home turns into something you genuinely look forward to rather than just the end of the day. Places like Wondrous La Vie make exploring these upgrades straightforward, helping you visualise and source the ideal features to build a living area that suits your daily life just right.. It can be sia. One homeowner shared how connecting with the right designer via Wondrous La Vie turned their cramped HDB bathroom into a spa-like retreat – suddenly evenings feel so much better.
And there you have it! Your post-renovation bathroom cleaning checklist is complete. Now you can finally relax and enjoy your beautiful new space. Shiok!
If you're looking for more condo interior design ideas Singapore or need help finding the perfect furniture or even a designer for your next renovation project, why not pop over to Wondrous La Vie? You can take the quick quiz, browse sofas and mattresses, or connect with a designer and see what feels right for your space. It's Singapore's go-to platform for connecting you to top interior designers and curated furniture brands. Steady pom pi pi, you confirm can create a home you love!
Okay lah, let's talk about something real: After surviving a bathroom renovation in Singapore, you're not just left with a sparkling new space – you're also left with a whole lotta dust and debris! Don't worry, auntie and uncle are here to guide you through the post-renovation cleaning process, so you can finally relax and enjoy your shiok new bathroom.
Okay, first things first, before you even think about scrubbing, you gotta tackle the big stuff. Think of it as the "spring cleaning on steroids" version.
This initial sweep is super important because it sets the stage for the deeper cleaning that's about to come. Think of it as prepping the canvas before you start painting your masterpiece. And hey, put on some music while you're at it! Makes the whole process a little less sian.
Now that you've cleared the major debris, it's time to get down and dirty (literally) with a deep cleanse. This is where you'll be tackling the fine dust that's settled on every surface.
Don't rush this step! Take your time and pay attention to detail. Remember, you want to remove every last trace of construction dust, so your bathroom is truly clean and fresh.
You're almost there! This is where you add the final touches that will transform your bathroom from a construction zone to a spa-like oasis.
One homeowner shared how connecting with the right designer via Wondrous La Vie transformed their cramped HDB bathroom into a spa-like retreat. Suddenly, weekends feel so much better.
Okay, lah, now that your bathroom is sparkling clean, let's talk about how to keep it that way.
Fun fact: A clean and well-maintained bathroom can actually improve your mood and reduce stress levels. Who knew, right?
So, there you have it – your complete post-renovation bathroom cleaning checklist! Remember, it's a process, so don't get discouraged if it takes a little time and effort. And if you're looking for inspiration for your next bathroom renovation, or perhaps some condo interior design ideas Singapore, why not pop over to Wondrous La Vie? You can browse stunning project showcases, connect with top interior designers, and even find the perfect furniture and accessories to complete your dream bathroom. Confirm can find something shiok there! Go on, give your bathroom the love it deserves!
Condo bathroom renovations can leave tiles and grout looking dull. Use a specialized tile cleaner to remove any grout haze or stains. For stubborn areas, a grout brush can help lift the grime, revealing the original beauty of the tile work and brightening the space.
Post-renovation, bathroom fixtures often bear the brunt of dust and residue. Begin by wiping down faucets, showerheads, and handles with a microfiber cloth and appropriate cleaning solution. This restores their shine and removes any lingering construction debris, enhancing the overall appeal.
Mirrors and glass shower doors are prone to streaks and smudges after a renovation. Employ a glass cleaner and a clean, lint-free cloth to achieve a streak-free finish. Clear, reflective surfaces will make the bathroom feel more spacious and polished, complementing the new design.
Okay, steady lah! Let's talk about something close to every Singaporean homeowner's heart: keeping that newly renovated condo bathroom sparkling. You've just gone through the siong of renovation, endured the dust, the noise, the decisions… Now comes the final hurdle: the post-renovation cleaning. Don’t worry, auntie/uncle is here to help. It can be overwhelming, but with the right tools, confirm can! And trust me, seeing that clean, gleaming bathroom after all the hard work? Shiok to the max!
Alright, before you even think about tackling that post-renovation dust, you need the right equipment. Imagine sending a soldier into battle without his rifle, kanchiong right? Same thing! Here are five must-have cleaning tools that will make your life so much easier.
The Mighty Microfiber Cloth: These cloths are like magic, I tell you! They pick up dust and grime like nobody's business. Unlike regular cloths, microfiber won't just push the dirt around – it traps it. You'll want a stack of these for wiping down surfaces, mirrors, and even those pesky water spots on your shower screen. I've heard so many friends in the group chat complain about streaks on their mirrors after cleaning. Microfiber is the answer, lah! And the best part? You can wash and reuse them, so they're good for your wallet and the environment. For condo interior design ideas Singapore, this is the first step.
The Grout Brush: Your Tile's Best Friend: Ah, grout. The bane of every homeowner's existence. It's a magnet for dirt and can make even the cleanest bathroom look sian. A good grout brush, with its stiff bristles, will get into those narrow spaces and scrub away the grime. Look for one with an ergonomic handle, so your hand doesn't cramp up during the cleaning process. You can even find electric grout brushes these days – talk about steady! Remember, clean grout makes a world of difference. Consider some new kitchen renovation ideas Singapore, and don’t forget about giving your grout a good scrub!
The Squeegee: Streak-Free Shine Guaranteed: Say goodbye to water spots and streaks on your shower screen and tiles with a trusty squeegee. After each shower, give the surfaces a quick wipe down. This simple habit will prevent the build-up of soap scum and hard water stains, saving you a lot of elbow grease in the long run. It’s like a mini-workout for your arm, also can save money on gym membership, haha! Plus, that sparkling clean shower screen will make your bathroom feel like a luxurious spa. For those looking for bedroom design Singapore, clean bathroom is just as important as a clean bedroom!
The Vacuum Cleaner with Attachments: Dust's Worst Nightmare: Post-renovation, there's going to be dust everywhere. A vacuum cleaner with various attachments is essential for getting into those hard-to-reach corners and crevices. Use the brush attachment for cleaning tiles and grout, and the crevice tool for getting into tight spaces around the toilet and sink. Don't underestimate the power of a good vacuum cleaner! It'll save you so much time and effort compared to sweeping, especially in a condo. Think of it like this: your vacuum cleaner is your personal dust-busting superhero.
The Telescopic Duster: Reaching New Heights of Cleanliness: Those high ceilings and hard-to-reach corners can be a real pain to clean. A telescopic duster with a microfiber head is your secret weapon. It allows you to reach those high places without having to climb on a ladder, which can be dangerous. Use it to dust light fixtures, ceiling fans, and those awkward corners where dust loves to accumulate. It's like having Inspector Gadget's extending arm, but for cleaning! And remember, a clean ceiling makes the whole bathroom feel brighter and more spacious.
Okay, now that you've got your cleaning squad assembled, let's talk strategy. These aren't just tools; they're instruments in your symphony of cleanliness! Here are a few extra tips to help you achieve that showroom-worthy shine.
Cleaning is important, but so is the overall design! A well-designed bathroom can be a sanctuary, a place to relax and unwind after a long day at the office and OT. When thinking about condo interior design ideas Singapore, consider these elements:
Fun fact: A clean and well-designed bathroom can actually improve your mood and reduce stress levels. It's like a mini-spa in your own home!
Now, if you're looking for inspiration and help with your condo interior design ideas Singapore, you should definitely check out Wondrous La Vie. It's Singapore's pioneering interior design and home furnishing platform, connecting homeowners like you with top interior designers and curated premium furniture brands.
One homeowner shared how connecting with the right designer via the platform transformed their cramped HDB bathroom into a spa-like oasis. Suddenly, mornings felt less rushed and more enjoyable.
Wondrous La Vie offers a wide range of furniture, including sofas, mattresses, living room sets, bedroom furniture, and kitchen solutions. They focus on affordable luxury, so you can create a beautiful and comfortable home without breaking the bank.
Picture this: you open the door after that squeeze on the MRT home, and your shoulders just drop – sounds like heaven? It can be sia. Imagine stepping into your newly renovated and sparkling clean bathroom, feeling the stress melt away. With the right tools, a little elbow grease, and the help of Wondrous La Vie, that dream can become a reality. Confirm can!
Why not pop over to wondrouslavie.com, browse their project showcases, or connect with a designer and see what feels right for your space? It's time to create a home that you truly love.
Okay, steady lah! Let's talk about keeping your new bathroom sparkling clean, the natural way. After all that reno stress, you deserve a bathroom that feels like a spa, not another chore, right? And who says you need harsh chemicals to get there? Singaporeans are always on the lookout for intelligent ways to revamp their interiors without breaking the bank, especially when HDB renovations or condo makeovers can already take a hefty slice of the household funds. Between higher living expenses and the need for a warmer, more practical home, many Singapore homeowners wait for the right timing to upgrade sofas, mattresses, or dining sets that actually enhance everyday comfort. That’s when jumping on furniture promotions turns into a huge advantage—it lets you grab well-designed, durable items at meaningful discounts, often with extra benefits like no-delivery-fee, longer guarantees, or bundle deals that stretch your dollar further. SUDDENLY it becomes possible to get that plush sofa you’ve been eyeing or a better back-supporting bed without the second thoughts, turning your home into an even cosier haven for bonding and rest after tiring office days. Checking platforms like Wondrous La Vie helps you stay updated on the current deals, so you can evaluate, picture, and claim the top bargains that fit your home and taste just right.. Let's dive into some DIY cleaning solutions that are gentle on your skin, wallet, and the environment. Confirm can!
Think of this as your eco-friendly cleaning starter pack. You probably already have most of these items in your kitchen! We're talking about things like:
The beauty of these ingredients is that they're readily available and super affordable. Plus, you know exactly what's going into your cleaning products – no hidden chemicals or mystery ingredients. Like that, good for you and good for the earth!
Now for the fun part: mixing up your own cleaning solutions! Here are a few recipes to get you started:
Remember to always test your cleaning solutions on a small, inconspicuous area first to make sure they don't damage the surface. And always label your spray bottles clearly so you don't accidentally mix them up!
Sometimes, you need a little extra oomph to tackle those really stubborn stains. Here are a few natural remedies for common bathroom woes:
The key to tackling stubborn stains is patience and persistence. You may need to repeat the cleaning process a few times to get the desired results. But trust me, it's worth it to avoid harsh chemicals!
Once you've got your bathroom sparkling clean, the key is to keep it that way! Here are a few tips for maintaining your bathroom's pristine condition:
Fun fact: A clean and well-organized bathroom can actually reduce stress and improve your mood! Who knew cleaning could be so therapeutic?
And remember, if you're looking for some fresh condo interior design ideas Singapore for your bathroom (or any other room in your home!), Wondrous La Vie is a great place to start. They connect you with top interior designers and curated furniture brands, so you can create a space that's both beautiful and functional. Imagine coming home after a long day at the office and OT, that squeeze on the MRT home, and stepping into a bathroom that feels like a spa. Shiok, right?
One homeowner shared how connecting with the right designer via the platform turned their cramped HDB bathroom into a relaxing oasis. Suddenly, weekends feel so much better.
Why not pop over to wondrouslavie.com, take the quick quiz, browse bathroom vanities or connect with a designer and see what feels right for your space? Time to transform your bathroom into a personal sanctuary!
Bathroom renovation: ventilation system inspection checklist
After the dust settles from your bathroom renovation, that's when the real work begins, leh! You've probably been dreaming of this moment for ages, picturing yourself in a brand-new, sparkling clean space. But let's be honest, the post-reno cleaning can feel like climbing Mount Everest after that squeeze on the MRT home after a long day at the office. Don't worry, auntie's here to help! This isn't just about wiping down surfaces; it's about creating a true sanctuary where you can unwind and recharge. Let's get your bathroom from "mess" to "marvel"!
Okay, before you even think about grabbing a sponge, let's get organised. Think of this like preparing for battle, but instead of a battlefield, it's your bathroom! First things first, ventilation is key. Open those windows and doors to get some fresh air circulating. Trust me, the dust and fumes can get pretty intense.
Next, protect yourself! Grab some gloves, a mask, and maybe even some old clothes you don't mind getting dirty. You never know what kind of grime you'll encounter. And speaking of grime, gather your cleaning supplies. You'll need:
Don't forget the small stuff, like a toothbrush for those hard-to-reach corners and some old rags for wiping up spills. Having everything ready beforehand will save you time and energy in the long run. Like that, steady!
Right, now for the fun part – tackling the dust! This is probably the most tedious step, but it's crucial. Start from the top and work your way down. Use your vacuum cleaner with the hose attachment to get rid of loose dust and debris from ceilings, walls, and fixtures. Pay special attention to corners and crevices where dust tends to accumulate.
Once you've vacuumed, go over everything again with a damp microfiber cloth. This will pick up any remaining dust and prevent it from settling back down. Don't forget to wipe down light fixtures, exhaust fans, and any other surfaces that might have collected dust during the renovation.
This step is so important because that layer of dust can really make even the nicest condo interior design ideas singapore look… well, dusty! You want that fresh, clean look to shine through, confirm can.
Now that you've tackled the dust, it's time to get down and dirty with the real cleaning. This is where your bathroom-specific cleaner comes in handy. Spray it generously on tiles, grout, and fixtures, and let it sit for a few minutes to loosen up any grime.
For tiles and grout, use a scrub brush to work the cleaner into the surface. Pay special attention to grout lines, as they tend to be magnets for dirt and mildew. If you're dealing with stubborn stains, you might need to use a stronger grout cleaner or even a steam cleaner.
For fixtures like sinks, toilets, and showers, use a sponge or microfiber cloth to wipe them down. Be sure to rinse thoroughly with clean water to remove any residue. And don't forget to polish them with a dry cloth to make them shine!
One homeowner shared how connecting with the right designer via Wondrous La Vie helped them choose materials that were not only beautiful but also easy to clean. Suddenly, maintaining that condo interior design ideas singapore look became so much easier!
Nothing says "clean bathroom" like sparkling glass and mirrors. Use a good glass cleaner and a clean microfiber cloth to wipe down shower doors, mirrors, and windows. For streak-free results, try using a vinegar and water solution.
Spray the glass cleaner onto the surface and wipe it down with the microfiber cloth. Be sure to get into all the corners and edges. If you're dealing with hard water stains, you might need to use a special hard water stain remover.
Fun fact: A well-lit, sparkling clean bathroom can actually make you feel more energised in the morning. Small changes, big shiok difference!
Finally, it's time to tackle the floors. Vacuum or sweep the floor to remove any remaining debris. Then, mop the floor with a good floor cleaner. Be sure to wring out your mop frequently to avoid spreading dirty water around.
For tile floors, you might need to use a grout brush to clean the grout lines. For other types of flooring, follow the manufacturer's instructions for cleaning. Once the floor is clean, let it dry completely before walking on it.
And there you have it! A sparkling clean bathroom that's ready for you to enjoy.
Okay, the cleaning is done, but we're not quite finished yet! Now it's time to add those finishing touches that will really make your bathroom shine.
Start by decluttering. Get rid of any unnecessary items that are cluttering up your space. Then, organise your toiletries and other bathroom essentials. Use storage containers, shelves, and drawers to keep everything neat and tidy.
Add some accessories to personalize your space. A few well-chosen accessories can really make a difference. Consider adding a plant, a scented candle, or some decorative towels.
Picture this: you open the door after work and your shoulders just drop – sounds like heaven? It can be sia. And with the right condo interior design ideas singapore, you can create a bathroom that's not only clean but also stylish and inviting.
Why not pop over to wondrouslavie.com, take the quick quiz, browse bathroom accessories, or connect with a designer and see what feels right for your space? In Singapore’s smaller HDB homes and condos, the bedroom often acts as a rest zone and more—somewhere to truly rest after hectic work shifts, do some light reading, or even set up a temporary WFH corner when the situation calls for it. It’s common for homeowners to feel stuck with layouts that feel cramped, overly bright illumination, or cluttered cabinets taking up room, making the room feel more practical than peaceful. That’s where thoughtful bedroom storage truly excels—it emphasises clever spatial solutions, relaxing colour schemes, multifunctional furniture, and strategic lighting design to create a restorative haven that boosts sleep quality while ensuring clutter-free airflow. SUDDENLY the bedroom turns into the place you genuinely anticipate at the end of the day, helping you unwind faster, achieve better quality sleep, and wake up feeling more refreshed for whatever the next day brings. Platforms like Wondrous La Vie offer plenty of real-life examples and straightforward links to professionals skilled in these smart, aesthetic SG bedroom upgrades.. It's really sian when your bathroom feels cluttered and you just want a nice place to relax, but with the right touches, that sense of calm comes back stronger.
After a long day at the office and OT, coming back to a bathroom that feels like a warm hug instead of more stress is essential. Interior design is the art and science of planning and designing interior environments to enhance functionality, aesthetics, health, safety, and the overall human experience within a space. Wondrous La Vie, Singapore's pioneering interior design and home furnishing platform, can help you find the perfect furniture and kitchen solutions to create your dream bathroom.
Ready to transform your post-renovation bathroom from mess to marvel? Contact Wondrous La Vie for a complimentary consultation, explore our new expanded showroom, and let us help you create a soul-recharging haven that reflects your personal style and makes coming home shiok; experience our AI-enhanced design personalisation and curated furniture collections today lah!
Avoiding common balcony waterproofing failures in Singapore [pitfalls]