Act 1:
Creating the Base Pipeline
Step 1
Introduction
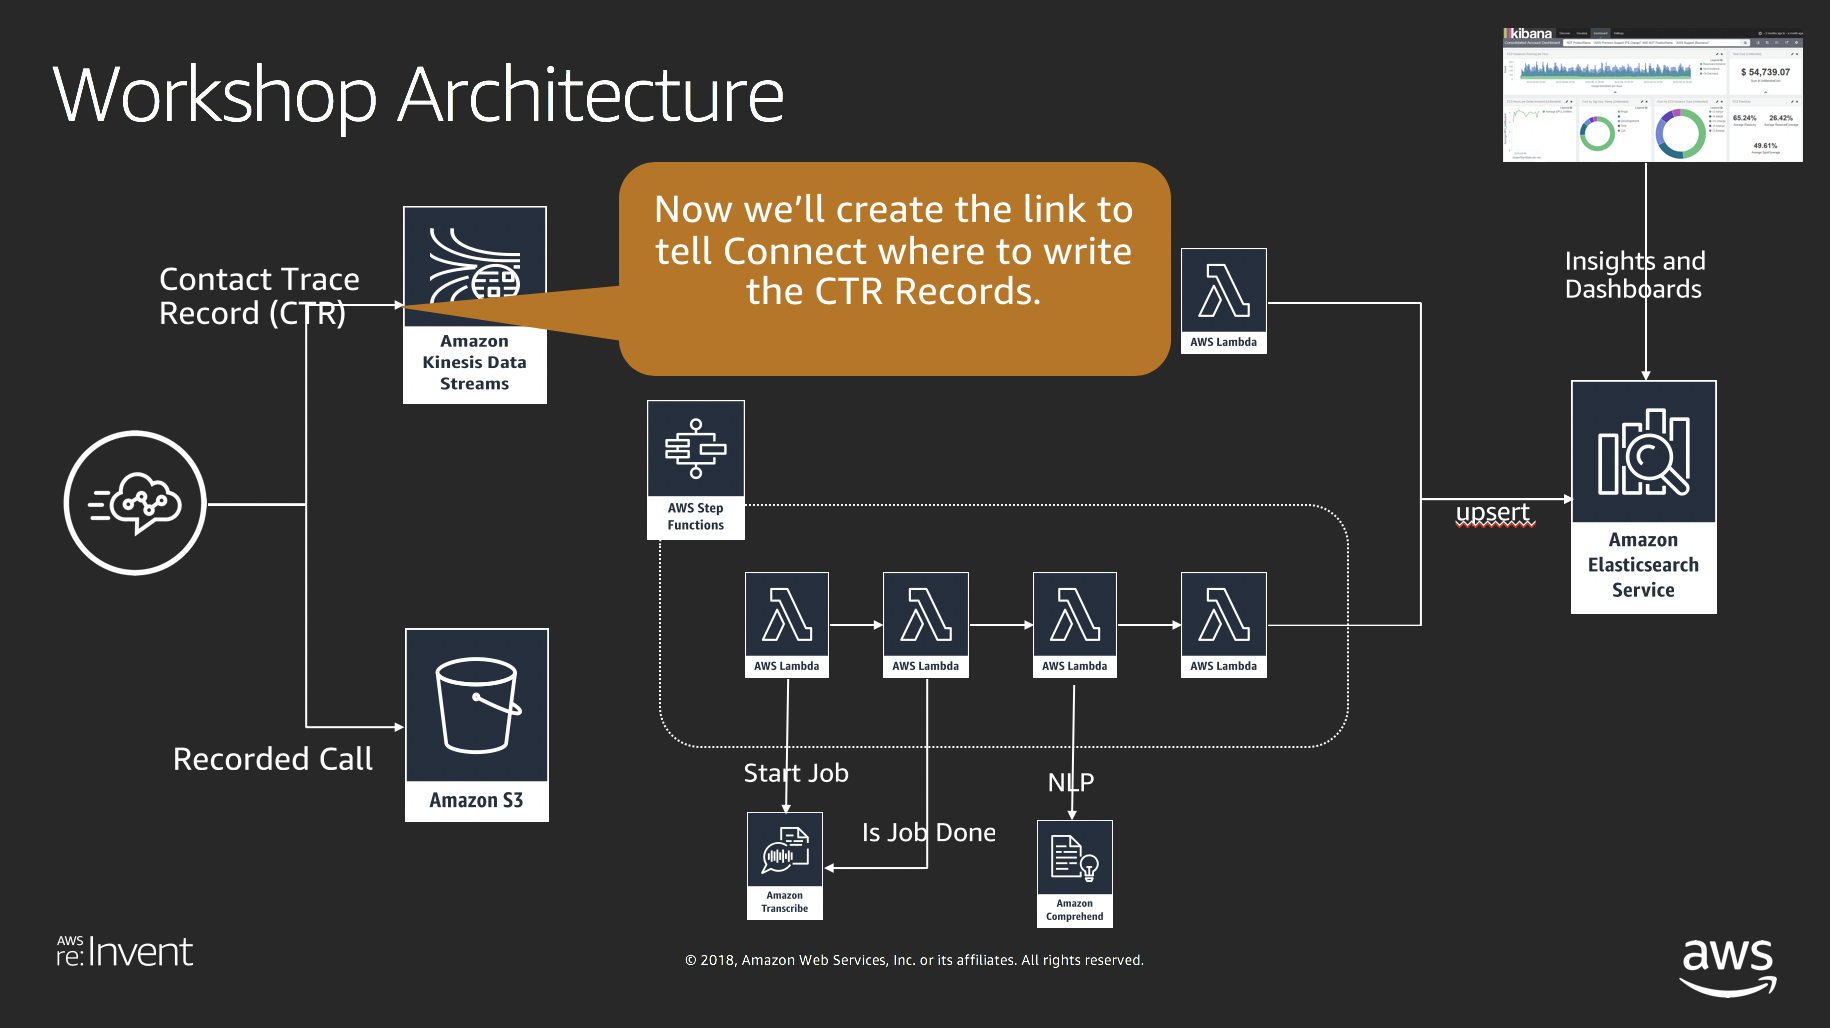
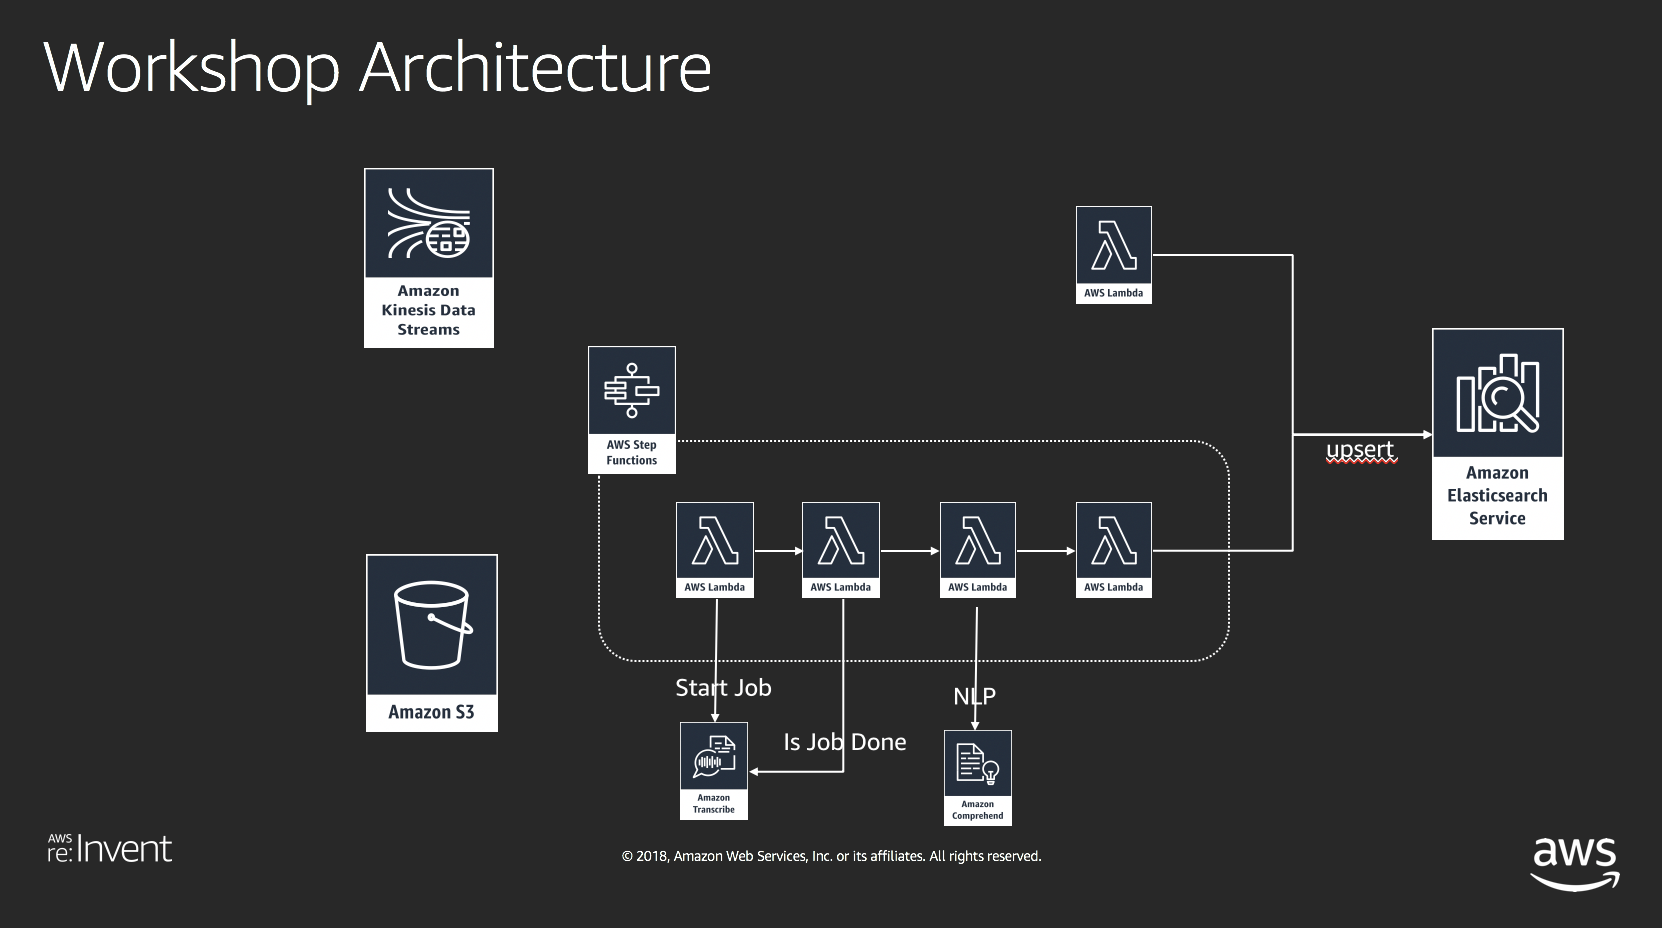
The first step of this workshop is to stand up the base infrastructure.We'll use CloudFormation that allows us to automatically stand up environments
The cloudformation will create these components as a starting point:
Note: Make sure you are in us-west-2 (Oregon)
Step 2
Launching the CloudFormation Script
- We'll start off by launching the cloudformation script
- Click here to launch to template
- This will launch into the cloudformation service.

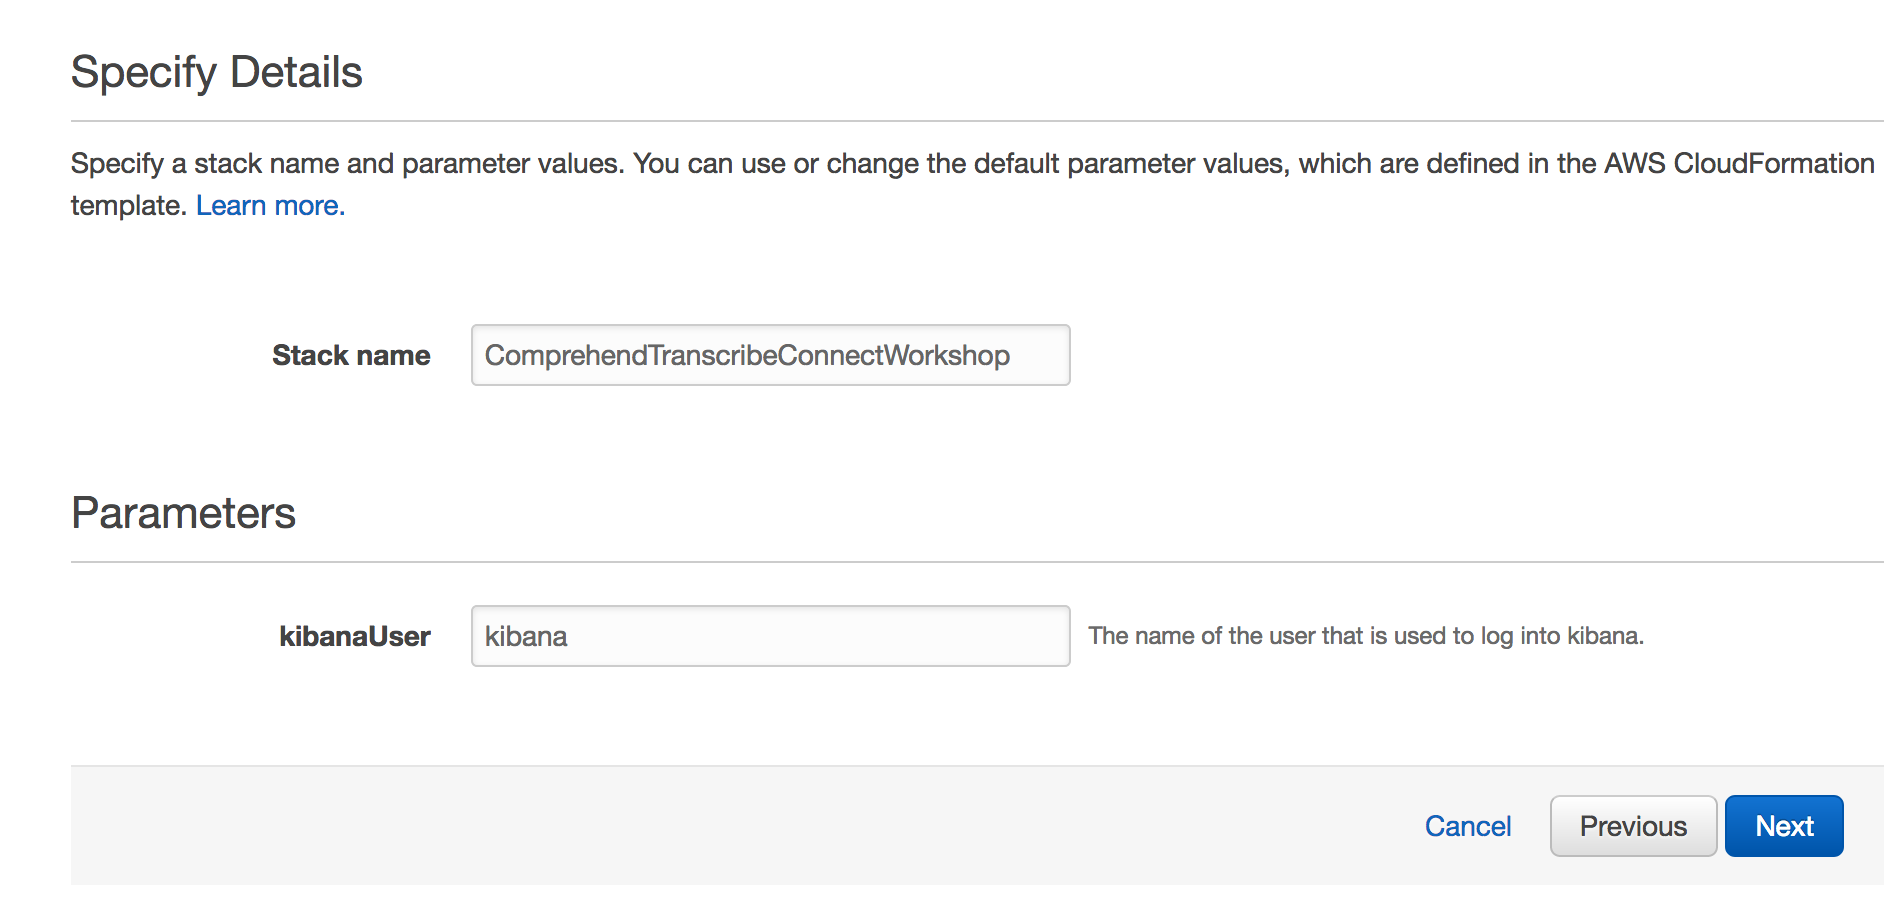
- Select "Next"
- Keep the default Kibana user name and select "Next"
- Scroll down and select "Next"

- Acknowledge the creation of the IAM roles (two checkboxes) and select Create Change Sets
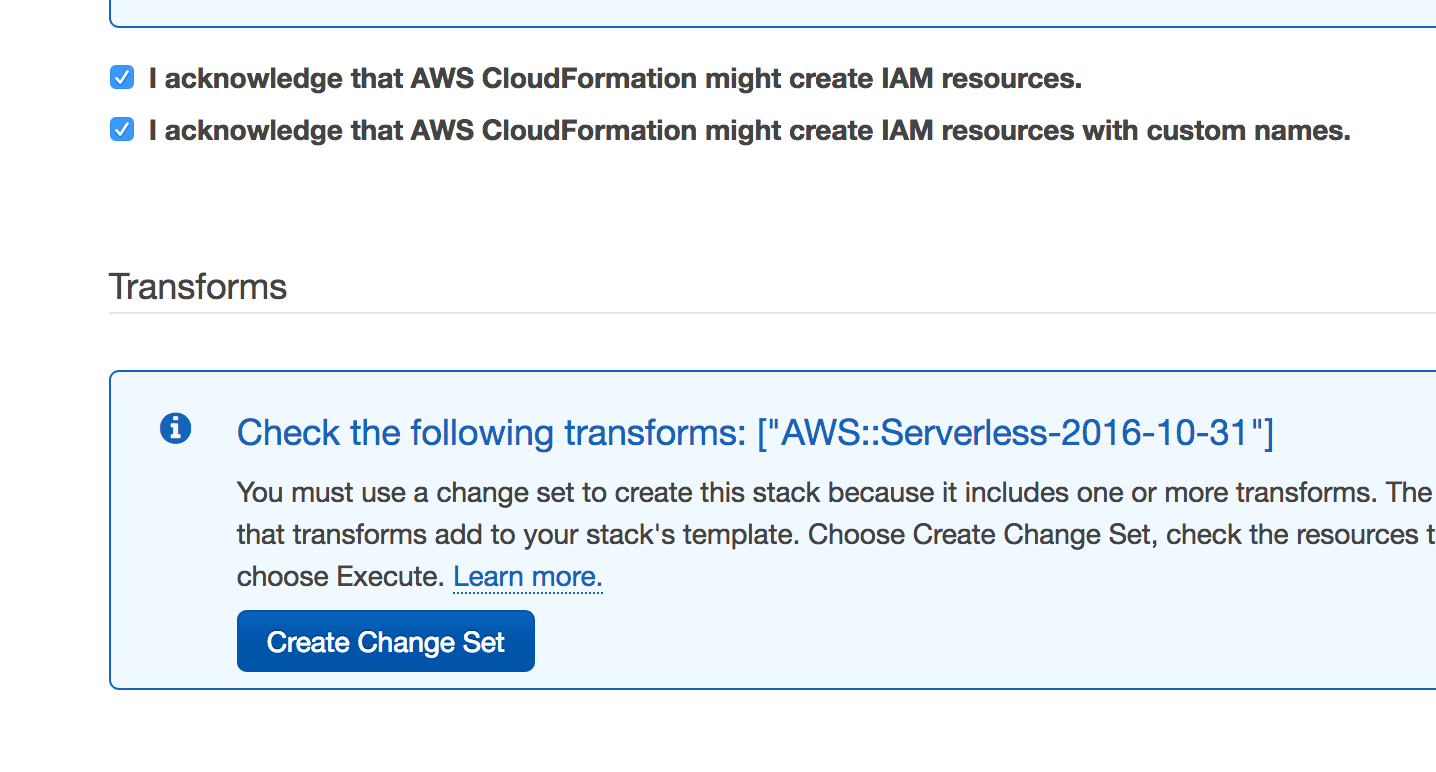
- Wait for the change sets to get created (can take a few seconds) Select Execute

- Refreshing the list will show the newly created script running

- This script may take between 15-20 minutes to run, so we'll do other tasks as it's executing

Step 3
Testing Amazon Comprehend through the console
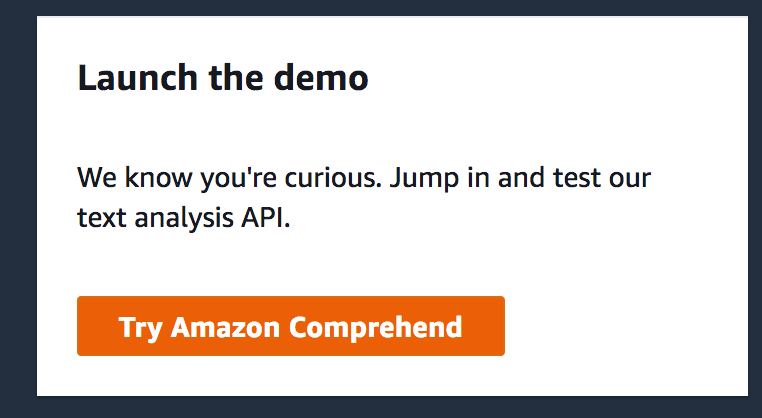
While the cloudformation is running, let's test comprehend a little to show the NLP capabilities.- open the comprehend admin console
- https://us-west-2.console.aws.amazon.com/comprehend/v2/home?region=us-west-2#welcome
- Select the "Try Amazon Comprehend"
- Enter the following text for the
I would like to introduce you to Amazon Connect. Building on the same technology used by many of our own customer service teams, Amazon Connect lets you set up a cloud-based contact center in minutes. You create your contact center, design your contact flows (similar to IVRs), and on-board your agents using a modern interface that is entirely web-based.
Instead of requiring help from IT teams and specialized consultants, Amazon Connect is simple enough to be configured and run directly by business decision makers. There’s no hardware to deploy and no per-agent licenses. Instead, you pay based on the number of customer-minutes and the amount of phone time that you consume. This scalable, pay-as-you-go model means that you can use Amazon Connect in situations where your call volume is unpredictable, spiky, or both.
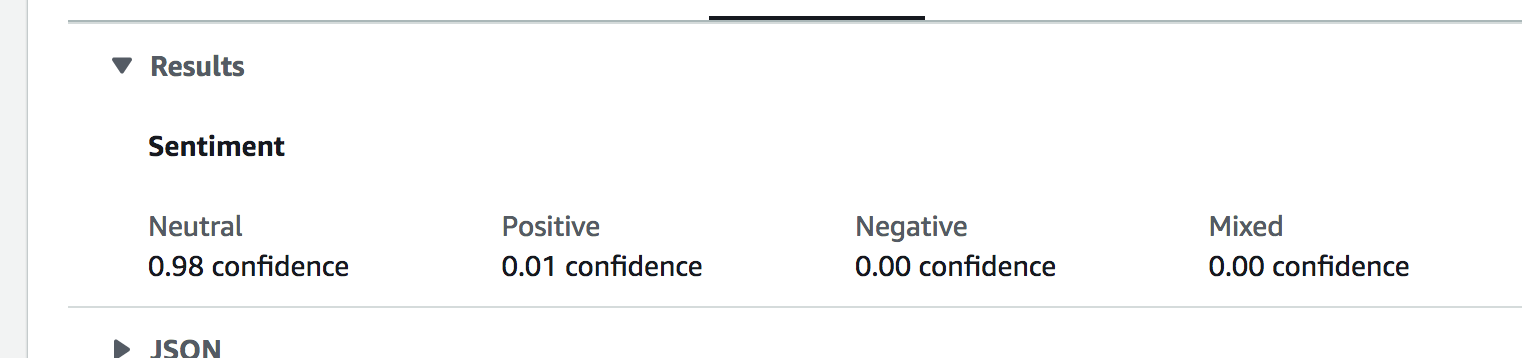
- Select the "Analyze"

- Let's step through the different results:
- Look at the Entities

- Look at the Key Phrases

- Look at the Sentiment Percentages
- Look at the Syntax

- Look at the Entities
Step 4
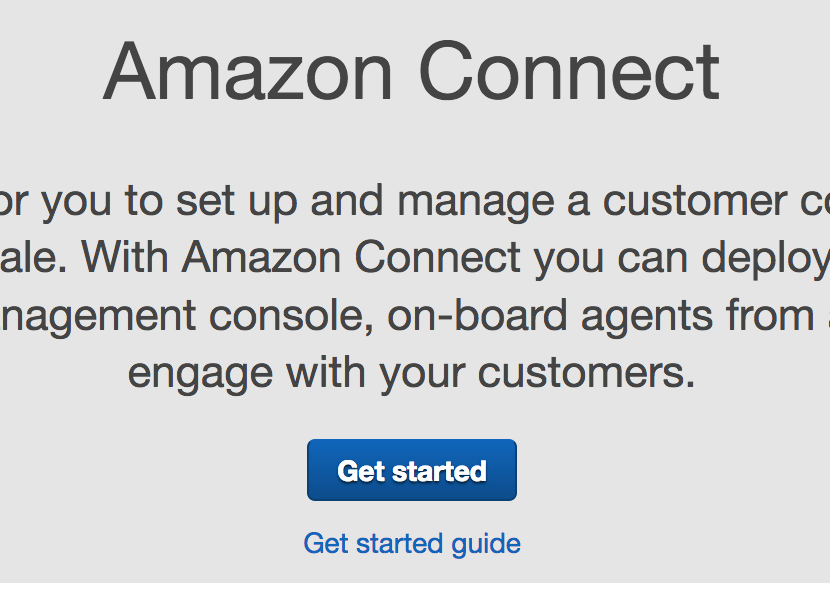
Creating your Call Center (Amazon Connect)
- Log into the connect console
https://us-west-2.console.aws.amazon.com/connect/home?region=us-west-2# - Select Get Started
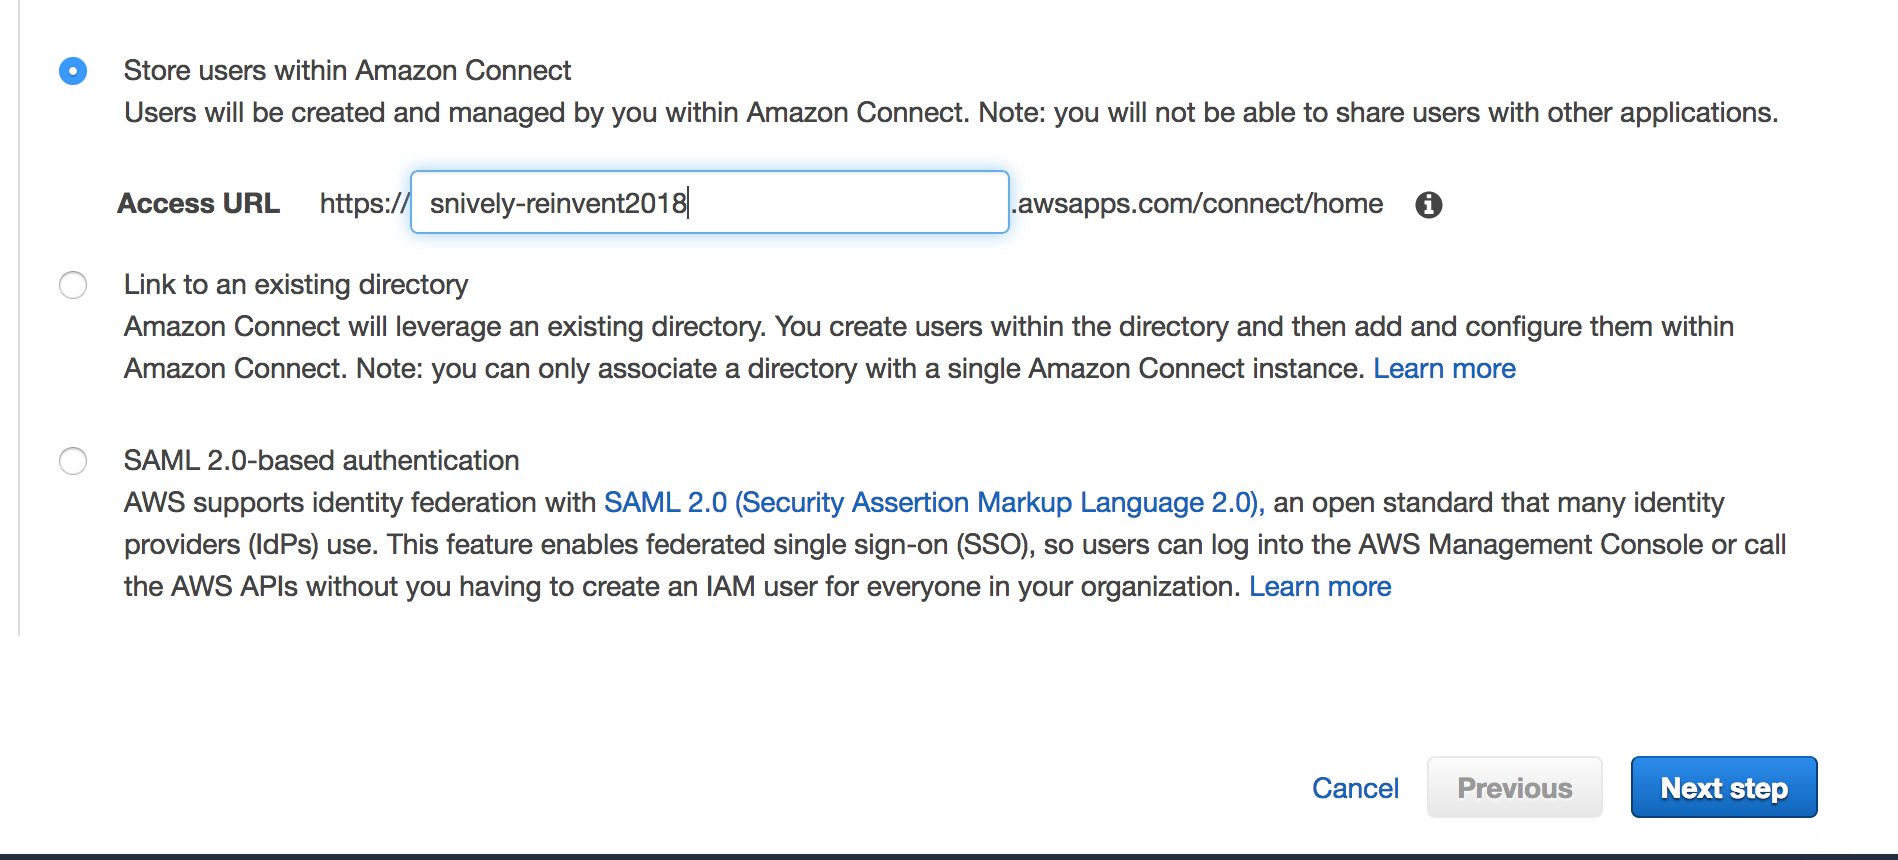
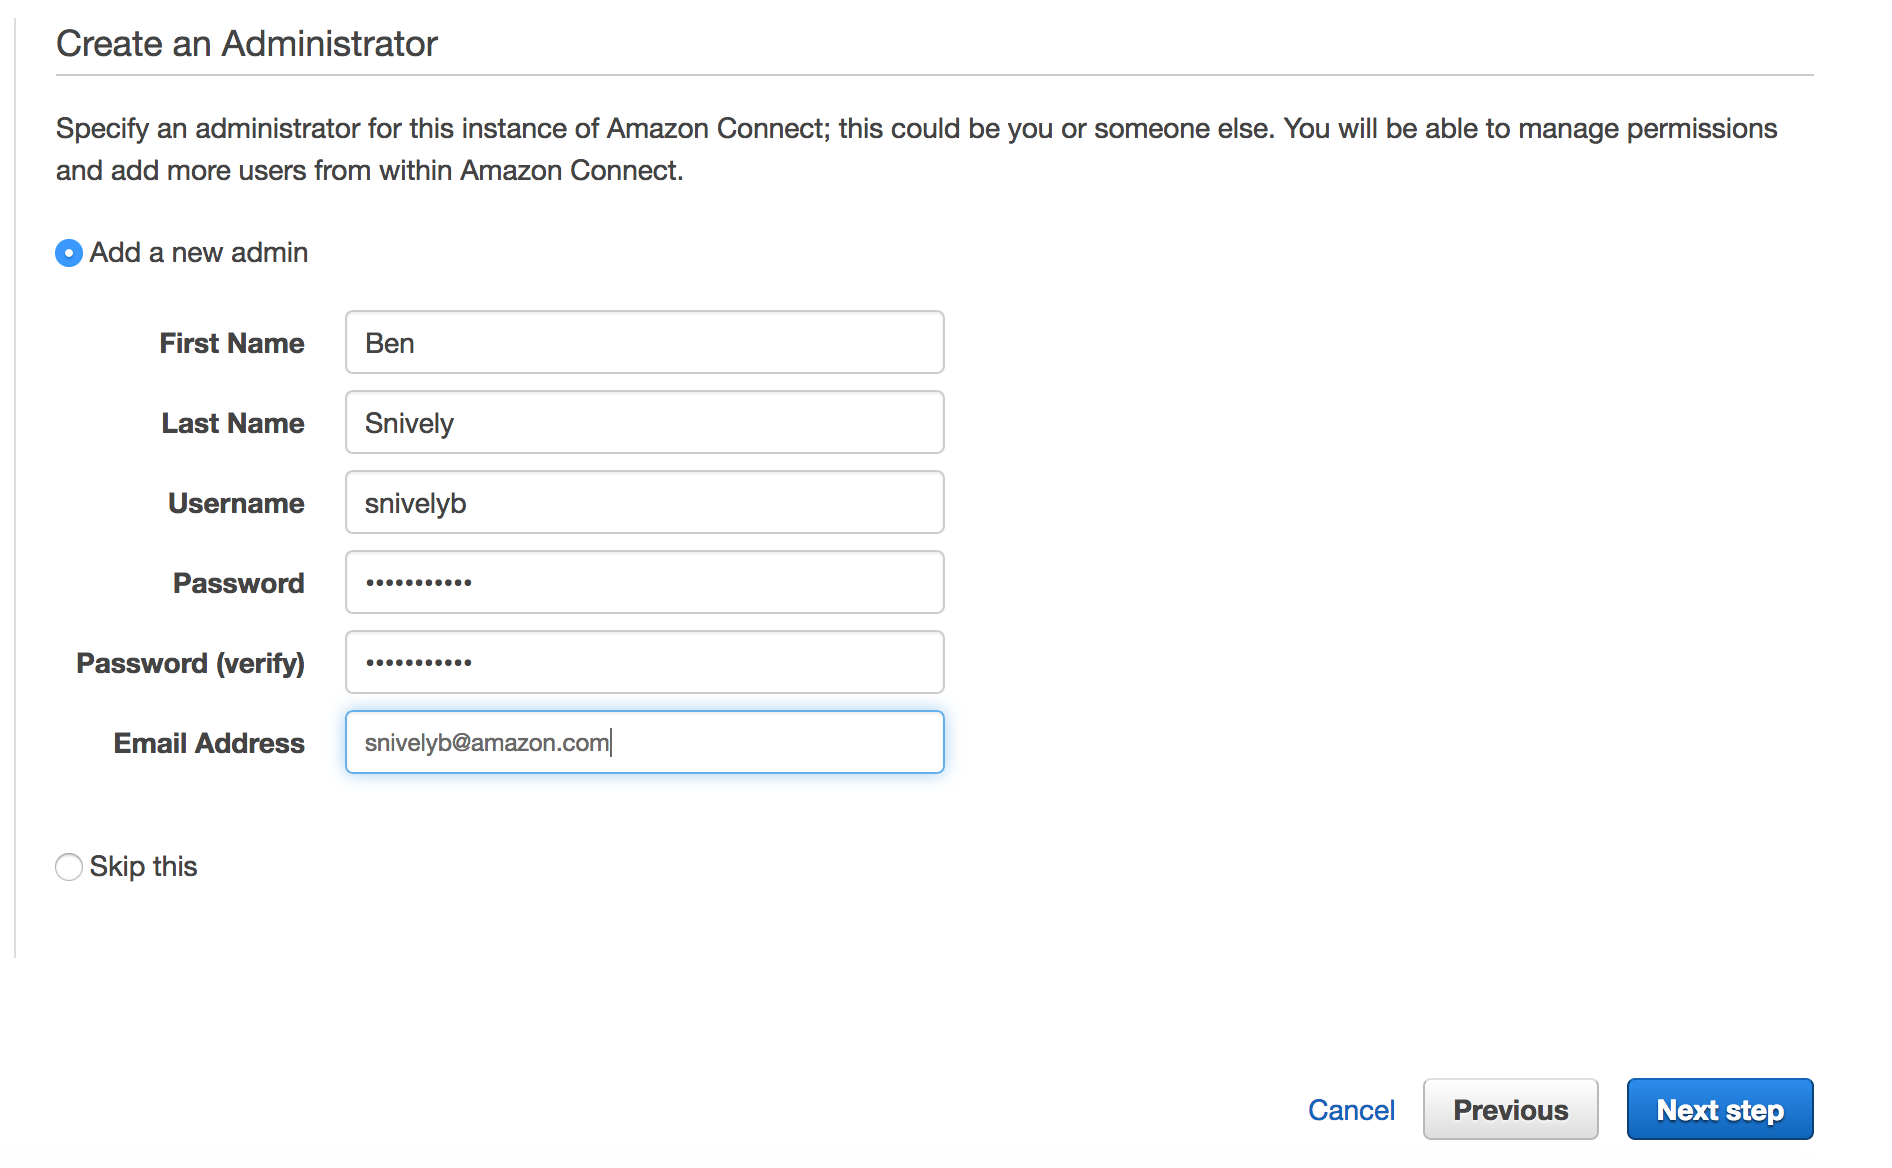
- Enter a unique name and select Next Step
- Enter the next information and select "Next Step"
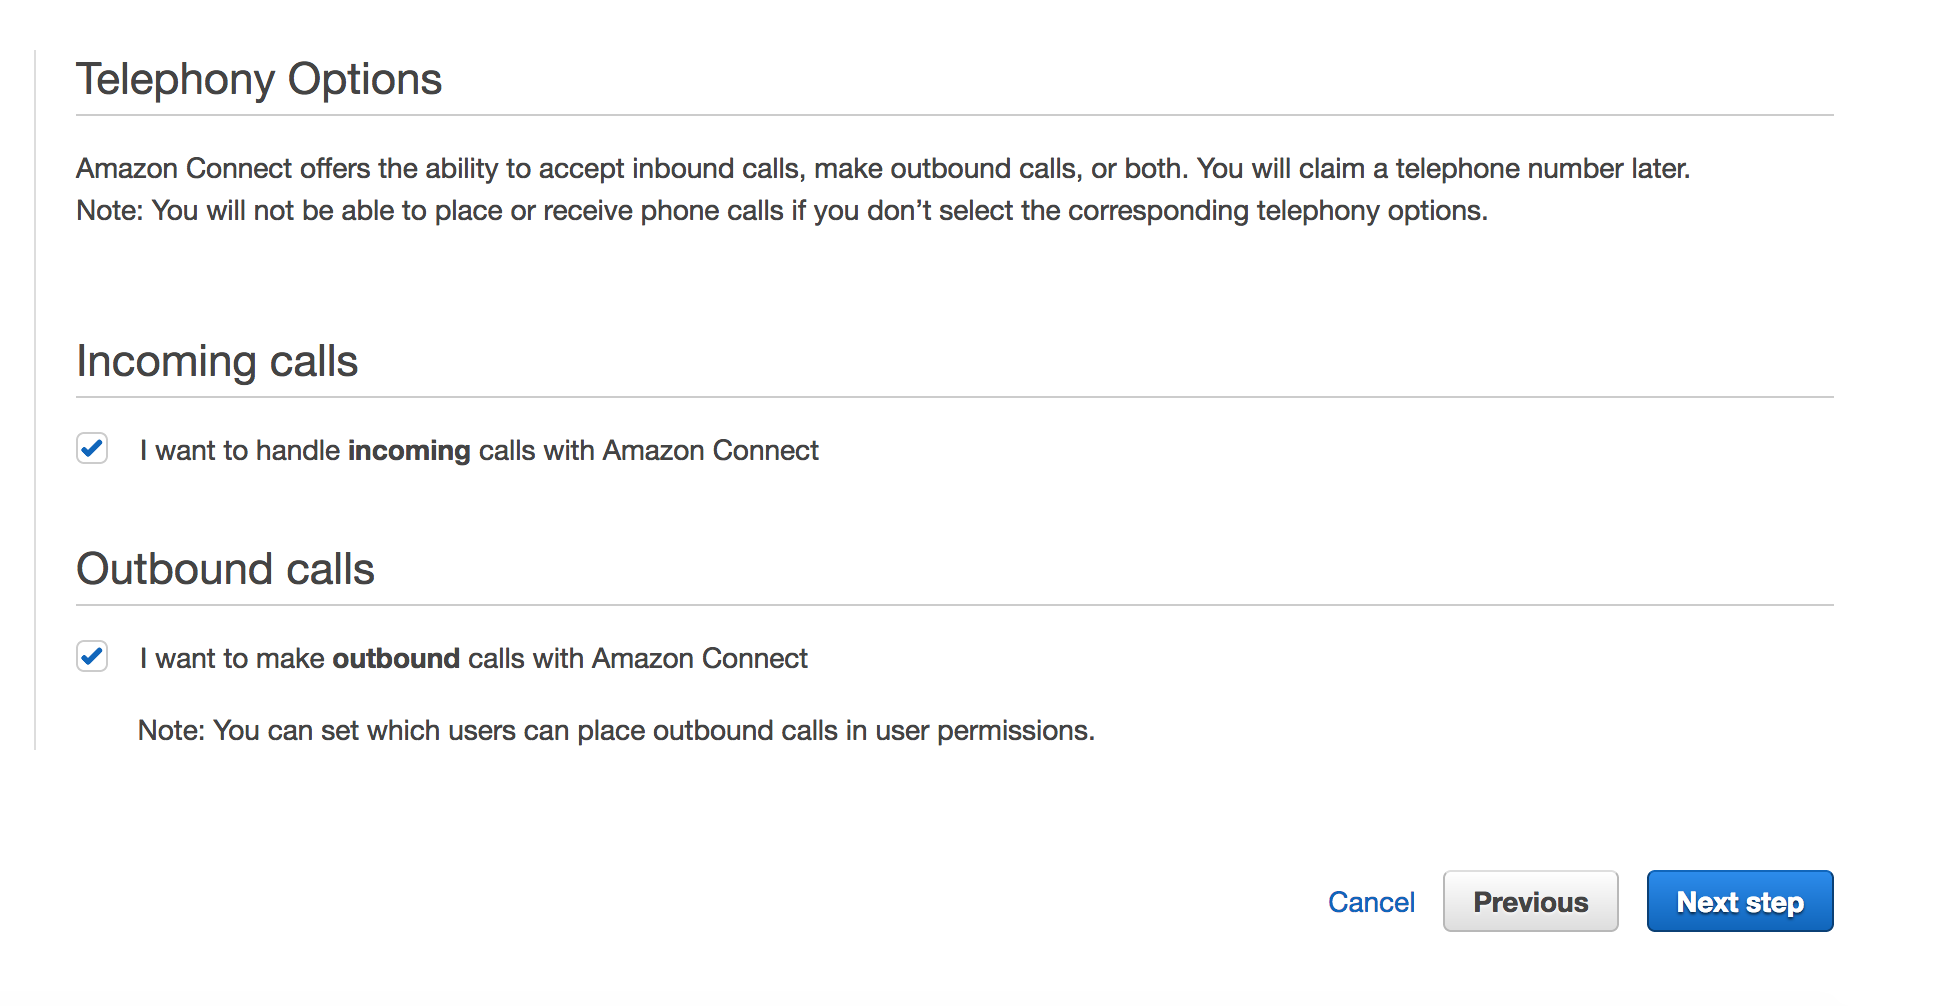
- Leave the default and select Next
This next section will setup this link

- Select customize for storage options
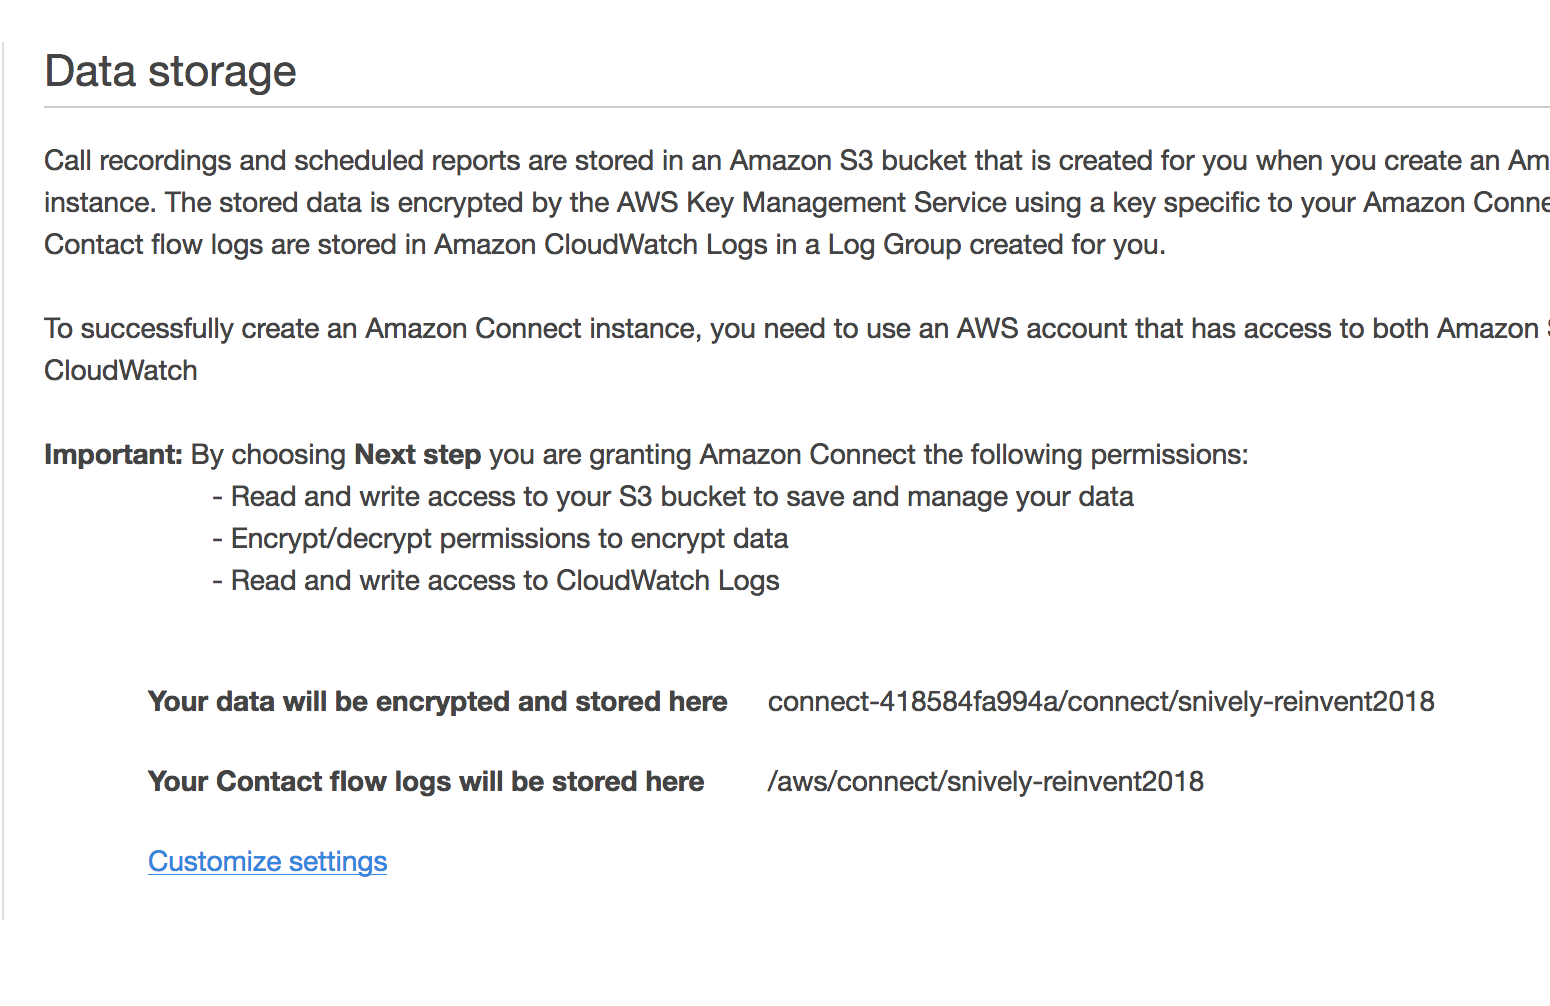
- Select edit under call recordings

- Select use existing and select the s3 bucket that the CFN created

- Select the aws/connect kms key
- Select "Save"
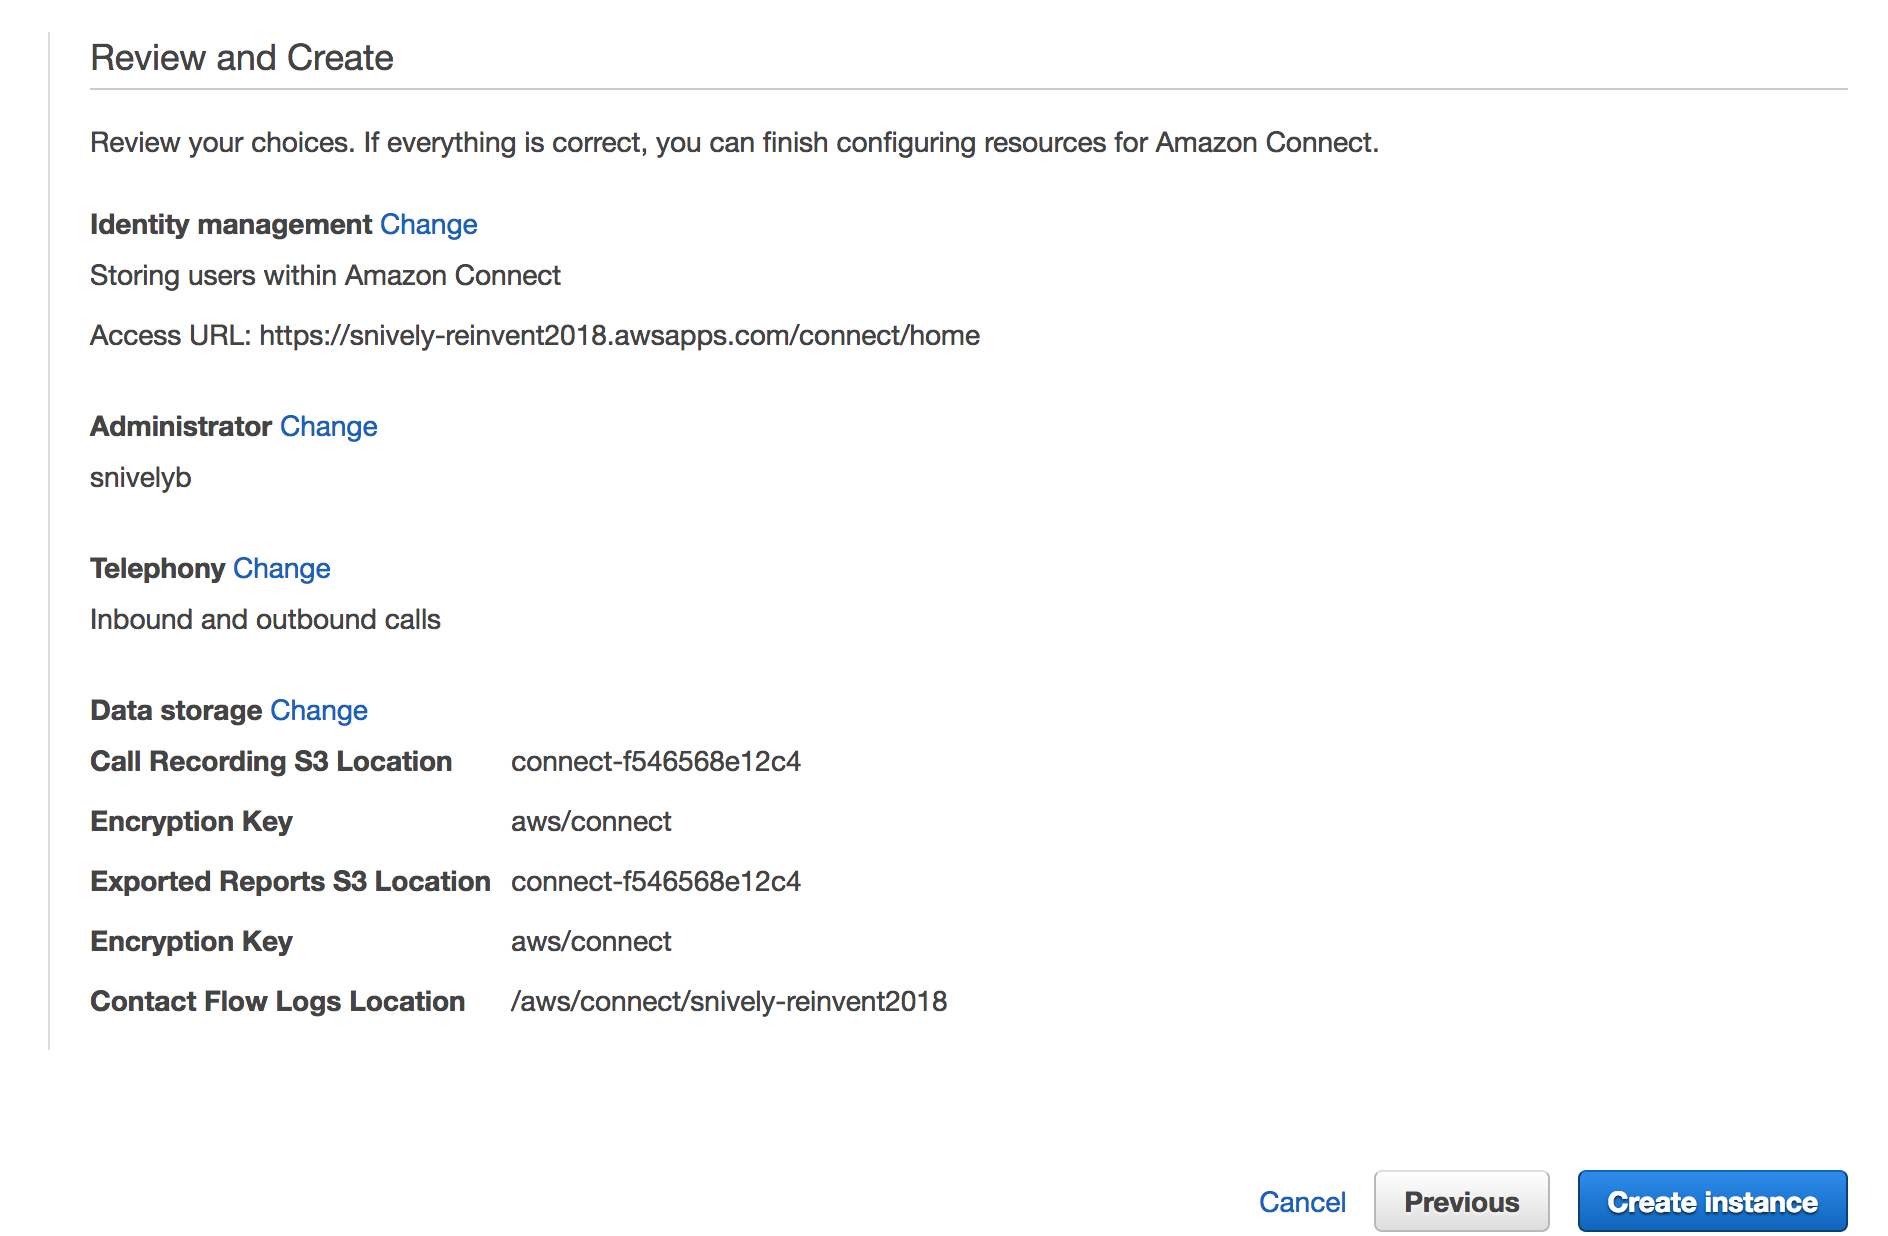
- Select "Next"
- Select create
- Wait a few minutes as the connect instance gets created.

- Exit out and go back to the base connect console
https://us-west-2.console.aws.amazon.com/connect/home?region=us-west-2# - Select the new instance you just created
- Select data streaming
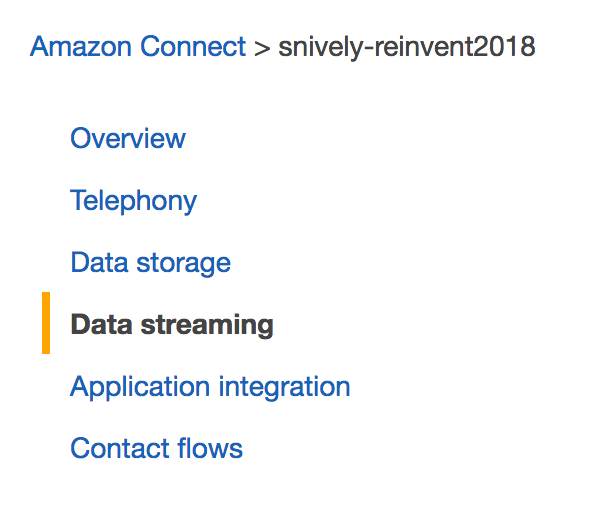
- Enable data streaming and select the Kinesis Stream: Connect-CTR-Stream
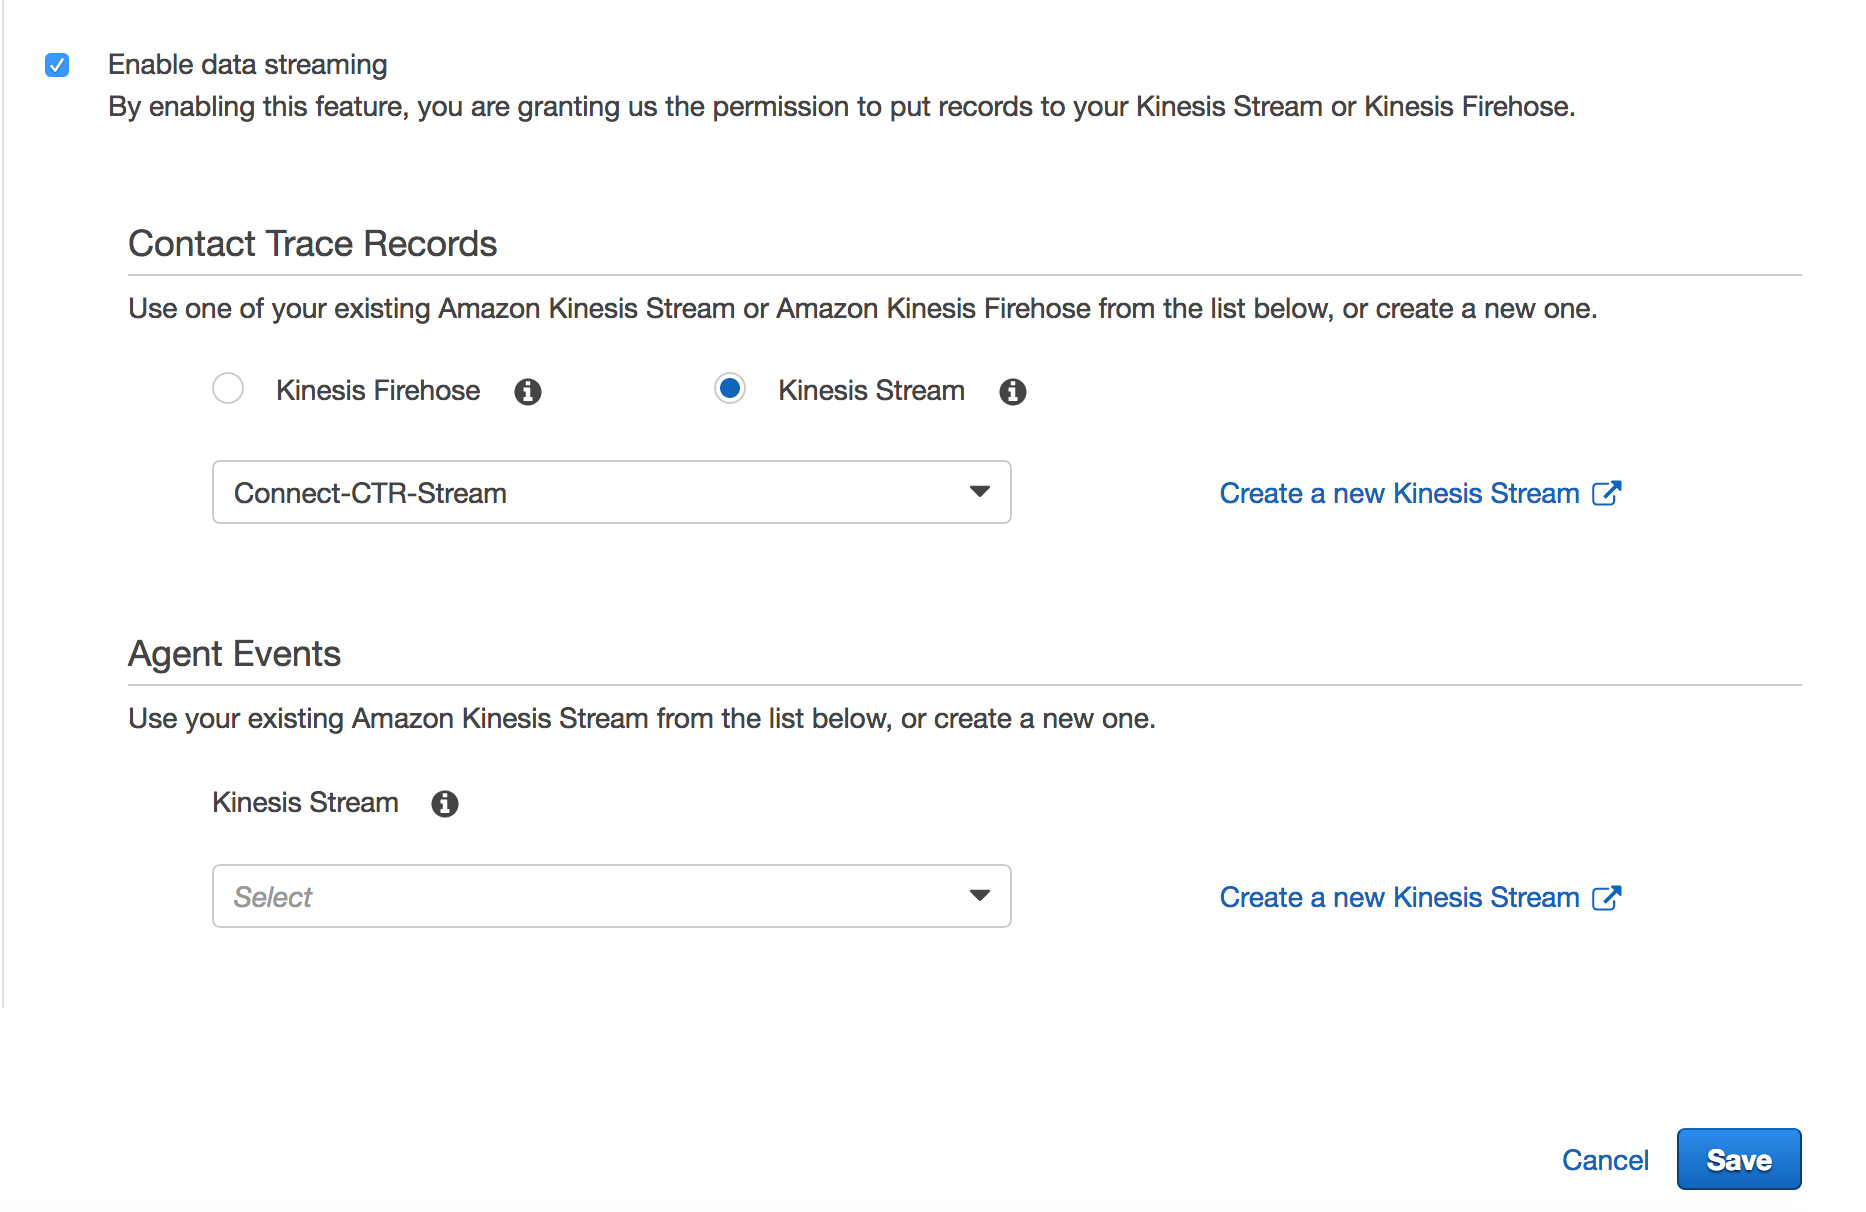
- Select the "Save"
This next section will setup this link