C.1.2 Wireless direct printing
The steps below describe the full process for uploading and printing
an arbitrary .stl file. (However, note that the Polar3D printer ships
with several .stl files, suitable for an initial test of the printer,
already onboard the printer user interface; for your very first print,
you may wish to print one of them rather than uploading your own
file.)
-
1.
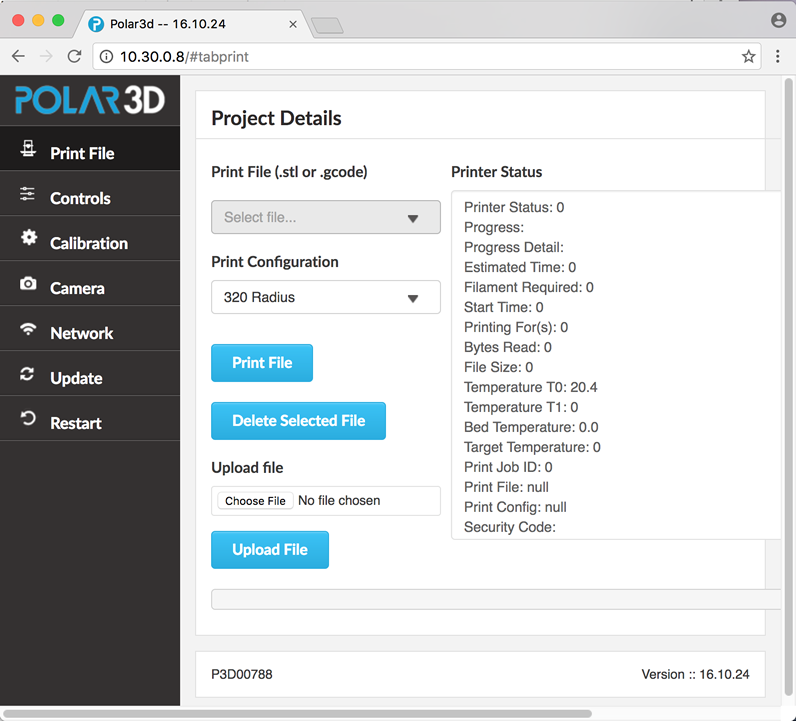
- On the printer’s user interface, click the Print File tab
(top choice in the column on the lefthand side of the
window). This will take you to the Project Details
screen, as shown in Figure C.2.
-
2.
- Upload a file to print. (If this is your very first print on this
printer, you may prefer to skip this step, of finding and
uploading an arbitrary .stl file, and instead go to step 3 to
print one of the files shipped as test print files.)
-
(a)
- Under Upload File, select Choose File.
-
(b)
- Find the file, select the file, and click Open.
-
(c)
- Click the Upload File button.
-
3.
- Select and print the file.
-
(a)
- Click the Select file... drop down menu under
Print File (.stl or .gcode); see Figure C.3.
-
(b)
- Select the desired file. (Note that several sample .stl files
ship with the Polar3D printer, accessible from the printer
local web interface,
for your convenience in using them as a first print, or for
calibration prints; see Figure C.4.)
-
4.
- Click the Print File button; see Figure C.5.
Your object will begin printing! You may click the “Camera”
tab (on the vertical menu at the left of the screen) if
you would like to watch the camera view of the printer
operating.