-
1.
- Obtain
an appropriate cable, either a type-A-male-to-type-B-male
USB cable of the type described above in Section C.2, or
an Ethernet cable.
-
2.
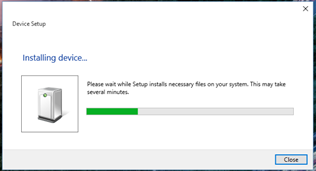
- Plug the cable into the printer and into your computer. A
window should pop up that says it is installing drivers; see
Figure C.6. Do not close that window!
-
3.
- Now, download and install Repetier-Host.
-
4.
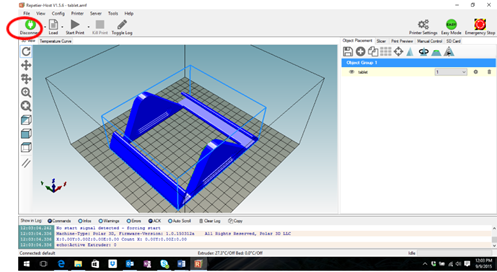
- Start up Repetier-Host. You should see a screen such as shown
in Figure C.7.
-
5.
- Once the drivers from step 2 have finished downloading,
unplug your printer. Then click Printer Settings on the top
right of the screen. You should now be looking at a window
such as shown in Figure C.8:
First, set the Baud Rate to 115200.
Next, click on the down arrow in the box labelled “Port” and
make a note of the values shown in the drop-down menu. This
will show you what ports you currently have on the device and
will help you determine the port used by the Polar3D
printer. Click “Cancel” to close the Printer Settings
window.
-
6.
- Plug your printer back in. Open Printer Settings again.
Select the new value in the drop down menu. In the example
shown below in Figure C.9, that new value is COM13, but the
actual new value may vary.
Click the “OK” button to save the changes.
-
7.
- Click the red “Connect” button (towards the top left of the
Repetier-Host window). If it turns green, that means you are
connected; see Figure C.10.
-
8.
- Now, configure Repetier-Host to work with your Polar3D
printer. Under “Printer Settings”, enter the values
shown in Figure C.11 below:
Click the “OK” button to save these settings.
-
9.
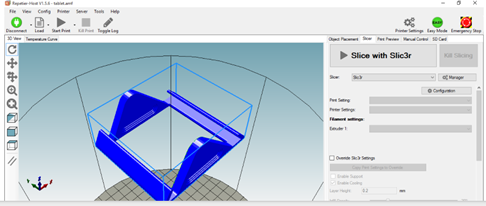
- Now, configure the CuraEngine slicer settings. (CuraEngine is
the slicer program that converts the 3D model – the .stl file –
to Gcode that the printer can read.) Click on the tab that says
“Slicer”, towards the right of the window; see Figure
C.12.
-
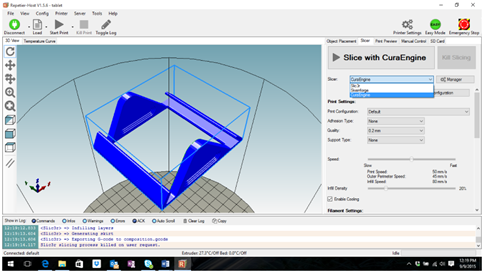
10.
- Make sure that the Slicer choice is set to CuraEngine:
Then, with the slicer set to “CuraEngine”, click the
“Configuration” button; see Figure C.14.
-
11.
- You will need to download two files from the Polar 3D support
page. The files to download are named “Polar Cura
Settings.rcp” and “Polar PLA Settings.rcf”. They are
available at the Polar 3D support website:
Polar 3D support: Repetier-Host/USB printing
Save the two files to your desktop.
-
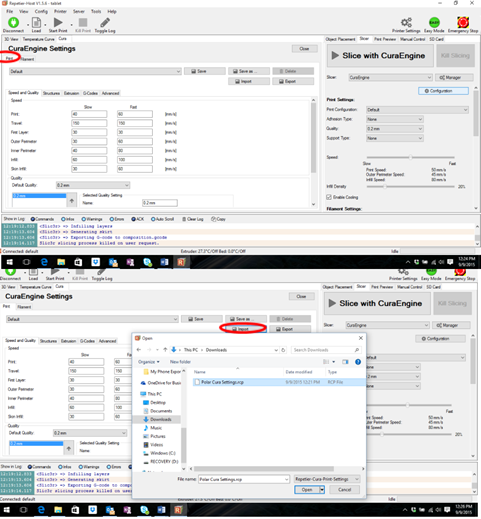
12.
- Still under the CuraEngine “Configuration” window from
step 10, navigate to the “Print” tab,
click “Import”, and then load “Polar Cura Settings.rcp”:
-
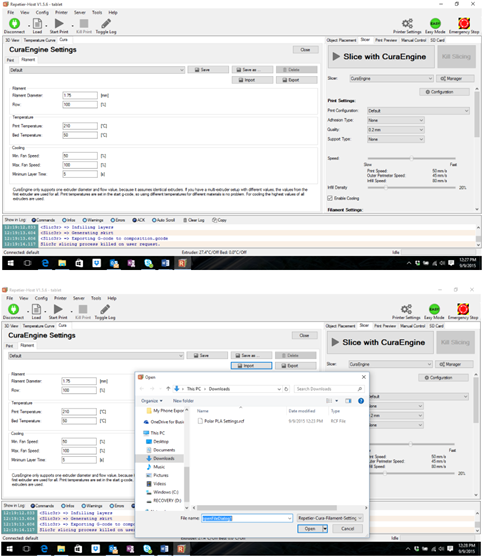
13.
- Next, navigate to the “Filament” tab, click “Import”, and load
“Polar PLA Settings.rcf”:
-
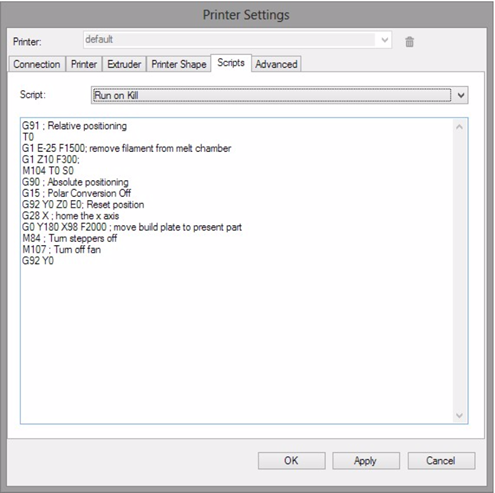
14.
- Navigate back to “Printer Settings” (see for instance steps 4
and 5), click on “Scripts”, then select “Run on Kill”; see
Figure C.17.
Copy the text as shown into the box as in Figure C.17 – or you
may copy the text from this link and paste it into the box.
Click “OK” to save.
Everything is set up and configured properly, and now it’s time
to print! See Section C.2.2!