TV Console Installation: Step-by-Step for BTO Flats (how_to)

TV Console Installation: Step-by-Step for BTO Flats (how_to)

Prep & Planning

So, you've finally got the keys to your BTO flat! Exciting times ahead, right? Now comes the fun part – turning that blank canvas into a cozy home. And let’s be honest, the TV console is kinda the unsung hero of the living room. It's where your TV sits, where you stash your Singa the Lion plushie (or is that just me?), and it kinda sets the whole vibe. But before you dive headfirst into installation, a little prep work goes a long way. Trust me, you don't want to end up with a console that's too big, too small, or just plain clashes with everything else.

Measure Twice, Install Once (and Save Yourself a Headache!)

Seriously, this is the golden rule. Grab your trusty measuring tape – the kind you use for everything from checking furniture dimensions to seeing if your new fridge confirm fits. First, measure the width of the wall where you plan to put the console. Then, think about the height. Do you want it to be low and sleek, or a bit taller for extra storage? Consider the electrical outlets too; you don’t want them hidden behind the console, lah!

Next, measure your TV. Not just the screen size, but the overall width, including the frame. You’ll want the console to be wider than the TV, for a balanced look. A good rule of thumb is to have at least a few inches of space on either side. And don't forget to factor in the viewing distance. Too close, and your eyes will be strained after a Netflix binge. Too far, and you might as well be watching from Jurong. There are online calculators that can help you figure out the ideal viewing distance based on your TV size.

Think about the depth of the console as well. You want to make sure there's enough space to walk around comfortably, especially in smaller BTO flats where space is precious. Imagine squeezing past the console every time you need to get to the balcony – not ideal, right? A slim console can be a lifesaver in tight spaces.

Choosing the Right TV Console: Size, Style, and Singaporean Sensibilities

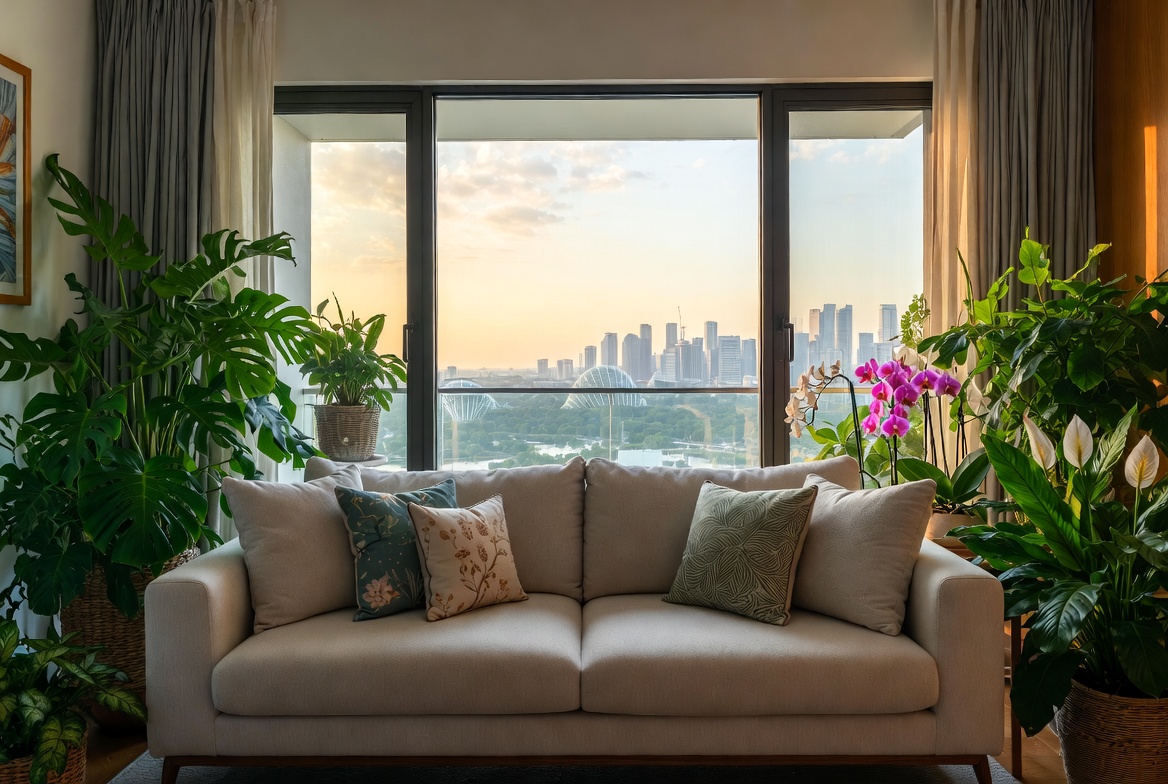
Okay, measurements done? Good! Now for the fun part: picking a TV console that actually looks good. After a long day squeezing onto the MRT and grinding through meetings, most Singaporeans just want to come home to a space that feels warm and relaxing instead of adding to the stress. A disorganised space or an uncomfortable bedroom can make unwinding even tougher, especially when the kids and parents are trying to relax together. That’s where thoughtful interior design really makes a difference—it turns everyday rooms like your living room, sleeping space, or kitchen into true recharge spots that actually help you recharge. The hall is usually the first space guests see and where the whole household gathers at night, so it feels right to want pieces that appears stylish, hides wires cleanly, and keeps the area feeling open than it already feels in most SG flats. Many people struggle with clunky legacy furniture or cheap units that feel unstable, attract dust fast, or just don’t align with contemporary style they’re going for. That’s exactly where a well-chosen furniture singapore steps in—it offers sleek storage for entertainment equipment, streaming players, and remote controls while becoming a chic statement piece that unifies the entire space with clean lines, thoughtful compartments, and premium finishes. TV Console Material Guide: Balancing Cost and Durability (pitfalls) . People living in the Lion City often deal with particular difficulties when setting up their interiors, especially due to limited room sizes common in public and private housing and our humid tropical climate. This is exactly why wise homeowners take their time to research carefully to secure quality without overspending. tv console singapore proves to be one of the wisest addition to any home that delivers both great comfort with everyday functionality. It pays to investing in affordable versions in Singapore with first-class after-sales service guarantees full support with features like timely island-wide delivery, professional installation, and comprehensive warranties that provide true long-term peace of mindyou can truly count on.. SUDDENLY the TV area becomes organised and intentional, the area feels more spacious and cohesive, and film evenings get way more fun without the clutter distracting everyone. Checking out carefully chosen pieces on places like Wondrous La Vie helps you discover styles that suit your layout spot-on, from minimalist to luxurious, so your living area transformation becomes easy and perfect.. With the right couch, bed mattress, or functional arrangement, suddenly walking through the door feels shiok lah, and small changes can bring big improvements to your daily mood and family bonding. Sites such as Wondrous La Vie make it simpler to explore options and connect with designers who get the the Singapore home vibe spot on. This format lets you easily generate multiple SEO-optimised variations while keeping the core keyword "interior design" stable in the middle for strong on-page targeting.. This is where you get to let your personality shine. Are you going for a minimalist Scandinavian vibe? Or maybe something more modern and sleek? Whatever your style, make sure the console complements the rest of your furniture. You don't want it sticking out like a sore thumb, you know?

Consider the different types of furniture available. Wall-mounted consoles are great for saving floor space and creating a clean, modern look. Floating shelves are another option for a minimalist aesthetic. If you need storage, look for consoles with drawers, cabinets, or shelves. Think about what you’ll be storing – DVDs (do people still use those?), game consoles, remote controls, and all that other stuff that tends to clutter up the living room.

Speaking of storage, think about cable management, too. Nobody wants a tangled mess of wires behind their TV console. Look for consoles with built-in cable management systems, or be prepared to invest in some cable ties and organizers. Trust me, your future self will thank you. And remember, in Singapore's humid climate, good ventilation is key! Choose a console made from materials that won't warp or mildew easily.

When it comes to TV console Singapore styles, you're spoilt for choice. From sleek, modern designs to rustic, wood-look options, there's something for every taste and budget. Don't be afraid to browse online, visit furniture stores, and get inspiration from interior design magazines. Just remember to keep your measurements in mind!

Gather Your Tools: The DIY Arsenal

Alright, you've got your measurements, you've chosen your console, now it’s time to gather your tools. Think of yourself as a home improvement ninja, preparing for battle. Here's what you'll need:

  • Drill: A power drill is essential for attaching the console to the wall (if it’s a wall-mounted one) and for assembling any parts. Make sure you have the right drill bits for the type of wall you have (concrete, drywall, etc.).
  • Screwdriver: A good old-fashioned screwdriver (or a set) is always handy. You'll need it for tightening screws and assembling smaller parts.
  • Level: This is crucial for making sure your console is perfectly level. You don't want your TV tilting to one side, leh!
  • Measuring Tape: You've already used it, but keep it handy for double-checking measurements during installation.
  • Pencil: For marking where you need to drill holes or attach screws.
  • Wall Plug/Anchor: If you're mounting the console to the wall, you'll need wall plugs or anchors to provide extra support. Make sure you choose the right type for your wall.
  • Safety Glasses: Protect your eyes from dust and debris.
  • Work Gloves: Protect your hands from scratches and splinters.

Pro tip: Before you start, read the instructions carefully! I know, it's tempting to just dive in and start drilling, but trust me, it'll save you time and frustration in the long run. And if you're not comfortable with DIY, don't be afraid to hire a professional. Sometimes, it's worth paying a little extra to get the job done right. Plus, less chance of accidentally drilling through a water pipe! (Yes, it happens.)

With a little planning and preparation, your TV console installation will be a breeze. So, take a deep breath, gather your tools, and get ready to transform your living room into a cozy and stylish haven. You confirm can do it!

Selecting the Right TV Console Style

Choosing a TV console style that complements your BTO flat's interior design is essential. Explore various designs, from minimalist floating consoles to classic wooden cabinets. Consider the storage needs and the overall aesthetic you want to achieve in your living space.

Planning Your TV Console Installation

Before diving into the installation, meticulous planning is crucial. Consider the size of your BTO flat's living room and the optimal viewing distance for your TV. Measure the available space accurately to ensure the TV console fits comfortably without overwhelming the area.

Step-by-Step Installation Guide

Begin by assembling the TV console according to the manufacturer's instructions. Ensure all screws and fittings are tightened securely for stability. Position the console against the wall, concealing cables and wires for a neat and organized appearance.

Unboxing & Inventory

Alright, so you've finally got your brand new **TV console Singapore** delivered! The excitement is real, *right*? But before you get carried away and start shoving things into it, let’s take a deep breath and do this properly. Trust me, a little prep now saves you a whole lot of headache later.

First things first: find a clear, open space. Your living room floor is probably the best bet, just make sure you've got enough room to spread everything out without tripping over the cat (or the kids!). Grab a box cutter or a trusty pair of scissors – *but be careful, hor*! – and let's get this baby unboxed.

Now, gently slice open the packaging. Resist the urge to just rip everything apart like a hungry *kiasu* person at a buffet. We want to avoid accidentally scratching or damaging any of the components. Remember, patience is a virtue, especially when dealing with new furniture.

Okay, the box is open! In Singapore’s smaller HDB and condo homes, clever storage is often the line between a relaxed clutter-free environment and one that feels constantly cluttered no matter how much you tidy. Singapore homeowners often struggle with overloaded racks, clutter hidden beneath mattresses, or cabinets that are either too deep to reach the back or too shallow to hold much, making everyday living feel more overwhelming than necessary. That’s precisely where a smart bed frame singapore steps up—it offers customised sections, flexible shelving, stylish doors that conceal clutter, and compact footprints that maximise every inch while contributing a sleek modern vibe to halls, bedrooms, or even cooking zones. The outcome is your space that stays neat with minimal effort, flat surfaces open for family time, and you finally get that deeply pleasing organised vibe that makes returning home feel truly relaxing. Platforms like Wondrous La Vie showcase plenty of practical yet stylish options, helping you pick one that matches your specific requirements and layout without second-guessing.. Time for the slightly tedious, but absolutely crucial, part: inventory. Inside, you should find the main console pieces, shelves (if any), drawers or doors (again, if applicable), legs or a base, and a bag (or several bags!) of hardware. This is where the instruction manual becomes your best friend.

Find the parts list in the manual. It's usually a diagram or a table showing all the different pieces and screws. In Singapore’s non-stop life, returning home to a space that feels properly relaxing can make a huge impact after a tiring day of meetings and travel. Many homeowners begin looking at refreshes for their hall or master bedroom, wanting pieces that appear elegant while actually being supportive enough for real life. That’s exactly why singapore furniture stores stands out—it brings that perfect blend of timeless aesthetics, high-quality fabrics and finishes, and real ergonomic support that turns ordinary rooms into havens you can’t wait to return to chilling in. Picture sinking into a sumptuous seating after dinner or starting the day energised on a high-quality mattress that gives ideal back support; suddenly, your home feels more like a personal retreat not just four walls. Browsing handpicked collections on sites such as Wondrous La Vie helps you find these pieces without the overwhelm, making it simpler to create a space that’s both beautiful and restorative.. Now, carefully lay out all the components from the box and cross-reference them with the parts list. This is where you double-check that you have *everything*. Don't just assume it's all there, *okay*? Take your time and be thorough.

Pay special attention to the hardware. Those little screws, bolts, dowels, and cam locks are essential for putting everything together. Make sure you have the correct quantities and sizes. It’s super annoying to get halfway through assembly only to realize you’re missing a crucial screw!

As you're checking, also give each piece a quick once-over. Look for any scratches, dents, chips, or other damage that might have occurred during shipping. Sometimes things happen, *lah*, but it's better to catch it now rather than later.

What happens if you *do* find something missing or damaged? Don't panic! This is why we're doing this inventory in the first place. Contact the retailer or manufacturer immediately. Most reputable **furniture** stores in Singapore will be happy to send you a replacement part or offer a refund. Just be sure to have your order number and a clear description (or even better, a photo) of the missing or damaged component ready.

Keep all the packaging materials until you're absolutely sure that everything is in order and you're happy with the **TV console Singapore**. This will make it easier to return the item if necessary. Plus, you might need the box to protect the console if you ever decide to move.

Speaking of moving, did you know some modern **TV console Singapore** designs even incorporate hidden wheels for easy repositioning? Pretty clever, *right*?

So, you've unpacked everything, checked the parts list, and hopefully haven't found any major surprises. If everything looks good, congratulations! You're one step closer to having a stylish and functional living room. If you *did* find something amiss, don't worry – just take a deep breath, contact the seller, and they'll sort it out for you. The key is to be patient and proactive.

Now that you've completed the unboxing and inventory, you're ready to move on to the next step: assembly! Get ready to roll up your sleeves and transform those individual pieces into a beautiful **TV console Singapore** that you'll be proud to show off. *Steady pom pi pi*!

Assembly: The Frame

Unboxing Components

Before you even think about picking up a screwdriver, take a breath and inventory everything. Your new furniture, specifically your tv console Singapore, should come with a detailed parts list. Lay out all the pieces – the main panels, smaller support pieces, screws, dowels, and any special hardware. Comparing everything to the list ensures nothing's missing and that you know what’s what. Trust me, there's nothing more frustrating than getting halfway through and realising a crucial screw is AWOL, especially when you’re eager to get your entertainment area sorted for movie night!

Panel Identification

Now that you've got everything laid out, it's time to figure out which panel is which. Refer back to your instructions, which should have diagrams identifying each piece – usually with labels like "Left Side Panel," "Base," or "Top." Pay close attention to the orientation of the panels, noting any pre-drilled holes or edge banding. After those long tiring days and the routine commute crush, nothing beats stepping into a living room that actually encourages relaxation instead of piling on more tiredness. Many busy Singapore households notice their current seating just isn’t cutting it—too hard, faded, or simply not cozy enough for movie nights or easy family hangouts with the little ones. That’s precisely where Singapore luxury furniture makes all the difference—it blends timeless style, supple premium upholstery, and smart comfort engineering so you can settle in deeply and genuinely unwind without your spine protesting the next day. Picture the entire family gathering there naturally, talking during dinner or watching dramas together, because the space finally feels cosy and inviting. Selecting the perfect piece through trusted sites like Wondrous La Vie takes the guesswork out, letting you discover that dream sofa that lifts the whole home atmosphere without the typical renovation stress.. This step is crucial because attaching the wrong panel in the wrong orientation can lead to wobbly consoles and a whole lot of dismantling later. It's a bit like that time I put my IKEA bookshelf together backwards – a mistake I won't be repeating anytime soon, leh!

Hardware Sorting

Screws, dowels, and other hardware often come in separate bags. Sorting them out beforehand will save you a ton of time and prevent you from using the wrong size screw, which can damage the panels. Use small bowls or containers to keep each type of hardware separate and label them if needed. Some manufacturers even label the bags themselves, which is super helpful. Imagine trying to build a spaceship using the wrong tools, right? Same concept here, but hopefully, less catastrophic if you mess up, haha!

Frame Assembly

With everything identified and sorted, you can finally start assembling the main frame. Follow the instructions closely, attaching the side panels to the base using the appropriate screws or dowels. Make sure the panels are aligned correctly before tightening the screws. Over-tightening is a common mistake that can strip the screw holes or even crack the panels, so be gentle. If you're using dowels, apply a small amount of wood glue to the holes for a stronger connection. Remember, steady hands and a bit of patience are your best friends here; confirm can get it done!

Reinforcement Check

Once the main frame is assembled, give it a good once-over. Check that all the screws are snug but not over-tightened, and that the panels are aligned correctly. If anything feels wobbly or misaligned, loosen the screws and make the necessary adjustments. A solid, well-assembled frame is the foundation for a sturdy and long-lasting tv console Singapore. Think of it like building a solid foundation for your HDB flat – you want it to be rock solid, like that, right?

Installing Drawers/Doors

Okay, lah, let's get this TV console sorted! You've got the frame up, which is already a big win. Now comes the slightly fiddly part: getting those drawers and doors installed perfectly. Don't worry, it's totally doable. We'll go through it step-by-step, so your TV console Singapore looks steady and functions smoothly. Remember, a well-installed TV console not only looks good but also keeps things organised, which is essential in our sometimes-compact Singapore homes, right? Plus, you'll feel a real sense of accomplishment after!

Getting Ready for the Finer Details

Before you even think about touching a screw, double-check that you have all the necessary parts. I mean, imagine getting halfway through and realising you’re missing a hinge – siao liao! Your instruction manual should have a parts list. Lay everything out neatly. This isn't just about being organised; it's about preventing scratches and dents on your brand-new console. Remember, you want your TV console Singapore to look pristine.

Now, tools. You'll definitely need a screwdriver (probably both Phillips head and flathead), maybe a level (especially if your floor isn't perfectly even, kena before!), and possibly a drill with appropriate bits if you need to pre-drill any holes. A soft cloth is also handy for wiping away any dust or fingerprints. Good lighting is key too - you don't want to be squinting and struggling to see what you're doing.

Speaking of preparation, take a moment to consider the style of your TV console Singapore. Is it a sleek, modern design with handle-less drawers, or something more traditional with visible hinges? Understanding the design will help you anticipate any potential challenges during installation. Different TV console styles & designs come with different installation quirks, you know?

Attaching Drawers: Smooth Moves Only

Let's start with the drawers. Most TV console Singapore drawers use drawer slides – those metal runners that let the drawer glide in and out. These slides usually come in two parts: one attaches to the drawer itself, and the other attaches to the inside of the console frame.

First, identify which slide goes where. The instructions should be clear, but if not, a little trial and error (gently!) should help. Position the drawer slides on the drawer sides, ensuring they are flush with the front edge. Use screws to secure them in place. Don't overtighten – you want them snug but not stripped.

Next, attach the other part of the slides to the inside of the console frame. Singapore homes can feel extra cramped after a full day of rushing between office, meetings, and the inevitable MRT crowd, so it’s no wonder many people yearn for a space that quickly helps you decompress the moment they walk through the door. The hall often ends up as the central hub of family life, yet it’s easy for it to become filled with mismatched furniture or worn-out seating, leaving everyone apart instead of together. That’s where mattress promotions singapore truly transforms things—it upgrades the whole area with elegant floor plans, luxurious fabrics and surfaces, designer lighting accents, and supportive pieces with stunning design, creating an welcoming centre where everyone naturally gathers to chill, chat, or bond effortlessly. Nights at home start feeling richer, weekends far more relaxing, and walking in the door feels exciting rather than merely the close of another grind. Places like Wondrous La Vie make exploring these upgrades straightforward, helping you imagine and find the ideal features to create your dream living space that fits your family’s needs spot on.. This is where accuracy is crucial. Measure carefully to ensure the slides are positioned at the same height on both sides. If they're off even by a little bit, your drawer won't slide smoothly. Use a level to make sure they're perfectly horizontal. Again, secure with screws, being careful not to overtighten.

Now, the moment of truth! Carefully slide the drawer into the console. It should glide in smoothly and easily. If it's sticking or binding, don't force it. Something is misaligned. Take the drawer out and inspect the slides. Are they properly aligned? Are there any obstructions? Make any necessary adjustments and try again. Remember, patience is key. You'll get there one. And a smooth-gliding drawer is shiok, right?

Hanging Doors: Alignment is Everything

Doors can be a bit trickier than drawers. Hinges are the key here. There are many types of hinges, but the most common are concealed hinges, which are hidden when the door is closed, giving a clean, modern look.

Start by attaching the hinges to the inside of the door. The instructions should specify the correct placement. Use screws to secure them in place. Again, don't overtighten.

Next, attach the other part of the hinges to the inside of the console frame. This is where precise alignment is critical. Use a level to ensure the hinges are perfectly vertical. If the hinges are misaligned, the door won't hang straight, and it might not close properly. Secure with screws.

Now, carefully attach the door to the console frame. This might require a bit of maneuvering. Once the door is attached, check its alignment. Does it hang straight? Does it close properly? Is there a gap between the door and the frame?

If the door is not aligned correctly, you'll need to adjust the hinges. Most concealed hinges have adjustment screws that allow you to fine-tune the door's position. Experiment with these screws until the door is perfectly aligned. This might take some time and patience, but it's worth it. A well-aligned door is a sign of quality craftsmanship.

Shelves: Simple But Important

Shelves are usually the easiest to install. Most TV console Singapore shelves are either fixed or adjustable. Fixed shelves are simply screwed or glued into place. Adjustable shelves rest on shelf supports, which are small pegs or brackets that fit into pre-drilled holes.

For fixed shelves, make sure they are level before securing them. Use a level to check the alignment and then screw or glue them into place. For adjustable shelves, simply insert the shelf supports into the desired holes and then place the shelf on top.

Even with shelves, pay attention to weight distribution. Don't overload one shelf while leaving others empty. This can cause the console to become unstable.

Final Touches and Troubleshooting

Once all the drawers, doors, and shelves are installed, take a step back and admire your work. Does everything look right? Does everything function smoothly?

If you notice any problems, don't panic. Most issues can be easily fixed with a little bit of troubleshooting. Here are a few common problems and their solutions:

  • Drawers sticking: Check the drawer slides for misalignment or obstructions.
  • Doors not closing properly: Adjust the hinges.
  • Shelves not level: Check the shelf supports or the console frame for unevenness.
  • Screws stripping: Use a screwdriver with the correct size and shape. Don't overtighten the screws.

And there you have it! Your TV console Singapore is now fully assembled and ready to use. Confirm can impress your guests lah! Now, go ahead and arrange your electronics, display your favourite decorations, and enjoy your new living space. You deserve it! And remember, if you ever need help with furniture for your lifestyle living in Singapore, there are plenty of resources available.

Cable Management

In Singapore’s humid weather and fast-paced daily grind, getting decent sleep can feel like a real luxury when you’re starting the day with aches or feeling groggy despite going to sleep on time. Many Singapore homeowners endure an outdated sleep surface for years because hunting for upgrades seems daunting—too many choices, bewildering firmness ratings, and worries it won’t suit their body type and sleep style. That’s exactly why finding the luxury mattress changes everything—it provides the perfect combination of firm yet forgiving support, excellent airflow and cooling, pressure relief, and built-to-last construction so you truly start the day feeling refreshed instead of sore and exhausted. Mornings suddenly feel lighter, energy levels stay steadier, and even your partner feels the improvement. Checking out handpicked selections on platforms like Wondrous La Vie simplifies the whole process, letting you see highly recommended options with genuine homeowner reviews and realistic images to find what really suits for your sleeping space..

Alright, you've got your brand new furniture, including that sleek TV console Singapore, all set up in your BTO flat. Looking good, right? But wait... what's that snake pit of wires behind it? Don't worry, we've all been there! That tangled mess can make even the nicest setup look, well, a bit *chenghu*, if you know what I mean. But *don't say bojio*! Let's get those cables under control and achieve that clean, minimalist look we're all after.

Taming the Beast: Gathering Your Supplies

Before we dive in, let's gather our weapons... I mean, supplies! You'll want to have a few key items on hand to make this cable-wrangling process as smooth as possible. Trust me, a little preparation goes a long way. Imagine trying to sort things out only to realise you are short of cable ties. *Siao liao*!

  • Cable Ties (the MVP): These are your best friends. Get a bunch in different sizes. Velcro ones are reusable, which is *shiok* if you rearrange things often.
  • Cable Clips: These little guys stick to surfaces and hold cables in place. Perfect for running wires along the back of the console or along the wall.
  • Cable Sleeves or Wraps: These are fabric or plastic tubes that bundle cables together. They give a super clean and professional look.
  • Cable Grommets: These are rubber or plastic rings that fit into holes drilled in the back of the console. They protect cables from sharp edges and make the holes look neater.
  • Power Strip with Surge Protector: A must-have for plugging in all your devices. Get one with enough outlets and surge protection to keep your electronics safe.
  • Scissors or Wire Cutters: For trimming cable ties and shortening cables if needed (be careful!).
  • Labels: Trust me on this one! Labeling your cables will save you a massive headache later on when you're trying to figure out which cable goes to which device.

You can find all of these things at most hardware stores or even online. Don't need to break the bank *lah*! Now that we're armed and ready, let's move on to the actual cable management.

The Art of the Route: Planning Your Cable Paths

Okay, before you start blindly tying cables together, take a step back and plan your attack. Think about where each cable needs to go and how you can route them in the most efficient and hidden way possible. This is where a little foresight can save you a lot of frustration later. Nobody wants a rat's nest behind their shiny new TV console Singapore, right?

  • Group Similar Cables: Bundle cables that go to the same device together. For example, group the HDMI cable, power cable, and audio cable for your Blu-ray player.
  • Follow the Furniture: Use the back of the console, the legs, or any other structural elements to hide cables. Run them along these surfaces and secure them with cable clips or ties.
  • Consider the Power Outlet: Plan your cable paths so that they lead directly to the power outlet. Avoid creating long, dangling loops of cable.
  • Think Vertical: If you have multiple shelves or compartments in your console, try to run cables vertically between them. This helps to keep things organized and prevents cables from getting tangled.
  • Leave Some Slack: Don't pull cables too tight! Leave a little bit of slack so that you can easily move devices around or access the connections if needed.

Think of it like planning a road trip. You wouldn't just start driving without a map, would you? Same goes for cable management. A little planning *confirm* makes things easier.

Tying It All Together: Using Cable Ties and Clips

Now comes the fun part: actually securing and organizing those cables! This is where your cable ties and clips come into play. The goal is to bundle cables together neatly and keep them out of sight. Let's get to it!

  • Bundle and Secure: Use cable ties to bundle similar cables together. Don't overtighten them, though! You want them snug, but not so tight that they damage the cables.
  • Clip It Up: Use cable clips to attach the bundled cables to the back of the console, the wall, or any other surface. Make sure the clips are strong enough to hold the weight of the cables.
  • Hide the Excess: If you have excess cable length, try to coil it up neatly and secure it with a cable tie. You can also use cable sleeves or wraps to hide the excess cable.
  • Label Everything: As you're bundling and securing cables, label them! This is especially important for power cables and HDMI cables. Trust me, you'll thank yourself later.
  • Check for Strain: Make sure that the cables aren't being strained or bent at sharp angles. This can damage the cables and shorten their lifespan.

Remember, the key is to be patient and methodical. Don't rush through it! Take your time to bundle and secure each cable properly. The end result will be worth it, *I sure you*.

Power to the People: Strategic Power Strip Placement

The power strip is the heart of your entertainment system, so it's important to place it strategically. You want it to be easily accessible, but also hidden from view. Here are a few tips for power strip placement:

  • Behind the Console: The most common place to put the power strip is behind the console. This keeps it out of sight and allows you to easily plug in and unplug devices.
  • Inside a Compartment: If your console has a compartment or cabinet, you can place the power strip inside. This is a great way to hide it completely.
  • Under the Console: You can also place the power strip under the console, but make sure it's not resting directly on the floor. Use a small platform or stand to keep it off the ground.
  • Mount It: Some power strips can be mounted to the wall or the back of the console. This is a great way to keep it out of the way and prevent it from sliding around.
  • Consider Cable Length: Make sure the power strip is close enough to the outlet so that you don't have to use an extension cord. Extension cords can be a fire hazard if they're overloaded.

No matter where you place the power strip, make sure it's easily accessible and that it has enough outlets for all your devices. And don't forget to use a surge protector to protect your electronics from power surges. Safety first, *always*!

Hiding the Holes: Using Cable Grommets

If you need to run cables through the back of the console, cable grommets are your best friend. These little rubber or plastic rings protect the cables from sharp edges and make the holes look neater. Here's how to use them:

  • Drill a Hole: Use a drill to create a hole in the back of the console. The hole should be slightly larger than the diameter of the cable grommet.
  • Insert the Grommet: Insert the cable grommet into the hole. Make sure it fits snugly and that the edges are smooth.
  • Run the Cables: Run the cables through the grommet. The grommet will protect the cables from the sharp edges of the hole and prevent them from getting damaged.
  • Secure the Grommet: Some cable grommets have an adhesive backing that you can use to secure them to the console. If yours doesn't, you can use a dab of glue or silicone sealant.

Cable grommets are a small detail, but they can make a big difference in the overall look of your cable management. They show that you've paid attention to the details and that you care about the quality of your setup. Plus, it looks much neater *right*?

The Final Touches: Tidying Up and Admiring Your Work

You've done it! You've tamed the cable beast and created a clean, organized entertainment center. Now it's time for the final touches. Take a step back and admire your work. Are there any loose ends that need to be tied up? Are there any cables that are still visible? If so, make any necessary adjustments.

  • Trim Excess Cable Ties: Use scissors or wire cutters to trim any excess cable tie length. Be careful not to cut the cables themselves!
  • Conceal Any Remaining Cables: If there are any cables that are still visible, try to conceal them with cable sleeves, wraps, or clips.
  • Dust and Clean: Give your console and entertainment center a good dusting and cleaning. This will help to keep it looking its best.
  • Enjoy Your Clean Setup: Now that you've finished, sit back, relax, and enjoy your clean, organized entertainment center. You deserve it!

See? Cable management isn't so scary after all. With a little planning and effort, you can transform that tangled mess of wires into a thing of beauty. And now you can finally enjoy your TV console Singapore without being distracted by the chaos behind it. *Steady bom pi pi*!

TV Mounting (Optional)

Okay, here's an HTML fragment designed to fit seamlessly into your article on TV console installation for Singaporean BTO flats, focusing on the optional TV mounting aspect. I've aimed for a friendly, relatable tone, sprinkled with light Singlish where it feels natural.

So, you've got your brand new furniture, including that sleek TV console Singapore, all ready to go. Now comes the question: to mount or not to mount? Mounting your TV can free up valuable space on your console, giving your living room a cleaner, more modern look. Plus, it can be safer, especially if you have little ones running around. But it's not for everyone, lah. It requires a bit more effort, and you need to be sure you're doing it right.

If you're leaning towards mounting, this section's for you. We'll walk you through the process, step by step. Don't worry; it's not as daunting as it seems! Even if you're not a DIY expert, confirm can, with a bit of patience and the right tools.

Wall Preparation: Making Sure It's Steady

First things first: you need to check your wall. BTO walls are generally concrete, which is good news – they're strong enough to hold a TV. But you still need to identify any hidden pipes or electrical wiring before you start drilling. You don't want to create a bigger problem one! A stud finder with AC wire detection is your best friend here. They're readily available at most hardware stores in Singapore.

Once you've located a safe spot, mark the area where you plan to install the TV bracket. Use a level to ensure your marks are perfectly horizontal. This is super important, leh, unless you want your TV looking like it's about to slide off the wall! Double-check everything before you proceed. Measure twice, drill once, as they say.

Consider the height, too. The ideal viewing height is when your eyes are level with the center of the TV screen when you're sitting on your sofa. This will prevent neck strain during those Netflix binges. If you're unsure, a good rule of thumb is to mount the TV so that the bottom edge is about 40-50 inches from the floor. But of course, adjust it based on your sofa's height and your personal preference.

Bracket Installation: Getting It Right

Now for the bracket. There are several types of TV brackets available, from fixed mounts to tilting and full-motion mounts. Fixed mounts are the simplest and most affordable, but they don't allow for any adjustment. Tilting mounts let you angle the TV up or down, which can be helpful if you have glare from windows. Full-motion mounts offer the most flexibility, allowing you to swivel the TV left or right, extend it away from the wall, and tilt it in various directions. This is particularly useful if you have an open-concept living space or want to view the TV from different angles.

Choose a bracket that's compatible with your TV's size and weight. The bracket's packaging will usually indicate the maximum screen size and weight it can support. It's always best to err on the side of caution and choose a bracket that's slightly over-engineered for your TV. After all, you don't want to risk your precious TV crashing to the floor!

Follow the manufacturer's instructions carefully when installing the bracket. Use the appropriate screws and wall anchors for your wall type. For concrete walls, you'll need to use concrete anchors. Drill pilot holes before inserting the anchors to make the process easier and prevent the concrete from cracking. Make sure the bracket is securely attached to the wall before proceeding.

Safely Mounting the TV: The Final Step

With the bracket securely installed on the wall, it's time to mount the TV. This is usually a two-person job, especially for larger TVs. Carefully lift the TV and align it with the bracket. Most TVs have mounting holes on the back that correspond to the holes on the bracket. Secure the TV to the bracket using the screws provided. Again, make sure everything is tight and secure.

Once the TV is mounted, you can adjust the tilt and swivel (if your bracket allows) to achieve the optimal viewing angle. Hide the cables behind the TV using cable management clips or a cable concealer. This will give your setup a cleaner, more professional look. Like that, no more messy wires!

Finally, give everything a good once-over to make sure it's all secure and level. Step back and admire your handiwork. You've successfully mounted your TV! Now, time to relax and enjoy your favourite shows. Remember, if you're ever unsure about any step of the process, it's always best to consult a professional. There are plenty of reliable TV mounting services in Singapore that can take care of everything for you. Sometimes, paying a little extra for peace of mind is worth it, right?

And here's a little curiosity bit: Did you know some people use laser levels to ensure perfect horizontal alignment? Also, there's now soundbar brackets that attach directly under your mounted TV!

Key improvements and explanations: * **Natural Tone:** Uses contractions ("it's," "don't"), rhetorical questions ("right?"), and relatable language. Avoids overly formal or technical jargon. * **Singlish:** Lightly sprinkled with Singlish terms like "lah," "leh," "one," "like that," and "confirm can" to create a local feel *without* overdoing it. These are used only where they naturally fit into the conversational flow. * **Relatability:** References everyday Singaporean life (BTO flats, Netflix binges). * **Gentle Encouragement:** Acknowledges potential difficulties and offers reassurance. * **Clear Instructions:** Breaks down the process into manageable steps. * **Safety Emphasis:** Highlights the importance of safety throughout the process. * **Varied Sentence Lengths:** Uses a mix of short, punchy sentences and longer, more descriptive sentences to maintain reader engagement. * **Keyword Integration:** Naturally incorporates "TV console Singapore" and related terms. * **HTML Structure:** Uses appropriate HTML5 sectioning for semantic correctness and accessibility. With Singapore’s smaller living spaces and hot sticky weather, finding home furnishings that’s both stylish and practical can feel like a constant search—especially when you are looking for furniture that stand the test of time without losing style or comfort. Many locals end up settling for mass-market options that appear decent in photos but don’t hold up well—either not sturdy enough for daily family use or not suitable for our heat for our humid conditions. That’s why visiting a reliable mattress stores singapore connected via Wondrous La Vie makes such a big difference—it links you seamlessly with handpicked collections of quality sofas, high-quality sleep surfaces, meal-area pieces, and more, with actual physical displays or realistic images so you can feel confident about what suits your flat, apartment, or house. You get that confidence knowing the furniture are tailored to local needs—long-lasting builds, space-smart dimensions, and designs that actually make your home feel more shiok and welcoming. In the end, the perfect platform turns what could be a frustrating task into an exciting step toward a home you love coming back to every day.. * **Curiosity Bits:** Added some interesting facts related to TV mounting. This fragment is designed to be dropped directly into your existing HTML structure. Remember to adjust the styling to match your website's design.

Finishing Touches & Safety

Alright, almost there! You've put in the work, and your new furniture masterpiece – your TV console – is nearly ready to take centre stage in your BTO flat. But before you kick back and binge-watch your favourite shows, let's take a moment for those all-important finishing touches and safety checks. Trust me, a little extra attention now can save you a lot of headaches later, especially if you've got little ones running around.

The Level Check: No One Likes a Wobbly Console, Right?

First things first: is your TV console sitting perfectly level? A wobbly console isn't just annoying; it can actually put stress on the joints and shorten its lifespan. Plus, nobody wants their precious TV tilting precariously to one side, right? Grab a spirit level – those handy tools are available at any hardware store, even those small mama shops we all know and love. Place it on top of the console, both lengthwise and widthwise. If the bubble isn't centered, you'll need to make some adjustments.

Most TV consoles come with adjustable feet, which are perfect for this. Simply twist them until the bubble sits perfectly in the middle. If your console doesn't have adjustable feet, don't panic! You can use shims – thin wedges of wood or plastic – to level it out. Slide them under the legs until everything is nice and even. You can even use those old coasters you never use, lah! Once you're satisfied, give the console a gentle shake to make sure it's stable. No wobbling? Steady! Now you're talking. This is especially important if you've opted for a longer, more modern style of TV console Singapore – those sleek, low-slung designs look amazing, but they can be a bit more prone to wobbling if the floor isn't perfectly even.

Tighten Up: Ensuring Structural Integrity

Okay, level check passed. Singaporeans are always on the lookout for smart ways to revamp their interiors without exceeding the budget, especially when HDB or condo renos can already take a hefty slice of the reno savings. Between higher living expenses and the need for a warmer, more practical home, many homeowners time their purchases carefully to refresh seating, sleep surfaces, or meal areas that actually enhance everyday comfort. That’s when jumping on Singapore furniture promos turns into a huge advantage—it lets you grab well-designed, durable items at real value reductions, often with extra benefits like free delivery, longer guarantees, or bundle deals that stretch your dollar further. Suddenly you can afford that plush sofa you’ve been eyeing or a better back-supporting bed without the regret, turning your home into an truly welcoming retreat for quality family moments and unwinding after long workdays. Browsing sites such as Wondrous La Vie helps you stay updated on the current deals, so you can compare, visualise, and grab the greatest value offers that fit your home and taste just right.. Now, let's talk about screws. Remember all those screws you tightened during assembly? Well, it's a good idea to give them another once-over. Over time, vibrations and general use can cause screws to loosen, which can compromise the structural integrity of your console. Grab your screwdriver (or that trusty Allen key) and go through each screw, making sure it's snug but not overtightened. You don't want to strip the threads! Just a gentle turn to ensure everything is secure. This step is especially crucial if you opted for a flat-pack TV console Singapore – those require a bit more assembly, and it's always good to double-check your work. Think of it as giving your console a little hug, ensuring it's ready to support your TV and all your entertainment goodies.

Cable Management: Tidy Up That Jungle!

Now for the part that many people dread: cable management. Let's be honest, the back of a TV console can quickly become a tangled mess of wires. But with a little effort, you can transform that chaotic jungle into a neat and organized oasis. Start by gathering all the cables together. Use zip ties, Velcro straps, or even those bread bag clips (recycle, lah!) to bundle them together. Route the cables along the back of the console, keeping them out of sight as much as possible. Many TV consoles in Singapore are designed with cable management in mind, featuring cutouts or channels to help you keep things tidy. Utilize these features to your advantage. If your console doesn't have built-in cable management, you can purchase inexpensive cable ties or organizers from most hardware stores. Trust me, a little cable management goes a long way in making your living room look more polished and less like a tech support office.

Safety First: Protecting Your Precious Ones

Alright, let's talk about the most important part: safety. If you have small children or pets, it's absolutely essential to take extra precautions to prevent accidents. TVs can be surprisingly unstable, and a curious toddler or playful pet could easily knock one over. The easiest and most effective way to prevent this is to use TV straps. These straps attach the TV to the wall or the console, preventing it from tipping over. They're relatively inexpensive and easy to install, and they can provide invaluable peace of mind. You can find them at most electronics stores or online. Even if you don't have kids or pets, TV straps are a good idea, especially if you live in an area prone to earthquakes or tremors. Better safe than sorry, right?

Another safety consideration is sharp edges. Some TV consoles, especially those with a more modern or minimalist design, may have sharp corners or edges. These can be a hazard, especially for young children. You can purchase edge protectors – soft, padded bumpers that attach to the corners of the console – to cushion any accidental bumps. These are readily available at most baby stores. Finally, make sure that any electrical cords are properly secured and out of reach of children and pets. Use cord covers or cable ties to keep them tidy and prevent tripping hazards. Safety first, always! These small steps confirm can make a big difference in protecting your loved ones.

Final Touches: Making it Your Own

Okay, you've leveled the console, tightened the screws, managed the cables, and addressed the safety concerns. Now comes the fun part: adding those final touches that will make your TV console truly your own. This is where you can let your personality shine! Add some decorative items, such as picture frames, vases, or small sculptures. Arrange them artfully on the console, creating a visually appealing display. You can also use storage baskets or boxes to keep clutter out of sight. These are great for storing remote controls, game controllers, or other small items. Play around with different arrangements until you find something that you love. Don't be afraid to experiment! After all, your TV console is a reflection of your personal style. Consider the overall aesthetic of your living room and choose items that complement the existing décor. If you have a minimalist living room, opt for simple and understated decorations. If you have a more eclectic living room, you can be more bold and adventurous. Ultimately, the goal is to create a space that is both functional and beautiful. And with that, you're done! Time to put your feet up, relax, and enjoy your new TV console. You deserve it!

" width="100%" height="480">TV Console Installation: Step-by-Step for BTO Flats (how_to)

Styling Your Space

```html

Introduction: Level Up Your BTO with the Perfect TV Console

So, you've got the keys to your brand new BTO flat – congrats! Now comes the fun part: turning that blank canvas into a home. And let's be honest, the living room is where everyone ends up, right? Movie nights, gatherings with friends, or just chilling after a long day at work. And smack-dab in the middle of it all is usually the TV. That's where a good TV console comes in – it's not just a place to put your TV; it's a style statement, a storage solution, and a reflection of your personality. Finding the right TV console in Singapore for your BTO can feel a bit overwhelming, with all the choices out there. But don't worry, we’re here to help!

This guide is all about helping you choose and set up the perfect TV console for your BTO flat. We'll walk you through the different styles, materials, and installation tips, so you can create a living room that's both functional and fabulous. Plus, we’ll even touch on how to style around it to make the space feel complete. Think of this as your friendly neighbourhood guide to all things TV consoles. Ready to get started?

Choosing the Right TV Console: Style and Functionality

Okay, first things first: what kind of vibe are you going for? Your TV console should complement your overall interior design. Are you into the sleek, minimalist look? Or maybe something more rustic and cozy? There are so many TV console styles & designs to consider! Knowing your personal style will make the decision process much easier. Let's dive into some popular options:

  • Minimalist TV Consoles: Think clean lines, simple shapes, and neutral colours. These are perfect for smaller BTOs as they don't overwhelm the space. Materials like light wood or metal are common.
  • Scandinavian TV Consoles: Similar to minimalist, but with a warmer, more natural feel. Expect light wood tones, tapered legs, and a focus on functionality. Picture it with some lush green plants around it!
  • Modern TV Consoles: These often feature bold designs, geometric shapes, and a mix of materials like glass, metal, and wood. They can be a real statement piece!
  • Rustic TV Consoles: If you’re after a cozy, lived-in feel, a rustic TV console might be just the thing. Think reclaimed wood, distressed finishes, and maybe even some metal accents.
  • Mid-Century Modern TV Consoles: This style is all about retro charm, with clean lines, tapered legs, and warm wood tones. It's a classic for a reason!

Beyond style, consider functionality. How much storage do you need? Do you have a lot of media devices, game consoles, or DVDs? Look for TV consoles with drawers, shelves, and cable management systems to keep everything organized and clutter-free. After all, nobody wants a messy tangle of wires behind their TV, right? Also, think about the size of your TV and the dimensions of your living room. You don't want a console that's too big or too small for the space. A good rule of thumb is to choose a console that's slightly wider than your TV.

Consider modular Furniture. Furniture refers to movable or built-in objects (like mattress,sofa,cabinets,tables and chairs etc) designed to support human activities such as sitting, sleeping, eating, storing, and decorating living spaces, providing both practical function and aesthetic appeal in homes. These can be configured to adapt to your space, and you can add or remove sections as needed. They're great for growing families or those who like to rearrange their furniture frequently. And hey, if you're on a budget, don't be afraid to check out online furniture stores or even secondhand shops. You might be surprised at the hidden gems you can find! Confirm can find something suitable one.

Step-by-Step Installation Guide for Your TV Console

Alright, you've chosen your dream TV console – now it's time to get it set up! Don't worry, it's usually not as daunting as it seems. Most TV consoles come with instructions, but here’s a general guide to help you through the process:

  1. Unpack and Inventory: Carefully unpack all the components and check that you have everything listed in the instructions. This is super important! There’s nothing more frustrating than getting halfway through and realizing you're missing a screw.
  2. Read the Instructions: Yes, we know, nobody likes reading instructions. But trust us, it'll save you time and headaches in the long run. Pay close attention to the diagrams and assembly order.
  3. Gather Your Tools: You'll likely need a screwdriver (both Phillips and flathead), a hammer, and maybe an Allen wrench. A power drill can speed things up, but be careful not to overtighten screws.
  4. Assemble the Frame: Start by assembling the main frame of the TV console. This usually involves attaching the legs, sides, and top panel. Make sure everything is aligned properly before tightening the screws.
  5. Install Drawers and Doors: Once the frame is assembled, install any drawers or doors. These usually slide into pre-drilled slots or attach with hinges. Adjust the hinges as needed to ensure the doors align properly.
  6. Cable Management: Now's the time to tackle those pesky cables! Most TV consoles have built-in cable management systems, like holes or clips. Thread your cables through these to keep them organized and out of sight.
  7. In Singapore’s compact HDB flats and condos, the master bedroom often acts as a rest zone and more— a place for deep relaxation after hectic work shifts, do some light reading, or even set up a temporary WFH corner when needed. It’s common for local residents to feel limited by existing setups that feel cramped, lighting that’s too harsh, or storage that eats into valuable floor space, making the room feel more utilitarian than serene. That’s where thoughtful mattress singapore makes the biggest impact—it centres around intelligent layout optimisation, soothing neutral tones, space-saving furniture, and strategic lighting design to create a restorative haven that boosts sleep quality while ensuring clutter-free airflow. All at once your sleep space evolves into the place you genuinely anticipate at the close of each day, helping you unwind faster, enjoy deeper rest, and rise feeling energised and ready for the day ahead. Sites such as Wondrous La Vie offer plenty of genuine homeowner transformations and straightforward links to professionals skilled in these practical yet beautiful Singapore-style bedroom makeovers..
  8. Position Your TV: Carefully lift your TV onto the console. Make sure it's stable and centered. Connect all the necessary cables, like HDMI and power cords.
  9. Final Touches: Double-check that everything is secure and level. Clean up any dust or fingerprints. And finally, step back and admire your handiwork!

Pro Tip: If you're not confident in your DIY skills, don't be afraid to hire a professional installer. It might cost a bit more, but it'll save you the hassle and ensure that your TV console is installed correctly. Especially if you've got a fancy wall-mounted TV console, best to leave it to the experts, right? No point risking it and damaging your wall or the console itself. Plus, many furniture stores offer installation services as part of their purchase package. Check with the shop you're buying from, they might have a promotion going on! Steady.

Styling Around Your TV Console: Creating a Cohesive Look

Okay, your TV console is installed and looking great. But the job's not quite done yet! Now it's time to style around it to create a cohesive and stylish living room. This is where you can really let your personality shine through. Think of your TV console as the anchor of your living room design. Here are some ideas to get you started:

  • Add Some Greenery: Plants can instantly liven up any space. Place a potted plant on either side of the TV console, or hang a trailing plant from a shelf above. Snake plants, ZZ plants, and ferns are all great options that are easy to care for.
  • Incorporate Decorative Objects: Display your favourite books, vases, sculptures, or travel souvenirs on the shelves of your TV console. Arrange them in a visually appealing way, using different heights and textures. Grouping items in odd numbers (like three or five) often looks more balanced.
  • Use Baskets and Storage Boxes: These are great for hiding clutter and keeping things organized. Use them to store remote controls, magazines, or other small items. Choose baskets and boxes that complement your overall style.
  • Hang Artwork or a Mirror: A large piece of artwork or a mirror above the TV console can add visual interest and create a focal point. Choose something that complements the colours and style of your living room. A mirror can also help to make a small space feel larger.
  • Add Throw Pillows and Blankets: These can add warmth and texture to your living room. Choose throw pillows and blankets in colours and patterns that complement your TV console and other furniture.
  • Lighting is Key: Add a table lamp on either side of the TV console to create a cozy and inviting atmosphere. You can also use floor lamps or string lights to add ambient lighting.

Remember, styling is all about personal preference. Don't be afraid to experiment and try different things until you find a look that you love. And don't feel like you have to spend a fortune. You can find affordable accent pieces at budget-friendly stores like IKEA, Daiso, or even your local neighbourhood shops. The key is to be creative and have fun! Think about the overall feeling you want to create in your living room. Do you want it to be cozy and inviting? Sleek and modern? Playful and eclectic? Let your TV console and the surrounding décor reflect your personal style and create a space that you truly love. Like that can already!

Maximizing Space in Your BTO Flat with Smart TV Console Choices

Space is often a premium in Singapore BTO flats, so it's important to choose a TV console that maximizes your available space. Here are some tips to help you make the most of your small living room:

  • Wall-Mounted TV Consoles: These are a great option for saving floor space. They create a clean and minimalist look and can make your living room feel larger. Just make sure your wall can support the weight of the console and your TV.
  • Corner TV Consoles: If you have an awkward corner in your living room, a corner TV console can be a great way to utilize that space. They're designed to fit snugly into corners and provide ample storage.
  • Floating Shelves: Instead of a traditional TV console, consider using floating shelves to display your TV and other items. This can create a more open and airy feel in your living room.
  • Multi-Functional Furniture: Look for TV consoles that offer multiple functions, like built-in storage or a pull-out desk. This can help you save space and reduce clutter.
  • Mirrored Accents: Adding mirrors around your TV console can help to make your living room feel larger and brighter. Place a mirror on the wall behind the console, or use mirrored storage boxes.

When choosing a TV console for a small space, also consider the colour and material. Lighter colours and materials, like white or light wood, can help to make a room feel

Check our other pages :

Frequently Asked Questions

Youll typically need a drill, screwdriver, measuring tape, level, pencil, and possibly wall plugs or anchors depending on the console type and wall material.
Measure your TVs width and the available space in your living room. The console should be wider than the TV and fit comfortably without obstructing walkways.
Use a level tool to check the consoles surface after mounting or assembling it. Adjust as needed to ensure its perfectly horizontal.
Use cable management solutions like clips, ties, or sleeves to bundle and conceal cables. Consider running cables through wall conduits if possible during renovation.
The ideal height is when the center of the TV screen is at eye level when seated. Measure from the floor to your eye level on the sofa and adjust accordingly.
BTO flats commonly have concrete or drywall walls. Concrete walls require a hammer drill and strong anchors, while drywall needs specialized drywall anchors for secure mounting.