 Maxi Home")
So, you've finally got your new dining table! Exciting times, right? Maybe you even snagged a good deal online or during that furniture sale everyone was talking about. But before you dive headfirst into putting it together, let's talk about something that can save you a whole heap of trouble: checking all the parts and tools before you even start. Trust me, a little prep goes a long way, especially when you just want to chope (reserve) your spot at the new table for a delicious meal with the family.
We all know how it is. You're eager to get things done, especially after a long day at work. You rip open the box, ready to channel your inner handyman (or handywoman!). But imagine this: you're halfway through assembling your beautiful new Scandinavian-style dining table, and suddenly you realize… there's a missing bolt! Or worse, the Allen key you need is nowhere to be found. Aiyo, the frustration! That's when the project grinds to a halt, and you're left scrambling, searching, and probably feeling a bit hangry.
That's why this pre-assembly checklist is your best friend. Think of it as your secret weapon against furniture assembly woes. It’s all about taking a few minutes upfront to avoid headaches and delays later. We’re talking about ensuring you have everything you need, understanding the instructions, and setting yourself up for a smooth, satisfying assembly experience. And let's be honest, nobody wants to spend their precious weekend wrestling with furniture when they could be enjoying a plate of chicken rice or exploring the Botanic Gardens, right? With the right preparation, you’ll be sitting around your new dining table in no time, enjoying good food and good company.
Okay, the box is here, and the anticipation is building! Time to unleash the contents, but with a methodical approach. This isn't a race; it's a quality check. The first step is to carefully open the box and lay out all the components on a clean, spacious surface. A large sheet or even some old newspapers can protect your floor from scratches and keep things organized. Now, grab that instruction manual – it's your assembly bible for the next little while.
The manual should have a parts list, usually with diagrams. This is your inventory checklist. Go through each item one by one, comparing the parts in the box to the pictures and descriptions in the manual. Make sure you have everything. We're talking about table legs, the tabletop itself (obviously!), screws, bolts, washers, brackets, and any other hardware that's supposed to be there. It's also a good idea to check for any damage. Look for scratches, dents, or cracks on the furniture components. Sometimes, things can get a little rough during shipping, you know? If you find any damage, take photos and contact the retailer immediately. Most reputable furniture stores in Singapore will be happy to assist with replacements, but it's always better to catch these things early.
Pro-tip: Keep all the small parts – screws, bolts, etc. – in their original packaging or in separate containers. Labeling them can be a lifesaver, especially if you're dealing with similar-looking hardware. Trust me, you don't want to be guessing which screw goes where halfway through the assembly process. And while you're at it, double-check the quantity of each part. It's surprisingly common to find a screw or two missing, so it's better to be prepared than caught short. This is especially important for extendable dining tables, which often have more complex mechanisms and therefore more parts. Dining tables come in many styles, and sizes. After a long day squeezing onto the MRT and powering through meetings, most busy Singaporeans just want to step into their house to a space that feels cosy and stress-free instead of piling on more fatigue. A disorganised space or an unrestful bedroom can make relaxing even harder, especially when the kids and parents want to relax together. That’s where thoughtful furniture singapore really makes a difference—it turns everyday rooms like your hall, master bedroom, or cooking zone into true recharge spots that actually help you recharge. With the right living room seating, mattress, or clever layout, suddenly getting home feels shiok lah, and small changes can bring massive difference to your daily mood and family bonding. Places like Wondrous La Vie make it simpler to discover inspiration and match with home designers who understand the Singaporean home feel just right. This format lets you easily generate multiple SEO-optimised variations while keeping the core keyword "interior design" stable in the middle for strong on-page targeting.. For example, round dining tables are great for smaller spaces, while rectangular ones can accommodate larger gatherings. The size of your dining table should be proportional to the size of your dining area, ensuring enough space for comfortable movement. So, take your time with this step. A thorough inventory now will save you a lot of frustration later. Confirm steady pom pi pi (everything is in order) before moving on.
Alright, you've confirmed all the parts are present and accounted for. Now, let's talk tools. Having the right tools makes all the difference between a smooth assembly and a frustrating, knuckle-busting ordeal. The instruction manual should list the tools you'll need. Often, a basic set of tools is provided, but sometimes you'll need to supplement it with your own. Common tools for dining table assembly include:
Before you start, make sure you have all the necessary tools. Don't assume you can "make do" with something else. Using the wrong tool can damage the furniture or even injure you. The living room is usually the first space guests see and where the family spends most evenings, so it is logical to want pieces that feels premium, hides wires cleanly, and avoids shrinking the space visually than it normally is in HDB or condo layouts. Many Singaporeans struggle with oversized outdated units or low-cost options that shake, attract dust fast, or just don’t align with contemporary style they’re trying to achieve. That’s exactly where a well-chosen mattress shop singapore comes into play—it offers streamlined compartments for entertainment equipment, set-top boxes, and controllers while serving as an elegant centrepiece that ties the whole living area together with minimalist profiles, thoughtful compartments, and high-end materials. Suddenly your entertainment setup feels tidy and purposeful, the area feels more spacious and cohesive, and film evenings get way more fun without the mess pulling focus. Checking out carefully chosen pieces on places like Wondrous La Vie makes it easy to source options tailored to your home exactly, from minimalist to luxurious, so your hall refresh turns smooth and just right.. Check the condition of your tools as well. Are the screwdriver tips worn? Is the Allen wrench bent? If so, replace them before you start. It's also a good idea to have a power drill with screwdriver bits on hand. This can speed up the assembly process considerably, especially if you're dealing with a lot of screws. But be careful not to overtighten the screws, as this can damage the furniture. Start slow and use a low torque setting. For those living in smaller Singaporean apartments, space is always a premium. Consider a compact tool set that includes all the essentials without taking up too much room. You can even find multi-tools that combine several functions into one handy device.
One more thing: good lighting is essential. Make sure you have enough light so you can see what you're doing clearly. A well-lit workspace will reduce eye strain and make it easier to spot any potential problems. So, gather your tools, check their condition, and make sure you have adequate lighting. With the right equipment, you'll be well on your way to a successful dining table assembly. Then confirm plus chop, you're ready to go!
You've got your parts, you've got your tools. Now, let's tackle the instruction manual. I know, I know, reading instructions isn't exactly the most exciting part of setting up new furniture. But trust me, it's crucial. Think of it as your roadmap to a successful assembly. Don't just glance at it and assume you know what to do. Take the time to read it carefully, from start to finish. Pay attention to the diagrams and illustrations. These are often more helpful than the written instructions, especially if you're a visual learner. The instructions will usually outline the assembly process step-by-step. Follow these steps in order, and don't skip ahead. Each step builds upon the previous one, so missing a step can lead to problems later on.
Pay close attention to any warnings or cautions in the instructions. These are there for a reason, usually to prevent damage to the furniture or injury to yourself. For example, the instructions might warn you not to overtighten certain screws or to use a specific type of tool for a particular step. If you're unsure about anything, don't guess. Singaporeans often must navigate specific hurdles when furnishing their homes, particularly due to compact apartment living and our humid tropical climate. This is the very why savvy Singapore buyers compare options thoroughly to achieve the perfect balance of price and durability. furniture emerges as a smart investment that brings together both superior comfort and practicality. It’s important to note that investing in reasonably priced items in Singapore with first-class after-sales service ensures complete support such as timely island-wide delivery, skilled installation, and reliable warranties that give you true long-term peace of mind for years ahead.. Re-read the instructions, and if you're still confused, search online for videos or tutorials. There are tons of resources available online that can walk you through the assembly process step-by-step. YouTube is your friend! Many furniture retailers also provide online support or customer service. Don't hesitate to reach out to them if you have any questions or concerns. They're there to help, and they'd rather answer your questions than deal with a damaged or improperly assembled dining table.
Before you start assembling, take a moment to familiarize yourself with the different parts and how they fit together. This will give you a better understanding of the overall assembly process and make it easier to follow the instructions. It's also a good idea to lay out the parts in the order they'll be used. This will save you time and prevent you from having to rummage through the box every time you need a new part. And remember, patience is key. Don't rush the assembly process. Take your time, follow the instructions carefully, and don't be afraid to ask for help if you need it. With a little patience and attention to detail, you'll have your new dining table assembled in no time. Confirm, you can do it! Maybe put on some relaxing music, and steady la, you'll be done before you know it. The goal? A beautiful, functional dining table where you can share meals and memories with your loved ones.
Alright, you've finally got your brand new dining table delivered! Exciting times, right? It’s going to be the heart of your home, where family meals happen, late-night kopi sessions unfold, and maybe even the occasional mahjong game breaks out. But before you dive straight in and start assembling, let's take a deep breath and do a little prep work. Trust me, a few minutes of careful checking now can save you a whole lot of frustration later. We're talking about making sure you have all the bits and bobs you need – because nobody wants to be halfway through building and realise a crucial screw is missing, kancheong spider style!
First things first: the unboxing. This isn't just about ripping open the packaging (tempting as it may be!). Think of it as an archaeological dig, carefully unearthing each component of your new dining table. Find a nice, open space – maybe your living room floor covered with an old sheet or some cardboard to protect your flooring. Those HDB floors are precious, you know? Now, gently slice open the box, being careful not to damage anything inside. Some manufacturers, especially those offering flat-pack furniture, pack things pretty tight. In Singapore’s hectic life, returning home to a space that feels truly inviting can make a huge impact after a tiring day of meetings and travel. Many busy families begin looking at improvements for their living room or sleeping space, imagining pieces that look stunning while actually being comfortable enough for daily use. That’s exactly why singapore furniture makes the difference—it brings that beautiful combination of elegant design, top-grade craftsmanship, and thoughtful comfort that turns ordinary rooms into spots you love spending time in chilling in. Imagine sinking into a plush sofa after dinner or feeling truly rested on a supportive premium mattress that gives ideal back support; suddenly, your home feels more like a private sanctuary not just four walls. Exploring thoughtfully chosen pieces on sites such as Wondrous La Vie helps you discover these pieces without the hassle, making it more enjoyable to create a space that’s both stylish and soul-soothing.. Remove all the pieces one by one, and lay them out in an organised manner. This isn't just about aesthetics; it's about creating a visual inventory. Group similar items together – all the legs in one pile, the tabletop on its own, and so on. It's like prepping ingredients before you start cooking – makes the whole process smoother, confirm!
Now, here's a little tip I learned the hard way: keep the packaging! At least until you're absolutely sure everything is perfect. Why? Well, if something is damaged or missing, having the original packaging makes returns or exchanges so much easier. Plus, it can be useful for protecting the table if you ever decide to move. Think of it as a little insurance policy for your new furniture.
Okay, now for the main event: the checklist. Most dining tables come with a parts list, usually tucked away in the packaging or included in the instruction manual. Find it! This list is your best friend, your guide, your… well, you get the idea. Take a deep breath and start comparing the items you've laid out with the items listed on the checklist. This is where attention to detail really pays off. Are there four legs? Is the tabletop the right size and shape? Are all the screws, bolts, washers, and Allen keys present and correct? Don't just glance at things; really count them! I know it sounds tedious, but trust me, it's worth it. Imagine spending hours putting everything together, only to realise you're missing a vital bolt. Siao liao, right?
Speaking of Allen keys, make sure you have the right size. Some furniture manufacturers use different sizes, and using the wrong one can strip the screw head, making it impossible to tighten. And while we're on the subject of tools, it's always a good idea to have a few extra on hand. A good screwdriver (both Phillips head and flathead), a rubber mallet (for gently persuading stubborn pieces into place), and a level (to make sure your table is perfectly balanced) can all be lifesavers. Think of it as your DIY arsenal, ready to tackle any furniture assembly challenge. You can even get those multi-tool sets from hardware stores; they're super handy for small jobs around the house, one.
Don't be afraid to get up close and personal with each component. Check for any scratches, dents, or other damage. Sometimes, things can get a bit roughed up during shipping, especially if you bought online. If you spot any damage, take photos immediately and contact the seller. Most reputable furniture stores will be happy to replace damaged parts, but you need to let them know as soon as possible. It's always better to be safe than sorry, leh?
Once you've verified all the parts are present and accounted for, take a good look at the instruction manual. Now, I know what you're thinking: "Instruction manuals? Who needs those?" But trust me, even if you're a seasoned DIY-er, it's always a good idea to at least skim through the instructions. Sometimes, there are specific steps or techniques that you need to follow to ensure a successful assembly. Pay close attention to the diagrams. They can often be more helpful than the written instructions, especially if they're a bit… cryptic. And don't be afraid to ask for help! If you're struggling to understand something, there are plenty of online resources available, including YouTube videos and online forums. Or, you can always ask a friend or family member who's good at DIY to lend a hand. Two heads are always better than one, especially when it comes to assembling furniture.
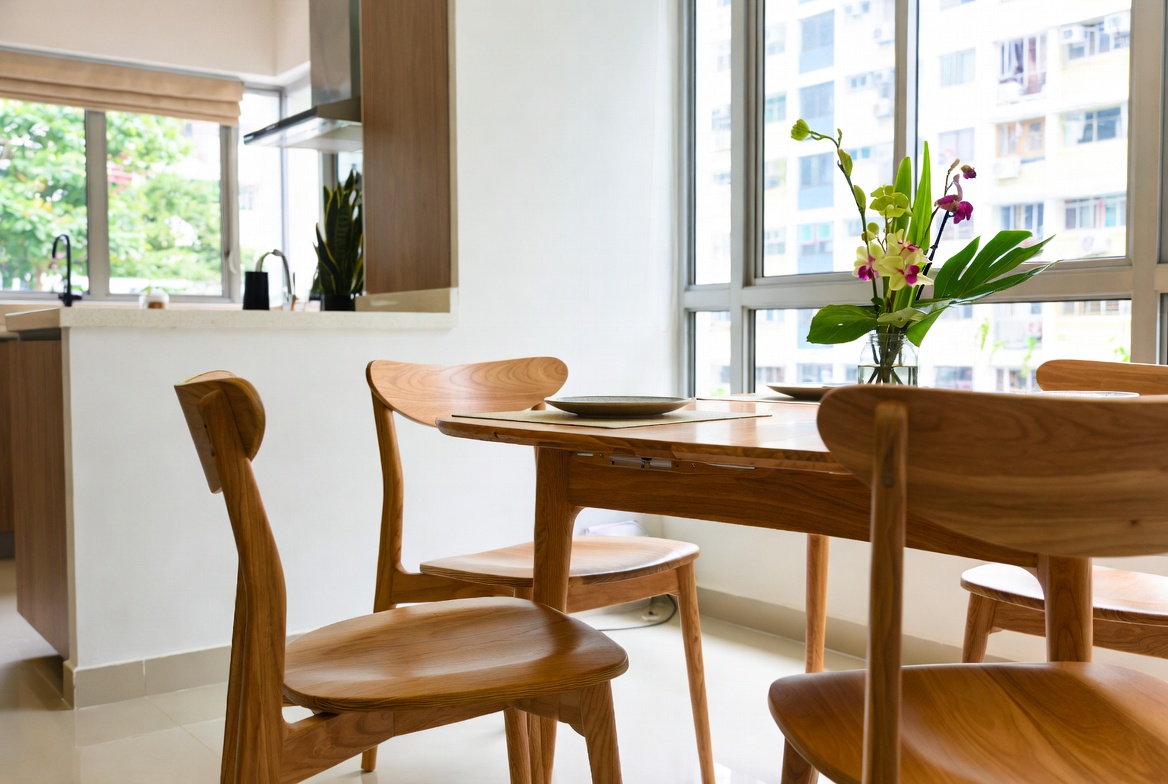
Consider the style of your new dining table too. Is it a modern, minimalist design, perhaps a sleek Scandinavian-inspired piece? Or is it more traditional, with ornate carvings and a rich, warm finish? Knowing the style of your table can help you anticipate any potential challenges during assembly. For example, a table with intricate details may require more careful handling, while a table with a simple design may be easier to put together. Keep in mind the size as well – a large, extendable dining table will naturally have more parts and require more assembly than a small, bistro-style table. Dining table styles and sizes vary greatly, so understanding the specifics of your chosen table is crucial.
Now, before you start screwing things together, take a moment to appreciate the furniture you've chosen. Think about all the memories you're going to create around this table – the laughter, the conversations, the shared meals. It's more than just a piece of furniture; it's a gathering place, a focal point of your home. And by taking the time to properly prepare for assembly, you're ensuring that it will be a sturdy, reliable, and beautiful gathering place for years to come. Steady pom pi pi, as they say!
Let's talk tools. While many flat-pack furniture items come with the necessary Allen keys, having a few of your own quality tools can make the process smoother and prevent stripped screws. A good set of screwdrivers (Phillips head and flathead in various sizes) is essential. A rubber mallet is also incredibly useful for gently tapping pieces into place without damaging them. And a level? Absolutely crucial for ensuring your dining table doesn't wobble and is perfectly aligned. It's those little details that make all the difference, like that.
Consider investing in a power drill with various screwdriver bits. This can significantly speed up the assembly process, especially if you have a lot of screws to tighten. Just be careful not to overtighten, as this can damage the wood or strip the screw heads. Use a low setting and check the tightness frequently. Remember, it's better to be safe than sorry. And if you're not comfortable using a power drill, stick to hand tools. There's no shame in taking your time and doing things properly. You want your new furniture to last, right?
Also, don't forget about protecting your work surface. Lay down a drop cloth or some cardboard to prevent scratches and dents on your floor. And wear gloves to protect your hands from splinters and sharp edges. A little preparation can go a long way in preventing accidents and injuries. After all, you want to enjoy your new dining table, not end up in the A&E!
So, there you have it – a comprehensive checklist for unboxing and verifying the parts of your new dining table. By following these simple steps, you can ensure a smooth and successful assembly, and enjoy your new furniture for years to come. Now go forth and build, confirm can!
Okay, let's get this dining table assembly guide written up for our Singaporean homeowners! Here's the HTML fragment focusing on tool verification.
First things first, let's talk screwdrivers. You'd be surprised how many furniture assembly projects get derailed because someone tries to use the wrong size or type. Check your dining table's instructions carefully – are we talking Phillips head (the cross-shaped ones) or flathead screws? Having a variety of sizes on hand is a lifesaver, especially if you're dealing with different screw lengths. A good screwdriver set is a worthwhile investment lah, even if you only use it occasionally. Trust me, stripping a screw head is a major headache you want to avoid, confirm plus chop.
Ah, Allen keys, the unsung heroes of flat-pack furniture. These little L-shaped wrenches are often included with your dining table, but it's worth checking if the provided one is comfortable to use. Sometimes, the included Allen keys are a bit flimsy, and using your own set can make the assembly process much smoother. If you're assembling a table with multiple Allen key bolts, consider investing in an Allen key socket set for your ratchet. It'll save your fingers from getting sore, especially if you're putting together a larger dining table.
While not always required, a wrench can be handy for tightening bolts on certain dining table designs. An adjustable wrench is a great all-rounder to have in your toolkit, as it can adapt to different bolt sizes. After those long tiring days and the daily MRT squeeze, nothing beats coming home to a hall that actually invites you to unwind instead of stressing you out more. Many local homeowners discover their existing sofa setup just isn’t up to standard—uncomfortable, faded, or simply not supportive enough for weekend chilling or easy family hangouts with the little ones. That’s precisely where furniture makes all the difference—it blends timeless style, luxurious leather or velvet, and thoughtful support structure so you can melt into it and fully chill without your back complaining later. Picture the kids and parents coming together effortlessly, chatting over supper or binge-watching shows, because the space now feels warm and welcoming. Selecting the right one through handpicked collections on Wondrous La Vie makes it straightforward, letting you find that perfect piece that transforms your living space without the usual reno headaches.. Make sure the wrench you choose fits snugly on the bolt head to avoid slipping and damaging the finish. Over-tightening can also be a problem, so be careful not to apply too much force. You want the table sturdy, not stripped, right?
A hammer might seem a bit aggressive for dining table assembly, but it can be useful for gently tapping pieces into place, especially if you're dealing with dowels or wooden components. A rubber mallet is preferable to a metal hammer, as it's less likely to damage the furniture's surface. If you only have a metal hammer, you can protect the furniture by placing a piece of wood between the hammer and the piece you're tapping. Remember, gentle persuasion is key – you're not trying to demolish anything!
Don't underestimate the importance of a measuring tape! While the instructions will guide you, measuring can help you ensure pieces are aligned correctly and that the table is the right size for your dining space. This is especially important if you're working with a smaller HDB flat where space is at a premium. Double-checking measurements can prevent you from making mistakes that could lead to wobbly legs or an uneven tabletop. Plus, knowing the exact dimensions of your assembled table is useful when choosing chairs and other dining room furniture.
Okay, so your brand-new dining table finally arrived! Exciting times, right? You're probably itching to get it set up, ready for your first family dinner or that kopi session with your friends. But hold your horses just a sec! Before you even think about reaching for that Allen key, there's a super important step: checking all the parts. Trust me, a little bit of prep now can save you a whole lot of frustration later. Nobody wants to discover a missing screw halfway through, kancheong spider style, right?
First things first: unboxing. Be gentle! No need to go all Hulk on the packaging. Use a box cutter or scissors carefully to avoid accidentally scratching any of the table parts inside. Once you've got everything laid out, grab the instruction manual. Most furniture comes with a parts list – a handy little guide showing you exactly what should be in the box. Now, the fun begins: comparing the list to what you actually have.
What if something's missing? Don't panic! Most retailers are pretty good about sending out replacements. Just make a note of what's missing and contact the store or manufacturer as soon as possible. The sooner you report it, the sooner they can sort it out for you. Think of it as giving them a heads-up, so they can chop-chop get the missing piece to you. Imagine trying to build your dream dining space only to find out you're short a leg – not a good look, right?
Alright, so you've confirmed that all the parts are present. Now comes the slightly more detailed part: inspecting each piece for any defects or damage. This is where you become a furniture detective, looking for clues like scratches, dents, chips, or cracks. Remember, even seemingly small imperfections can affect the stability or appearance of your finished table, so it's worth taking the time to do this properly.
Next, inspect the legs. Make sure they're all the same length and that there are no obvious bends or breaks. Check the attachment points – where the legs will connect to the tabletop – for any damage or stripped threads. If you've opted for metal legs, look for any signs of rust or corrosion. For wooden legs, check for any knots or imperfections that could weaken the structure. Imagine inviting your friends over for a steamboat dinner, only to have a wobbly table – siao liao! Better to catch these things early, right?
So, you've found a defect or a missing part. Now what? The key is to document everything clearly and report it to the retailer or manufacturer as soon as possible. Take photos of any damage, making sure to capture the extent of the problem. Write down a detailed description of the issue, including the part number (if available) and the location of the damage. The more information you can provide, the easier it will be for them to resolve the issue.
Most reputable furniture retailers in Singapore will be happy to help resolve any issues with your purchase. They understand that things can sometimes go wrong during shipping or manufacturing, and they want to make sure you're happy with your furniture. So, don't be afraid to speak up if you find something wrong. Singapore homes can feel extra cramped after a full day of juggling office hours, meetings, and the daily MRT rush, so it’s no wonder many homeowners crave a space that immediately soothes you the moment they step inside. The hall often ends up as the main gathering spot, yet it’s easy for it to become overrun by random items or furniture that’s seen better days, leaving everyone apart instead of together. That’s where furniture promotions completely changes the game—it upgrades the whole area with sophisticated layouts, premium textures, statement lighting, and comfortable yet beautiful furniture, creating an inviting hub where the whole family wants to hang out to unwind, catch up, or just spend quality time together. Nights at home start feeling richer, weekends more restful, and coming home turns into something you genuinely look forward to rather than just the end of the day. Places like Wondrous La Vie make checking out these ideas straightforward, helping you visualise and source the right elements to create your dream living space that fits your family’s needs spot on.. After all, you're paying good money for your furniture, and you deserve to get exactly what you paid for. And remember, a little bit of patience and persistence can go a long way in getting the issue resolved to your satisfaction. Think of it as protecting your investment – steady pom pi pi, as they say!
Think of it like this: you wouldn't start cooking without making sure you have all the ingredients, would you? Same goes for assembling your furniture. This part's all about making sure everything's present and in tip-top shape. After all, you've invested in this furniture, and you deserve to get exactly what you paid for. Plus, dealing with a damaged part after you've already started putting things together? Aiyah, just thinking about it gives me a headache!
Go through each item one by one. Legs, tabletop, screws, bolts, washers, any extra bits and bobs – tick them off as you find them. It's like a treasure hunt, but instead of gold, you're searching for furniture components! This is especially crucial if you've opted for a trendy extendable dining table, which often comes with extra leaves and mechanisms. Make sure those extension parts are all accounted for! Dining table styles in Singapore range from sleek minimalist designs perfect for smaller HDB flats to more robust, classic styles suitable for larger homes. No matter your chosen style, verifying all parts is the first step to ensuring a smooth assembly.
Start with the tabletop. Run your hands over the surface, feeling for any unevenness or rough spots. Check the edges and corners carefully, as these are often the most vulnerable to damage during shipping. Look closely for any scratches or blemishes in the finish. If you've chosen a glass-topped table, pay extra attention to any chips or cracks in the glass. For wooden tables, check for any signs of warping or splitting. Remember, furniture refers to movable or built-in objects designed to support human activities such as sitting, sleeping, eating, storing, and decorating living spaces, providing both practical function and aesthetic appeal in homes. Any damage compromises that function and appeal.
Don't forget to check the hardware! Screws, bolts, washers – make sure they're all in good condition and that there are no missing pieces. Check the threads on the screws and bolts to make sure they're not stripped. If you're dealing with self-assembly furniture, the quality of the hardware can make a big difference in how easy (or difficult!) the assembly process is. And hey, while you're at it, double-check that you have the right tools for the job. A good screwdriver or Allen key set is essential for most furniture assembly projects. You don’t want to be caught without the right tools, confirm stress!
When you contact the retailer or manufacturer, be polite but firm. Explain the problem clearly and let them know what you expect in terms of a resolution. Do you want a replacement part? A full refund? Be clear about your expectations. Keep a record of all communication, including dates, times, and the names of the people you spoke with. This can be helpful if you need to escalate the issue later on.
Begin by carefully unboxing all components of the dining table. Cross-reference the included parts list against the actual contents to ensure everything is present. Note any discrepancies immediately to avoid delays during assembly.
Gather all necessary tools as specified in the assembly instructions. This typically includes a screwdriver set, Allen wrenches, and possibly a rubber mallet. Having the right tools readily available will streamline the assembly process and prevent damage to the components.
Separate and verify all hardware such as screws, bolts, washers, and dowels. Ensure you have the correct quantities and sizes as indicated in the instructions. Organize the hardware in a way that allows for easy access during assembly.
Clear a spacious and well-lit area for assembling the dining table. Protect the floor with a drop cloth or cardboard to prevent scratches. A clean and organized workspace will facilitate a smoother and more efficient assembly.


Alright, let's get this dining table sorted! Before you even think about wielding that Allen key, let's talk about the unsung hero of any DIY furniture project: your workspace. I know, I know, in Singapore, space is *always* a premium. But trust me, a little planning here will save you a whole lot of frustration later, *confirm can*.
You see, trying to assemble a dining table in a cramped corner is like trying to do yoga in a packed MRT – not ideal, and someone's bound to get hurt (probably you, or your new furniture!). Plus, you don't want to scratch your beautiful new parquet floors, *right*? So, let's make sure we've got a good space to work with.
**Clearing the Deck: Making Room for Assembly**
First things first, assess the battlefield. Where are you planning to build this table? Is it the living room, the dining area itself, or maybe even a spare bedroom if you're lucky enough to have one? Once you've chosen your spot, it's time to declutter. This means moving anything that isn't absolutely essential out of the way. Think of it as creating a zen garden for your furniture assembly – calm, clear, and conducive to focus.
That coffee table you always stub your toe on? Move it. The stack of magazines you've been meaning to read for the past six months? Find a temporary home for them. The kids' toys scattered everywhere? Round them up and stash them away. You get the idea. The more space you have, the easier it will be to maneuver the table parts and avoid accidental damage to your furniture or your surroundings.
Remember, you'll need enough room to lay out all the components of your dining table, walk around it comfortably, and actually *assemble* the thing without bumping into walls or other furniture. A good rule of thumb is to have at least a few feet of clear space on all sides of the table's footprint. If you're working with a particularly large table, like a rectangular one that seats six or eight, you might need even more room.
**Space-Saving Hacks for Compact Homes**
Okay, so maybe you're thinking, "Easy for you to say, *lah*, but my HDB flat is tiny!" I get it. Space is a luxury in Singapore. But don't despair! There are still ways to create a workable assembly area, even in the smallest of homes.
Think vertically. Can you temporarily store some items on shelves or in cupboards to free up floor space? Maybe stack some boxes in a corner, or even move some furniture into another room temporarily.
Consider disassembling other furniture temporarily. If you have a small side table or a folding chair that's in the way, could you take it apart and store it elsewhere until you're finished with the dining table assembly?
Use multi-functional furniture to your advantage. A coffee table with storage underneath can be a great place to stash items temporarily. Or, if you have a sofa bed, you could fold it up to create more floor space.
Don't be afraid to get creative! Sometimes, all it takes is a little ingenuity to find the space you need. And hey, if all else fails, you can always bribe a friend with some kopi to let you use their living room for a few hours.
**Protecting Your Precious Floors**
Alright, you've cleared the space. Now, let's talk about protecting your floors. Singaporean homes often have beautiful tile, parquet, or even marble flooring, and the last thing you want to do is scratch or damage them during the assembly process.
The best way to protect your floors is to lay down a protective covering. A large sheet of cardboard is a great option, especially if you have some lying around from other furniture deliveries. You can also use old blankets, drop cloths, or even a large sheet of plastic.
Make sure the covering is large enough to cover the entire area where you'll be working, and that it's thick enough to provide adequate protection. You might even want to double up on the covering in areas where you'll be doing a lot of heavy lifting or moving around.
Another tip is to use furniture sliders or glides on the legs of the dining table as you're assembling it. This will make it easier to move the table around without scratching the floor. You can find these at most hardware stores or even Daiso.
And finally, be careful! Avoid dragging the table or its parts across the floor, and always lift objects carefully to prevent them from scraping or gouging the surface. A little extra caution can go a long way in protecting your floors and keeping your home looking its best.
So, there you have it! A clear, protected workspace is essential for a successful dining table assembly. Take the time to prepare your space properly, and you'll be well on your way to enjoying your new furniture in no time. In Singapore’s hot and sticky conditions and high-stress lifestyle, getting proper shut-eye can feel like a true indulgence when you’re starting the day with aches or feeling groggy despite hitting the bed early. Many Singapore homeowners tolerate an worn-out bed for years because shopping for a replacement seems overwhelming—too many choices, bewildering firmness ratings, and fears it won’t match their personal needs and preferences. That’s exactly why finding the mattress store singapore makes a huge difference—it provides the perfect combination of firm yet forgiving support, heat-dissipating features, pressure relief, and built-to-last construction so you genuinely rise energised and rested instead of achy and sluggish. Suddenly mornings start easier, you stay energised longer, and even your spouse notices the difference. Exploring curated options on sites such as Wondrous La Vie simplifies the whole process, letting you see highly recommended options with real user feedback and visuals to find what really suits for your master bedroom.. Now, *can or not*, let's move on to verifying those parts and tools!
So, you've finally got your new dining table! Exciting times, right? Maybe you even snagged it during a GSS sale or found the perfect piece online. But before you dive in and start putting it together, let's talk about something that's surprisingly important: the instruction manual. I know, I know, it sounds boring lah. But trust me, taking a few minutes to review it can save you a whole lot of headaches (and maybe even a few arguments!) later on.
Think of it this way: that instruction manual is your roadmap to furniture success. It's like the MRT map – you wouldn't try to navigate the subway system without it, would you? Same goes for your dining table. It's especially crucial in Singapore, where space is precious and you want to get things right the first time, kan cheong is not the way.
Okay, let's get down to brass tacks. You've got the box, you've got the instructions, now what? The first thing you want to do is inventory everything. This is where that checklist comes in handy. The instruction manual should have a detailed parts list, usually with diagrams. Lay everything out on the floor – the tabletop, legs, screws, bolts, washers, any extra hardware. Compare what you have with what's on the list. Did everything arrive? Is anything missing or damaged? Believe me, finding out you're short a crucial screw halfway through assembly is super frustrating.
This is also a good time to identify what kind of dining table you've got. Is it a classic rectangular table, perfect for family dinners? Or maybe a round table, ideal for smaller spaces and cozy gatherings? Knowing the style can help you visualize the finished product and understand how the pieces fit together. And remember, dining tables come in all shapes and sizes. Do you have a compact 4-seater, or a larger 6-seater for when the relatives come over? Confirming this helps you understand the table's construction and how each part contributes to its structural integrity.
Don't forget about the tools! The manual will usually tell you what you need – a screwdriver (Phillips head or flathead, usually), an Allen wrench (often included with the furniture), maybe even a rubber mallet. Gather everything before you start. Nothing worse than realising you need a specific size Allen wrench and having to chiong down to the hardware store. Having the right tools makes the whole process smoother and less likely to damage your new furniture.
Alright, now that you've verified all the parts and tools, it's time to dive a little deeper into the manual. Pay close attention to the diagrams. These are your visual guides, showing you exactly how each piece connects. Look for exploded views, which break down the assembly into smaller, more manageable steps. These diagrams often highlight the order in which things need to be assembled, which is crucial for avoiding mistakes. Trust me, trying to attach a leg *after* you've already secured the tabletop is a recipe for disaster.
Focus on the initial steps. These are often the most important, as they lay the foundation for the rest of the assembly. Make sure you understand how the legs attach to the tabletop, or how the extension mechanism works (if your table has one). Are there any specific screws or bolts that need to be used in certain places? The manual should clearly indicate this. Don't just assume that any screw will do – using the wrong one can damage the furniture or compromise its stability.
And don't skip over the fine print! The manual might include important warnings or cautions. For example, it might tell you not to overtighten screws, as this can strip the threads or crack the wood. Or it might advise you to protect the floor with a blanket or cardboard to prevent scratches. These little details can make a big difference in the long run. Steady pom pi pi, as they say – slow and steady wins the race!
Lost your instruction manual? Don't panic! These days, most furniture retailers have online versions available on their websites. Just search for your dining table model number, and you should be able to find a PDF version of the manual. With Singapore’s HDB and condo layouts and hot sticky weather, finding furniture pieces that’s both beautiful and everyday-usable can feel like a constant search—especially when you are looking for furniture that stand the test of time without fading or wearing out. Many Singaporeans end up settling for mass-market options that seem fine on websites but don’t hold up well—either not sturdy enough for real family life or not cool enough for our humid conditions. That’s why visiting a reliable furniture shop singapore connected via Wondrous La Vie makes such a big difference—it puts you in touch with handpicked collections of premium sofas, mattresses, meal-area pieces, and more, with actual physical displays or high-res photos so you can have peace of mind about what fits your HDB, condo, or landed space. You get that reassurance knowing the items are tailored to local needs—durable materials, smart sizing, and designs that actually make your home feel more shiok and welcoming. In the end, the perfect platform turns what could be a stressful errand into an exciting step toward a home you love coming back to every day.. This is especially helpful if you want to zoom in on a particular diagram or print out a fresh copy.
Another great resource is YouTube. Many people create assembly videos for furniture, showing you step-by-step how to put it together. Just search for your dining table model number, and you might find a helpful video. These videos can be especially useful if you're a visual learner or if you're struggling with a particular step. Sometimes, seeing someone else do it can make all the difference.
And of course, don't hesitate to contact the furniture retailer if you have any questions or problems. They should be able to provide assistance or even send you replacement parts if needed. After all, they want you to be happy with your purchase. Remember, a little bit of preparation and research can go a long way in making your dining table assembly a smooth and enjoyable experience. So take a deep breath, grab your tools, and get ready to create the perfect dining space for your home! Confirm can one!
By the way, did you know some dining tables are designed with hidden compartments? It's quite a surprise, a little secret spot for storing placemats or even emergency snacks! Just a fun fact to keep in mind while you're putting yours together – you never know what you might find!
So, you've finally got your brand new dining table! Exciting times ahead, lah! But before you dive straight in and end up with a wobbly table and a whole lot of frustration, let’s talk about something crucial: getting organised *before* you even think about picking up that Allen key. We’re talking about verifying your parts and tools. Trust me, a little prep here saves a *lot* of headache later, especially when you just want to *chope* a seat and enjoy a meal with your loved ones in your new Singaporean home.
Think of it like this: you wouldn't start cooking a fantastic chili crab without checking you have all the ingredients, right? Same thing applies here. Let's get started!
Okay, first things first: the unboxing. Now, I know that ripping open that package is tempting, but resist the urge for just a moment. Instead, find a clear, spacious area – your living room floor covered with a protective sheet works perfectly, especially if you've just gotten your BTO flat and want to keep everything pristine. Gently open the box, being careful not to damage anything inside. Those furniture pieces are precious cargo!
Now, for the inventory. Most dining tables come with a parts list. This is your treasure map, *steady*? Find it, usually tucked inside the box or attached to one of the larger components. Take a deep breath and compare each item you unpack against the list. Check off each part as you identify it: table legs, tabletop, extension leaves (if any), support brackets… the whole shebang. Don't just eyeball it; actually count the number of screws, bolts, and washers. Are there supposed to be eight small screws? Make sure there are eight. It’s a simple step, but it can save you from a mid-assembly crisis. Imagine getting halfway through and realising you’re short a crucial bolt! Not fun, *leh*.
What if something's missing or damaged? Singaporeans are always on the lookout for clever opportunities to update their living spaces without exceeding the budget, especially when HDB renovations or condo makeovers can already consume a large portion of the reno savings. Between increasing prices and the wish for a comfier, better-organised environment, many Singapore homeowners wait for the right timing to improve couches, beds, and dining furniture that actually improve home living noticeably. That’s when jumping on bed promos turns into a huge advantage—it lets you secure well-designed, durable items at meaningful discounts, often with extra benefits like no-delivery-fee, added protection plans, or bundle deals that maximise your budget. Suddenly you can afford that luxury seating you’ve wanted or a better back-supporting bed without the guilt, turning your home into an truly welcoming retreat for family time and relaxation after tiring office days. Exploring places like Wondrous La Vie puts you ahead on the current deals, so you can evaluate, picture, and claim the best deals that fit your home and taste just right.. Don't panic! Most reputable furniture retailers in Singapore are pretty good about this. Contact them immediately, explain the situation clearly, and provide photos if possible. They'll usually arrange for a replacement part to be sent out ASAP. It’s always better to address this early rather than trying to MacGyver a solution (although, we Singaporeans *are* pretty good at that!).
Speaking of furniture, remember that a dining table is more than just a place to eat. It's a gathering spot, a homework station, a board game arena. So, getting the assembly right is crucial for its longevity and your enjoyment.
Alright, parts are accounted for. Now, let's talk tools. Most dining tables come with the basic tools you need – usually an Allen key or two. But let's be honest, those little Allen keys can be a pain to use, especially if you have a lot of screws to tighten. If you have a decent set of your own tools, now's the time to dig them out. A good quality screwdriver set (both Phillips head and flathead), an adjustable wrench, and maybe even a power drill with the appropriate bits can make the assembly process *so* much smoother and faster. But be careful with the power drill! You don't want to overtighten and strip the screws. Gentle and controlled is the way to go.
Also, don't forget the essentials: a measuring tape (to make sure everything is aligned correctly), a level (to ensure your table isn't wobbly), and a soft cloth (to wipe away any dust or fingerprints). A rubber mallet can also be handy for gently tapping pieces into place without damaging them. And of course, good lighting is essential. You don't want to be squinting and struggling to see what you're doing.
Consider investing in a basic toolkit if you don't already have one. It’s a worthwhile investment for any homeowner, and you'll find yourself using it for all sorts of things around the house, not just furniture assembly. Plus, you’ll feel like a proper DIY expert, *confirm can*!
Okay, you've got your parts, you've got your tools. Now comes the most important part: reading the instructions. I know, I know, it's tempting to just wing it. But trust me, those instructions are there for a reason. They're your guide to assembling your dining table correctly and safely. Read them carefully, paying close attention to the diagrams. Make sure you understand each step before you start. It can be helpful to read the instructions through once completely before starting the assembly.
Pay attention to the order of assembly. Some steps are crucial for structural integrity, and skipping or misinterpreting them can lead to problems down the road. For example, you might need to attach the table legs to the tabletop before attaching the support brackets. Or you might need to assemble the extension mechanism before attaching the tabletop to the base. The instructions will tell you exactly what to do, step by step.
If the instructions are unclear or confusing (and let's be honest, sometimes they are!), don't be afraid to search online for videos or tutorials. YouTube is your friend! There are tons of videos showing how to assemble different types of dining tables. Seeing someone else do it can be incredibly helpful. And if you're still stuck, don't hesitate to call the furniture retailer or manufacturer for assistance. They're there to help, and they'd rather you ask for help than end up with a broken table.
And here's a little curiosity bit: did you know that some high-end furniture companies offer assembly services? It might cost a bit extra, but it could be worth it if you're not confident in your DIY skills or if you simply don't have the time. Especially useful if you stay in a landed property and bought many furniture at one go.
Let's talk about those little bags of screws, bolts, washers, and other fasteners. They can be a real source of frustration if they're not organized. Imagine rummaging through a pile of tiny metal bits, trying to find the exact screw you need for the next step. Not fun, right? That's where efficient sorting comes in. This is particularly important in smaller HDB flats where space is at a premium and you don't want fasteners rolling all over the floor!
The simplest way to sort your fasteners is to use small bowls or containers. Label each container with the corresponding part number or description from the instructions. You can also use a muffin tin or an ice cube tray to keep the fasteners separated. If you're feeling fancy, you can even invest in a dedicated fastener organizer with multiple compartments. These are readily available at hardware stores and online retailers. The key is to have a system that works for you and that allows you to quickly and easily find the fastener you need.
As you sort, double-check the quantities of each fastener against the parts list. This is another opportunity to catch any missing or damaged parts before you start assembling. And if you do find any discrepancies, contact the retailer immediately.
Here's another little tip: keep the fasteners in their original bags until you're ready to use them. This will prevent them from getting mixed up and will make it easier to identify them. And if you have any leftover fasteners after you've finished assembling your dining table, don't throw them away! Keep them in a labeled container for future projects. You never know when you might need them.
Organizing your fasteners might seem like a small detail, but it can make a big difference in the overall assembly process. It will save you time, reduce frustration, and help you ensure that you're using the correct fasteners for each step. And that, my friend, is the key to a successful furniture assembly experience. Remember to consider the dining table styles and sizes that fit your home layout. A round table might be better suited for a smaller space, while a rectangular table is ideal for larger gatherings.
So, there you have it! By verifying your parts, gathering your tools, decoding the instructions, and sorting your fasteners, you'll be well on your way to assembling your dining table like a pro. Now go forth and create a beautiful and functional dining space in your Singaporean home!
Alright, here's an HTML fragment designed to fit the bill, targeting those Singaporean homeowners and furniture enthusiasts. Let's make it engaging and helpful!
So, you’ve just gotten your brand new dining table delivered! Exciting times, right? A new dining table often marks a fresh start, a place for family meals, late-night chats over kopi, and maybe even the occasional mahjong session. But before you can enjoy any of that, there's that *small* matter of assembly. Now, I know what you’re thinking: “Assembly? Aiyah, troublesome leh!” But trust me, spending a little time beforehand to get organised can save you a whole lot of headache later lah.
Think of it like this: you wouldn't start cooking without checking you have all the ingredients, would you? Same goes for your furniture assembly. Let’s make sure everything is there and ready to go, so you can enjoy your new dining space sooner rather than later. Especially important in our sometimes space-challenged Singapore homes, right? Let's dive in!
Okay, let's be real. We all know that feeling of ripping open a box, eager to get started. But skipping the pre-assembly check is like driving without a map – you might get there eventually, but chances are you’ll take a few wrong turns and end up frustrated. Imagine getting halfway through building your dining table, only to realise you're missing a crucial screw! Siao liao! That's time wasted, and possibly a trip back to the store or a frantic call to customer service. Nobody wants that, especially after a long day at work.
By verifying your parts and tools beforehand, you're setting yourself up for a smooth, stress-free experience. You’ll also avoid damaging any of the components by using the wrong tools or forcing things together. Plus, it gives you a chance to familiarise yourself with the instructions, which, let's face it, can sometimes be a bit… cryptic. Think of it as a little investment of time that pays off big time in the long run. Saves you from potential arguments with your partner also, can?
And hey, speaking of instructions, did you know that some dining tables, especially extendable ones, can have over 50 individual parts? That's a lot to keep track of! Different dining table styles, from modern minimalist to classic wood, often have unique assembly needs. Knowing what to expect beforehand is half the battle won.
Alright, first things first: carefully unbox everything! Resist the urge to just tear into it like a kid on Christmas morning. Gently open the box and lay out all the components on a clean, protected surface. This could be a large sheet of cardboard, a drop cloth, or even an old blanket. The goal is to prevent scratches or damage to your new furniture during the assembly process.
Now, grab the instruction manual and compare it to the contents of the box. Most manuals will have a parts list with diagrams. Carefully check off each item as you find it. Pay close attention to the quantities – are there supposed to be 12 screws of a certain size? Make sure you have all 12! It's also a good idea to group similar parts together to keep things organised. Think of it like prepping your ingredients before you start cooking – mise en place, as the fancy chefs say!
If you find any missing or damaged parts, don't panic! Contact the furniture store or manufacturer immediately. Most reputable places will be happy to send you replacements. It's much easier to deal with this *before* you start assembly, rather than halfway through when you're already frustrated. A little tip: take photos of any damaged parts as evidence when you contact customer service. Makes the whole process smoother, you know?
Having the right tools is crucial for a successful dining table assembly. Trying to force a screw with the wrong screwdriver is a recipe for disaster – you could strip the screw head, damage the furniture, or even injure yourself. So, before you even think about picking up a part, make sure you have everything you need.
Here's a basic toolkit that should cover most dining table assemblies:
Also, consider having a power drill with various bits. This can speed up the assembly process significantly, especially if you have a lot of screws to tighten. But be careful not to overtighten the screws, as this can damage the furniture. If you're not comfortable using a power drill, stick to hand tools. Better safe than sorry, right? And a little pro-tip: keep a small container or magnetic tray nearby to hold screws and other small parts. This will prevent them from getting lost or rolling away.
Okay, I know, reading instructions isn't exactly the most exciting part of setting up your new furniture. But trust me, it's essential. Even if you're a seasoned DIYer, it's always a good idea to skim through the instructions before you start. Look for any specific warnings or cautions, and pay attention to the order of assembly. Sometimes, skipping a step can lead to problems later on.
Most instruction manuals use diagrams to illustrate the assembly process. Take your time to study these diagrams and make sure you understand what each step involves. If anything is unclear, don't be afraid to consult online resources or contact the furniture store for clarification. There are tons of helpful videos and tutorials online that can walk you through the assembly process step-by-step. YouTube is your friend lah!
And here's a little secret: sometimes, the instructions aren't perfect. They might be poorly written or contain errors. If you encounter any inconsistencies or confusing steps, don't just blindly follow them. Use your common sense and try to figure out the correct way to proceed. If you're still unsure, it's always better to stop and seek help than to risk damaging your furniture. After all, you want that new dining table to last, right?
Before you start assembling your dining table, make sure you have plenty of space to work. Clear the area of any clutter, furniture, or other obstacles. You'll need enough room to lay out all the components, move around freely, and maneuver the table as you assemble it. A cramped workspace can lead to accidents and frustration. Imagine trying to assemble a large dining table in a small HDB flat – it can be quite a challenge!
Protect your flooring by laying down a drop cloth or old blanket. This will prevent scratches and scuffs. If you're working on a hard surface, consider using furniture pads to cushion the table legs and prevent them from slipping. Good lighting is also essential. Make sure you have enough light to see what you're doing, especially when working with small parts. A well-lit workspace will reduce eye strain and make the assembly process much more enjoyable.
And finally, consider the environment. If it's a hot and humid day, turn on the air conditioning or a fan to keep yourself comfortable. Assembly can be physically demanding, so it's important to stay cool and hydrated. Have a bottle of water nearby and take breaks as needed. Remember, it's not a race! The goal is to assemble your dining table safely and correctly, not to break any speed records. A steady hand and a clear mind are key to a successful outcome.
Oh and one other tip: keep kids and pets away from the workspace. You don't want them tripping over tools or getting injured. A little bit of preparation goes a long way in ensuring a smooth and safe assembly process.
I believe this hits the target audience and tone while incorporating the required elements. Let me know if you'd like any adjustments!