Utilizing a carpet shampooer keeps your carpet fresh and tidy. These cleaners look like a vacuum but with a warm water extractor that produces warm, sudsy water to clean the carpet. The shampooing machine has a solution tank and cleansing accessory with a nylon brush. The brush spins and releases the cleansing service into the carpets, which creates foam. Relocating a circular fashion, the brush scrubs the carpets. It uses suction to remove the water and after that sends the water to an unclean water reservoir. They're truly not that hard to use, and they can save you an outright fortune in professional carpet cleansing!
Here are 5 steps to shampoo your carpet to get it tidy:
1. Prepare your carpet and locations to be shampooed
If readily available, review the instructions that go with your carpet to make sure that the cleansing option and shampooer you use are appropriate for the carpet you own.
Begin by eliminating furniture from the space and after that thoroughly vacuum the carpet ideally with a powerhead vacuum, before shampooing to remove loose dirt, pet hair and other particles. This ought to also expose the carpet discolorations, if there are any.
Focus on high-traffic locations, in addition to corners and areas where the carpet meets the wall. Utilize an attachment, if essential, to get suction into areas the vacuum can't effectively cover.
When using a carpet shampooer it is a good idea to carry out an area test on an out of the way portion of the carpet to make certain that no staining takes place and the settings are proper prior to applying it liberally.
Treat difficult areas with a stain remover spray. Spray the cleaner directly on the stain and follow manufacturer instructions for cleaning it up. Some sprays are left on the stain until you vacuum it up while others will be dabbed with a tidy cloth. The stain eliminator works by using chemicals to break the electrical charge in between the dirt particles and carpet fibers. This enables the dirt to break complimentary and the option draws it to the surface area of the carpet for elimination.
Eliminating as many of the irritants, dirt and dust mites as possible with a powerhead vacuum before shampooing will substantially increase the quality of the outcome.
Clear the space you will be cleaning. Operate in one room at a time and get rid of as much furnishings as you can. If needed, shift all the furnishings to one side of the room so you can clean up the opposite. This might trigger issues however when you have to set the furniture on the moist carpet. This may not permit the carpet to dry properly.
Note: Silk carpet ought to not be treated with a carpet shampooer.
2. Prepare the carpet shampooing machine
Fill the clean water tank with water and carpet hair shampoo as directed by manufacturer instructions. Do not use more hair shampoo than needed. Excess shampoo will leave greater residue on the carpet, permitting dirt to cling to the dried residue and making carpets look filthy again.
It is necessary to check out the list of ingredients on the hair shampoo bottle before cleaning. Mix carpet hair shampoo according to the guidelines and contribute to carpet shampooer.
When looking for carpet shampooer, be sure that the shampooer is an extractor with a tidy water rinse cycle.
3. Now you are ready to shampoo your carpet
Hurrying the cleaning job may offer bad results so strategy to take your time.
To completely clean up the carpet, navigate the machine across the surface area several times. This might include stopping regularly to clear the dirty water from the tank and refill it with tidy water.
Use constant forward and reverse strokes over the carpet surface area.
Clean the entire room by moving in an up and down movement, working from one wall to the other and after that back up until the waste water being sucked up is clear. Empty the waste water tank and refill the tidy water tank with option, as needed. For more difficult discolorations, you may want to move back and forth over the stain numerous times up until the water is clear.
Don't 'overdose' the shampoo solution, it is better to go over an unclean area twice than put excess shampoo in the carpet
Getting rid of the soap from your carpet is extremely important. The quantity of water drawn out is likewise really essential. If you leave water in the carpet, you're leaving dirt and the wetness will potentially lead to mold and mildew.
If too much cleaning agent is utilized, or if all the detergent is not removed, the carpet will get dirtier earlier. Cleaning agent left in a carpet, functions as a magnet for new dirt.
When finished shampooing, run a tank of clear water over the heavy cleaned locations (e.g. entrances and walkways). This will help get rid of excess hair shampoo and keep those locations cleaner for longer. It likewise helps to wash out the shampoo from inside in the maker!
4. After shampooing
Press your hand on the carpet. If your fingers have residual wetness, it is necessary to extract the remnants of water/shampoo from the fibers by suctioning the carpet further. Do this up until the procedure of pushing your hand to the carpet no longer produces much residue. Carpet care requires persistence, and it is not a small task.
Clean cleaning solution from woodwork and wood furniture instantly to prevent damage to the wood or upholstery.
Allow ample time for the location to dry before putting furnishings back on it. This might take overnight. For smaller sized areas, it can be dry in just 2 hours. Bigger spaces may take 1 day for everything to be completely dry. Opening windows and switching on fans can assist it to dry quicker.
If furniture needs to be positioned back in the space prior to the carpet is dry, use aluminum foil or plastic under the furniture legs to prevent staining the carpet.
Usage towels or white cloths to step on if you must walk on the location prior to it is dry. Attempt to keep kids and family pets off the carpet up until it is totally dry.
When your carpet is dry, vacuum once again to remove any loose particles suspended on top of the carpet before anybody strolls on it.
5. Cleaning up Frequency
How regularly you should hair shampoo carpet depends largely on the quantity of traffic a carpet gets. A carpet that is strolled on everyday must be cleaned a minimum of once or twice per year, however carpet in a rarely utilized room may need to be shampooed just every 18 months.
Light colored carpets will show dirt more easily and may need to be cleaned up more frequently.
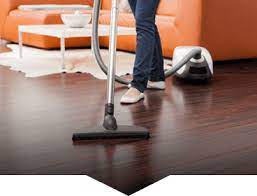
Stress washers can be enjoyable to make use of and show amazing outcomes. If the outside of your residence or organization requires a good washing, it may be time to damage one out. It's the fastest and most convenient way to tidy however there are a great deal of points that you will need to precede you make a decision to perform.
Have a look at these 8 stress washing ideas before you start on your cleansing task.
1. Work with a Professional, Rental Fee, Or Buy
Employing a professional is a great suggestion if you're cleansing your entire house. If you're cleaning up a little section of your residence, after that renting out is the means to go.
Do your research study and obtain quotes from a number of various companies. Professional pressure washing machines might charge $800 or more to clean your whole house depending on the dimension.
If it's a smaller task, as well as you would still rather hire professionals then it could run you about $200.
Leasing a power washer may cost you regarding $60 a day. If you think it would certainly be an excellent concept to purchase one, it will be a hefty financial investment of around $100-- $300. The decision to lease or acquire depends on exactly how often you think you'll be utilizing it.
2. A Stress Washer's Stamina
You can determine a pressure washer's toughness in a couple of methods. Pounds per square inch or strength of outflow and gallons per min or quantity of the water. A lot of makers have three to five ideas that you can select in between.
For most jobs, twenty-five to fifty feet of high-pressure tube will be more than enough.
3. What To Do If You're Washing Concrete Veranda Or A Deck
Prior to you begin it's finest to get everything off the beaten track. When it comes to washing a concrete veranda or a deck, you need to sweep whatever off of it initially.
You will certainly have way much better outcomes if you obtain all the dirt and debris off the veranda before you push wash. If you have any patio furnishings you will want to remove it to stay clear of damage.
If you're cleansing the side of your house make certain to cover all the lights with plastic bags. Cut back any hedges that have actually grown around the side of the house, and also it do without claiming to turn the electricity off at your breaker box.
4. Pressure Washing Machines Are Potent
Stress washers are not just potent however very effective. Never ever direct it at another person. See to it you take protective preventative measures when utilizing one. Use work boots or footwear.
The power of the spray can cut your skin and also also tear through light shoes. Never spray it at home windows or electric outlets. Do not push clean your roofing system because it can harm shingles.
Never ever spray cooling condenser coils. They are very fragile as well as the stress washer might harm them.
5. Follow Your User's Manual For Power Washing Tips
Comply with all the directions in the guidebook to the t. It will certainly have the very best stress cleaning suggestions that you could ever before obtain. It will tell you every little thing you require to understand, from what power and also hose pointer to use, to what to wash and what not to clean.
Constantly comply with the guidelines so you don't break things you can not replace or that will certainly be costly to change. Reviewing the user's manual will certainly also stop you from hurting yourself and others.
6. Stress Washing Power And Tip Selection
We have actually talked a lot regarding various pressure and also idea selections. The reason is that the washers are so versatile. They can come with several power selection and also ideas designs. Every one of the suggestions has a different usage relying on what you're cleaning.
For example, because timber is so fragile, you want to make use of the lowest pressure setting readily available and if you have an option to take legal action against a follower suggestion, you would make use of that a person on the timber.
Test your stress and also pointer on a smidgen of the surface area that you're cleansing first to see if it's going to trigger any type of damages.
7. Stress Laundering Technique
Agan, you will certainly utilize a fan suggestion for something like a wood deck. They can be found in a selection of sizes, a forty to sixty-degree suggestion size is the standard for deck cleansing.
You will hold it about 12 feet off the surface of the deck as well as clean it using a sweeping activity. After a little bit, your arm might become weary as well as you will certainly have the temptation to drop your arm a little. Try to withstand this as well as maintain a constant distance away from the deck.
8. Elevated Wood
When you're washing a wood deck, in some cases it will certainly engrave and peel off. You wish to prevent this, however occasionally it happens even when you go as gentle as you can.
This is especially dreadful when you clean a wood barrier which chips. Splinters can be killer on the hands. You have a number of choices to save your deck when chips occur.
If you go easy on the deck as well as do marginal damage, you can sand the timber pull back and then throw some sealer on it. If the timber looks dingy after you fix it up, you can also restain it. This will actually leave the surface of your wood really smooth.
Using a stress washing machine can be the simplest and also fastest means to wipe your deck or house. Adhere to these convenient pressure cleaning suggestions, and if all else falls short ensure you consult your manual. It's there for a reason.
The Ultimate Overview to Stress Laundering
If you're like us, you love in the past and also after home photos. Yet you would not believe a few of the "in the past" images we have actually seen at Mi-T-M. In some images, you can't even inform the original shade of the plastic siding, others show greasy and also blackened driveways and garages, while some photos feature decks covered in slimed algae.
Not just are these undesirable and also unwelcoming views, a lot of these areas are slippery and unsafe.
As a hectic home owner, it's simple to let maintenance as well as house tasks fall by the wayside. Yet what happens if you had a very easy, affordable as well as quick method to cleanse your home from top to bottom and from pathway to back fence? You do.
Pressure cleaning is an exceptional approach to make fast job of built-up gunk, mud, and also mold as well as mold. And also at Mi-T-M, we're your trusted provider of top notch property and industrial stress washers.
Virtually 48 years earlier, Mi-T-M's creator, AJ Spiegel realized the demand for a portable, economical, and effective cleaner. With a history in paint as well as cleaning, he built a 1000 PSI gas-powered unit. It was a simple, yet important step. We've come a long way ever since and today we provide thousands of industrial as well as domestic cleaning products and tools.
With a variety of dimensions as well as kinds, our powerful Mi-T-M makers can aid you deal with outdoor patios, driveways, decks, exterior siding, pools, fencing, yard furniture, as well as also prep for painting. As soon as unclean and dirty spaces all of a sudden change right into sparkling and also refined locations. Those are precisely the types of pictures we cherish: the after images.
We have actually prepared this fun step-by-step guide on stress washing to assist you find out just how to press wash your home. Made use of together with our short and insightful videos, our team believe you'll be a professional quickly as well as your home will be the envy of the area.
As Well As the Third Little Piggy Built His Home of Bricks
Block residences are attractive, sturdy, as well as ageless. Like various other home surface areas, blocks become dirty, mossy, and also need routine maintenance. Unlike many various other residence materials, block is porous and more vulnerable to staining as well as structural damage. Therefore, before you attempt to pressure clean your block house, you need to understand the appropriate methods for cleansing.
Adhere to these 7 standard steps of preparation before you utilize your stress washer and you'll get on the fast track to a more recent, brighter brick home.
Shut off outdoor electric components and stay clear of high-voltage places like your central air conditioning conditioner.
Use water resistant clothes, gloves, and safety glasses.
Study as well as research the surface. If you see splits or openings between the blocks, you need to repair them before you begin stress cleaning. Meticulously spot these locations with mortar and let them cure for a minimum of a week. Once they're completely dry, you can move to the following action.
Soak and fill your brick with H20 inside out. Water aids prepare the brick for cleansing. It also avoids the blocks from absorbing harsh cleaning agents.
Evaluate a far-off area. Utilize your stress washer to blast away grime from a little space of block. This experiment will reveal if you require to adjust your stress washing machine settings before you start on the whole residence. Remember: You don't need to harness the power of a tidal wave to clean block. Deny the PSI till you discover simply the best setup.
Apply pressure washer detergent. Choose just cleaners assigned for cleaning block. Splash the cleaning agent from base to top to stop spotting. Allow the cleaner to saturate into the brick surface for 5-10 mins. Do not allow the detergent to dry on your surface area.
Check for extra difficult stains. If you find a particularly unclean area, use a rotating scrub brush. This will certainly aid loosen the crud and also is a much safer approach than cranking up the stress washer.
Opposite, rinse and repeat. When you applied water to dampen the block, you splashed from base to top. Now, to get rid of the cleaning agent and minimize residue, you need to carefully spray water inside out.
Some individuals, once the block is completely dry, decide to use a brick and mortar sealant. Your regional equipment shop can help you pick one that's made exclusively for brick.
There you have it. With just 7 very easy steps, you've enhanced the appearance and also expanded the life of your brick house. Aren't you pleased you didn't construct your house of straw?
Stress Washing House Siding with the Professionals
Now that we've revealed you the proper methods for pressure washing block homes, we would certainly be remiss if we didn't describe how to pressure laundry homes with plastic house siding.
Plastic home siding is made use of on greater than 32 percent of new homes in the U.S. It's a low-maintenance, affordable product that never needs to be repainted. But it's also infamous for gathering mold, mildew, dust as well as particles. And also due to the fact that plastic home siding is flexible, you can not blast it with excessive pressure.
Comply with these simple actions and also you'll be well on your means to discovering a residence with lots of visual charm.
Place safety and security first. Just like any kind of outdoor pressure washing job, avoid electric lines, conduits as well as outside appliances. Cover any type of subjected electrical outlets.
Choose the right device for the work. You'll want a minimum of 3,000 PSI to get to high, out-of-the method areas. Whether you favor a gas- or electric-powered stress washing machine is your selection. Yet Mi-T-M enjoys to talk about the best fit for you.
Wear water-proof clothing, handwear covers, and also goggles.
Safeguard any kind of bushes as well as bushes that might be harmed your by high-pressure spray work. Make use of a ground cloth or a plastic tablecloth to cover them while you function.
Scan the surface area of your vinyl siding. If you observe any specifically moldy areas, you need to pre-treat them with a mix of bleach and water. Rub the place with a sponge by hand and also rinse with water. Pre-treat an examination area with the bleach mixture before continuing to the following.
Prepare yourself to apply cleaning agent to your vinyl siding. Make sure to use cleansers made especially for pressure washers. Mi-T-M offers stress washers with injectors that mix your option right into the jet spray.
Check your stress washer on a little area of vinyl before you clean the whole kit and caboodle. This will give you a great procedure of the power you'll need. You can bump the influence on the surface area by putting less distance in between you and also the house siding. Keep in mind, more ranges equates to much less stress.
Use your soap combination making use of a lower pressure setting. Functioning from bottom to top, go for smooth as well as constant strokes with your wand.
Sweep your washing machine from entrusted to right utilizing overlapping strokes. Maintain the wand aimed slightly downward to avoid spraying beneath the spaces in the vinyl home siding.
Enable the cleaning agent to sit as well as saturate right into the plastic for regarding 5-10 minutes. Simply make sure you do not allow it dry externally.
Start the rinse process with fresh, clean water. Once again, start on top and function your method down with the stress washer to avoid spotting.
Currently, go back as well as appreciate your handiwork. If you have actually followed our suggestions and methods over, your residence should look brand spankin' new. Well done, weekend warrior. Well done.
Doing your annual rain gutter cleaning? Here's the most effective method to do it-- from prep job to gunk and debris elimination.
Rain gutters safeguard your home's landscape design and also home siding from extreme drainage while likewise preventing damages to your home's structure. However when gutters full of fallen leaves, sticks, and also other particles it can cause obstructions that cause water sneaking under the roof as well as at some point into the foundation. Clogged rain gutters can additionally cause ice dams in the wintertime. That's why it is necessary to be cleaning your seamless gutters, specifically in the autumn.
You need to clean your rain gutters a minimum of annually. You need to do it regularly if you have looming trees and also after a huge tornado.
Exactly How to Clean Rain gutters
Make sure you have a good, durable, extendable ladder. Always position the ladder on a tough surface area (beware of landscape design rocks listed below which can move). You can utilize a ladder stabilizer both for safety and security and also to prevent damages to the gutters. Likewise, it's best to have a helper around in case you drop something or require a hand with the ladder.
Dress for the task. Wear a long-sleeved t shirt, work trousers and also rubber handwear covers. Cleaning seamless gutters is a dirty task.
To remove the gunk from the gutters, utilize a tiny, plastic scoop. Gutter scoops are available at the hardware shop, or a kid's sandbox shovel likewise functions simply fine. If you have an old plastic kitchen area spatula, that functions too, as well as it will not harm the rain gutters. Better yet, get a rain gutter cleaning robot to do the task for you!
Spread out a tarp beneath your office to gather all the seamless gutter substance and protect your grass and landscaping.
As soon as you have actually removed the particles from the gutters, utilize a garden hose pipe to flush the gutters as well as downspouts as well as clear out any type of remaining debris. This will certainly likewise reveal you if you have any kind of leakages.
Once the seamless gutters are clear, repair any drooping metal. You can do this by placing a rain gutter wall mount. Numerous seamless gutter repairs are DIY work.
As soon as you master it, seamless gutter cleansing isn't that poor, and also you'll really feel terrific when it's done! Since you know just how to clean out rain gutters, make certain to add it to your order of business at the very least annually.
If winter is around the bend, take the required actions to prepare your rain gutters for winter months.
Floor tile floorings might be durable and also a cinch to maintain, but sand and also grit can be their one failure. If not gotten rid of, it can scratch the surface. If you don't cleanse your ceramic tile floors, they might experience irreversible damage. What's more, dirty floor tile can make an otherwise tidy room look filthy, specifically since the cement dims in time as it soaks up dirt.
Exactly How to Clean Ceramic Ceramic Tile Floors
Prior to you start, get rid of all footwear, carpets, furniture as well as anything else that may get in your means while you cleanse. Then comply with these actions:
Get rid of loosened dust, sand and various other debris with a vacuum or broom.
Utilize an old charge card or a plastic putty knife to scratch any type of sticky residue on the tiles.
Fill a bucket with hot water, a fifty percent mug of vinegar and also a half tablespoon of meal soap. Don't utilize way too much soap, or the soapy deposit will certainly make your floorings look boring.
Before you wipe, rinse out the wipe head under warm running water to remove any type of particles from last time you utilized it.
Wipe the ceramic tile floors with soapy water.
Then remove any type of soap deposit by mopping with ordinary hot water.
You can permit the flooring to air-dry yet drying it with a tidy towel or towel will certainly get rid of much more dirt as well as protect against water areas.
Exactly How to Clean Ceramic Tile Cement
Your ceramic floor tile floors will just look as good as the cement that holds it together. House owners can lease grout-cleaning equipments from equipment shops that make use of hot vapor to deep-clean the grout. If you want a do it yourself technique, nonetheless, the very best method to tidy cement is detailed below:
Mix a pail of water with powdered oxygen bleach according to the directions on the bottle. This reliable sort of bleach has a different chemical substance from chlorine bleach and also is safe and also color-safe. You can typically locate it in the cleansing aisle at any type of grocery store or equipment store.
Use your remedy to the cement lines with either a spray bottle or a scrub brush. For grout that is extra dirty, we like to utilize both methods of application.
Allow the solution sit on the cement for at the very least half an hour. The longer you wait, the better. The oxygen ions in the bleach option continue to help as much as six hours.
Once the bleach service has taken in, utilize a stiff nylon brush or an old toothbrush to scrub the cement lines. Scrub a tiny location of cement at once, as well as absorb the dirty water with a towel as you go.
As soon as all the cement lines are tidy, rinse the location with fresh water, and dry it with a clean cloth.
When you're completed as well as the floor is dry, make use of a cement sealer to maintain the grout clean.
You can substitute the oxygen bleach with a blend of white vinegar as well as either lemon juice or sodium bicarbonate which you most likely currently have on hand. But based upon our experience, the bleach solution calls for the least quantity of scrubbing and also is one of the most reliable for eliminating stains.
1 Picking a Stress Washer
Depending on the outside of your home, you may require to utilize a certain kind of pressure washing machine to match the housing materials to the right water pressure degrees.
Vinyl home siding can endure an effective gas pressure washer (2,500-3,000 psi).
Light weight aluminum, stucco or soft-grain wood residences will certainly do better with a much less effective washer (concerning 1,200-1,500 psi).
Establish whether you will rent out or purchase your maker. If this is a tiny task, or you understand you won't require to have a stress washing machine, we have all your rental demands in one area.
Decide if you require any accessories such as pressure washing machine extension wands or stress washing machine telescoping wands, which are handy when cleaning two-story homes or hard-to-reach locations.
Idea: If you have a wooden deck, pressure washing is a choice, but comply with guidelines to avoid damaging the wood. Use the stress washer at a low setting with a follower spray nozzle as well as check supplier's suggestions for the wood type. Do not utilize a pressure washing machine on a composite deck, as it can damage the decking.
2 Prepare the Location and Place On Safety Gear
As soon as you have actually made your option, it's time to prepare the location as well as construct your safety and security equipment.
Prior to you start, remove or cover such things as light fixtures and also air conditioning unit compressors to safeguard them from damage.
Make use of a tarp or plastic covering over shrubs and garden plants. Safeguard the tarps in position with duct tape. Keep in mind the place of windows as well as electric outlets to ensure you avoid them while stress cleaning.
Do not base on a ladder when using a pressure washing machine. The stress could cause you to shed your balance.
Never ever drive water directly right into voids or cracks in your home's exterior. Spot fractures and also holes in mortar and also brick.
Maintain your pressure washing machine stick at the very least 6 feet away from electric cords and also never spray water into electrical outlets. Cover electrical outlets with air duct tape or close the covers prior to cleaning.
Pre-scrub the outside with a scrub brush or spray with a yard pipe to eliminate any type of dust, debris or mildew.
Never point a pressure washing machine at other people or family pets.
Safety and security: Make certain to put on the appropriate safety gear, such as safety goggles and job gloves, when stress washing a residence.
3 Establish the Pressure Washer
Take these steps to establish the stress cleaner.
Utilizing a 5-gallon water bucket, mix water and also a cleansing detergent with mildewcide according to maker's referrals.
Affix your pressure washing machine to your garden tube. Select the stress washing machine nozzle you prepare to make use of as well as affix it to your sprayer.
Step back about 3 feet from your house as well as examination the stress washer versus your home. Adjust your position and spray until you feel the pressure is solid sufficient to get rid of dust or mold without harming the house's outside.
4 Clean From all-time low Up
Now that your option is combined and also you have actually examined your pressure washing machine, it's time to start.
Making use of the cleaning remedy, begin power washing at the end of your home and function your means up. Functioning from the top down can trigger water and also suds to run down the side of your home, making it more likely you'll miss out on an area.
Spray in a straight, side-to-side movement.
When spraying roof covering overhangs as well as seamless gutters, always maintain a 45-degree angle.
Tip: Do not power clean your home if it's been repainted with lead paint.
5 End up and Allow Dry
Once you have actually ended up pressure washing your house, turn off the stress washer and disconnect it from the yard pipe.
Seek advice from the proprietor's handbook for the appropriate actions for storing the stress washing machine, such as draining pipes liquid from the pump when completed.
Utilize simply the garden tube to wash the soap from your house with simple water.
Remove all tarps, drop cloths as well as duct tape.
If you prepare to paint, permit the residence's outside to entirely dry. This commonly takes about 2 days.
Knowing exactly how to pressure clean a residence is a reliable way to ensure your house looks its finest, particularly if you want to prepare it for a fresh coat of paint. You can purchase a stress washer and also accessories or browse rental alternatives online.