Getting Started with Deep Security as a Service
This guide will show you how to get started protecting your Amazon EC2 cloud instances with Deep Security as a Service.
- Sign up for a free Deep Security as a Service trial account.
- Modify your AWS Security Group to open required ports on your instances.
- Create a dedicated AWS policy and user account for Deep Security to access your cloud account.
- Import your AWS instances to Deep Security.
- Deploy Deep Security Agents to your AWS instances.
1. Sign up for a free Deep Security as a Service trial account
Go to https://app.deepsecurity.trendmicro.com/SignUp.screen and register for an account.
Once your account has been created, you'll get an account confirmation email with a link to activate your new account.
2. Modify your AWS Security Group to open required ports on your instances
- Log into your Amazon Web Services Console.
- Go to the Security Groups page on your EC2 Dashboard and either create a new Security Group to assign to the instances you want to protect with Deep Security or edit a Security Group that is already assigned to them to allow the following inbound traffic:
- 4118: To allow communication from the Deep Security Manager to the Deep Security Agents.
- 3389: (Windows only) RDP access to the instance for Agent deployment.
- 22: (Linux only) SSH access to the instance for Agent deployment.
3. Create a dedicated AWS policy and user account for Deep Security to access your cloud account
- Log in to your Amazon Web Services Console and go to Identity and Access Management (IAM).
- In the left navigation pane, click Policies.
If this is your first time on this page, you'll need to click Get Started.
- Select Create Policy.
- Select Create Your Own Policy.
- Give the policy a name and description, then copy the following JSON code into the Policy Document area:
{
    "Version": "2012-10-17",
    "Statement": [
        {
            "Sid": "cloudconnector",
            "Effect": "Allow",
            "Action": [
                "ec2:DescribeImages",
                "ec2:DescribeInstances",
                "ec2:DescribeTags"
                ],
            "Resource": [
                "*"
                ]
            }
        ]
}
- Click Create Policy. Your policy is now ready to use.
- Back in the Identity and Access Management page's navigation pane, click on Users.
- Click Create New Users to display the Create User page.
- Enter a username and select the Generate an access key for each User option and click Create.
- Click Download Credentials to download the generated User Security credentials (Access Key Id and Secret Key) and then close the dialog window.
- Back on the Users page, click on the User to display the User properties, then scroll to the Permissions section of the page.
- In the expanded Permissions section, click on Attach Policy at the bottom of the window to display the Attach Policy page.
- Select the Policy you just created and click Attach Policy to apply the policy to the new user account.
The Amazon Web Services account is now ready for access by a Deep Security Manager.
4. Import your AWS instances to Deep Security
- Sign in to your Deep Security as a Service account at
https://app.deepsecurity.trendmicro.com. You'll arrive at the Deep Security Manager web console.
- Close the Welcome screen (and the smaller tutorial windows if this this your first time in the Deep Security Manager console) and click on the Computers tab to display the Computers page.
- On the Computers page, click New > Add Cloud Account to display the Add Cloud Provider Wizard.
- In the wizard, enter the following information and then click Next:
- Provider Type: Select Amazon.
- Provider Region: Select the region where your AWS instances are hosted. (If you have instances hosted in multiple regions, you'll have to add a Cloud Account for each region.)
- Name and Description: Name and description of the resources you are adding. These are only used for display purposes in the Deep Security Manager.
- Access Key Id and Secret Access Key: These are the credentials generated for the AWS user account you created specifically for Deep Security.

- Deep Security Manager will verify the connection to the AWS cloud account and display a summary of the import action. Click Finish and then Close.
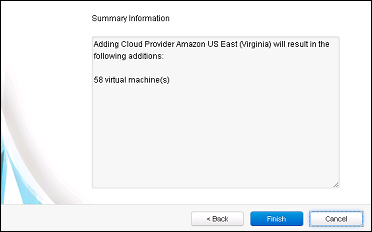
- When it's done importing your AWS instances the wizard will display the results of the action.
- Your AWS instances now appear in the Deep Security Manager under their own branch under Computers in the navigation panel.

5. Deploy Deep Security Agents to your AWS instances
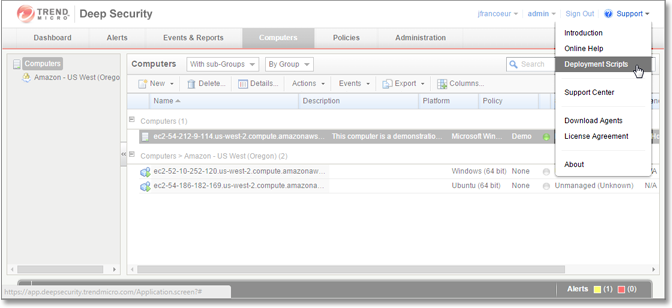
- Back in the Deep Security Manager main console, open the Deployment Script generator by selecting Deployment Scripts from the Support menu (in the upper-right corner of the Deep Security Manager console).
- In the Deployment Scripts modal window,
- select the Platform to which you are deploying the software
- select the Activate Agent Automatically option
- select a Policy based on the operating system to which you will be deploying the Agent(s)
Leave the other options at their default settings. As you make the selections, the Deployment Script Generator will generate a script (Powershell for Windows, bash for Linux), that you will run on your Deep Security instance. 
- Copy the script to your clipboard.
- For Windows platforms,
- RDP into to your Windows instance.
- Start Powershell.
You must run Powershell as Administrator.
- Paste the script from your clipboard into Powershell and run it.
For Linux platforms,
- SSH into your Linux instance.
- Run the copied bash script from a command line.
You must run the script as root.
The script will download, install, and activate a Deep Security Agent on your AWS instance, and then apply a Deep Security protection policy.
- Return to the Deep Security Manager console to verify that your AWS instance shows a Status of "Managed (online)" (or that some operation is underway) and a Policy is assigned.
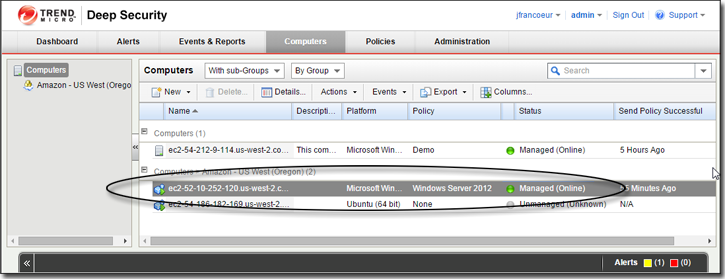
You're done!
Your AWS instance is now protected by Trend Micro Deep Security.