
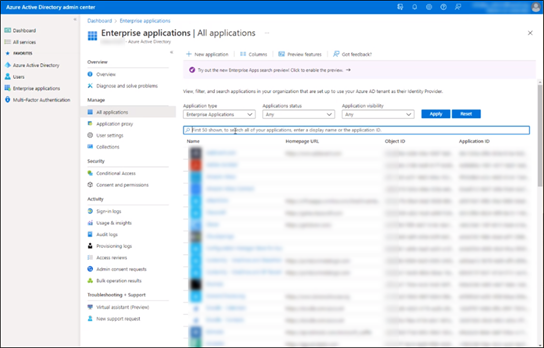
1. Login to Entra ID.
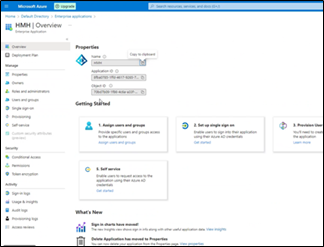
2. Create a new SAML SSO Application as follows:
a. Select Entra ID.

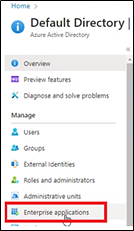
b. Select Enterprise applications.
c. Click New application.

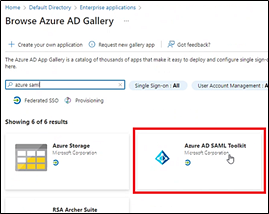
d. Search for and select Entra ID AD SAML Toolkit.
e. In the Name field, enter a connection name for it, such as HMH SAML, and then save it.
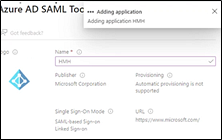
Note: This can take 30 to 60 seconds to complete.
Your HMH SAML Connection page should open automatically. (If not, see step f.)
f. If necessary, open your HMH SAML Connection page, as follows:
i. Return to Enterprise applications.
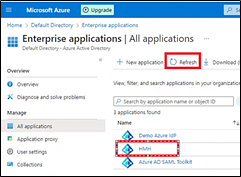
ii. Click the Refresh button.
iii. Select your connection name.
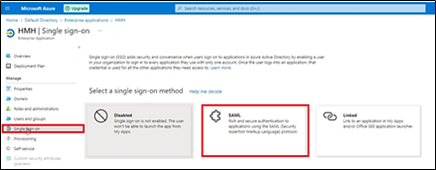
g. In the left menu bar, select Single sign on, and then select SAML.
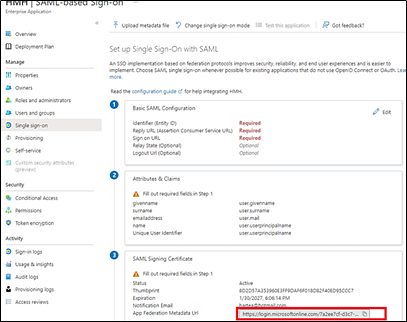
h. Move to the SAML Signing Certificate area, and then copy and store the App Federation Metadata URL (to be entered immediately in step i and again in the HMH systems later in step 3e).
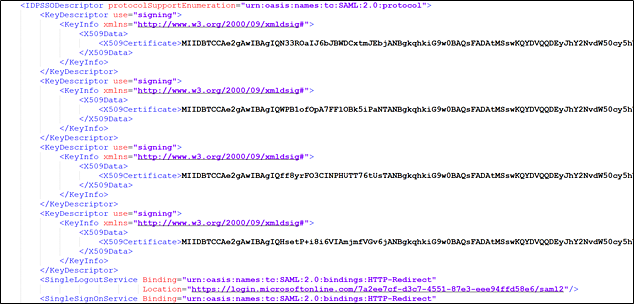
i. Open a new tab or browser, paste the App Federation Metadata URL in the address bar, and press <Enter>. An XML file opens. Scroll to the bottom and look for IDPSSODescriptor in black.
In this area, the certificates tied to the connection you just created are displayed.
○ If you only have one (1) X509 Data Certificate, you can proceed to step 4.
○ If you have multiple X509 Data Certificate lines in this file, then there is a caching issue with Entra ID/Microsoft, you will need to wait for it to get updated.
You can close all browsers/tabs and refresh by going to the App Federation Metadata URL again to see if it has been updated. If nothing changed, then you may need to start again with a new connection as the Entra ID MS service may not be responding in a timely manner.
Example of correct metadata: (This example shows only 1 X509 Certificate.)

Example of incorrect metadata: (This example shows 4 certificates attached.)
For additional support, refer to the following Microsoft sites:
○ https://docs.microsoft.com/en-us/azure/active-directory/manage-apps/add-application-portal
○ https://learn.microsoft.com/en-us/entra/identity/enterprise-apps/add-application-portal
○ https://docs.microsoft.com/en-us/azure/active-directory/manage-apps/add-application-portal-setup-sso
○ https://learn.microsoft.com/en-us/entra/identity/enterprise-apps/add-application-portal-setup-sso
3. Set up your HMH platform to use your new Entra ID SAML SSO connection as follows:
a. Log in to HMH as a district administrator, and do the following:
○ For Ed users, open the My Schools page, on the left panel, click Roster.
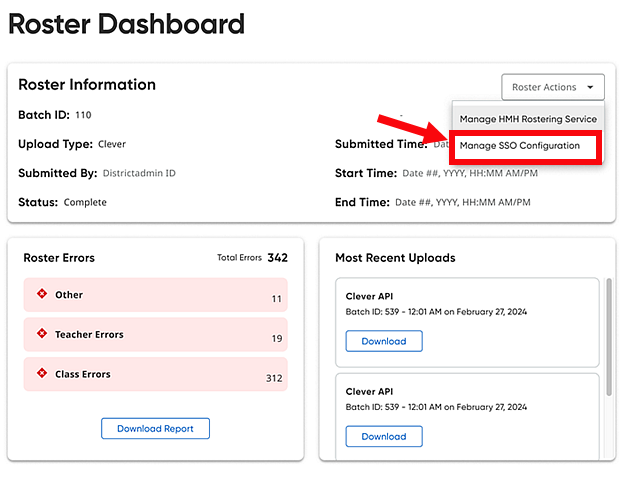
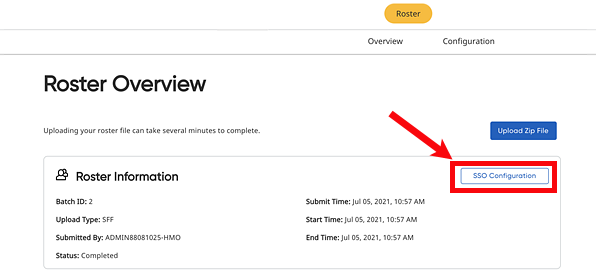
○ For ThinkCentral or Holt McDougal Online users, click Import. The Roster Overview page appears.
b. If you are an advanced roster/automated user, set usernames on the Define Login Options page, using the Step-by-step Instructions for SAML. If usernames are correct, then proceed to next step.
Important: The usernames in HMH systems must be identical matches to your SSO Principal usernames.
c. Do either of the following:
○ On the Rostering Overview page, click the SSO Configuration button.
○ Open the Advanced Roster option, and then go to the Define Login Options page.
d. Click the Add SAML button.
e. Enter the path for your metadata URL (from step 2h). This is known as your App Federation Metadata URL from your HMH SAML connection inside Entra ID.
f. Type a Connection Name, which can be any name you want to use to identify your connection, and then click Connect.
g. If you want to force your users to only log in using only SSO, make sure y our Global SSO Settings check boxes are selected (turned on).

4. Store critical connection information:
a. Copy and store all the HMH Platform SSO Endpoint URLs (URLs for Flight, Ed, ThinkCentral, Holt McDougal Online, and SAM) to a secure location (to be used in step 6).
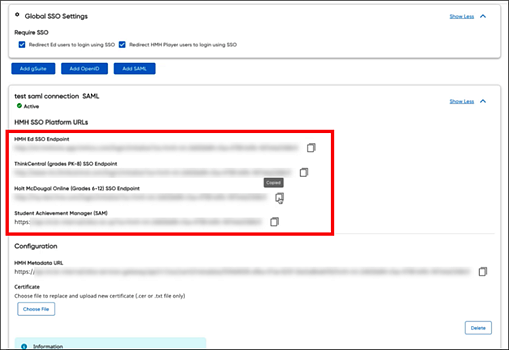
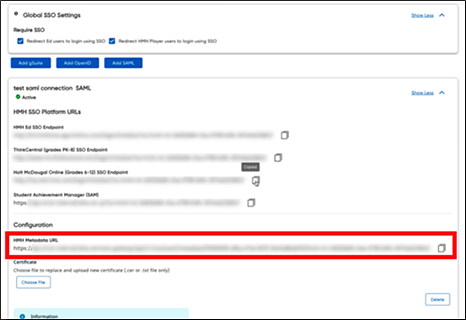
b. Copy the metadata URL as this will need to go back into your SAML Provider (Entra ID) to complete the trust relationship. It is best to save the data in this URL to an XML file. To do this, open the HMH Metadata URL in another tab/browser, click SAVE AS, and store to HMHMetadata.XML on your machine (to be used in step 5b).
5. Open Entra ID and follow these steps:
a. Login to Entra ID and open your existing HMH connection.
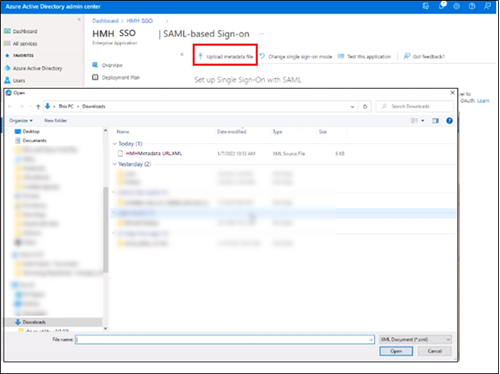
b. Upload the HMH metadata URL (saved from step 4b) and import it here.
This should populate your fields in Entra ID. If not, then you will need to open the file we provided and use the specific values listed for each field Entra ID requires.
Do NOT put the URL address of the HMH Metadata URL in the Reply URL (Assertion Consumer Service URL).
Entra ID requires a sign on URL. Entra ID will not let you continue until you enter something in this field.
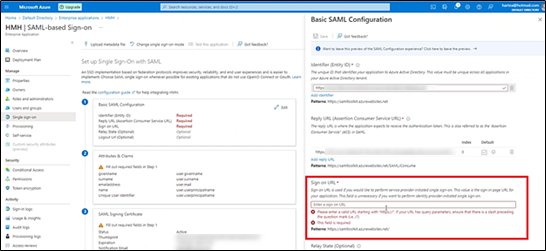
We recommend that you enter the Ed SSO URL into this field.

6. Test the new connection URLs by logging in to Flight, Ed, ThinkCentral, Holt McDougal Online, and SAM as a student, teacher, and administrator to confirm all is working as expected. Be sure to use the URLs provided to you from your SSO Configuration page.
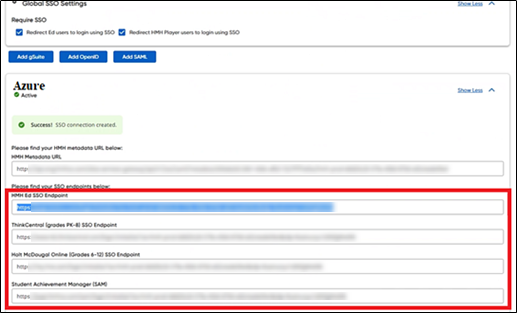
○ If your test is successful, you can update your SSO Portal page or shortcut URLs on your client machines.
○ If you get an OKTA 400 error, then something in the SSO setup is not correct. Update your certificate.
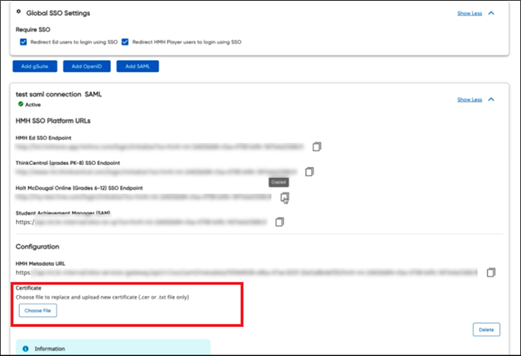
○ If you get a 2001 error, then the value you are sending from Entra ID to Ed is a username that we do not have stored in the connected user store. You might need to change your username formula on accounts or in the Advanced Rostering wizard.