Each Math 180 lesson has a Teacher Display Tools component.
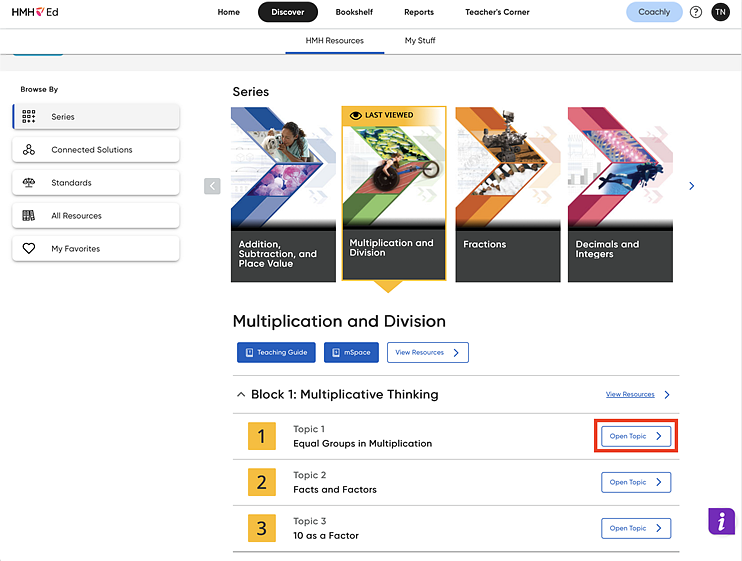
1. On the Discover page with Math 180 selected as your program, select the Series you want to view, locate a topic, and then click the Open Topic button.

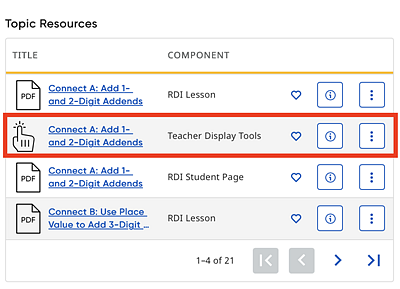
The list of resources associated with the selected topic appear.
2. Locate a Teacher Display Tools resource card and click to open it.

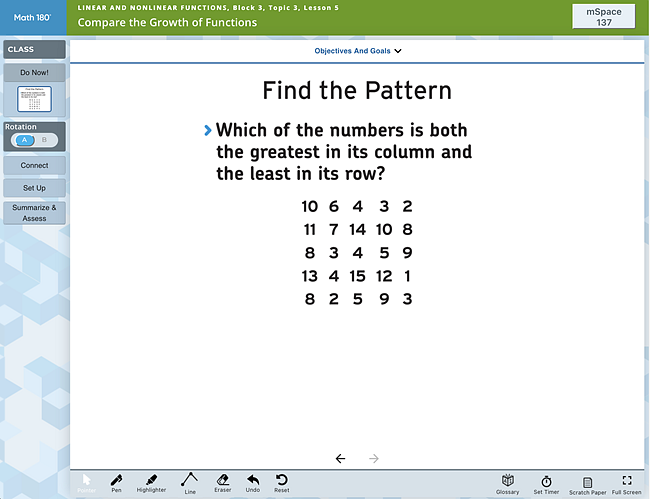
The Teacher Display Tool appears.

3. Note the following options available on the Teacher Display Tool page.
Top Bar

– In the upper right corner of the page is the mSpace button for topics that have mSpaces. Click the button to open the lesson’s mSpace page.
Bottom Bar
The bottom bar of the Teacher Display Tool provides several on-screen tools detailed as follows:

– The Pointer button allows a pointer tool to be used on-screen. This is a default setting in Teacher Display Tools.
– The Pen button is the marker tool. Click it and then scroll the pointer to the screen to mark the on-screen content. Click and hold on it to select a color.
– The Highlighter button makes the pointer a highlighter. Click it and then scroll over on-screen text or numbers to highlight. Click and hold on it to select a color.
– The Line button draws a line between two points.
– The Eraser button erases specific marks. Click it and then scroll over the marks to erase.
– The Undo button erases the last markings on the screen.
– The Reset button erases all marks. Click it and then click Yes on the confirmation screen to remove all marks.
– The Glossary button opens the Glossary.
– The Set Timer button opens the on-screen Timer.
– The Scratch Paper button opens a blank sheet of scratch paper. Use the pen tool to write on the scratch paper. Students’ scratch pages are saved per lesson. Clicking the button gives users a choice of using blank or graph paper.
– The Full Screen button opens the Teacher Display Tool in a full-screen. This is especially useful if projecting the Tools on an Interactive Whiteboard.
Left Panel
The left of the panel provides a Lesson Navigation Menu, organized in lesson sequence, as detailed below:
|
– Do Now! When the Teacher Display Tool opens, the Class menu and the Do Now exercise appear displaying the two class rotations.
➔ Click the arrow at the bottom of the screen to display the Do Now activity.
At the top of the page is an arrow next to a label marked Objectives And Goals.
➔ Click the arrow to show the lesson’s content objective and goals. The page lists the Content Objectives, Language Goals, and Instructional Focus, which shows the standards that correlate to the lesson. To close this page and return to the activity, click the X.
|
|
– Rotation ➔ Click the rotation letter to move between each group’s activities. Moving between rotations allows teachers to use the IWB to work with one group without losing work done by the other group. Each group’s work is saved separately.
|
|
– Lesson Navigation Buttons The steps of the lesson are stacked in the order of their approach. ➔ Click each button to open that step on the main page. A thumbnail also opens in the navigation menu.
At the end of every lesson there is a Summarize & Assess step. This step consists of an Exit Ticket and a final activity.
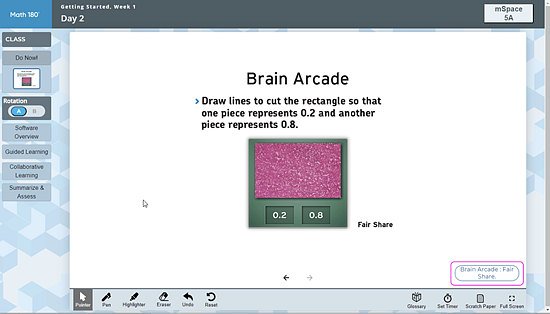
– Brain Arcade Recommendations At the bottom of the Summarize & Assess step is a Recommended Games button.
➔ Click this button to view recommended Brain Arcade games for the lesson.
Brain Arcade Recommendations are also available as a resource. |
Resources specified in the Getting Started Guide are now accessible directly from the Teacher Display page.

Clicking the resource opens it in a separate browser window.