Insulation Baffles Home Depot
Start by measuring the space between your attic rafters before you start installing an attic baffle. Attics and More states that you need to measure your rafters to determine their size. Next, plan to spread the baffles out approximately 4 inches apart. Place your baffles in between the rafters. Attach the first baffle to your first roof deck vent. Install baffles in the areas where the drywall attaches with the rafters in your attic if they have knee walls.
Next, measure the distance between the rafters. The distance should be at least four inches. The bottom of each baffle should start where the ceiling joist meets the roof rafters. Once you've measured the distance, you can then start installing the baffles. Be sure to align and secure the baffles properly. It's also important to secure the connecting points with spray foam to prevent air leaks.
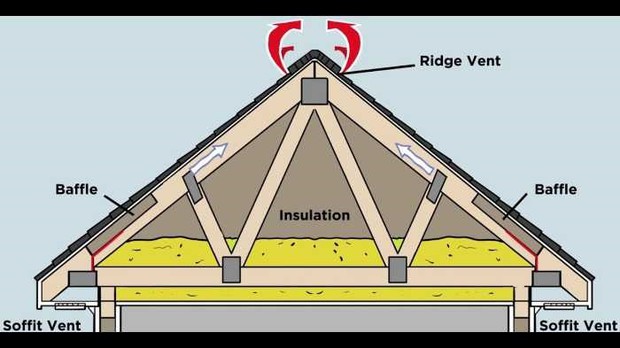
Insulation baffles require little effort and are very affordable. The baffles can be installed by sliding between the insulation layer and the roof deck. After they are in position, they will be stapled along one side. Do not make a mistake during installation. Insulation baffles also known as attic vents (wind baffles), or rafter vents. They allow air to flow up and out of an attic. They are often made of cardboard, plywood, rigid foam board, or plywood. They are used to prevent excess moisture building up as well as draw in fresh oxygen.