
Changing Shingles or Tiles
Changing Tiles or Tiles: A Crucial Step in Fixing a Leaky Roofing
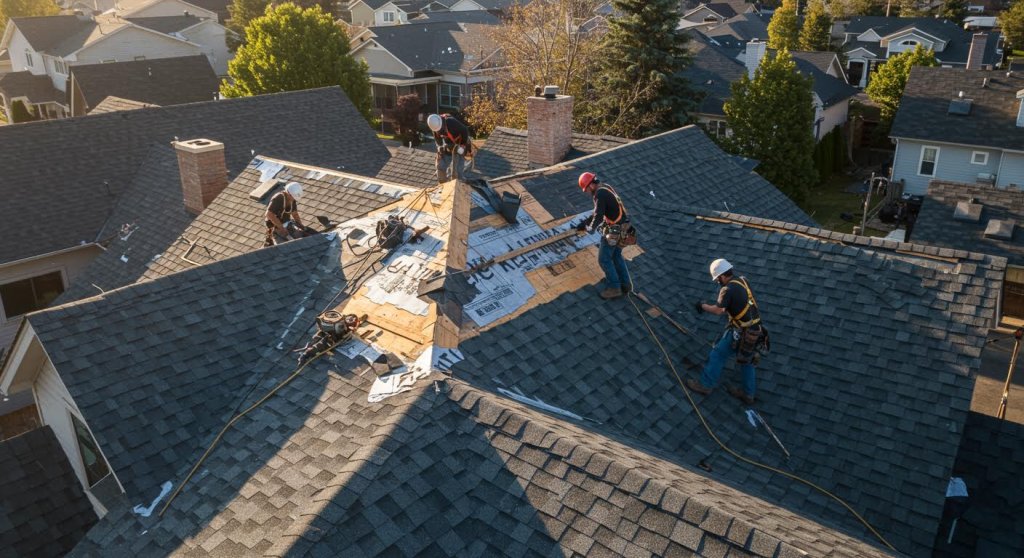
A dripping roofing can trigger substantial damage to a home, bring about pricey repairs if not resolved quickly. How to Fix a Leaky Roof: A Step-by-Step Guide . One of one of the most typical perpetrators behind these leakages is damaged or missing shingles or tiles. Replacing these components is an essential part of maintaining the honesty of a roofing and stopping water damage to your home. Below's a straightforward guide on just how to change shingles or tiles, guaranteeing your roof continues to be in leading problem.
Action 1: Safety And Security First
Prior to you start any service your roofing, focus on safety. Ensure you have a tough ladder, non-slip shoes, and take into consideration making use of a harness. It's likewise a good idea to tackle this task in good weather to avoid unsafe surface areas.
Step 2: Assess the Damage
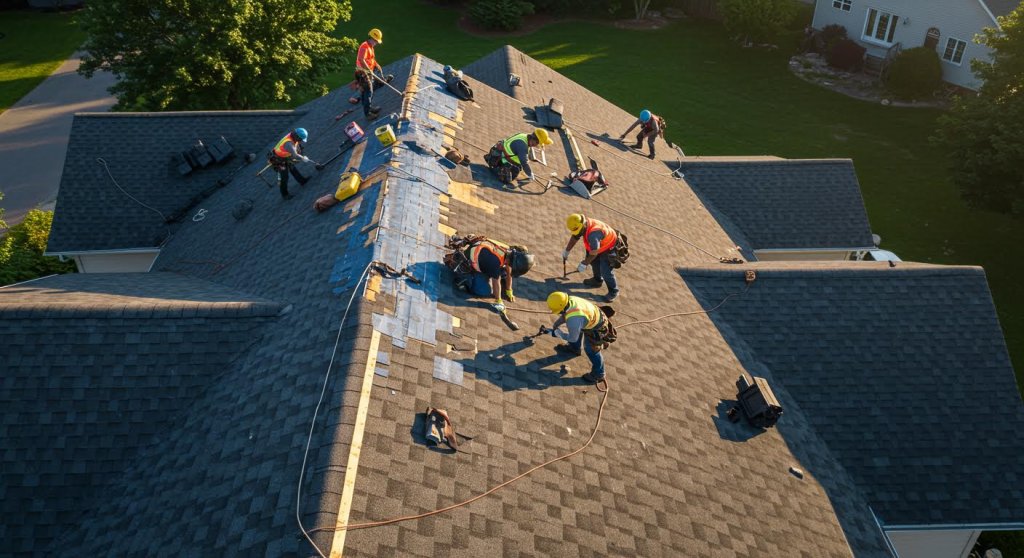
Start by recognizing which roof shingles or ceramic tiles require substitute. Try to find signs of fracturing, flexing, or missing items. Often the damages isn't visible from the ground, so a closer assessment on the roof might be necessary.
Action 3: Collect Your Materials
You will certainly need substitute tiles or ceramic tiles that match the existing ones in regards to product, form, and shade.
How to Fix a Leaky Roof: A Step-by-Step Guide - multi-family roof repair – Keeping the whole gang dry and drama-free.
- garage felt roof repair – Felt cute, might repair later (but better call us now).
- garage shingle repair – Because patching with duct tape isn’t an option.
- chimney flashing repair – Saving your chimney from becoming a leaky gossip.
Step 4: Getting Rid Of Damaged Shingles or Tiles
Very carefully utilize the crowbar to lift the sides of the bordering roof shingles or floor tiles, and get rid of any nails with the hammer. Move out the damaged roof shingles or floor tile with care to avoid destructive nearby ones.
Tip 5: Preparing the Location
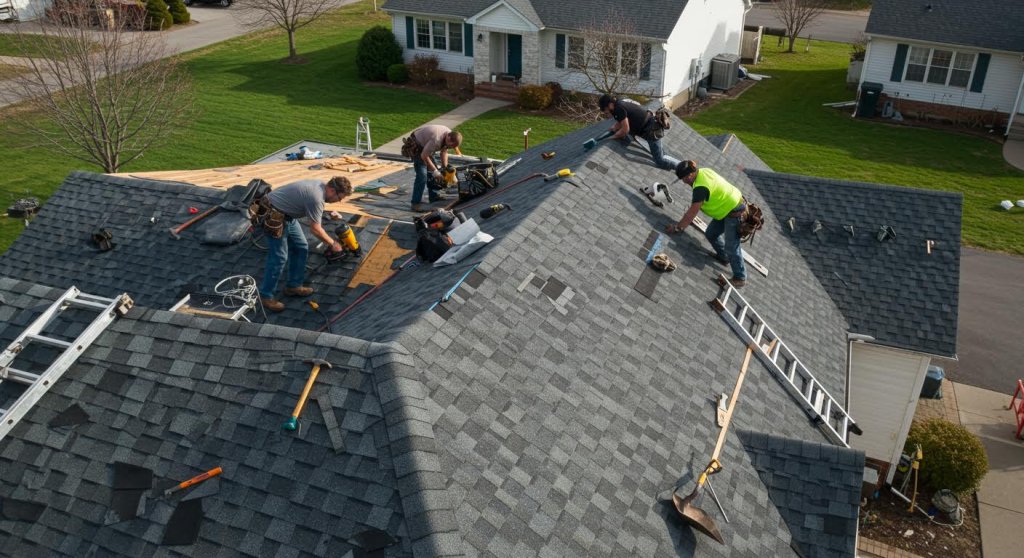
Clean the area where the new roof shingles or tile will certainly go. Eliminate any particles, leaves, or recurring nails. This makes sure a tidy surface for installment, which can assist prevent future leaks.
Action 6: Installing the New Roof Shingles or Ceramic Tile
Glide the brand-new shingle or tile into place. Make sure it lines up properly with the others in the row. Secure it with roofing nails, typically one at each corner of the shingle or as called for by the kind of floor tile. Use a percentage of roof covering cement under the edges to secure and secure it even more.
Action 7: Double-Check Your Job
After setup, go back and examine your job from a range to make sure whatever looks uniform. Its likewise smart to check the roof covering after the next rainfall to make certain there are no signs of dripping.
Sealing Around Chimneys and Vents
Securing around smokeshafts and vents is an important action in taking care of a dripping roof covering. This process, commonly ignored, can prevent water breach that leads to significant damages both to the roofing and the interior of a home. Comprehending just how to properly seal these at risk areas can conserve homeowners from pricey fixings in the future.
To start with, its important to evaluate the area around the smokeshaft and vents completely. This entails looking for any kind of indications of existing damages such as fractured or missing mortar, damaged seals, or tatty blinking. These issues are common resources of leaks, as they permit water to permeate via and under the roof product.
Once any damages has been recognized, the following action is to clean up the surface areas around the smokeshaft and vents. Eliminating any kind of particles, dirt, or old sealer gives a tidy base for new products to abide by and makes sure a longer-lasting seal.
How to Fix a Leaky Roof: A Step-by-Step Guide - roof repair solutions – Less drama, more hammer.
- chimney roof leak repair – Fireplaces are for warmth, not waterworks.
- roof repair payment plans – Fix now, pay later, sleep better.
- chimney crown repair – Royal treatment for your leaky stack.
The choice of sealant is critical in attaining a leak-proof seal. A top notch urethane or silicone-based caulk is recommended for its resilience and versatility. These products are capable of enduring extreme temperatures and supply a solid obstacle versus water infiltration. It's important to apply the sealant uniformly around the base of the chimney or air vent, filling all gaps and splits extensively. Utilizing a caulking weapon can help attain a smooth, constant grain of sealer.
Along with caulking, installing or replacing the flashing around chimneys and vents is usually necessary. Flashing is a thin strip of water-proof material, generally steel, that routes water away from crucial areas. It should be installed under the roof shingles adjacent to the smokeshaft or vent and split properly to make certain water flows far from the framework instead of right into it. Safeguarding the blinking with roof covering nails and securing its sides with caulk additional boosts the defense against water.
After the securing and flashing remain in area, its vital to examine the entire roofing for other prospective problems such as cracked floor tiles or shingles, as these can additionally lead to leakages. Changing damaged roof shingles and applying a water-proof sealer where required can help preserve the stability of the roofing.
Ultimately, routine maintenance and examinations ought to not be overlooked. Seasonal checks, particularly after serious weather, can help recognize and deal with small concerns before they rise right into major leaks. Making certain that the seals around smokeshafts and vents are undamaged and efficient
Using Roofing Finish for Added Security
Using Roof Covering Finishing for Added Security
When addressing a leaking roof covering, one essential step frequently overlooked is the application of a roof covering coating, which offers an added layer of security. This essay talks about the value of this step and how to successfully use roof covering covering in the context of fixing a dripping roofing system.
Firstly, its vital to recognize what roofing coating is and its advantages. Roofing system layer is a monolithic, completely adhered, fluid-applied roofing membrane layer. It has elastic residential or commercial properties that permit it to stretch and return to their initial form without damage. This quality makes it perfect for safeguarding against all kinds of weather conditions. The main advantage of applying a roofing finishing is its ability to expand the life of a roof by shielding it from UV rays, rain, and even physical damages like cracks and sores.
Before using the roofing coating, the roof covering has to be extensively prepared to make sure that the layer adheres appropriately and offers effective security. Beginning by cleansing the roof surface area with a high-pressure washer to remove any dirt, particles, or existing spots of damaged or loose product. It is essential to repair any type of damages, such as small openings or leaks, as the finishing is not a standalone solution for large breaches or damage.
As soon as the roofing system is tidy and dry, and all necessary repair work have been made, the process of using the roofing layer can begin. Generally, roofing coverings are used using rollers, brushes, or sprayers, relying on the type of layer and the roofing systems size. It is advisable to start from the outermost factor and function back towards the gain access to point to avoid tipping on the fresh applied covering.
Apply the coating uniformly throughout the roof covering surface, making certain that no areas are missed out on. Many roofing system coatings call for two coats, with the second layer used vertical to the very first to make sure complete insurance coverage. It is additionally essential to adhere to the manufacturers instructions regarding drying out time between layers.
In cooler climates, take into consideration the temperature and weather when intending your project, as the majority of coverings require application at certain temperature levels for ideal adhesion and treating.
Finally, regular evaluations and maintenance should comply with the application of roof covering covering. Although roof covering finishings are durable, they are not impervious to damage or use and may need to be reapplied or repaired after numerous years.
In conclusion, applying roof finishing when taking care of a leaking roof covering is a crucial step that ought to not be neglected. It not only assists in sealing current leakages however likewise includes a substantial layer of security against future damage, eventually extending the roof covering's life-span
Carrying Out Last Evaluations and Upkeep Tips
Conducting Last Examinations and Upkeep Tips for Fixing a Leaky Roofing
After faithfully resolving the actions to take care of a leaking roof covering, performing a comprehensive last inspection is vital to make certain that the problem is properly settled and future concerns are reduced. Right here are some guidelines and upkeep ideas to help house owners keep their roof coverings in optimal condition after the repair work is completed.
Last Evaluations
As soon as the repairs are done, its essential to examine the roofing system thoroughly to guarantee that all issues have been dealt with. This involves examining the changed or fixed roof shingles for correct installment, making sure that there are no spaces or misalignments that can allow water seep via. For those who used sealers or caulking, it is important to examine these locations for smooth application and to ensure that they cover the essential spots with no openings or voids.
Checking the attic room or the underside of the roof covering is additionally important. Try to find any type of indications of moisture, damp insulation, or stained timber, as these can be indications of lingering leakages. If any wetness is identified, its crucial to map its resource and address it quickly to prevent further damage.
Upkeep Tips
Keeping a roof covering in good problem is essential to preventing the recurrence of leakages. Below are a number of tips to help extend the life of your roofing system:
-
Routine Inspections: Arrange bi-annual examinations of your roof covering to capture potential issues early. roof repair solutions – Less drama, more hammer. It's specifically vital to evaluate your roof covering after extreme weather like heavy storms, snow, or high winds.
-
Clean Gutters and Downspouts: Ensure that gutters and downspouts are free from particles such as fallen leaves and branches, as blockages can cause water merging and at some point, roof covering damage.
-
Trim Overhanging Branches: Tree branches that hang over the roof ought to be trimmed back to prevent them from scraping against roof covering tiles and removing them during windy problems. This likewise lowers the quantity of debris that drops onto the roof.
-
Look for Moss and Algae: Moss and algae can damage roof tiles and cause water infiltration. Usage proper products to maintain the roof covering clean of these growths. Make sure to follow producer guidelines to prevent accidentally harming the roof covering material.
-
Reapply Sealants and Caulking: Over time, sealants and caulking can deteriorate. Its a good idea to inspect these products consistently and reapply them as needed to guarantee continuous security from water.
-
Look


