
Note: |
Long Term retention is not available when the VPG is recovered to a Public Cloud. |
Note: |
When needed, you can manually run the retention process ad hoc. See Manually Running the Retention Process |
Setting & Description | Select... |
Daily | |
Click the edit icon. The Daily Retention window is displayed . 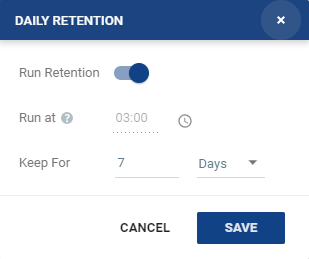 | ■ Run at: The time set to run all retention processes. This field cannot be edited from the Daily Retention window. |
■ Keep For: Define the number of days to keep the Daily Retentions. A rotation of the retention process will be performed to enforce the predefined retention. | |
Weekly | |
Click the edit icon. The Weekly Retention window is displayed. 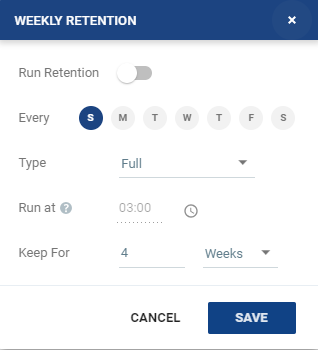 | ■ Every: Run a retention process every selected day of the week. |
■ Type: Select Full or Incremental from the drop-down menu. ■ Full: All the data is copied to the Repository. ■ Incremental: Only the changes from the last retention process are copied. | |
■ Run at: The time set to run all retention processes. This field cannot be edited from the Weekly Retention window. | |
■ Keep for: Define the number of weeks to keep the Weekly retentions. A rotation of the retention process will be performed to enforce the predefined retention. | |
Monthly | |
Click the edit icon. The Monthly Retention window is displayed. 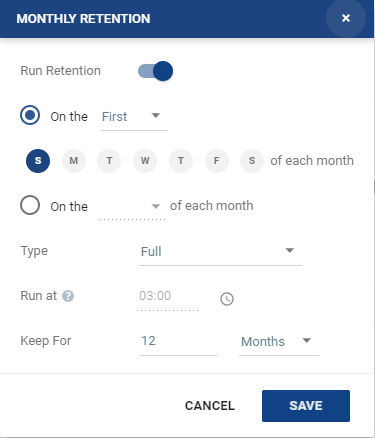 | ■ Run a retention process on the first, second, third, fourth or last selected day of each month. For example, you can choose to run a retention process on the last Sunday of each month. ■ Or, you can run a retention process on a specific date of the month up to the 28th and last. For example, you can choose to run a retention process on the 12th of each month. |
■ Type: Select Full or Incremental from the drop-down menu. ■ Full: All the data is copied to the Repository. ■ Incremental: Only the changes from the last retention process are copied. | |
■ Run at: The time set to run all retention processes. This field cannot be edited from the Monthly Retention window. | |
■ Keep for: Define the number of months to keep the Monthly retentions. A rotation of the retention process will be performed to enforce the predefined retention. | |
Yearly | |
Click the edit icon. The Yearly Retention window is displayed. 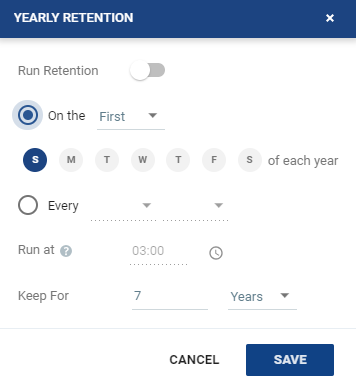 | ■ Run a retention process on the first or last selected day of the year. For example, you can choose to run a retention process on the last Sunday of each year. ■ Or, you can run a retention process on a specific day and month of the year. For example, you can choose to run a retention process every 12th of July. |
■ Type: Select Full or Incremental from the drop-down menu. ■ Full: All the data is copied to the Repository. ■ Incremental: Only the changes from the last retention process are copied. | |
■ Run at: The time set to run all retention processes. This field cannot be edited from the Yearly Retention window. | |
■ Keep for: Define the number of years to keep the Yearly retentions. A rotation of the retention process will be performed to enforce the predefined retention. | |