Enabling Long Term Retention for the VPGs
Following is the procedure for enabling Long Term Retention for a VPG.
Long Term Retention can be enabled at the same time when you first create the VPG to protect Virtual Machines.
You can also enable Long Term Retention by editing an existing VPG.
Note: |
Long Term retention is not available when the VPG is restored to a Public Cloud. |
Before You Begin:
Before you can enable Long Term Retention for the VPG, verify that a repository was first created where the retention sets will be saved.
Repositories are created and configured via the SETUP tab as described in
Creating a New Repository for Retention.
Enabling Long Term Retention for a VPG:
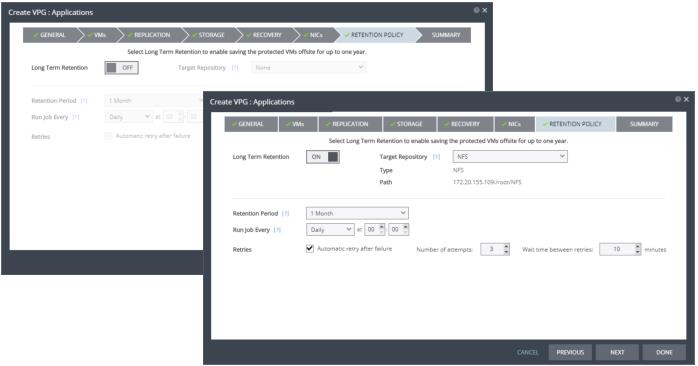
1. Toggle Long Term Retention from OFF to ON.
The options on the screen become available.
Note: When VPG is restored to a Public Cloud, Long Term retention is not available.
2. Enter the Target Repository name. This is the name of the repository where the repository sets are written.
3. Select the
Retention Period from the drop-down list. The time you select is the length of time to keep repository sets. This is up to a maximum of one year. For details of how this affects the number of repository sets saved, see
Storing Repository Sets.
4. Run Job Every: The recurrence and time to start the retention process.
5. Retries: Select Automatic retry after failure to automatically rerun the retention process, if the job fails.
■ If you select this option, you must also define Number of attempts, and the Wait time between retries.