Failing Back a Windows Machine to a VMware ESXi Host
The procedure to fail back recovered Windows machines from AWS to a VMware ESXi host is done on a machine-by-machine basis; failing back is not performed for a VPG. You must use a VMware tool. The description in this section uses information derived in part from the VMware Knowledgebase article:
The procedure is divided into the following parts:
Preparing the Instance for Failback
1. Open the AWS EC2 Management Console and under Instances note the availability zone of the instance you want to fail back.
2. Select ELASTIC BLOCK STORE > Volumes.
3. Click Create Volume.
The Create Volume dialog is displayed.
4. Enter the following:
Type – General Purpose (SSD)
Size – Specify a size that is at least the size of all the volumes for the virtual machine instance.
Availability Zone – Select the availability zone of the instance you want to fail back.
Leave both Snapshot ID and Encryption with the default values.
5. Click Create.
It may take a few minutes for AWS to create the volume.
6. After the volume is created, attach it to your instance:
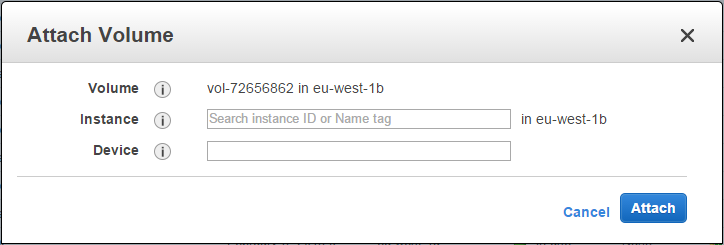
a) Select the volume you just created.
b) Select Actions > Attach Volume.
The Attach Volume dialog is displayed.
c) Choose the instance to fail back from the drop-down list.
d) Click Attach.
AWS attaches the new volume to the instance you selected.
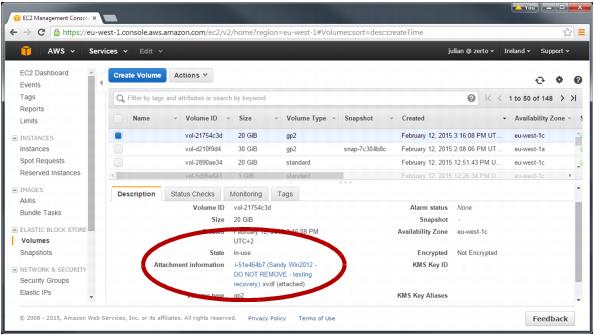
7. Reboot the instance to see that the new volume is attached to the instance.
In AWS, you can see that the volume is attached to the instance by selecting the volume and checking the Attachment information in the bottom section of the screen.
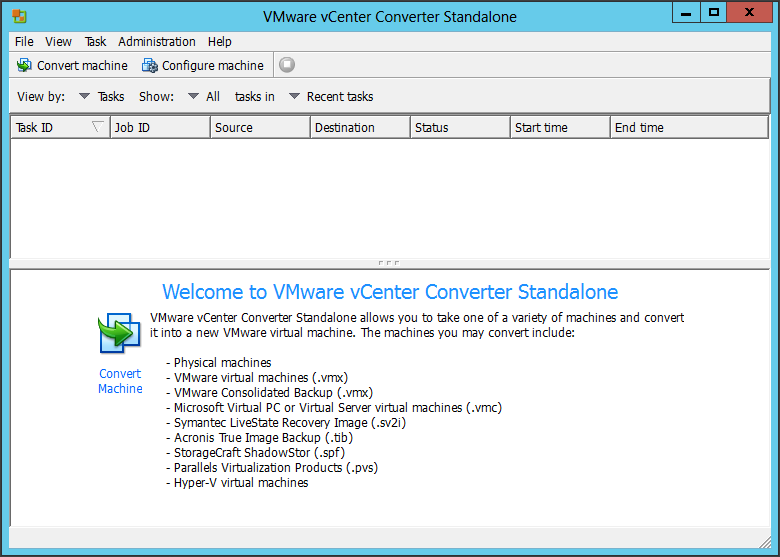
You must open an account with VMware to download the software, which is free. The following documentation is based on VMware vCenter Converter Standalone version 5.5.3.
9. Run the VMware vCenter Converter Standalone and follow its instructions until the Setup Type step.
10. Select Local installation and click Next.
11. In the Ready to Install step, click Install.
The converter is installed on the instance.
12. Select Run Converter Standalone Client now and click Finish.
The VMware vCenter Converter Standalone opens.
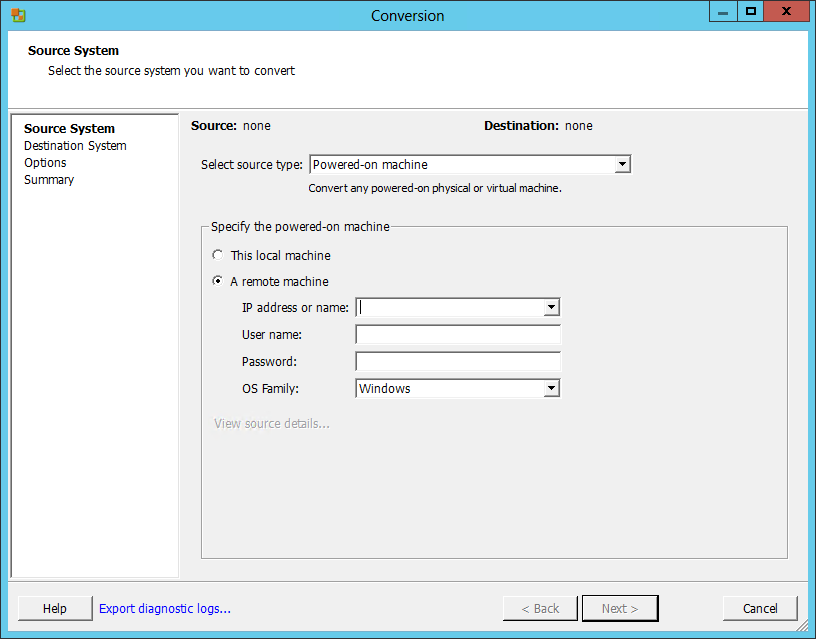
13. Click Convert machine.
The Source System page is displayed.
14. Select the following:
Select source type – Select Powered-on machine
This local machine – Select the local machine.
15. Click Next.
The Destination System page is displayed.
16. Select VMware Workstation or other VMware virtual machine for Select destination type.
The Destination System page is redisplayed
17. Set the following:
Select VMware product – Select the VMware Workstation version you need. Zerto recommends using the latest version.
Name – Enter a name to assign to the machine to be created in vCenter Server.
Select a location for the virtual machine – Select the volume you created in steps
3-
5 as the location of the new instance that will be created.
18. Click Next.
The Options page is displayed.
19. Check which volumes will be copied by clicking
Edit for
Data to copy. Make sure the checkbox next to the volume you created in steps
3-
5 is
not checked. This ensures that this volume will not be included in the conversion process.
Make sure that all other check boxes are checked, to ensure that all other volumes will be included in the conversion process.
Check the other settings and, if necessary, edit them.
20. Click Next.
21. In the Summary step, review the conversion parameters that will be used.
22. Click Finish.
The instance and its volumes are copied to the new volume.
Failing Back the Instance to vSphere
1. In VMware vCenter Converter Standalone, click Convert machine.
2. In the Source System page, specify the following:
Select source type – Select VMware Workstation or other VMware virtual machine
Virtual machine file – Select the
<name>.vmx file that was created, where
<name> is the name you gave in step
17 in the section
Preparing the Instance for Failback.
3. Click Next.
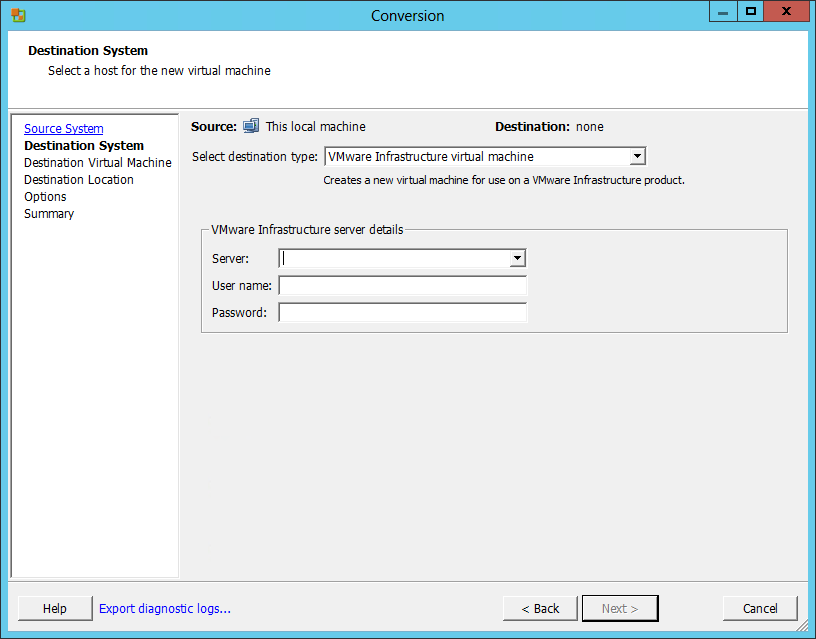
4. In the Destination System page, specify the following:
Select destination type – Select VMware infrastructure virtual machine.
Server – Enter the IP address of the VMware vCenter Server to which the new machine will be copied.
User name – Enter the user name of the VMware vCenter Server.
Password – Enter the password of the VMware vCenter Server.
5. Click Next.
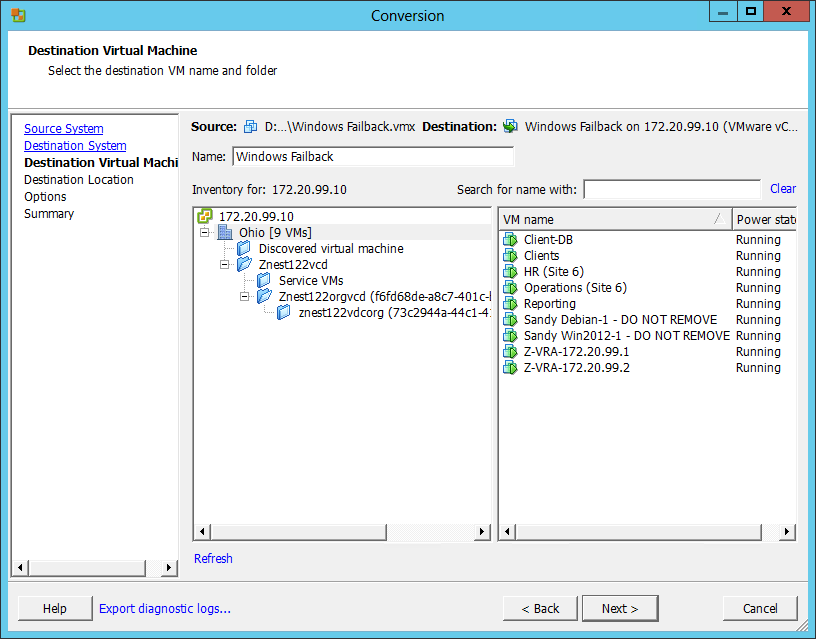
The converter connects to the VMware vCenter Server you specified in the previous step, step
4, and the
Destination Virtual Machine page is displayed.
6. In Name, enter a name for the new machine.
7. Click Next.
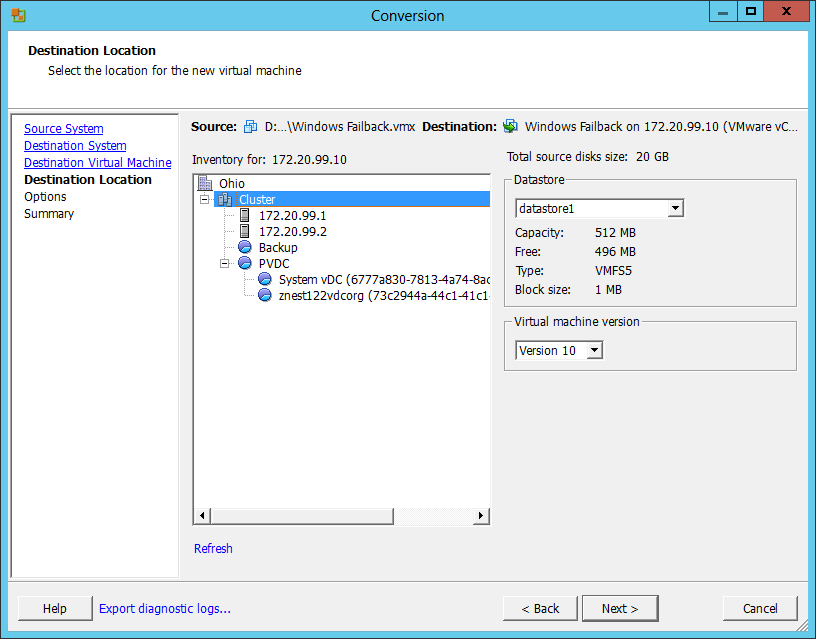
The Destination location page is displayed.
8. Choose the host and datastore and virtual machine version.
9. Click Next.
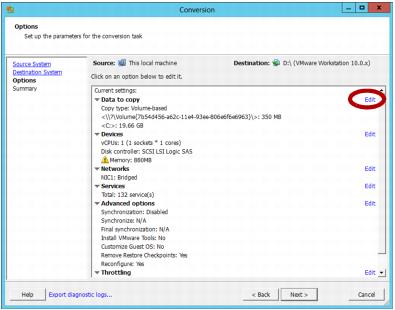
10. In the Options step, check the values of the settings and, if necessary, edit them. For example, in the Data to copy section, check whether the disk should be thick or thin provisioned.
11. Click Next.
12. In the Summary step, review the conversion parameters that will be used. Click Finish.
The instance in AWS is converted to a virtual machine in your vCenter Server. The virtual machine is not powered on.