Cloning Protected Virtual Machines to the Remote Site
You might want to create a clone if you need to have a copy of the virtual machines saved to a specific point-in-time, for example, when a VPG enters a Replication Paused state, or when testing a VPG in a live DR test.
To clone a VPG:
1. In the Zerto User Interface, in the VPGs tab click on the name of the VPG to be cloned.
A new tab is added to the Zerto User Interface, with the name of the VPG that you clicked. The tab displays data about the VPG.
Note: If the VPG was previously viewed, and the tab for this VPG is still displayed, you can access the details by selecting the tab.
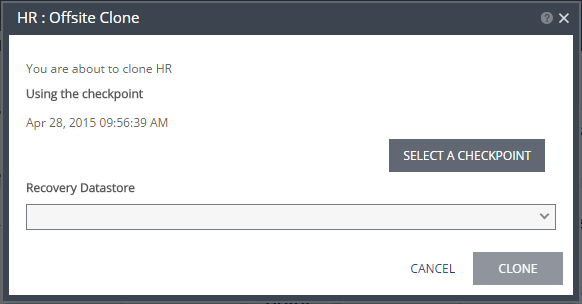
2. Select the new tab and click MORE > Offsite Clone.
The {VPG-Name}: Offsite Clone dialog is displayed.
3. If you intend to use the last checkpoint, which is displayed in the dialog, go to step
6.
To select the checkpoint to use to create the clone, click SELECT A CHECKPOINT.
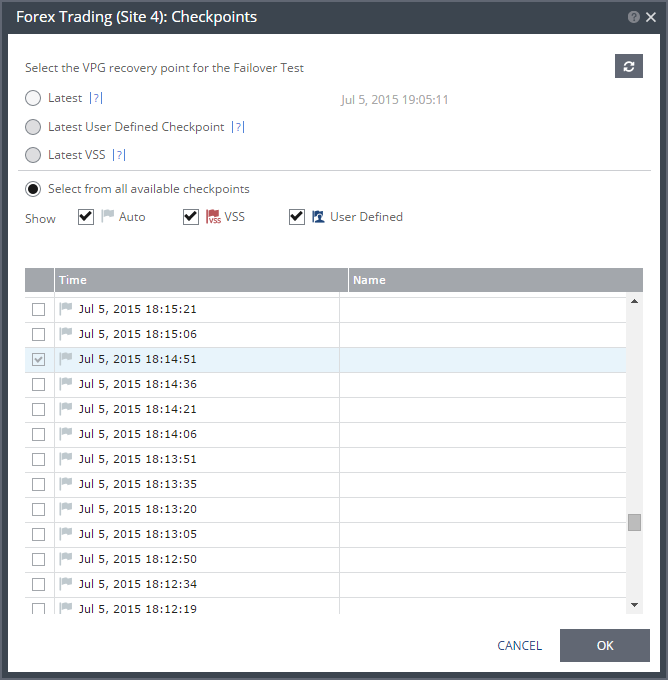
The {VPG-Name}: Checkpoints dialog is displayed.
4. Select the checkpoint to use. Click the refresh button to refresh the list. You can choose from one of the following checkpoints:
Latest – The recovery or clone is to the latest checkpoint. This ensures that the data is crash-consistent for the recovery or clone. When selecting the latest checkpoint, the checkpoint used is the latest at this point. If a checkpoint is added between this point and starting the failover or clone, the later checkpoint is not used.
Latest User Defined Checkpoint – The recovery operation is to the latest checkpoint created manually. Checkpoints added to the virtual machine journals in the VPG by the Zerto Virtual Manager ensure that the data is crash-consistent to this point. If a checkpoint is added between this point and starting the operation, this later checkpoint is not used.
Latest VSS – When VSS is used, recovery or clone is to the latest VSS snapshot, ensuring that the data is both crash‑consistent and application consistent to this point. The frequency of VSS snapshots determines how much data can be recovered. For details about VSS checkpoints, see
Ensuring Transaction Consistency in Microsoft Windows Server Environments.
If you do not want to use the latest checkpoint, latest user defined checkpoint, or latest VSS checkpoint, choose Select from all available checkpoints. By default, this option displays all checkpoints in the system. You can choose to display only automatic, VSS, or user defined checkpoints, or any combination of these types.
5. Click OK.
6. Select the recovery datastore to use for the cloned virtual machines.
Note: All the cloned virtual machines use a single datastore, that is accessible by all the recovery site VRAs used by the VPG. In a vCD environment the datastore is selected from the list of available datastores that is accessible by all the recovery site VRAs and that has the most free space.
7. Click CLONE.
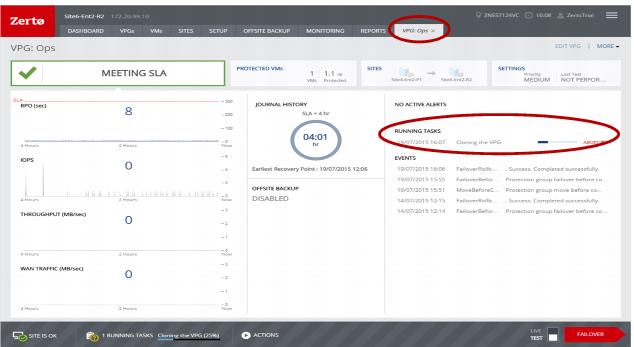
The cloning starts and the status is displayed in the VPG details tab.
The cloned machines are assigned the names of the protected machines with the addition of the timestamp of the checkpoint used for the clone. The cloned virtual machines are not powered on.
When cloning to VMware vSphere environments:
■ The cloned virtual machines are created in the ZertoRecoveryFolder folder, and not the recovery folder defined in the VPG.
■ The cloned virtual machines use a single datastore.
■ The VMDKs are renamed (1).vmdk, (2).vmdk, etc.
■ When the recovery site is VMware vCloud Director, the clone is created in vCenter Server and the virtual machines have to be manually imported into vCD.
■ If the protected virtual machine has RDMs attached, these disks are always cloned as thin-provisioned VMDKs to the datastore specified in the Recovery Datastore field in the Edit VM dialog in the REPLICATION step in the Edit VPG wizard.
When cloning to Microsoft Hyper-V environments:
■ The cloned virtual machines use a single storage.
■ The VHDs are renamed (1).vhdx, (2).vhdx, etc.