Figure 3.3: Printer local web interface Print File (Project Details)
screen
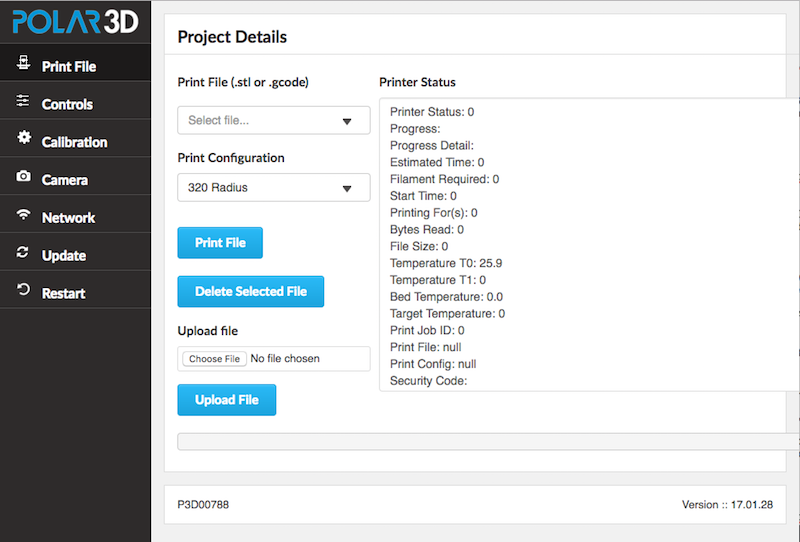
Clicking the “Print File” tab (printer icon) of the printer local web interface main menu will take you to the “Project Details” screen. At this screen, you may upload a file to print, or select an already available file to print (as the Polar3D printer’s local web interface ships with several test .stl files), and then initiate printing.
Note that Polar3D printer local web interface supports printing .stl files and G-code files, but it does not directly support printing OBJ files. (However, you may use the Polar Cloud to convert an OBJ file to .stl file format: submit a print job of your desired OBJ file object, and then use the print job “Download STL File” option to download to your device an .stl file version of the object, including any virtual build plate modifications you may have made to the object.)
This screen also displays, on the right hand side under “Printer Status”, various status information regarding the printer; see Figure 3.3.