Reconfiguring the Zerto Virtual Manager Setup
When installing Zerto Virtual Replication, you provide the IP address of the vCenter Server to connect the Zerto Virtual Manager with, and the IP address of the machine where the Zerto Virtual Manager runs to enable running the Zerto User Interface.
You can change these IP addresses if necessary, using the Zerto Virtual Replication Diagnostics utility.
To reconfigure the Zerto Virtual Manager:
1. Click Start > Programs > Zerto Virtual Replication > Zerto Diagnostics.
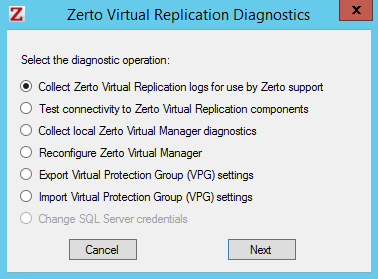
The Zerto Virtual Replication Diagnostics menu dialog is displayed.
2. Select the Reconfigure Zerto Virtual Manager option and click Next.
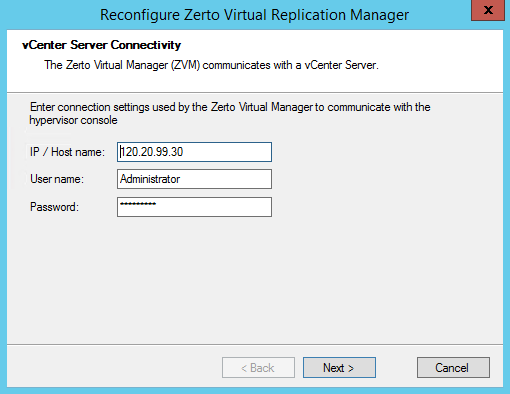
The installation settings for the connection to the vCenter Server are displayed.
3. Change the IP and username and password if necessary.
■ IP / Host Name: The IP address or host name of the machine where the vCenter Server runs.
■ User Name: The user name for an administrator to the vCenter Server. The name can be entered using one of the following formats:
■ username
■ domain\username
■ Password: A valid password for the given user name.
4. Click Next.
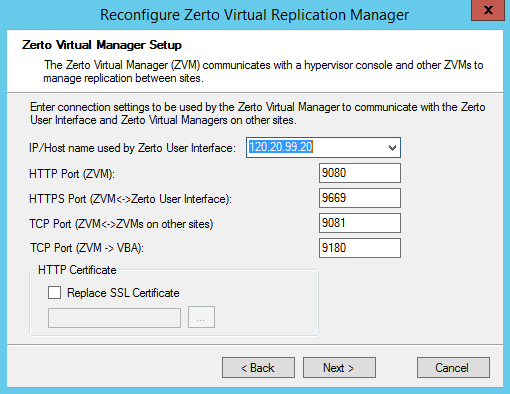
The dialog for Zerto Virtual Manager setup is displayed:
■ IP/Host name used by Zerto User Interface: The IP to access the Zerto Virtual Manager from the Zerto User Interface. If the machine has more than one NIC, select the appropriate IP from the list, otherwise the IP that is displayed is the only option.
■ HTTPS Port (ZVM <-> Zerto User Interface): The port used for inbound communication between the Zerto User Interface and the Zerto Virtual Manager.
■ TCP Port (ZVM<->ZVMs on other sites): The port used for communication between Zerto Virtual Managers.
■ Both the protected and recovery sites belong to the same enterprise: If you change the value, when pairing sites, use the TCP port value you specify here.
■ An enterprise using a cloud service provider to supply disaster recovery services: You must not change this value.
■ TCP Port (ZVM->VBA): The port used for communication between the Zerto Virtual Manager and the Virtual Backup Appliance.
■ HTTP Certificate: Check Replace SSL Certificate and browse for a certificate, if you change the certificate you have been using.
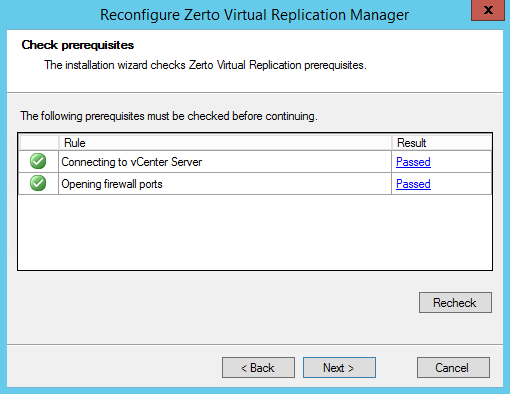
5. Click Next.
The connectivity is checked.
Note: If one of the tasks fails, click the link for information about why it failed. Usually it is a mistake when entering an IP address.
6. Click Next.
The Zerto Virtual Manager is reconfigured.
7. Click Finish.
8. If you changed the IP address of the Zerto Virtual Manager, or the TCP port it uses to communicate with paired Zerto Virtual Managers on other sites, you have to unpair these sites, both from this site and from the remote sites and then pair the sites again.
Reconfiguring the Microsoft SQL Server Database Used by the Zerto Virtual Manager
1. Click Start > Programs > Zerto Virtual Replication > Zerto Diagnostics.
The Zerto Virtual Replication Diagnostics menu dialog is displayed.
2. Select the Change SQL Server Credentials option and click Next.
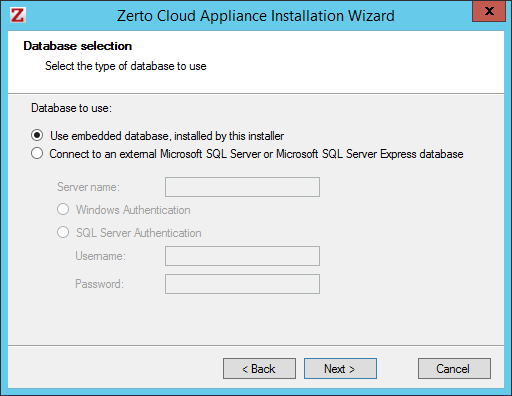
The installation settings for the SQL Server are displayed. Change the IP and username and password if necessary.
Server Name: The domain name and server instance to connect to, with the format <server_name>\<instance_name> or <Server_IP>\<instance_name>.
Specify either of the following authentication options:
Windows Authentication: Use Windows authentication. This option is only enabled if a specific service user account was specified in the previous Service User dialog, in which case the service account name and password are used.
SQL Server Authentication: Use SQL Server authentication.
User Name: The user name for SQL Server database.
Password: A valid password for the given user name.
3. Click Next to the end of the wizard and then click Finish.
4. The Zerto Virtual Manager service is restarted using the new credentials.